Here in lockdown mode, due to the global pandemic, I feel now more than ever that memories, bonding, love and food are what keep us going and make it possible to manage this difficult time. I sincerely hope that you and your families are keeping well, and that my recipes will offer you some comfort.
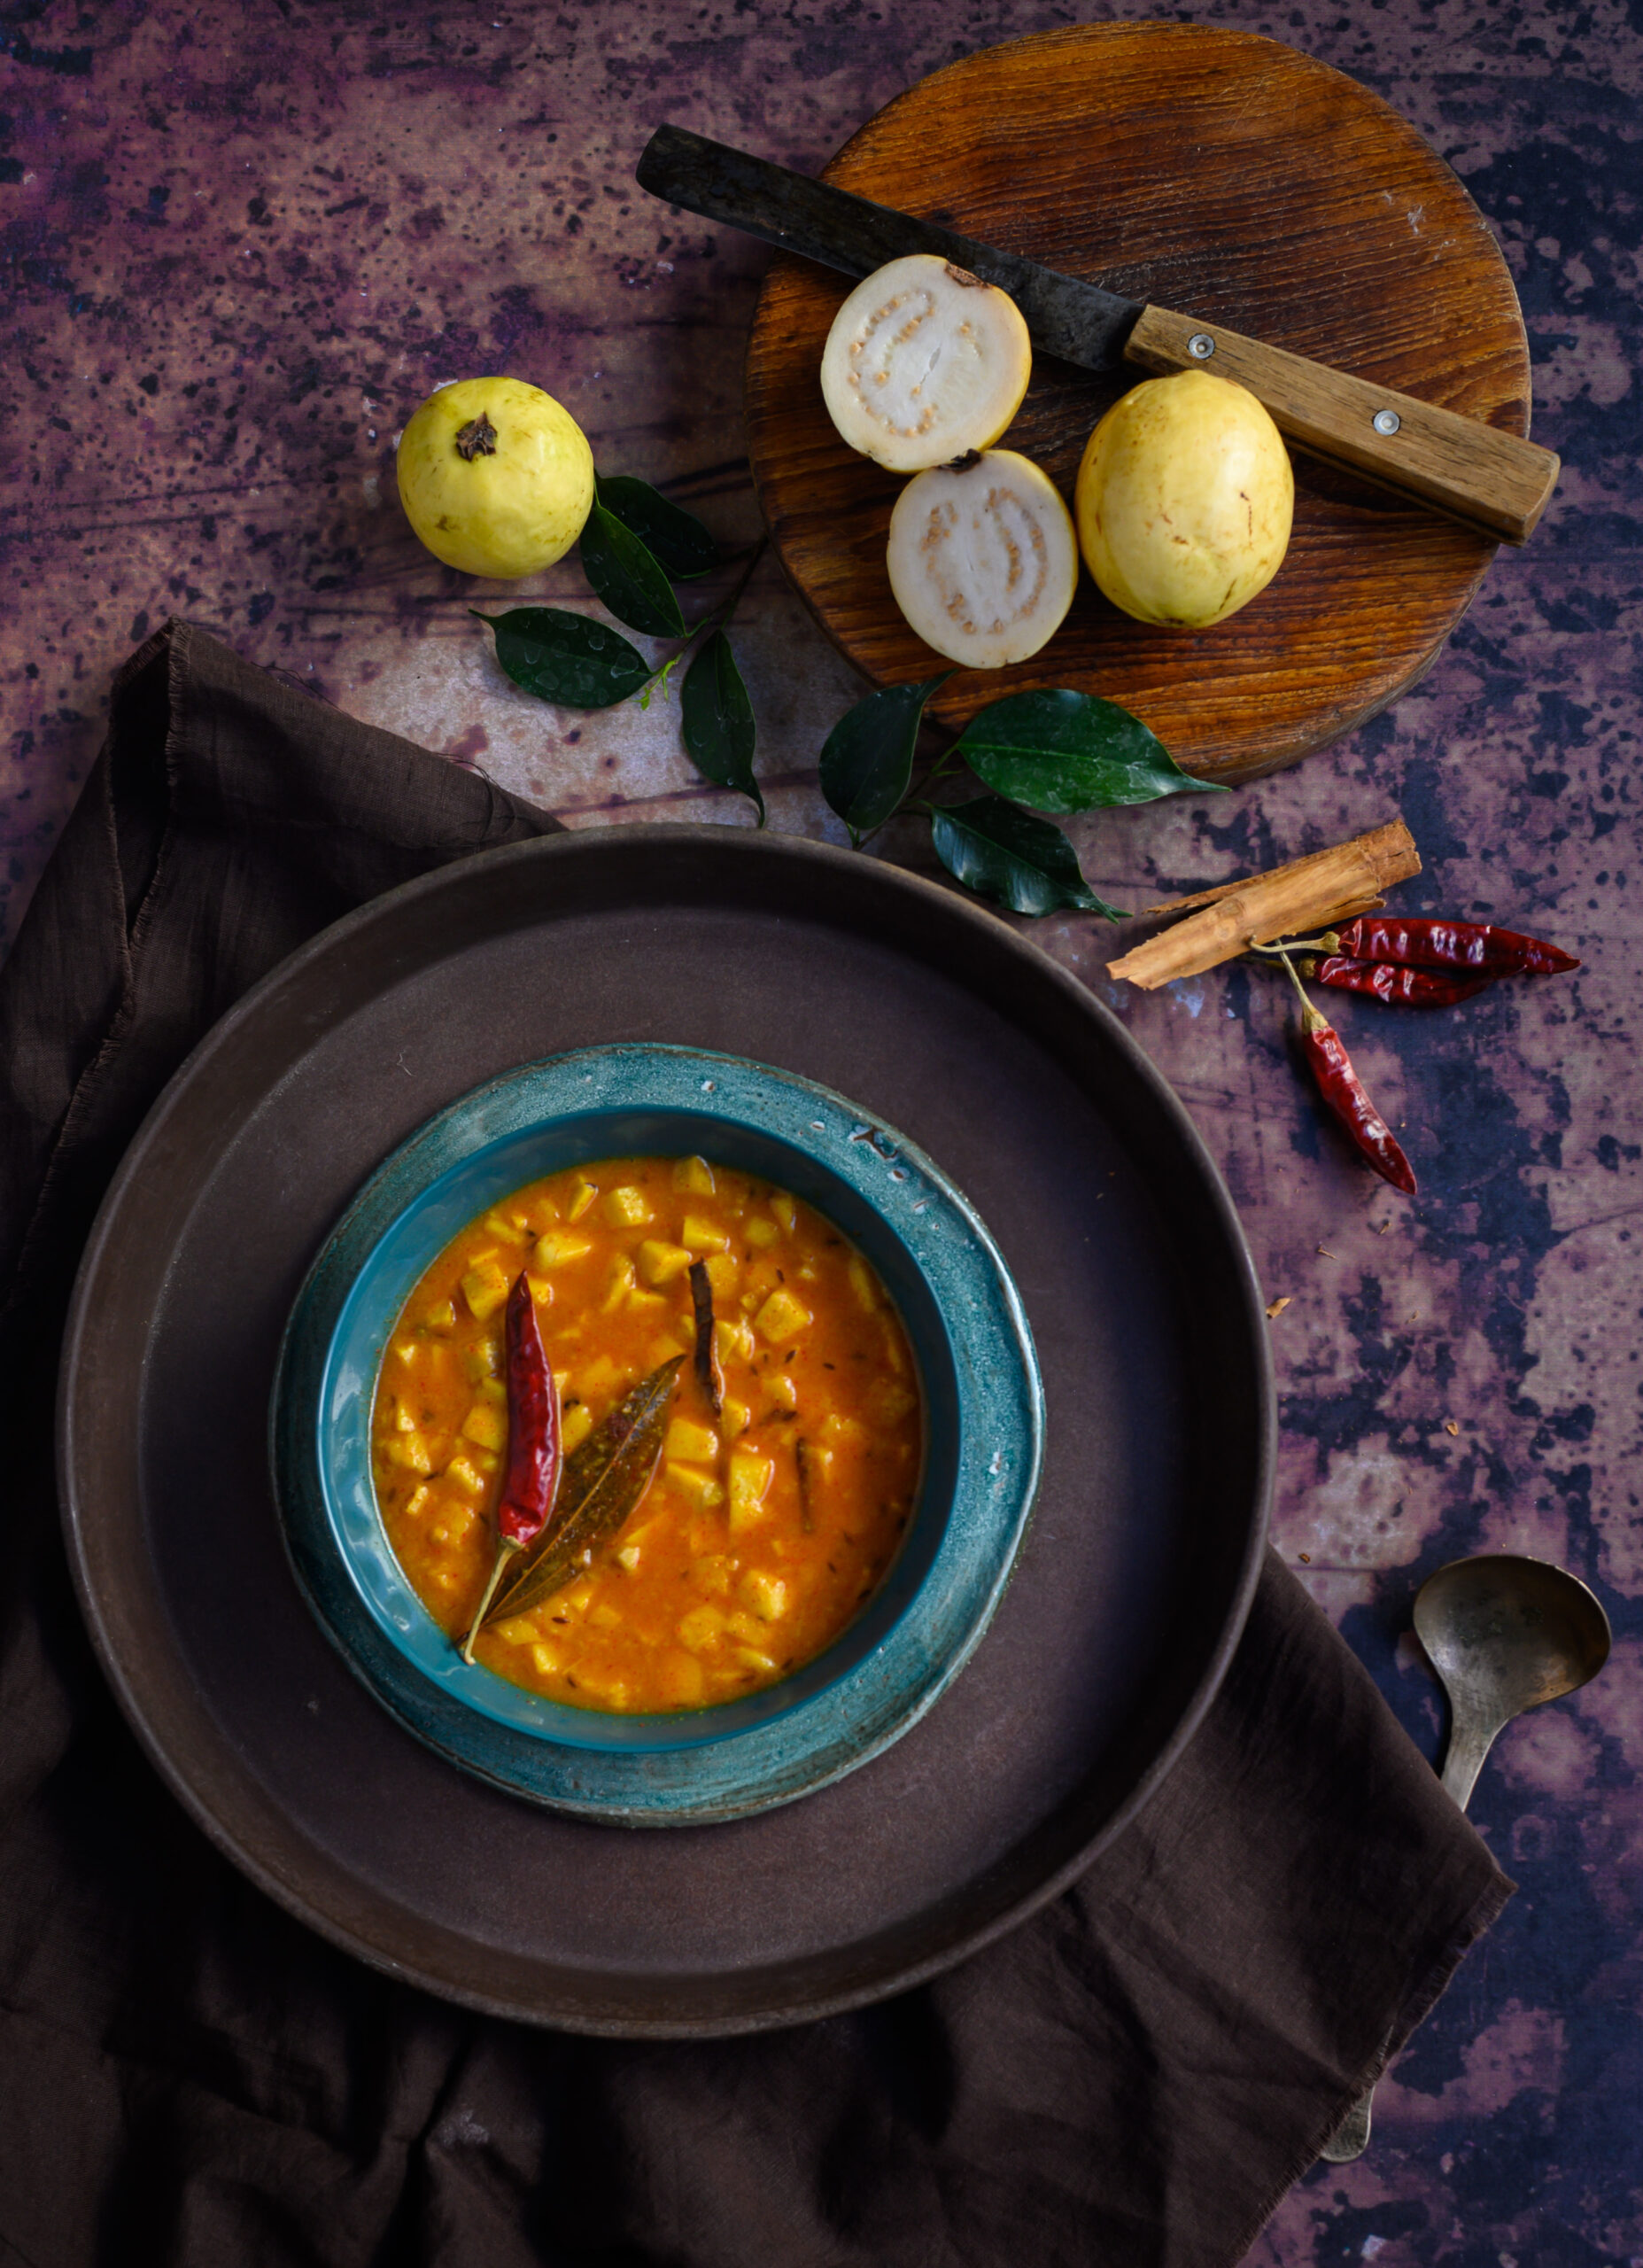
Ever since I can remember, this traditional stuffed vegetable dish has been a part of my life. It’s typically Gujarati, in the sense that every Gujarati household makes it. Some use onions and garlic, while for others these ingredients are not permitted religiously. Some use peanuts to add more texture. This dish is true to its region, so the taste and style you experience will also vary depending on where in the state the family originated from. No matter the variant, the base recipe for this Gujarati Potato & Brinjal Curry, which can be made either as a gravy or dry, is the same.
Needless to say, it’s a favourite and frequent dish in my home today, just as it was when I was growing up. It was a trademark preparation of my mother’s. When I first got married, she would speak to me often on the phone and if she sensed that I was feeling down, she would always say, “Come home for a meal. I made your favourite vegetable dish today.” Till she was 84 years old, she cooked this sabzi regularly for me. In that last year when she was unwell, it became my turn to. I would cook it and send it to her, made with all the love I have for her and the memories she had given me, and she would enjoy it just as much as I did.
And how many memories I have of this dish! Memories of eating it at home as a child, memories of making it for my own family once my kids were born, memories of visiting Gujarati relatives and friends for a meal and almost invariably being offered their own personal rendition of it. Perhaps there was something extra special about it to me always, and maybe this was the reason why my mother recognised that it was my favourite. That was because it was always served during our Sunday lunches when we were growing up. We would all be glad for the weekend, enjoying our leisure, and this delicious concoction of potato and stuffed brinjal would fill our tummies and become associated with the joy of a day of rest itself. Funnily, for such a quintessential and ubiquitious dish, Gujaratis don’t have a special name for it. We just call it “potato-brinjal curry” in our language too!
There are certain dishes which, even if one usually dislikes the main ingredient, the magic of the preparation always sways the eater to relish it. I’ve heard quite often that people who don’t enjoy eggplant in other ways do so when they have a bite of this. (People not liking potatoes is much rarer, of course!). Whether you call it brinjal, baingan, aubergine or eggplant, it’s a vegetable that has a host of benefits, and which can be made in delicious ways so that your family receives these. This Gujarati curry, for which I will provide both the gravy and the dry options in the method below, is the perfect way to bring the antioxidant-rich, fibre-rich, nutrient-rich vegetable into your regular diet.
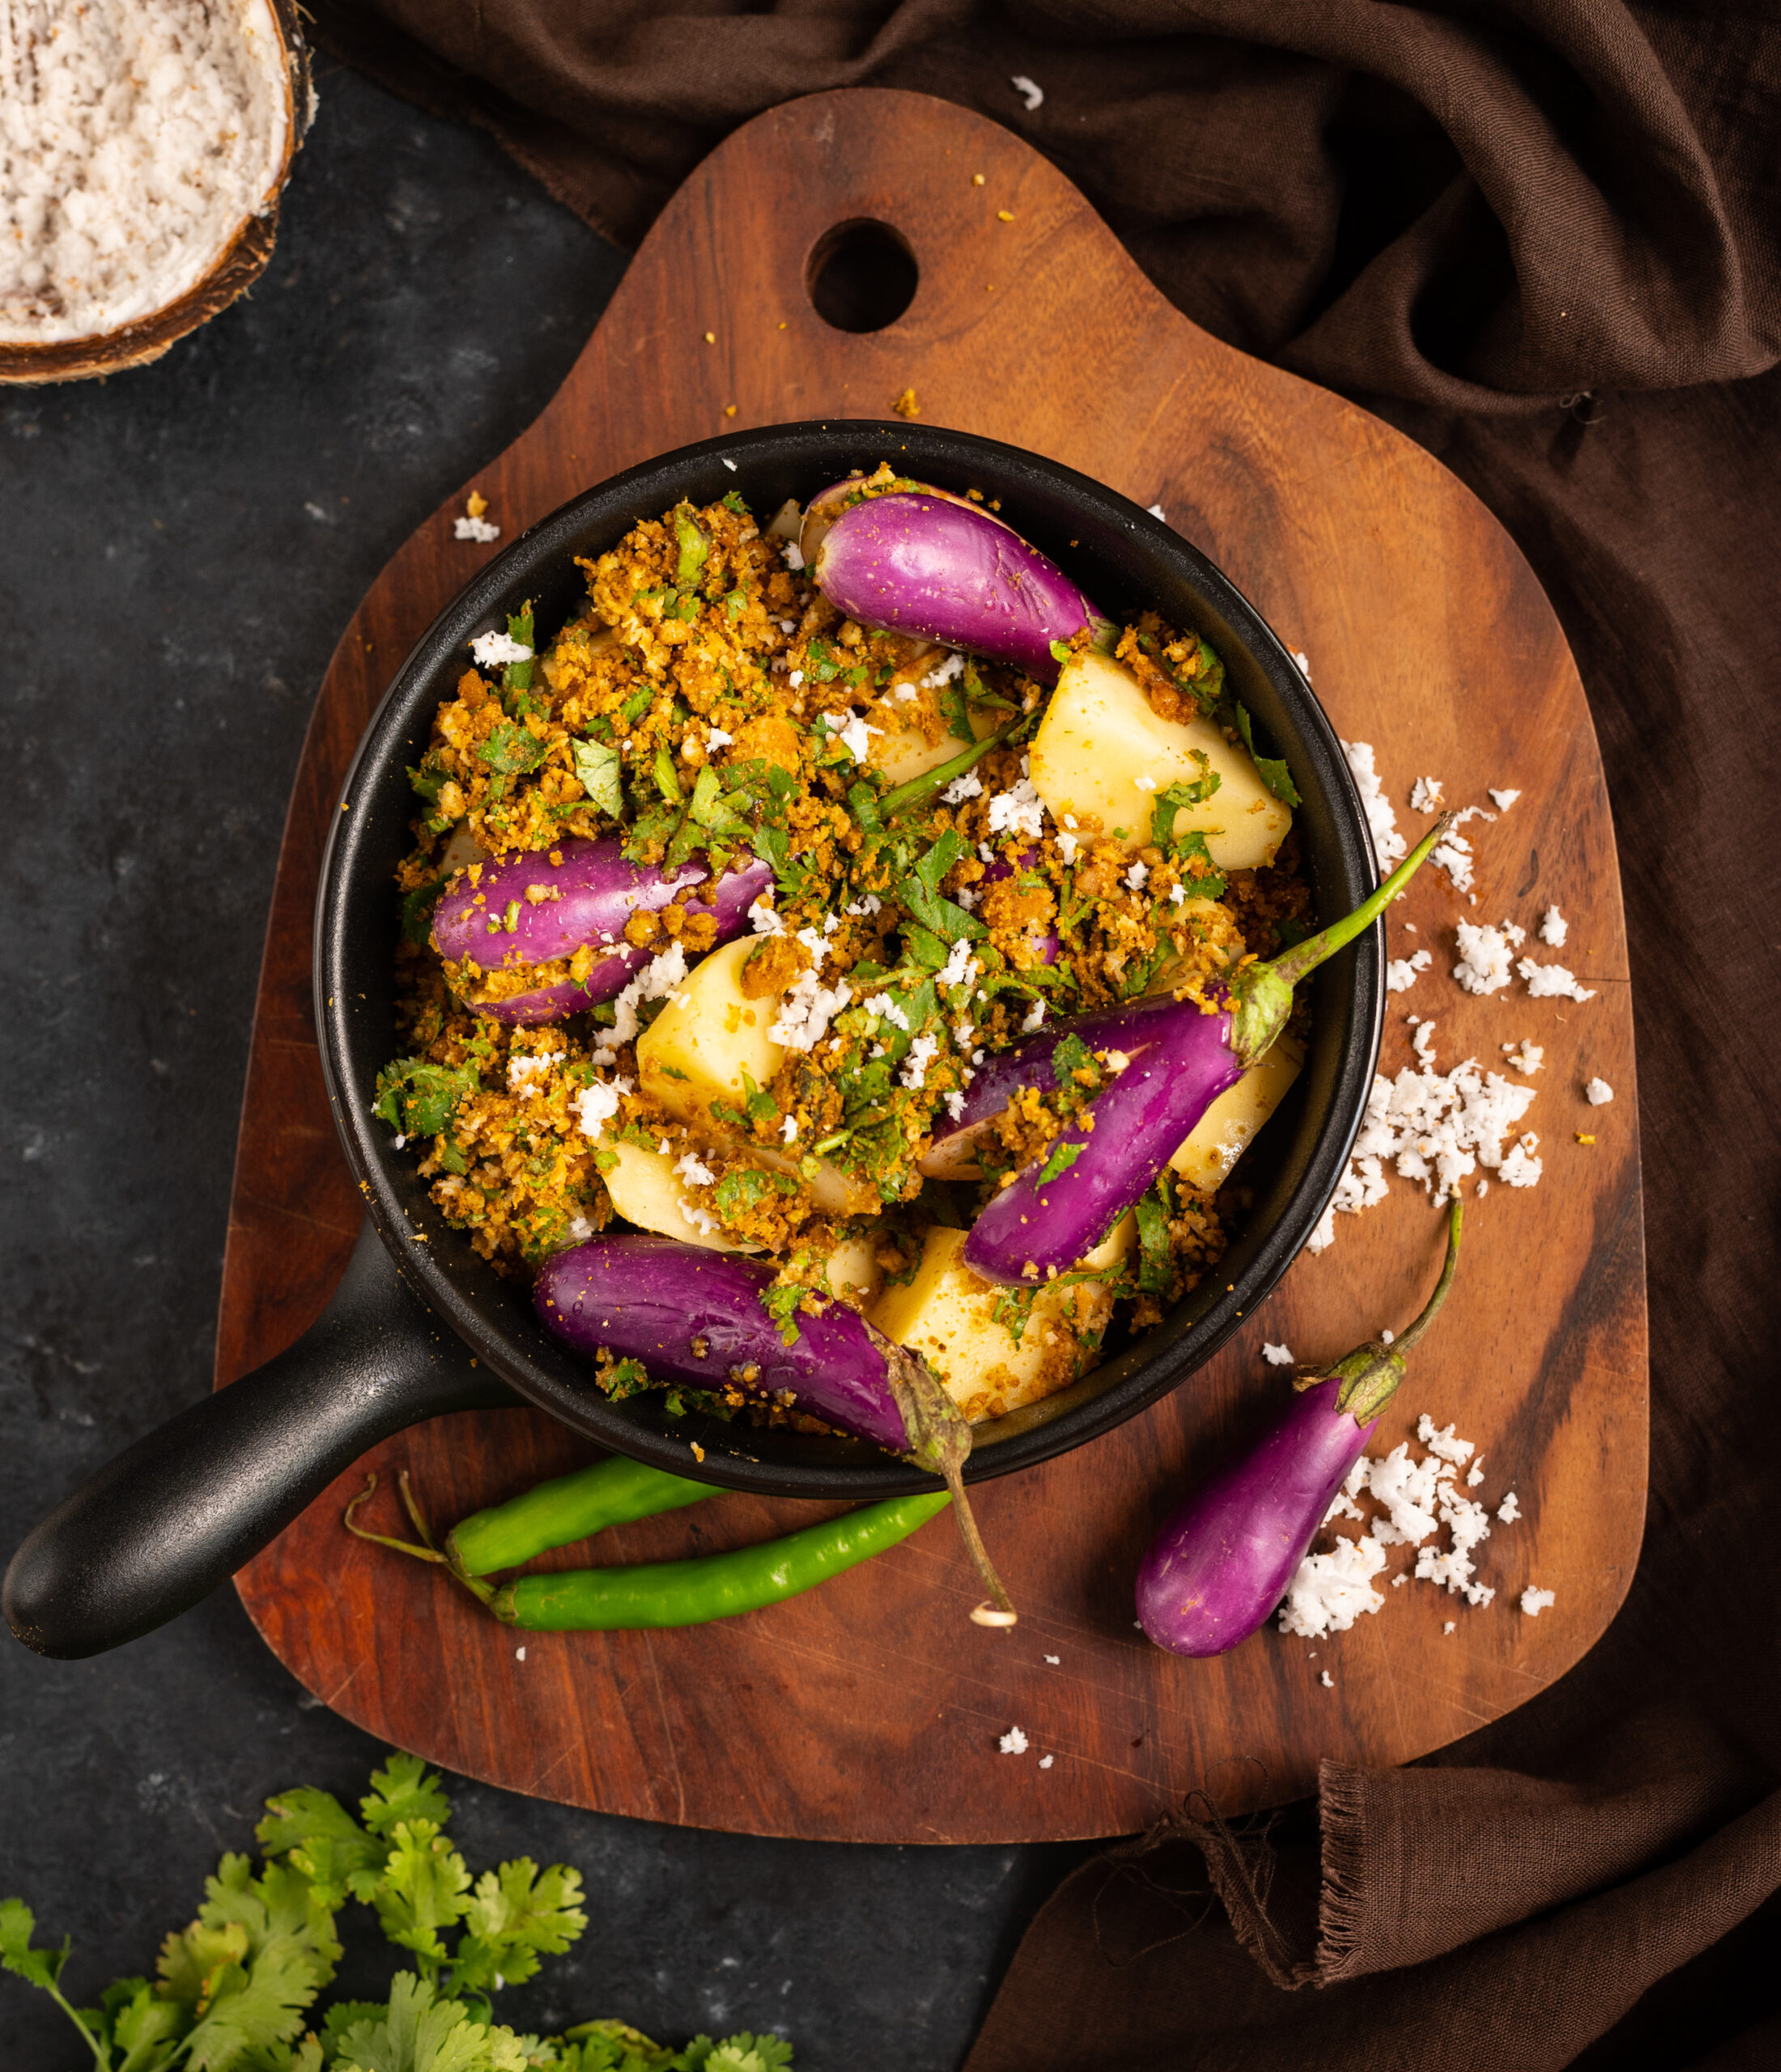
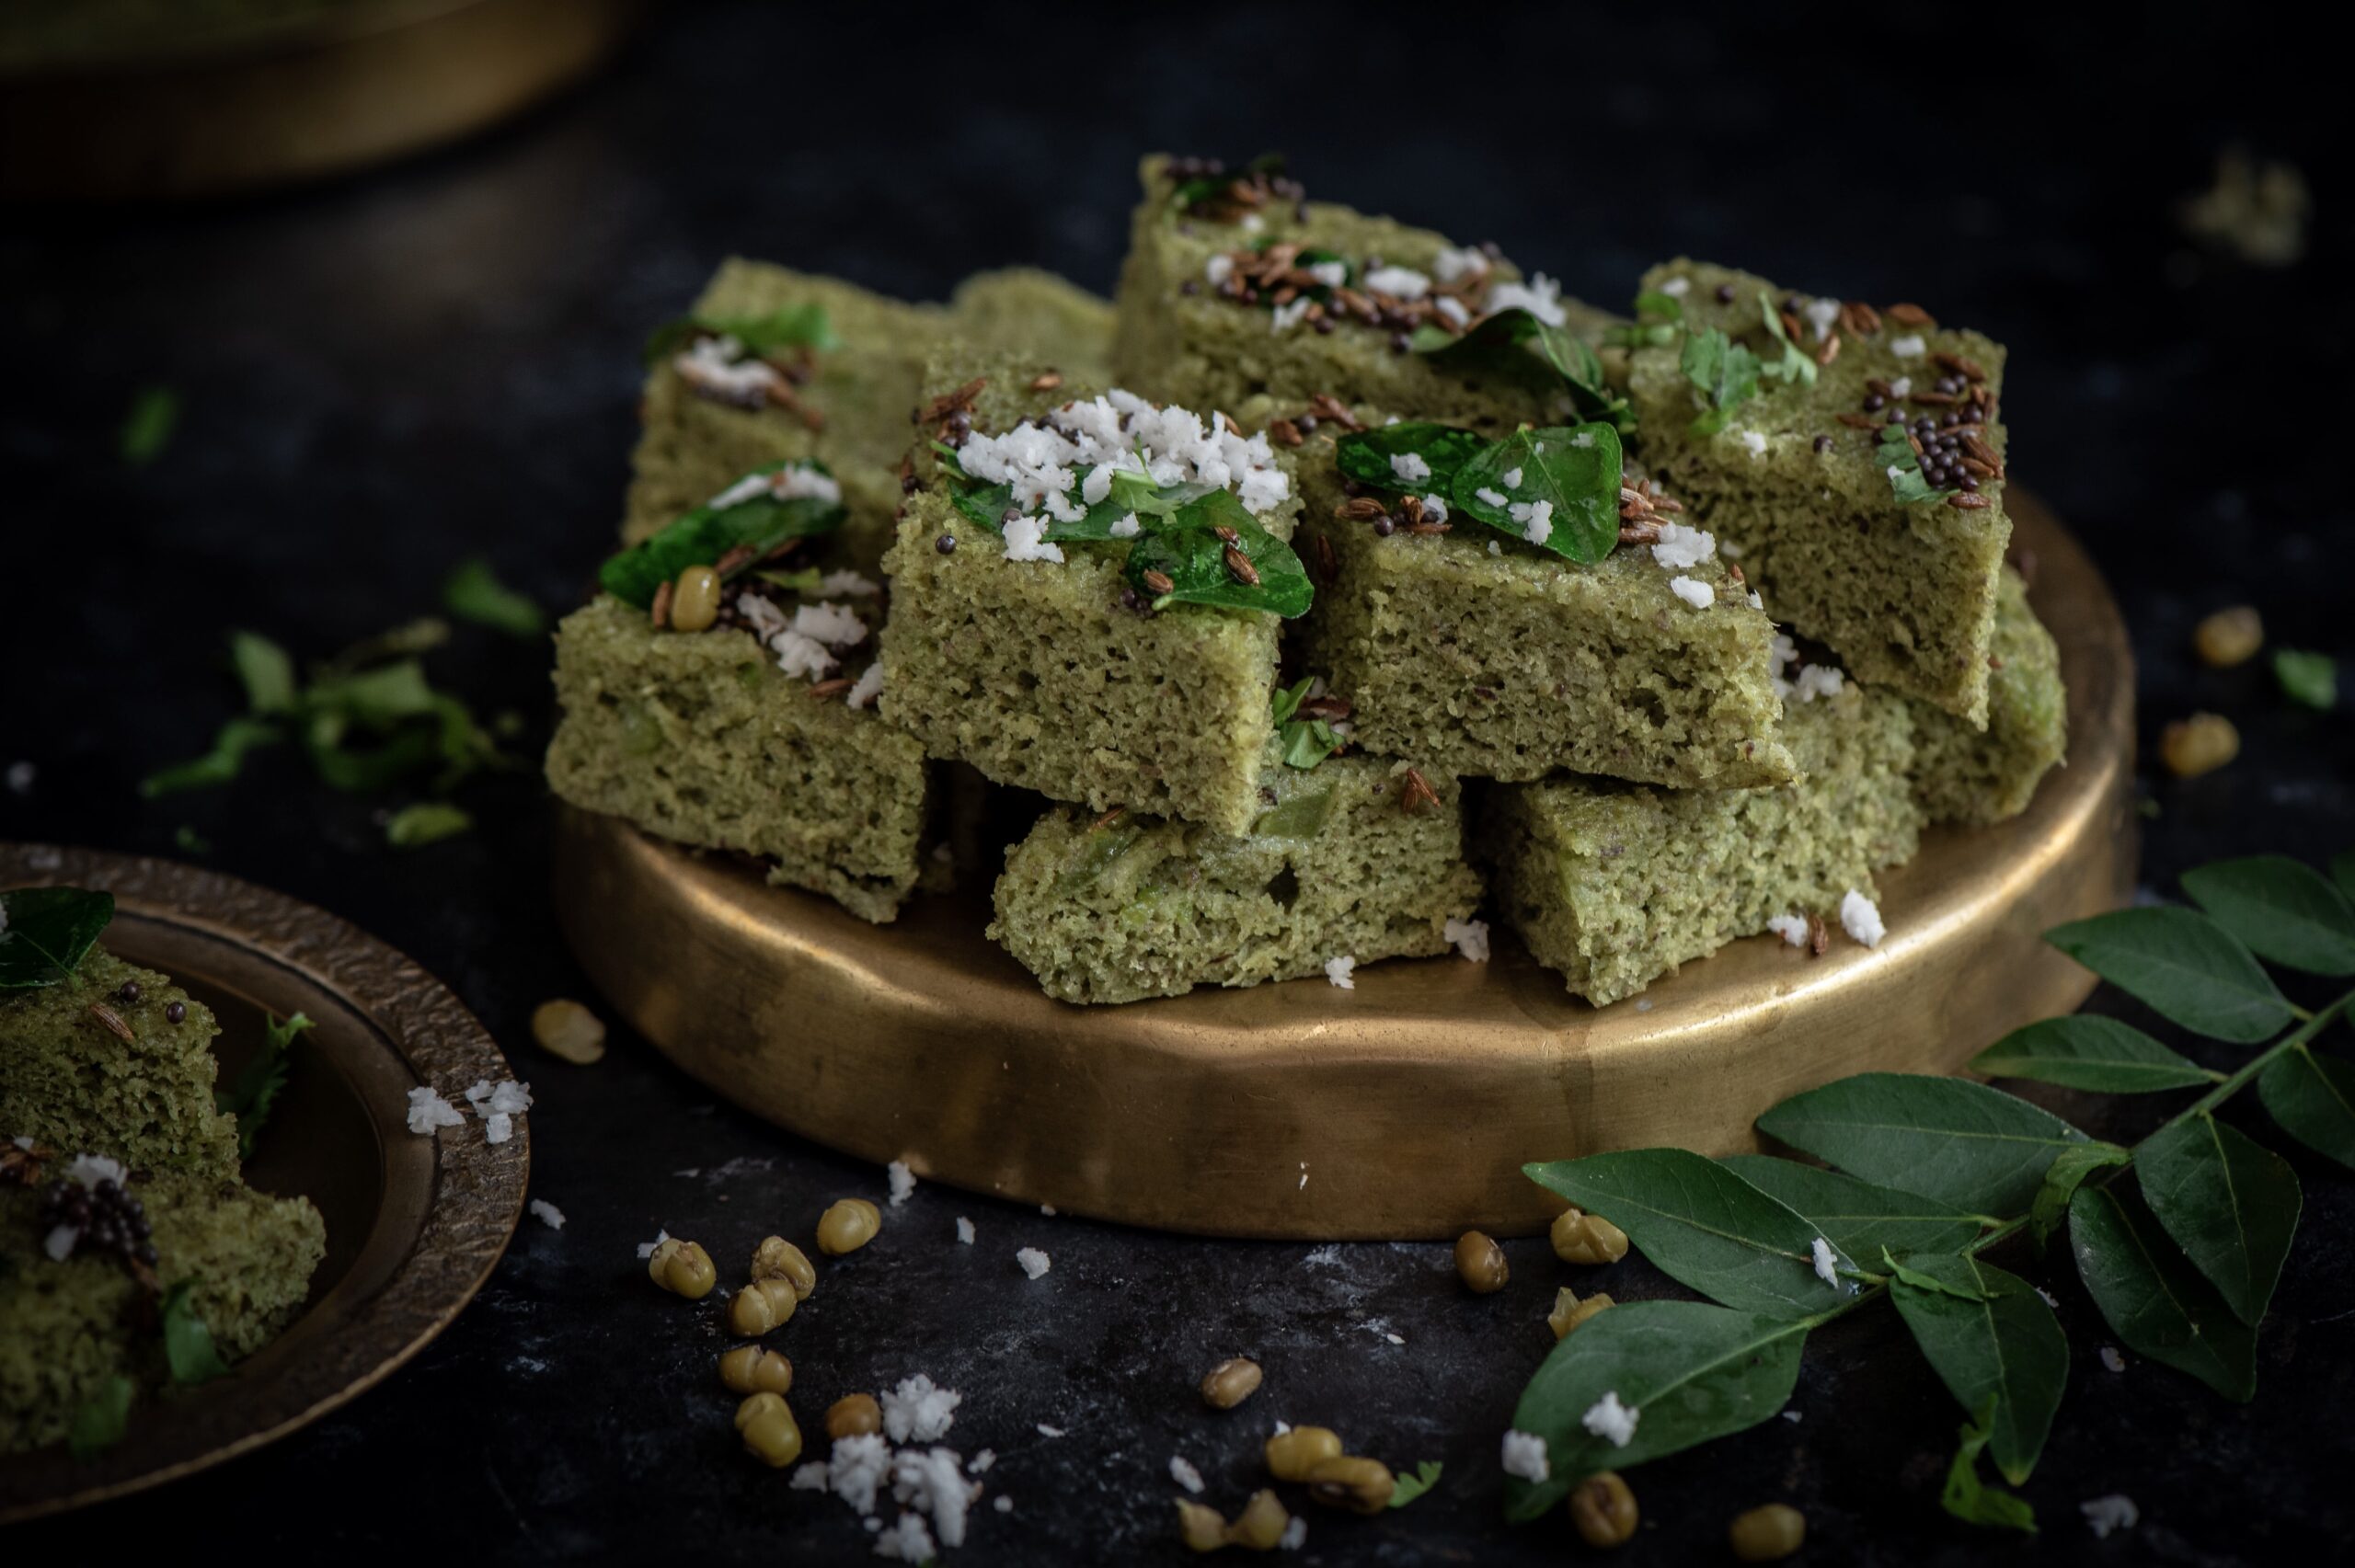
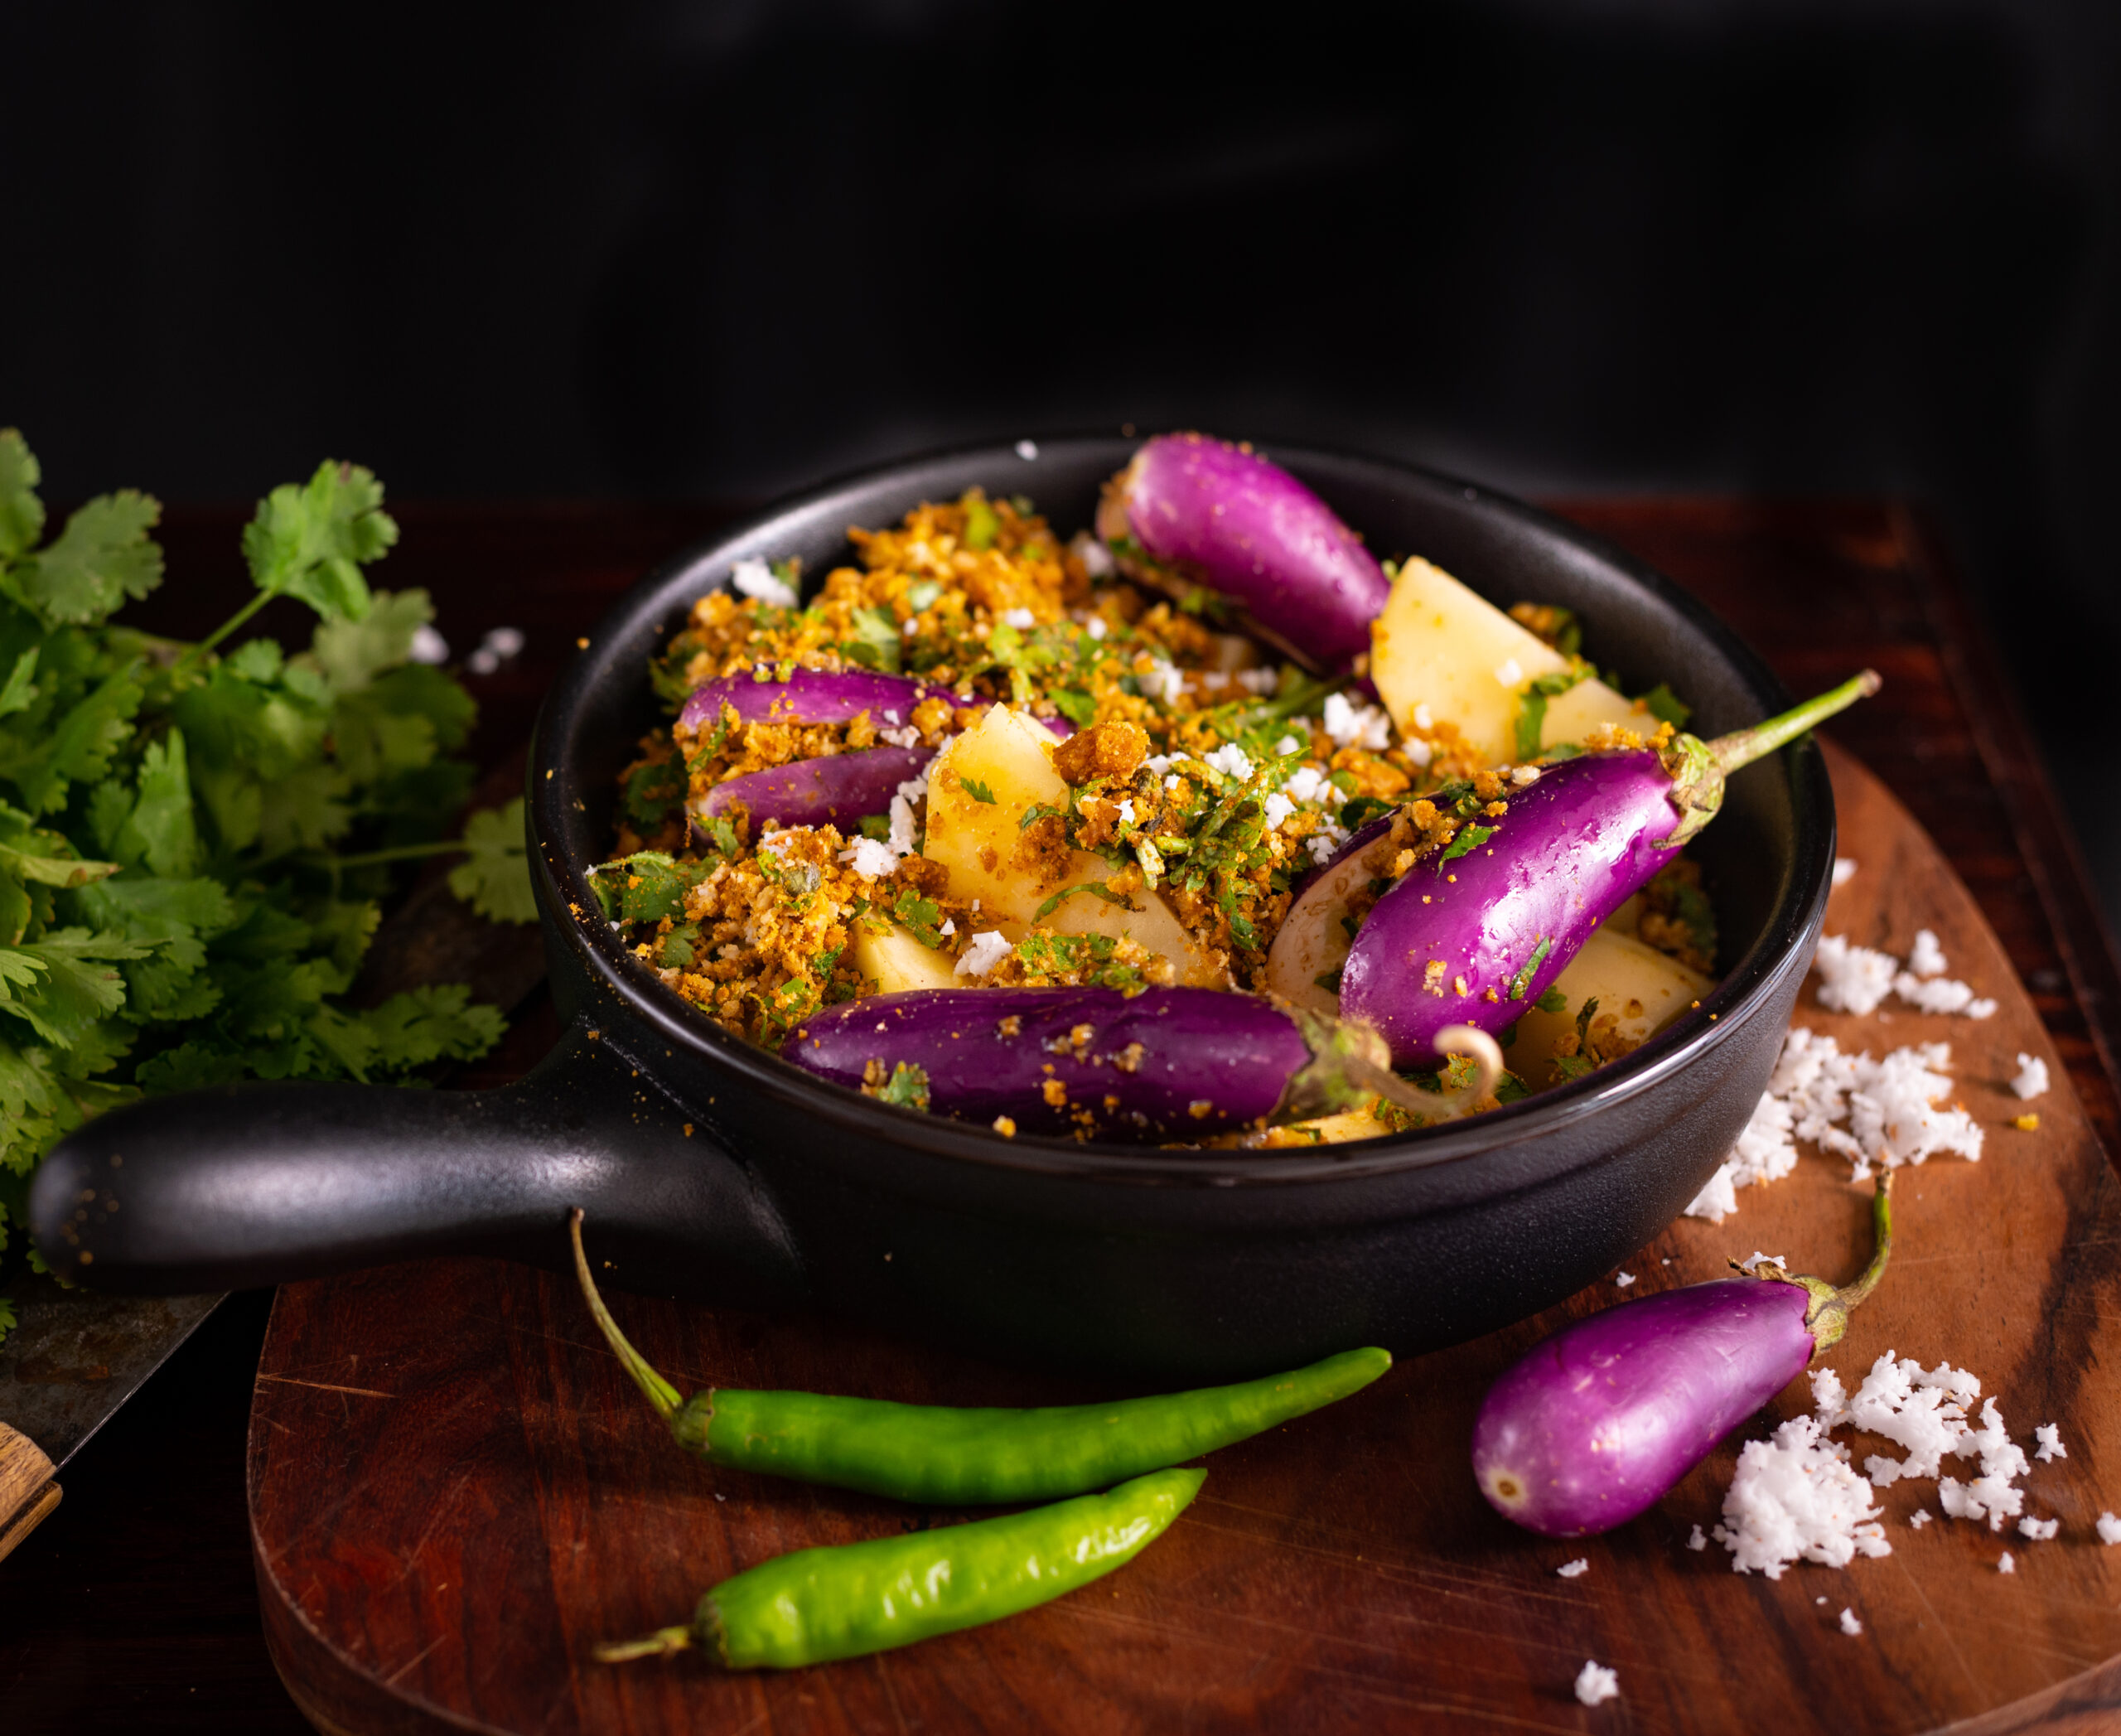
Gujarati Potato & Brinjal Curry (Gravy/Dry)
(Yield: 1 bowl)
½ cup grated coconut
¼ teaspoon turmeric powder
2 tablespoons cumin/dhania (coriander) powder
1 teaspoon amchur (mango powder)
1 teaspoon garam masala
2 tablespoons jaggery
1 teaspoon chilli powder
Salt to taste
½ teaspoon grated ginger/green chili
½ cup finely chopped coriander leaves
2 tablespoons oil
6 baby eggplants
3 large potatoes
3-4 cups water


First, let me share the gravy version of this dish. The dry version is provided further below.
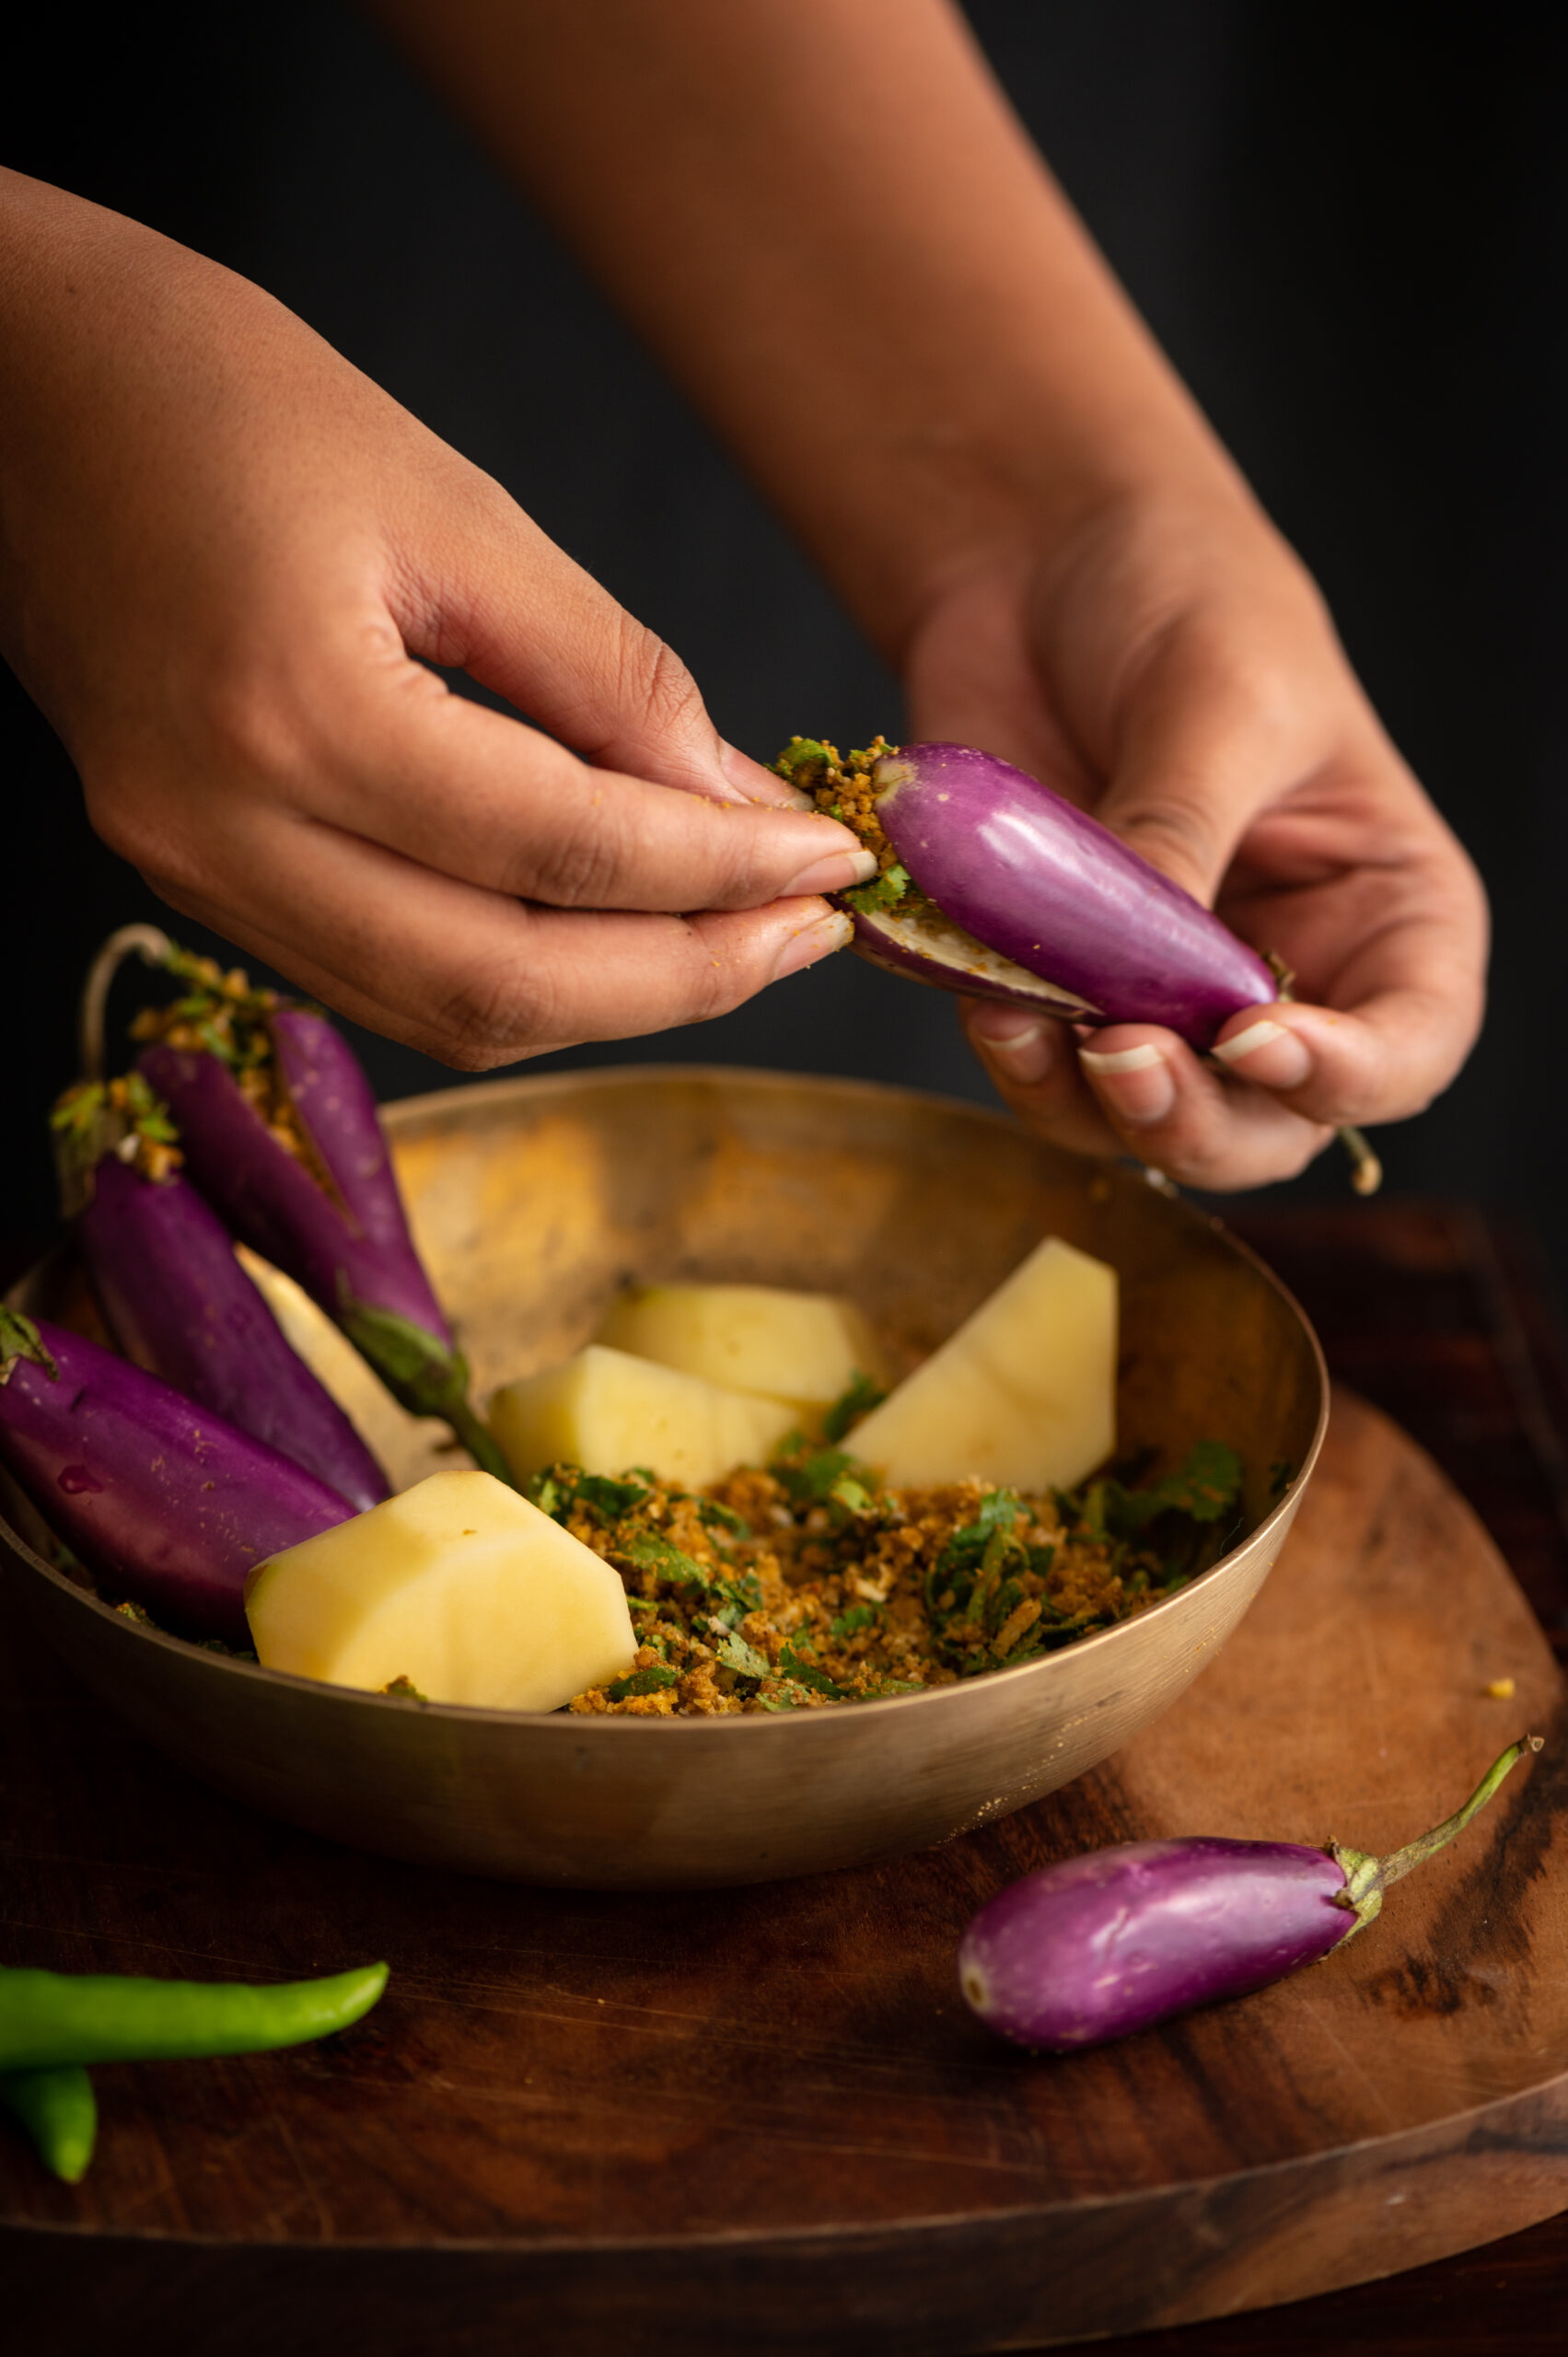
Wash the baby eggplants. Slit them lengthwise (so that they can be stuffed; be careful not to cut completely) and keep the slices in water.
Peel the potatoes and cut them into big pieces. Set aside.
In a plate, prepare the stuffing by adding together the coconut, salt, spices, coriander leaves, ginger chili paste, and jaggery. Mix it well with your fingertips and set aside. Now, take each eggplant and stuff it with this prepared masala. Keep aside.
Heat the oil in a pressure cooker and gently add potatoes, making sure the oil doesn’t splutter. Next, gently add the stuffed eggplants over the potatoes. You will find that there is a lot of masala left over. Sprinkle this over the vegetables, leaving just a little on the plate for later. Again, gentleness is key so that the stuffed eggplants don’t break.
Now, add the water and mix the concoction – again, gently! Cover the cooker and wait for three whistles. Allow to cool, then open the lid and add the remaining masala. Stir once again. Your gravy Gujarati Potato-Brinjal Curry is ready to serve.
If you prefer a dry version of the same, follow the first three steps as above: cleaning and preparing the eggplants for stuffing, cutting the potatoes, and preparing the masala.
Then, add the oil in a kadai. Once it has heated, add the potatoes. Stir them, then cover with a lid on a slow flame. Stir occasionally, making sure they do not stick to the bottom. Once the potatoes are slightly tender to the touch and not overcooked, open the lid and add the stuffed eggplants. Remember that potatoes take longer to cook than eggplants so gauge the time well. Cover again.
If required, especially if the vegetables are sticking to the bottom of the pan, sprinkle some water and cover. Continue to allow the dish to cook until all the vegetables are well-done. Finally, add the masala and stir gently. Cover again and allow it to sit. The dry version of this dish is now ready to serve.
As you prepare the dish, adjust the spices as per your preference. If you don’t like the standard Gujarati-style touch of sweetness, don’t include jaggery. If you want to spice it up while maintaining colour, chopped green chillies will do the trick. Don’t forget the versions mentioned at the beginning, which incorporate peanuts, garlic or onions.
No matter which way you choose to make it, I hope this Gujarati Potato-Brinjal Curry brings as much comfort and deliciousness to your home as it does to mine. As with all Indian curries, it’s perfect with rice and a range of breads. It’s got the spiciness of our masala, is tummy-filling thanks to the potatoes, and just has such a feel-good effect on the heart. Trust me: generations of Gujaratis have been turning to this dish as nutritious comfort food!


")