Tag

Gujarati

Browsing

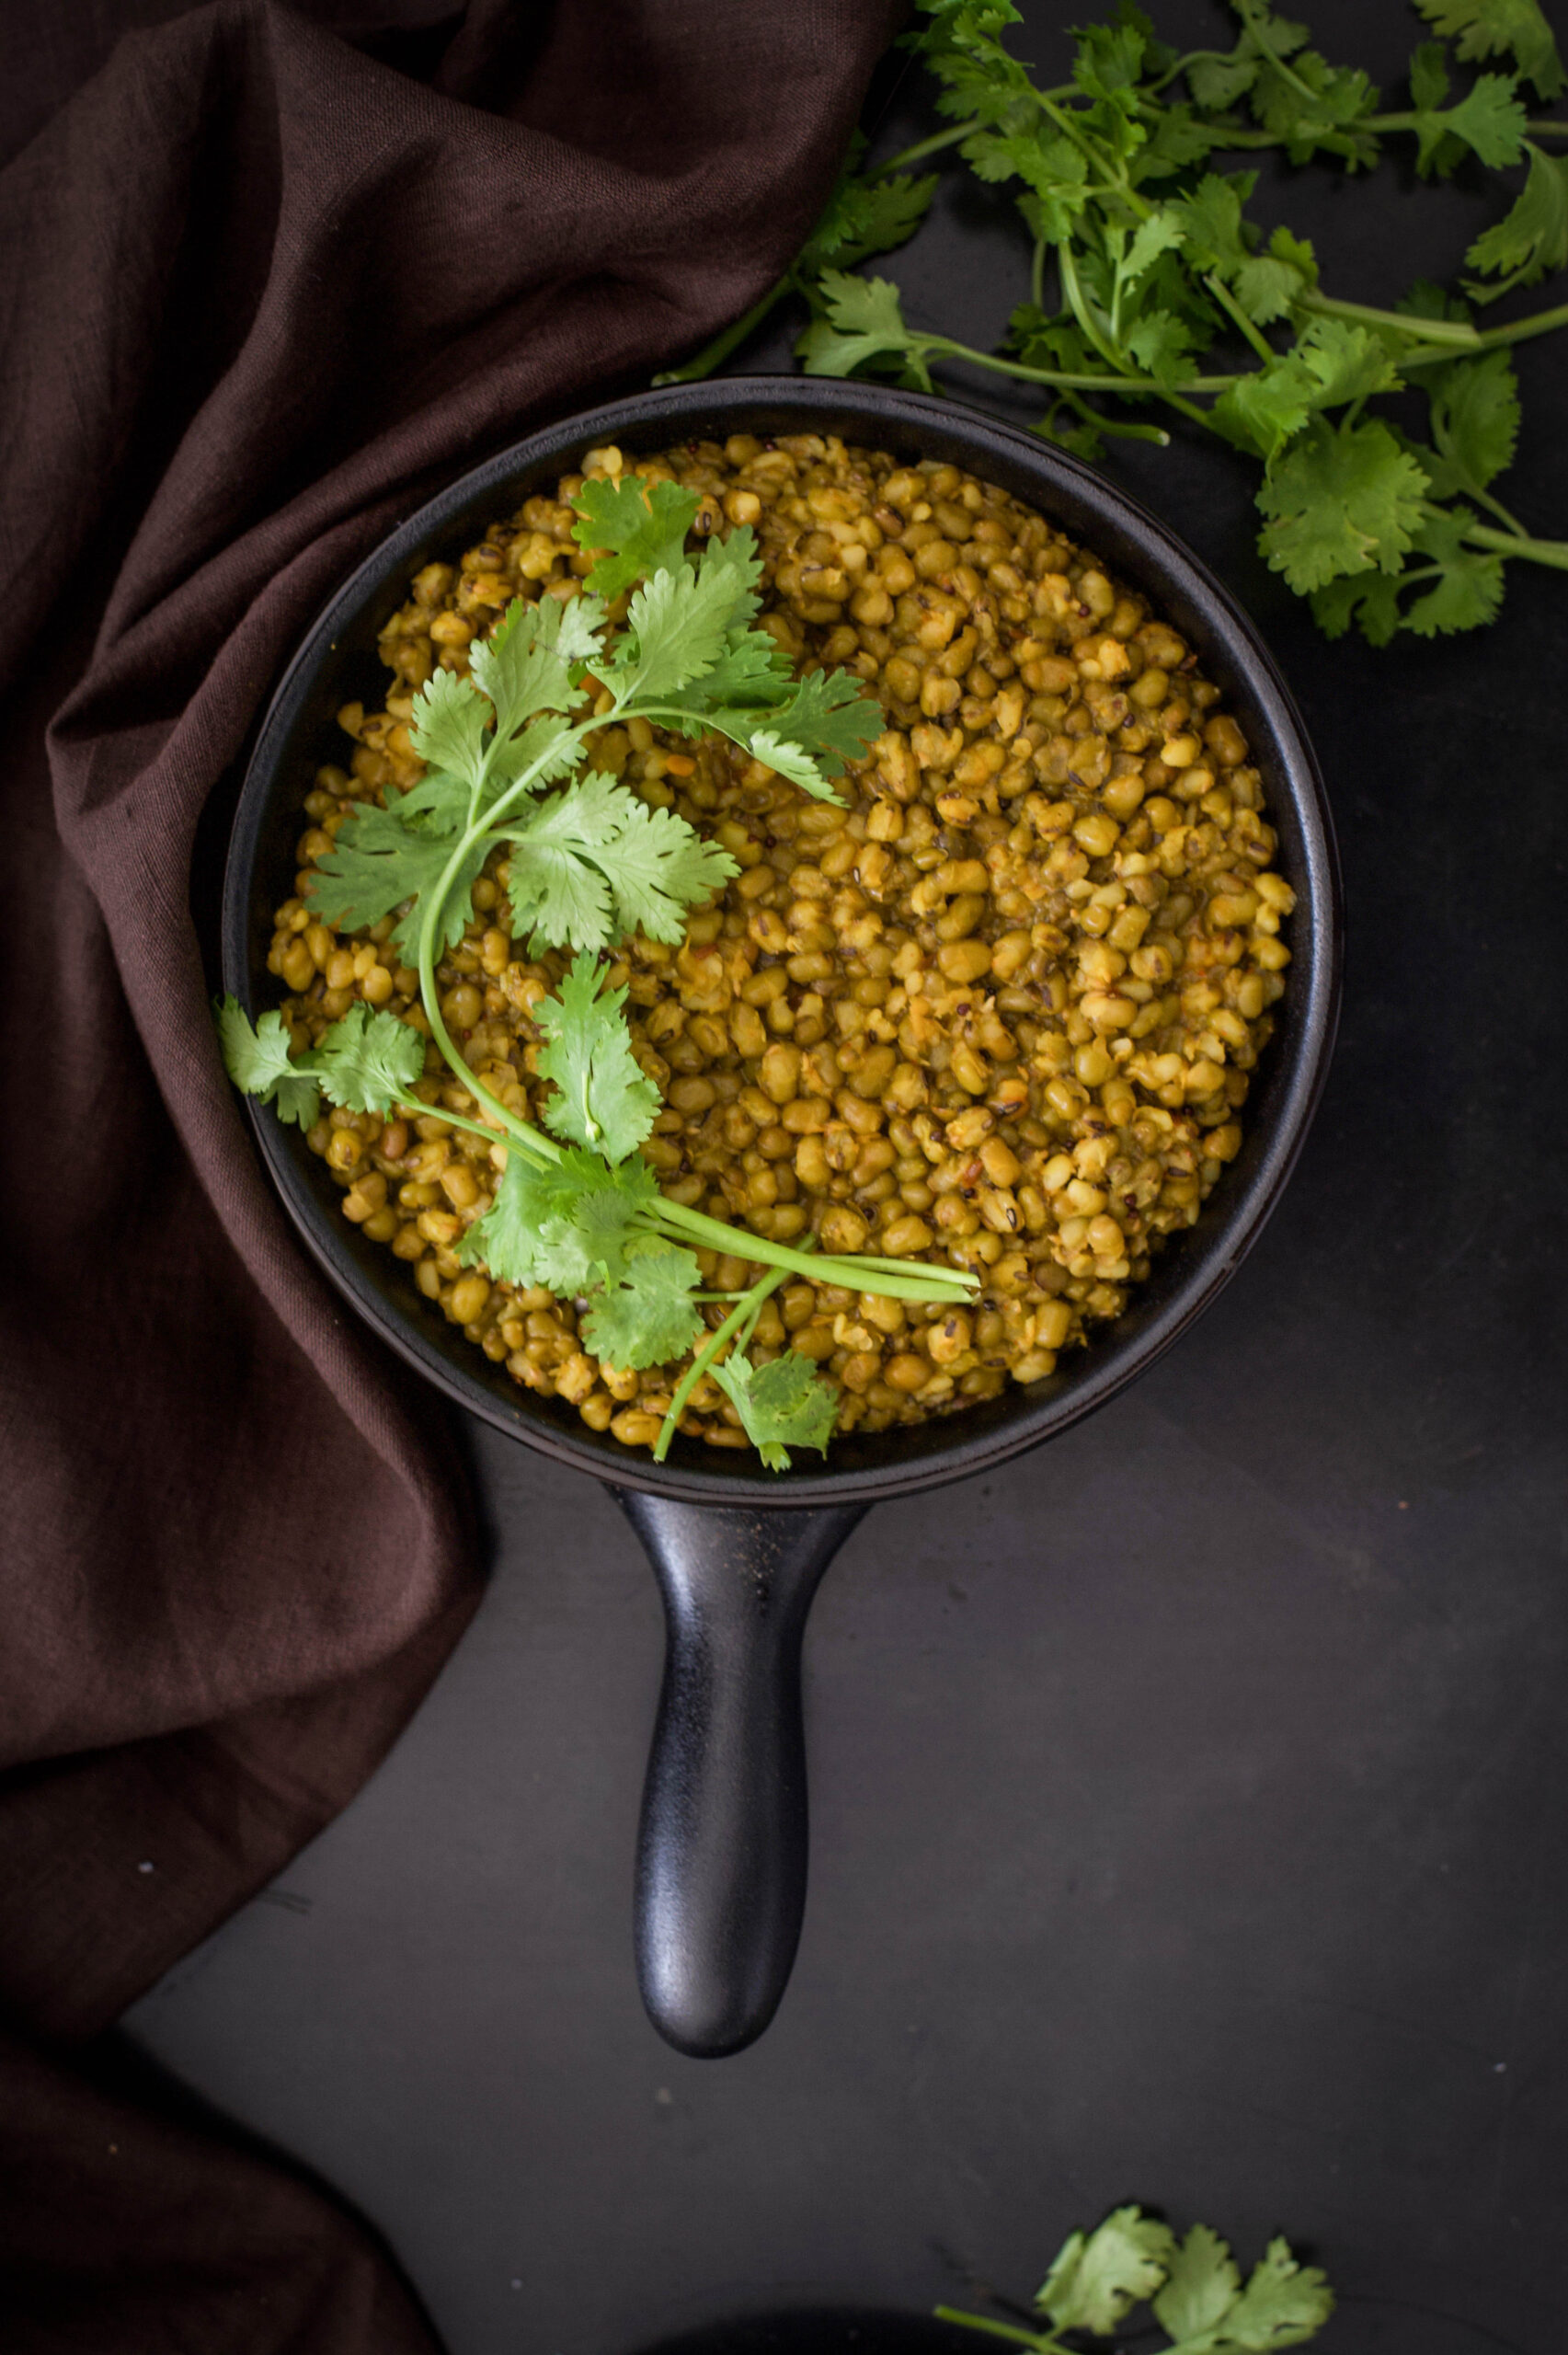
If you’ve been following my blog for a while, you may not be surprised to hear me say that green moong is my favourite among lentils (you may know it as mung bean, green gram or pachai payiru). As you’d have seen, I’m so in love with its versatility that it’s found a place in recipes as diverse as this crunchy teatime snack and in this deeply filling meal-in-a-bowl. With Republic Day this weekend, honouring the Indian constitution, I thought of how to best honour a different kind of Indian constitution – and once again, the humble yet power-packed mung bean was what came to mind.

Green is one of the three stripes of the tricolour and greenness is something that I think we need and must celebrate in this country. It’s a colour that evokes fecundity, growth and serenity. In my previous post, I talked about the harvest festival Sankranti. As a farm-owner, and someone very invested in using the goods of my garden in my kitchen, “green” is a way of life for me. I hope that this year will be good for farms and farmers everywhere, for political calmness, and for harmony and oneness with nature.

The recipe I am sharing today is for green moong dhokla – a healthy, fermented, steamed dish that can be eaten as a main course, a snack or an accompaniment. Soft and flavourful, a dhokla is so ubiquitously Gujarati that it’s a stereotype. I’ve literally heard people say “Dhokla!” when they hear what my ethnicity is. We have so many varieties, and my personal favourite is actually the buckwheat kind which is eaten on Agyaras, the eleventh day of each month which is traditionally observed by Gujarati Vaishnavites as a relaxed fast during which no grains or salt are consumed, but buckwheat, fruits, yams, potatoes and the like are allowed. I’m not one for fasting, but I always look forward to having some dhokla when I’m around someone who is!

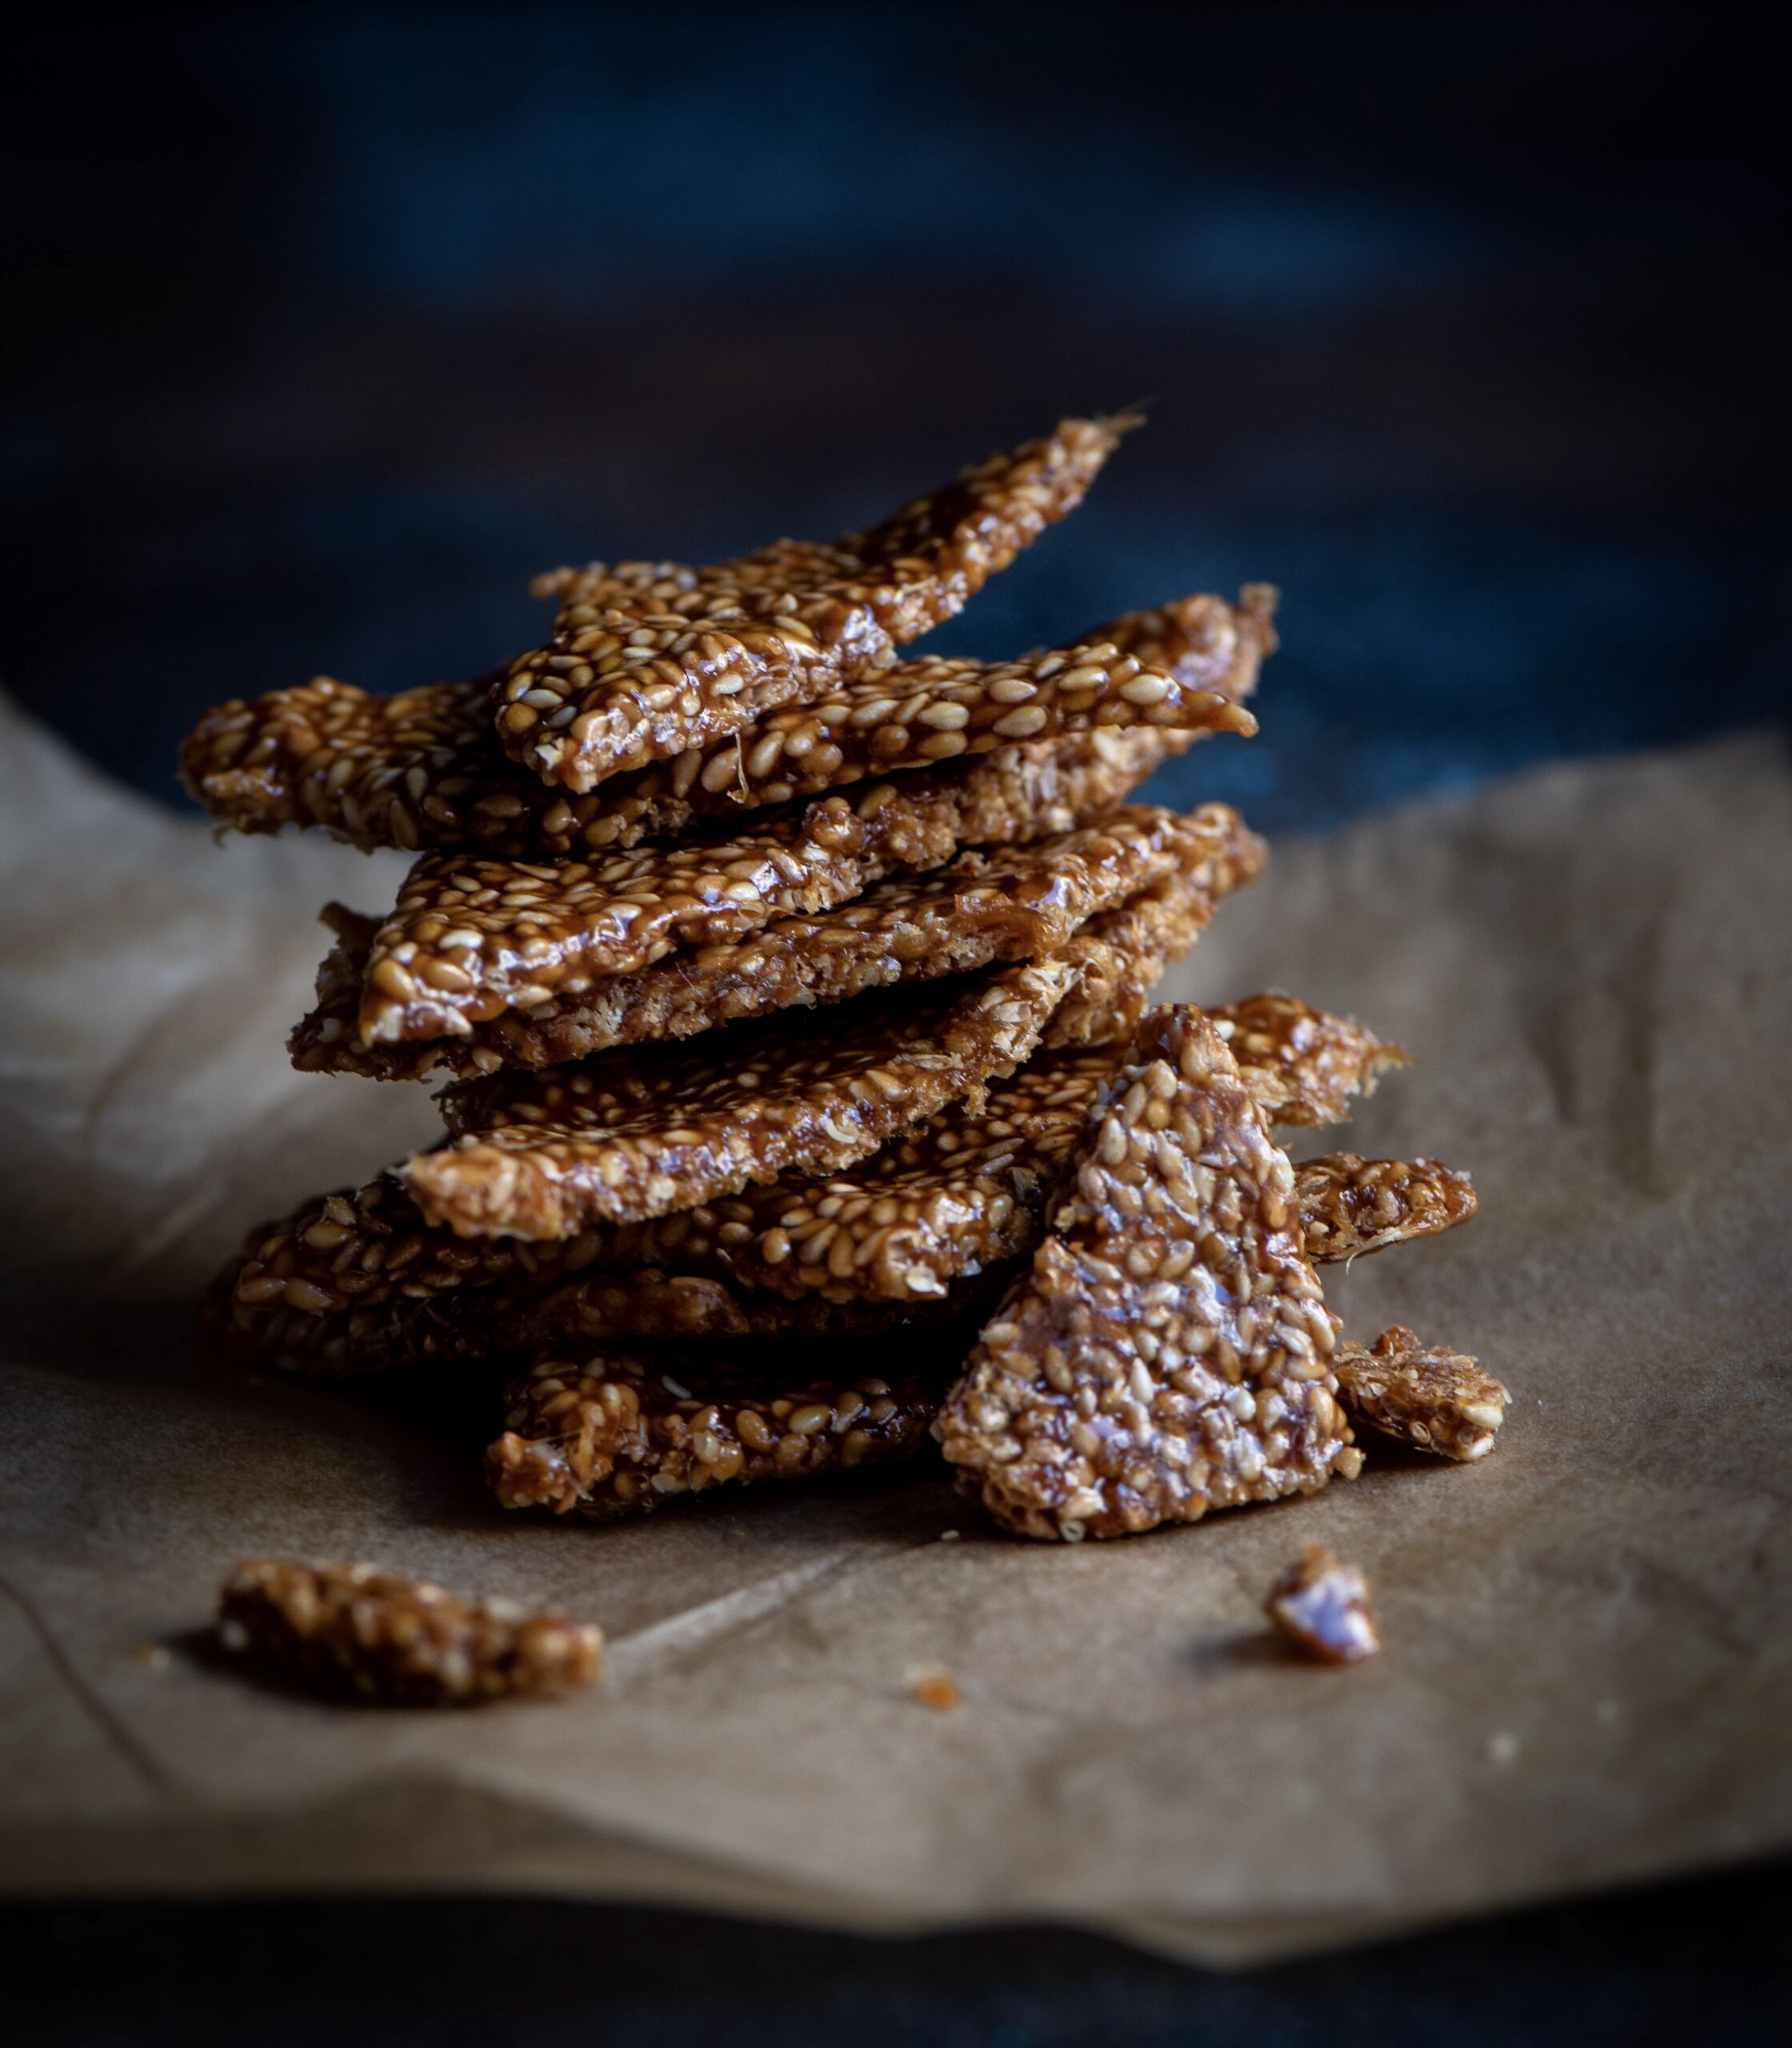
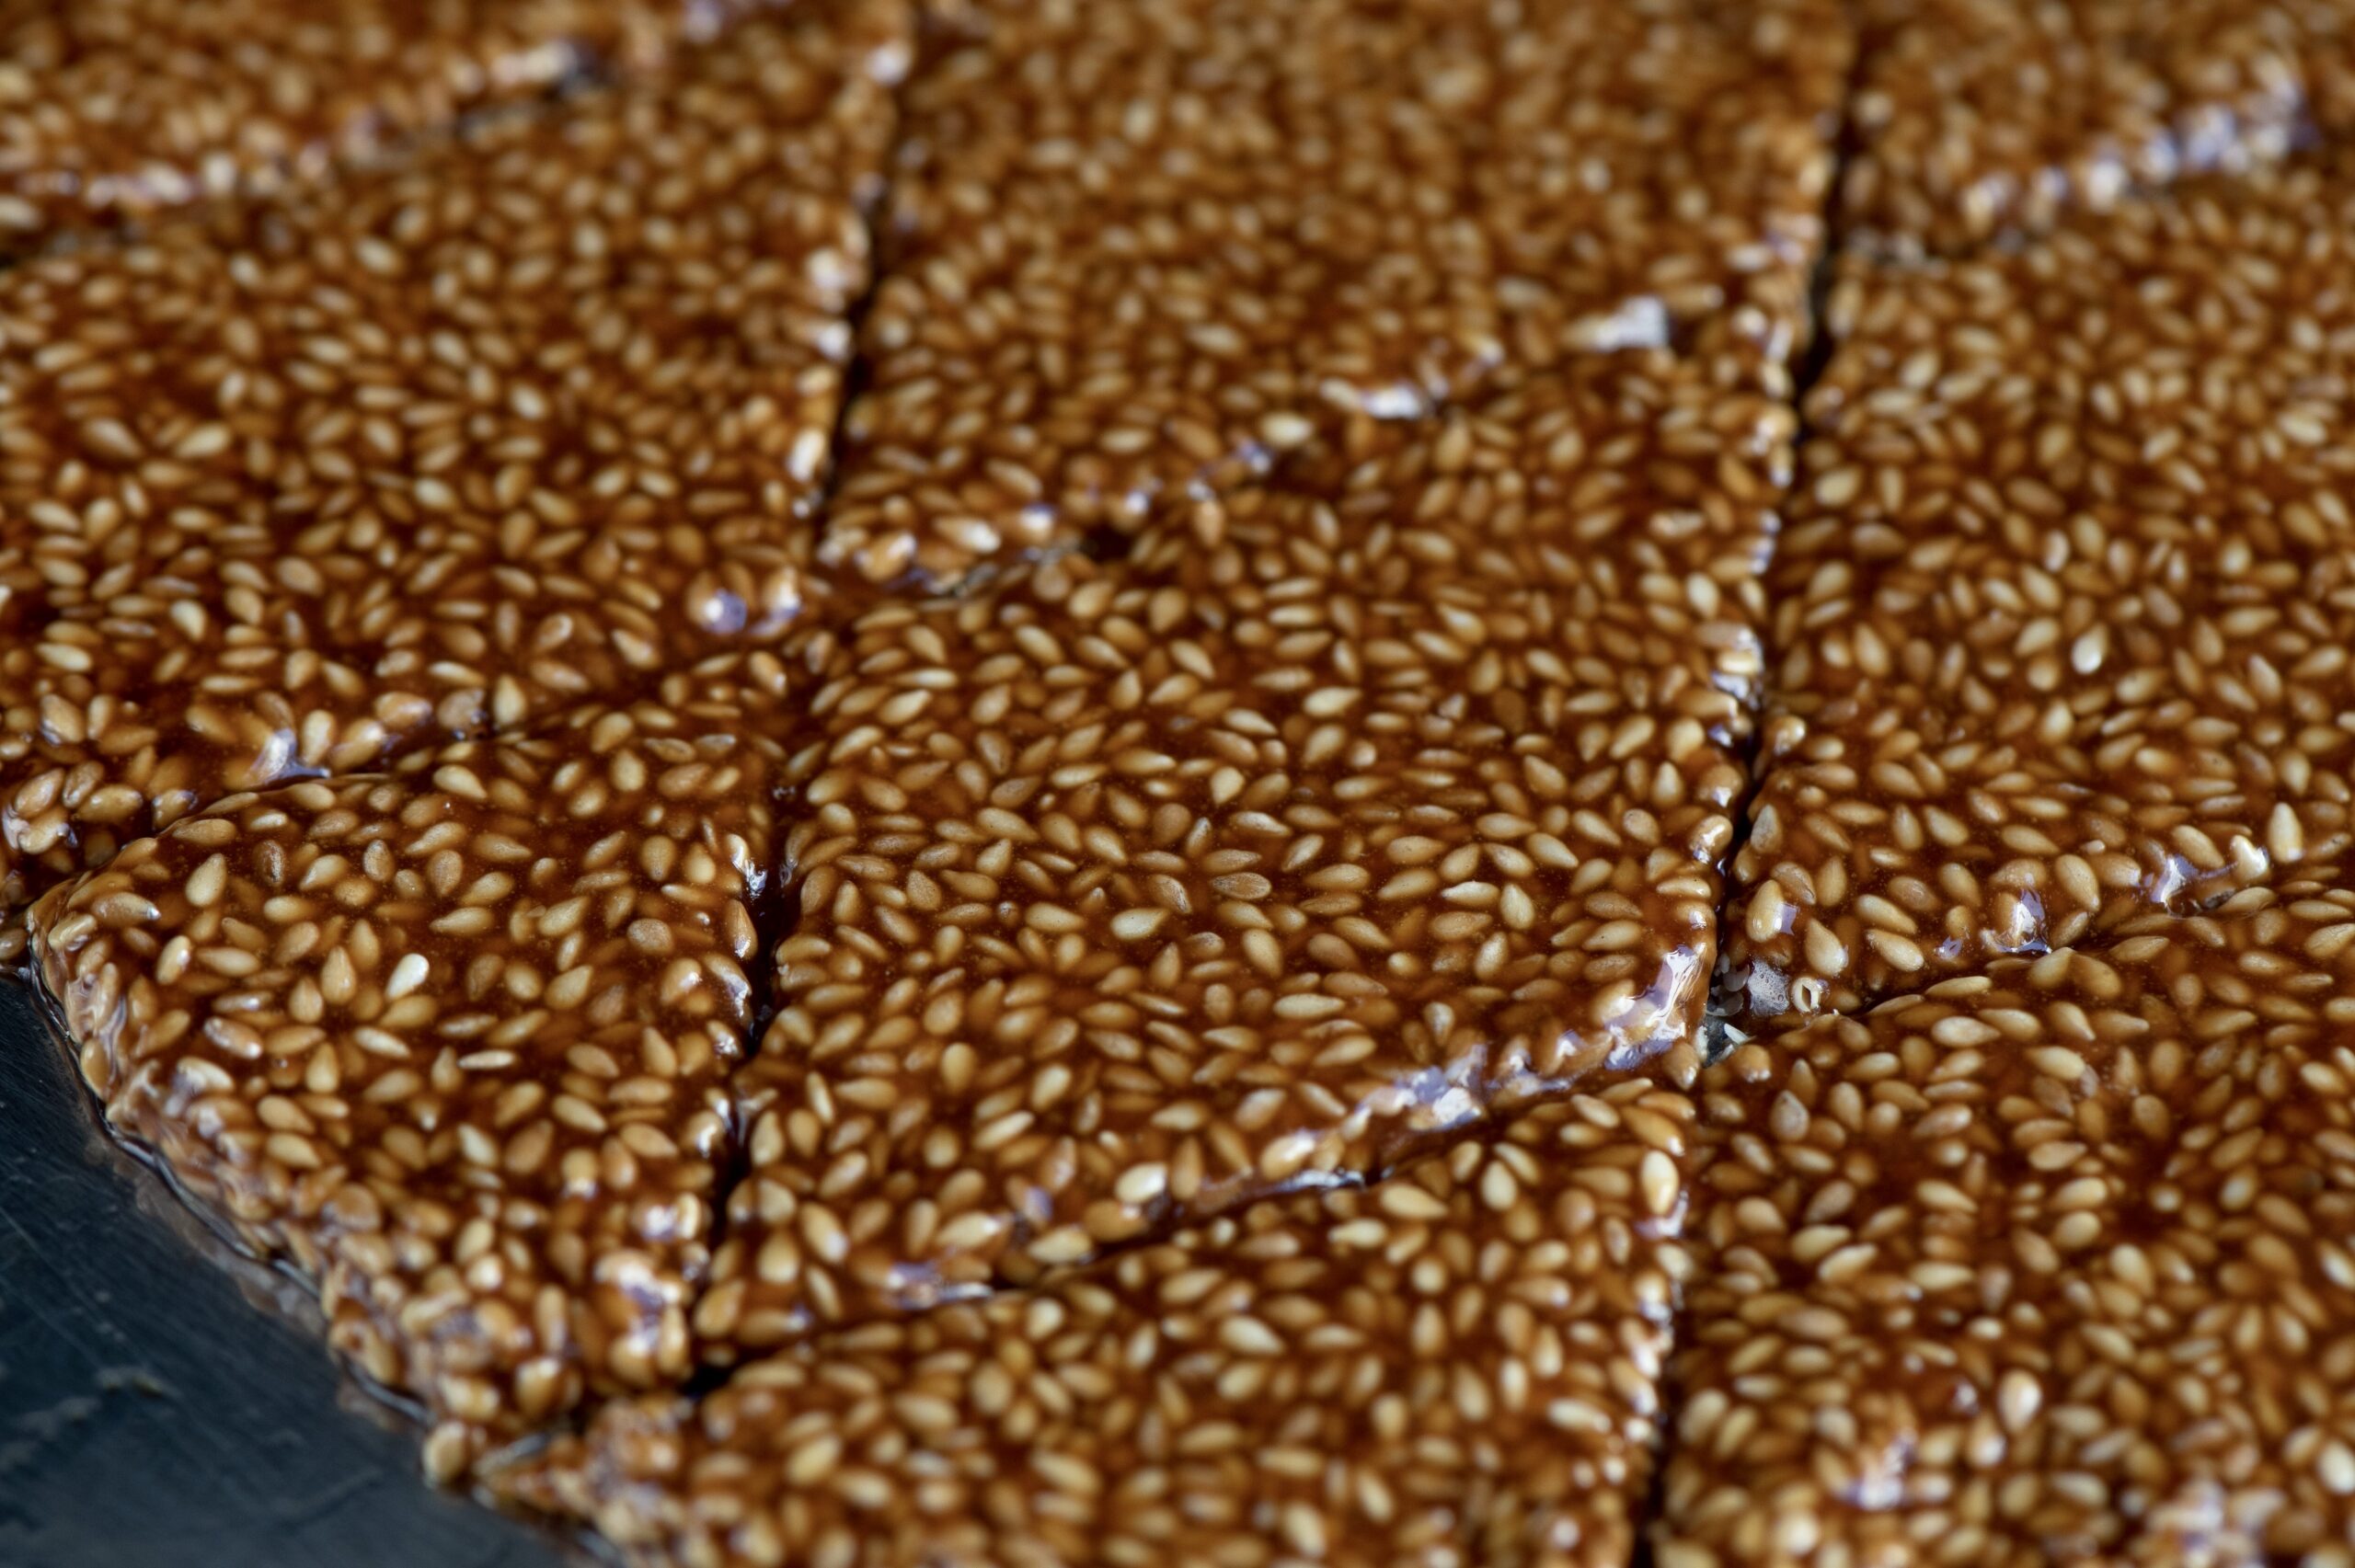
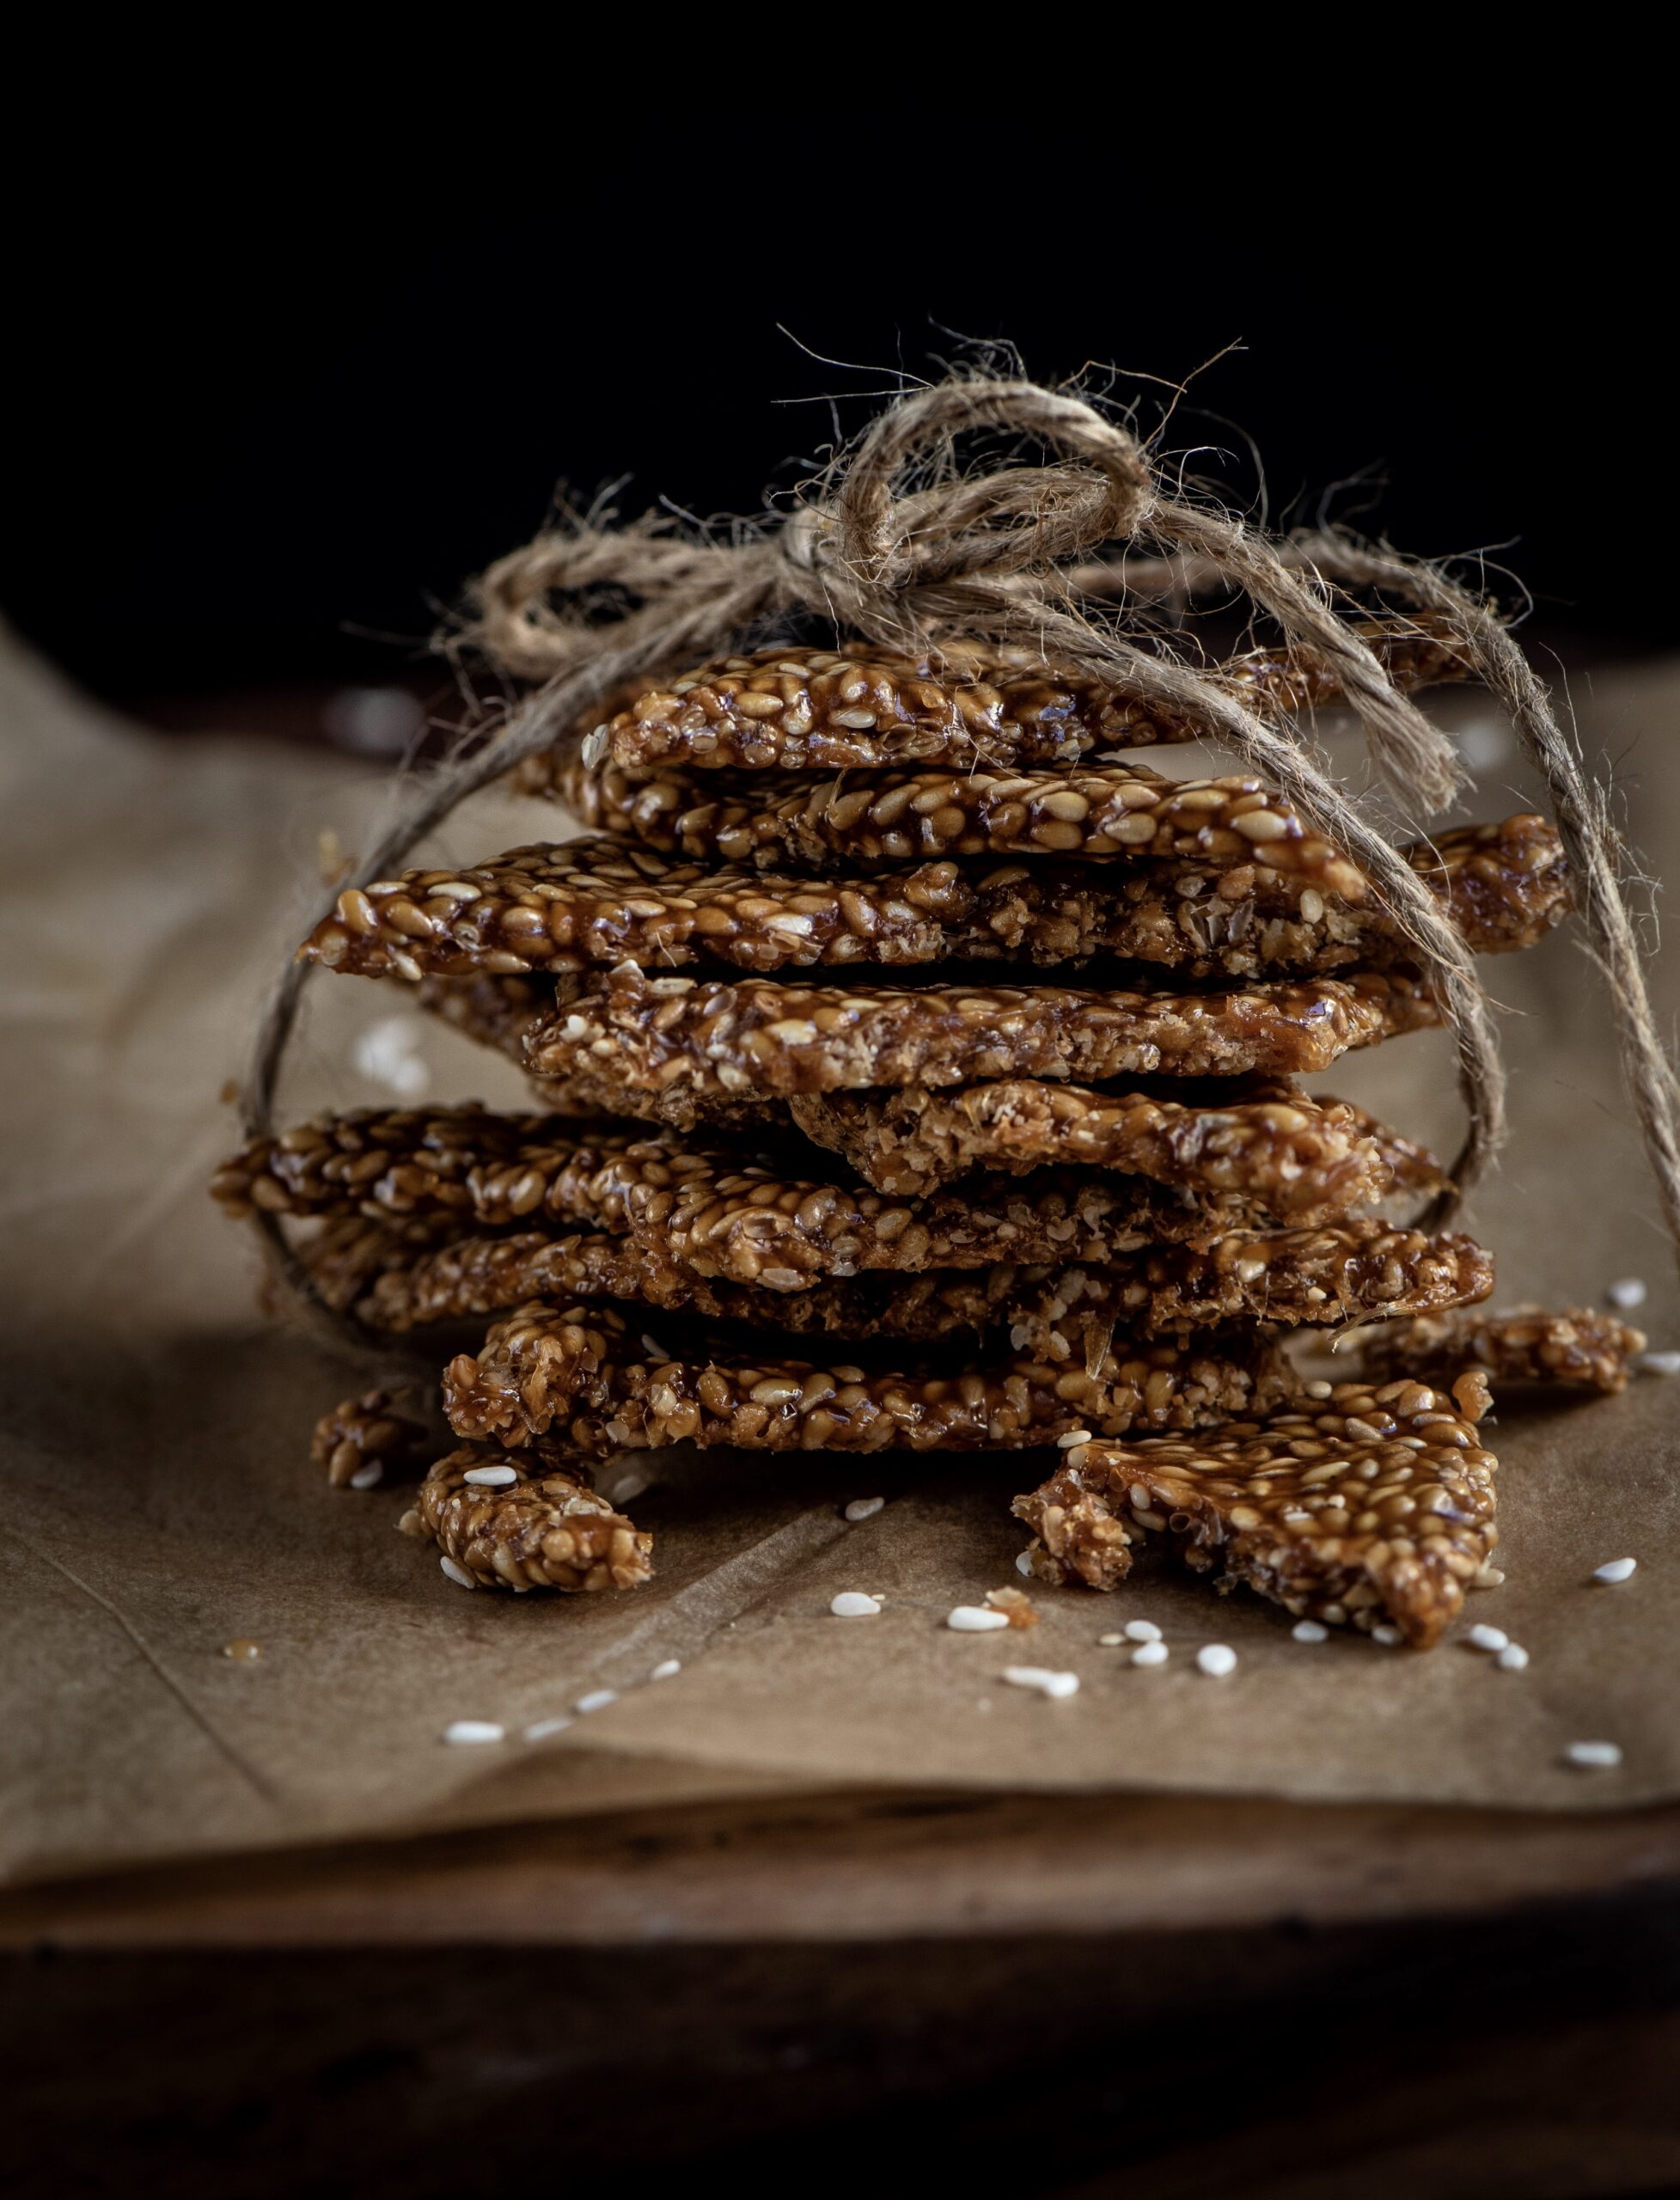
Once again, it was my sister who taught me how to make this – one more classic item from the Gujarati cuisine that she learnt after getting married, just like this til-ka-chikki. She has a knack for making it in practically a snap of the fingers – often, I’d ask for a plate of green moong dhokla, go downstairs for a bit, and come up to see it was already prepared.

This green moong dhokla is eye-catching thanks to its colour, which is always a great way to get kids to eat something that’s good for them. As you may remember from earlier posts, moong is extremely nutritious. It is a great source of fibre, potassium, manganese, folate and various vitamins and minerals. They are also an excellent source of protein, and I would say crucial to a vegetarian or vegan diet. They are known to lower blood pressure and sugar levels, prevent heat stroke, aid digestion, reduce the risk of cardiac disease, and possibly assist in weight loss.

A dhokla could be described as a kind of savoury sponge cake, steamed rather than baked. Every kind of dhokla is delicious, in my opinion. But as a Gujarati, I’m biased. Why don’t you try this version and tell me what you think?

Green Moong Dhokla

(Yield: 15-20 pieces)

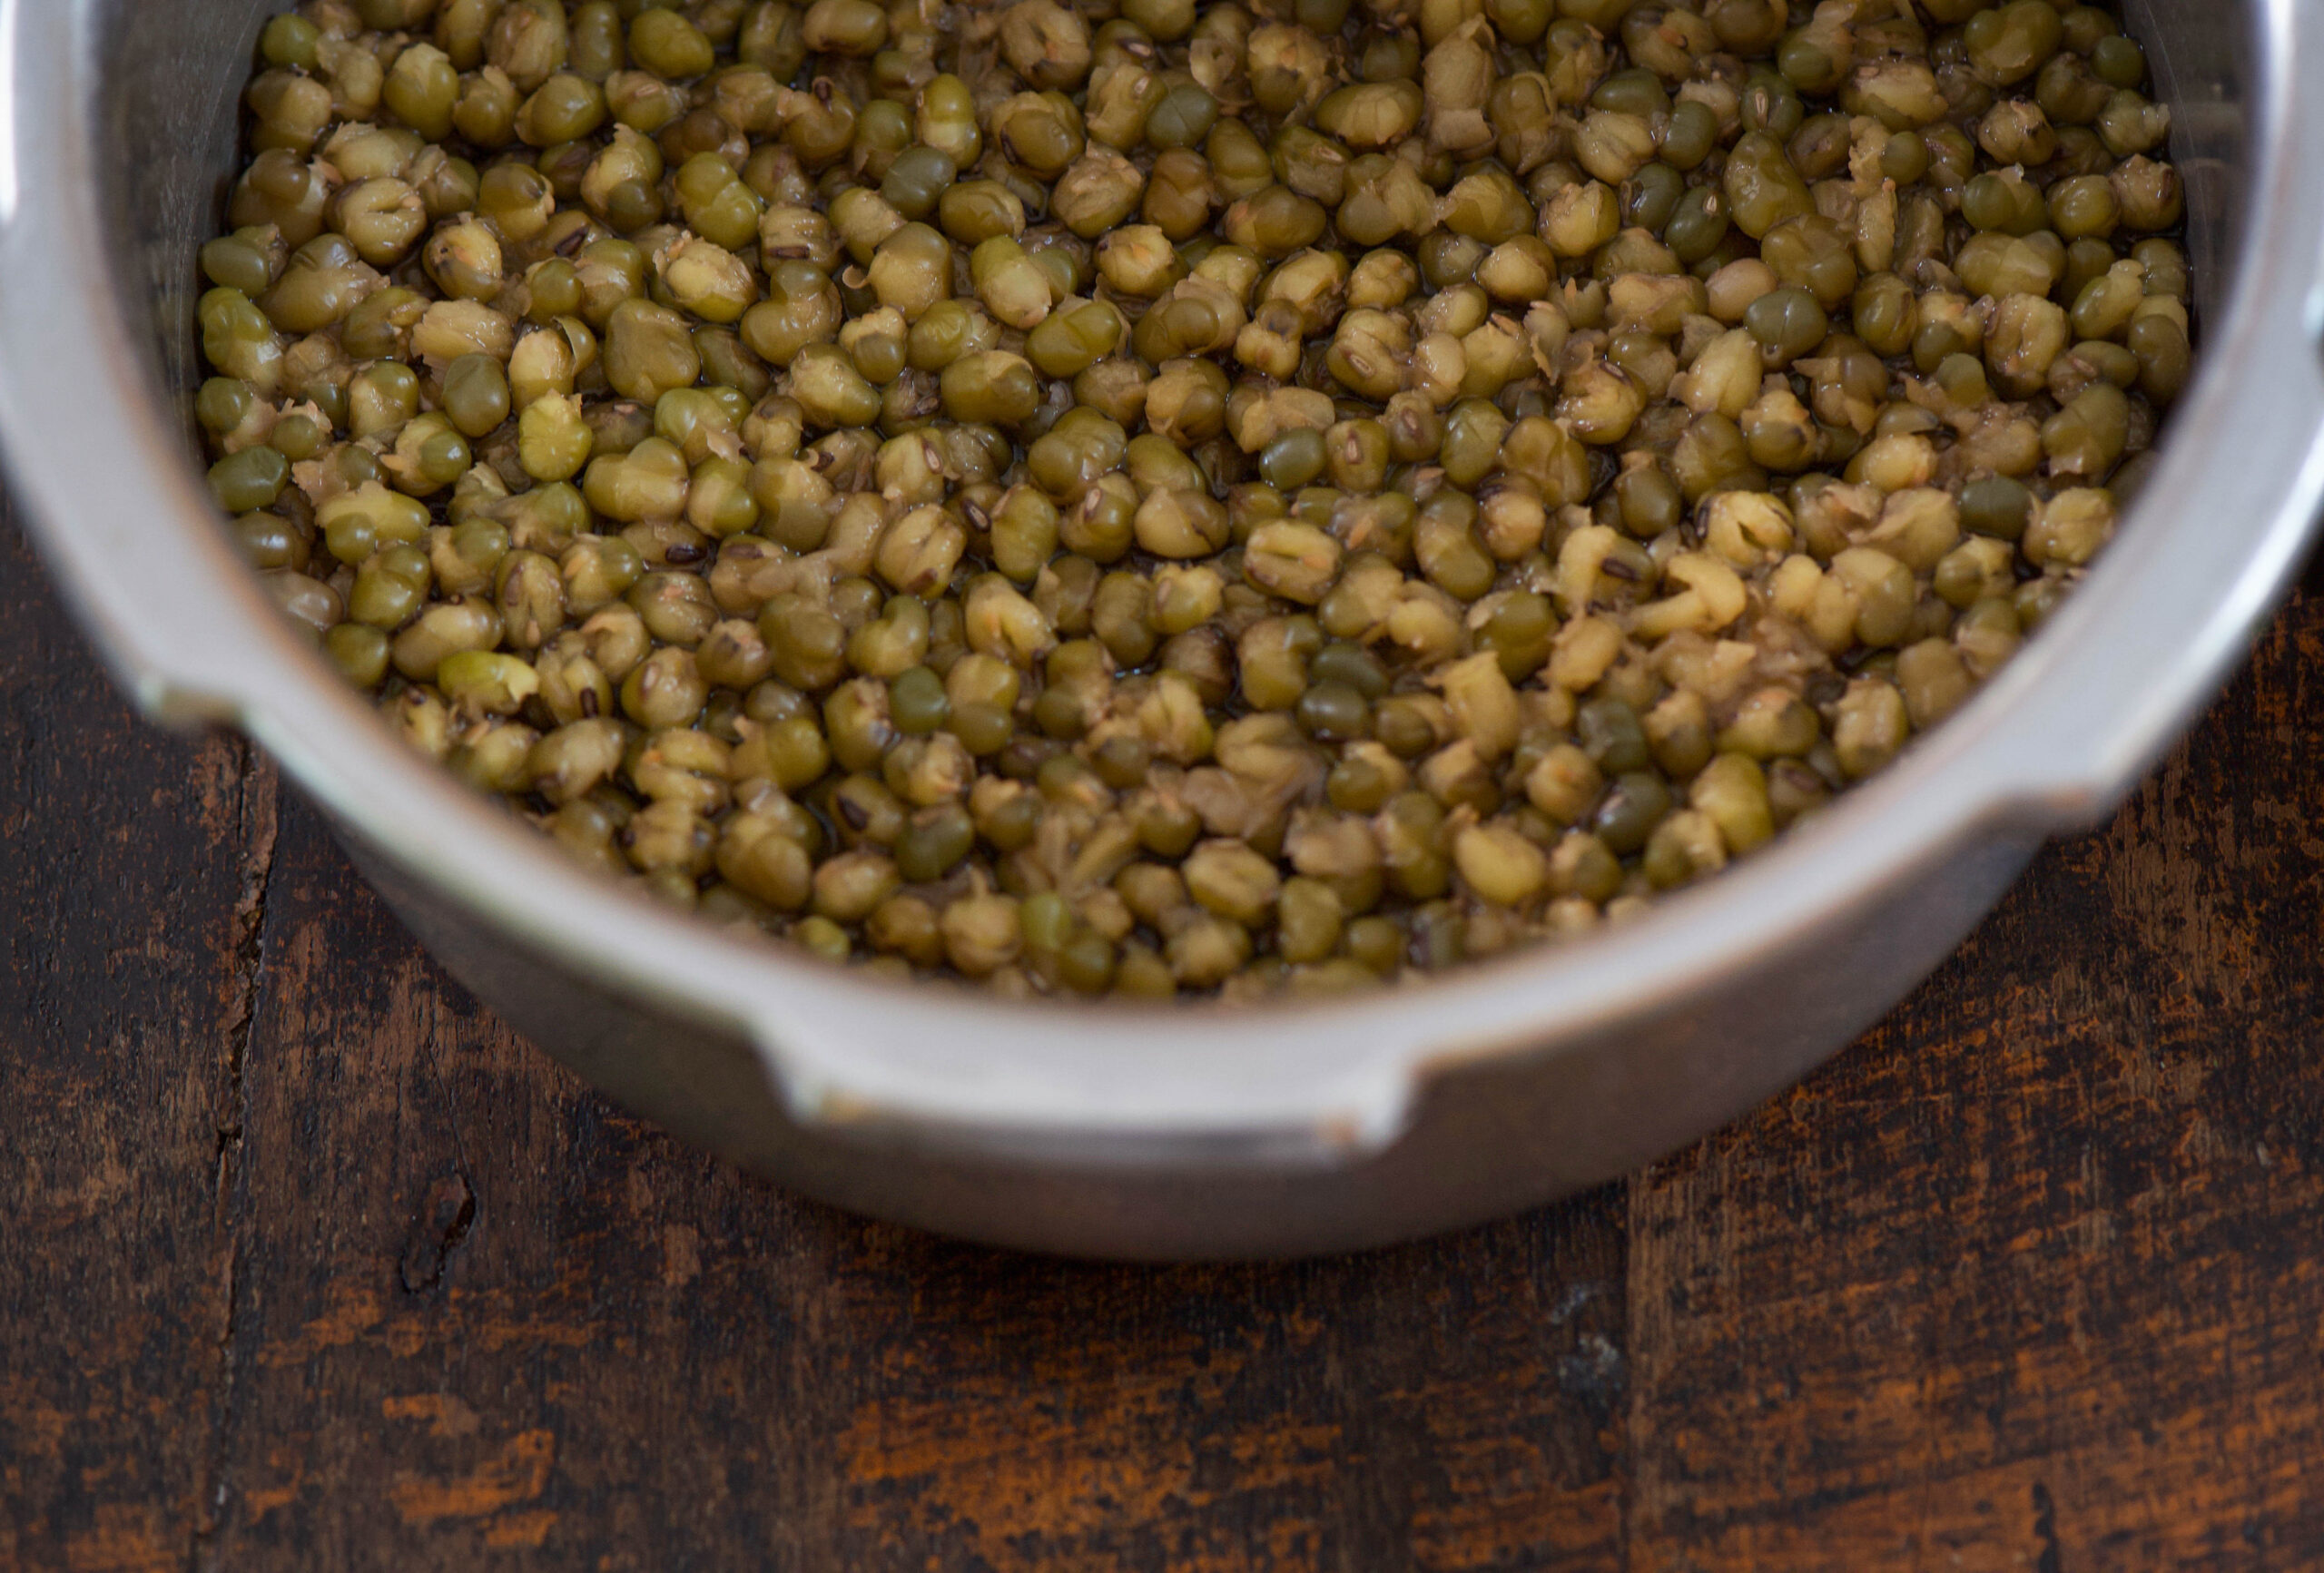
1 cup green moong (mung beans)

½ teaspoon ground green chilli paste

1 teaspoon ginger paste

2+2 tablespoons oil

1 teaspoon lemon juice

1 cup coriander leaves

½ cup capsicum

½ teaspoon sugar

½ teaspoon eno powder

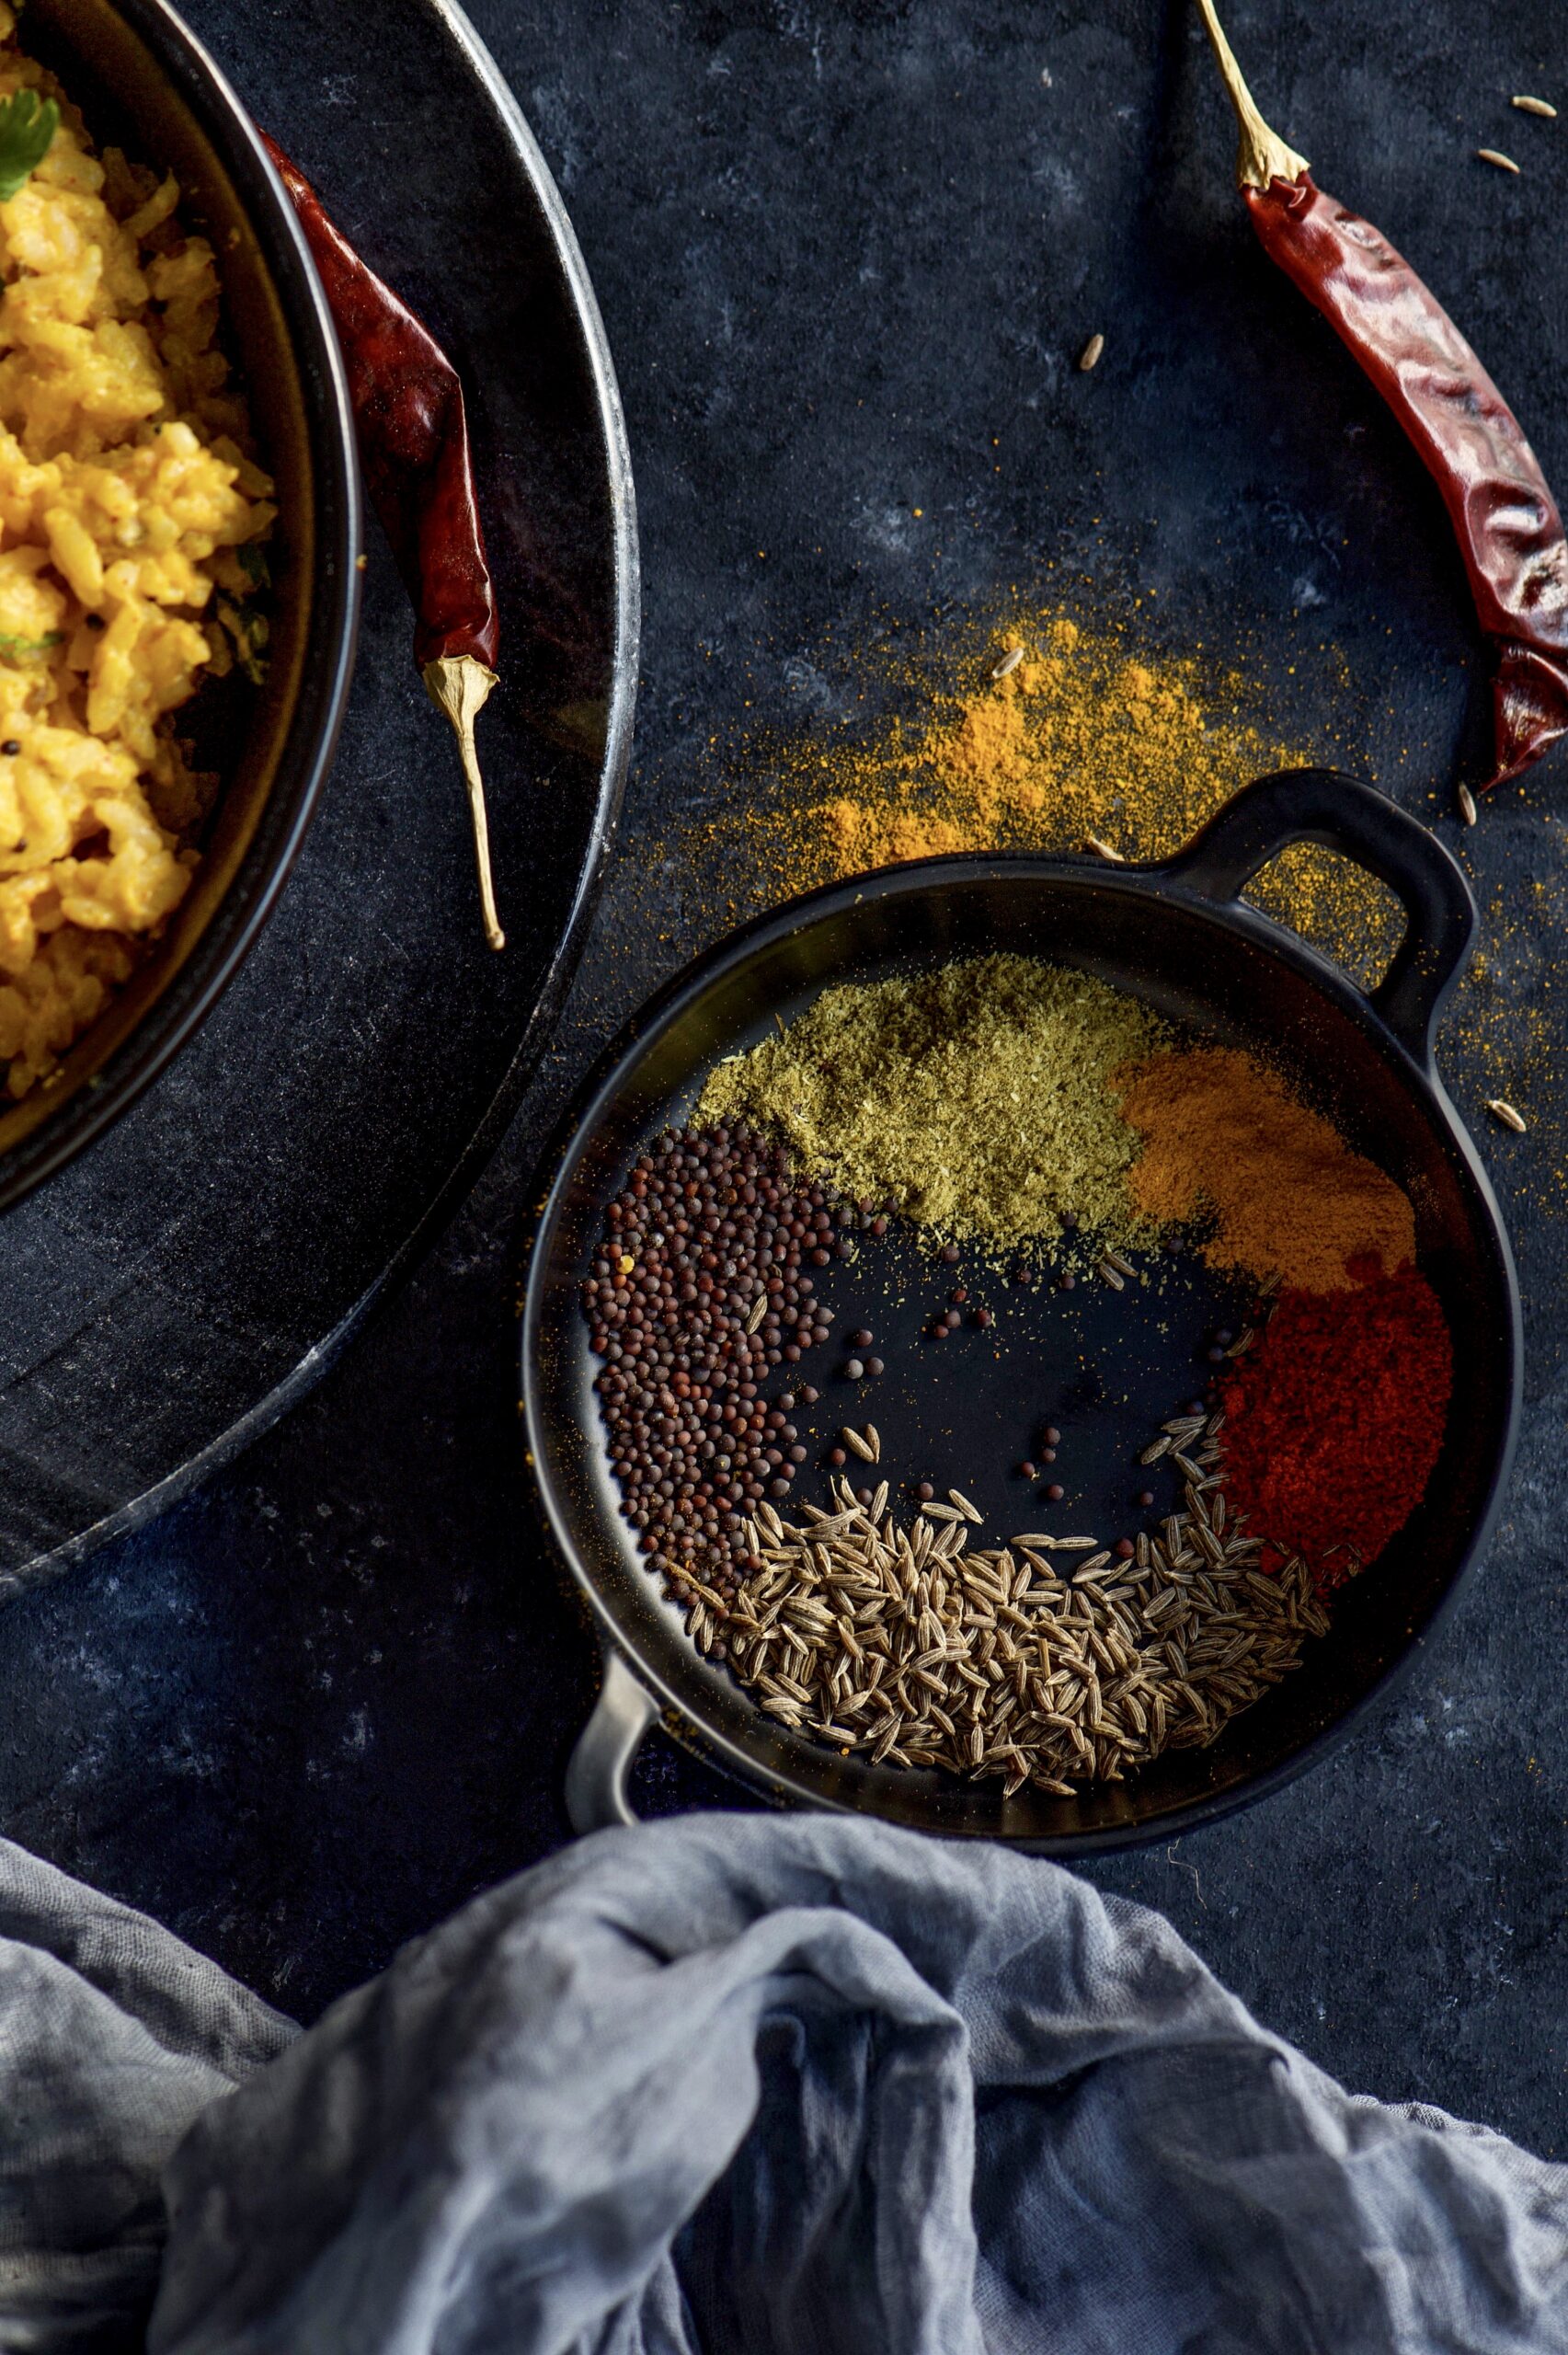
½ teaspoon mustard seeds

½ teaspoon cumin seeds

A few curry leaves

Salt to taste

Grated coconut (optional)


Soak the green moong overnight. In the morning, rinse the moong, remove the water and put the beans in a blender along with salt, coriander leaves, ginger paste and green chilli paste. You may need to add approximately a ½ cup of water to allow it to grind well. The The consistency of the batter needs to be a little thicker than that of pancake, or in other words, like idly batter.

Now, add 2 tablespoons of oil, and the lemon juice and finely cut capsicum to the batter.

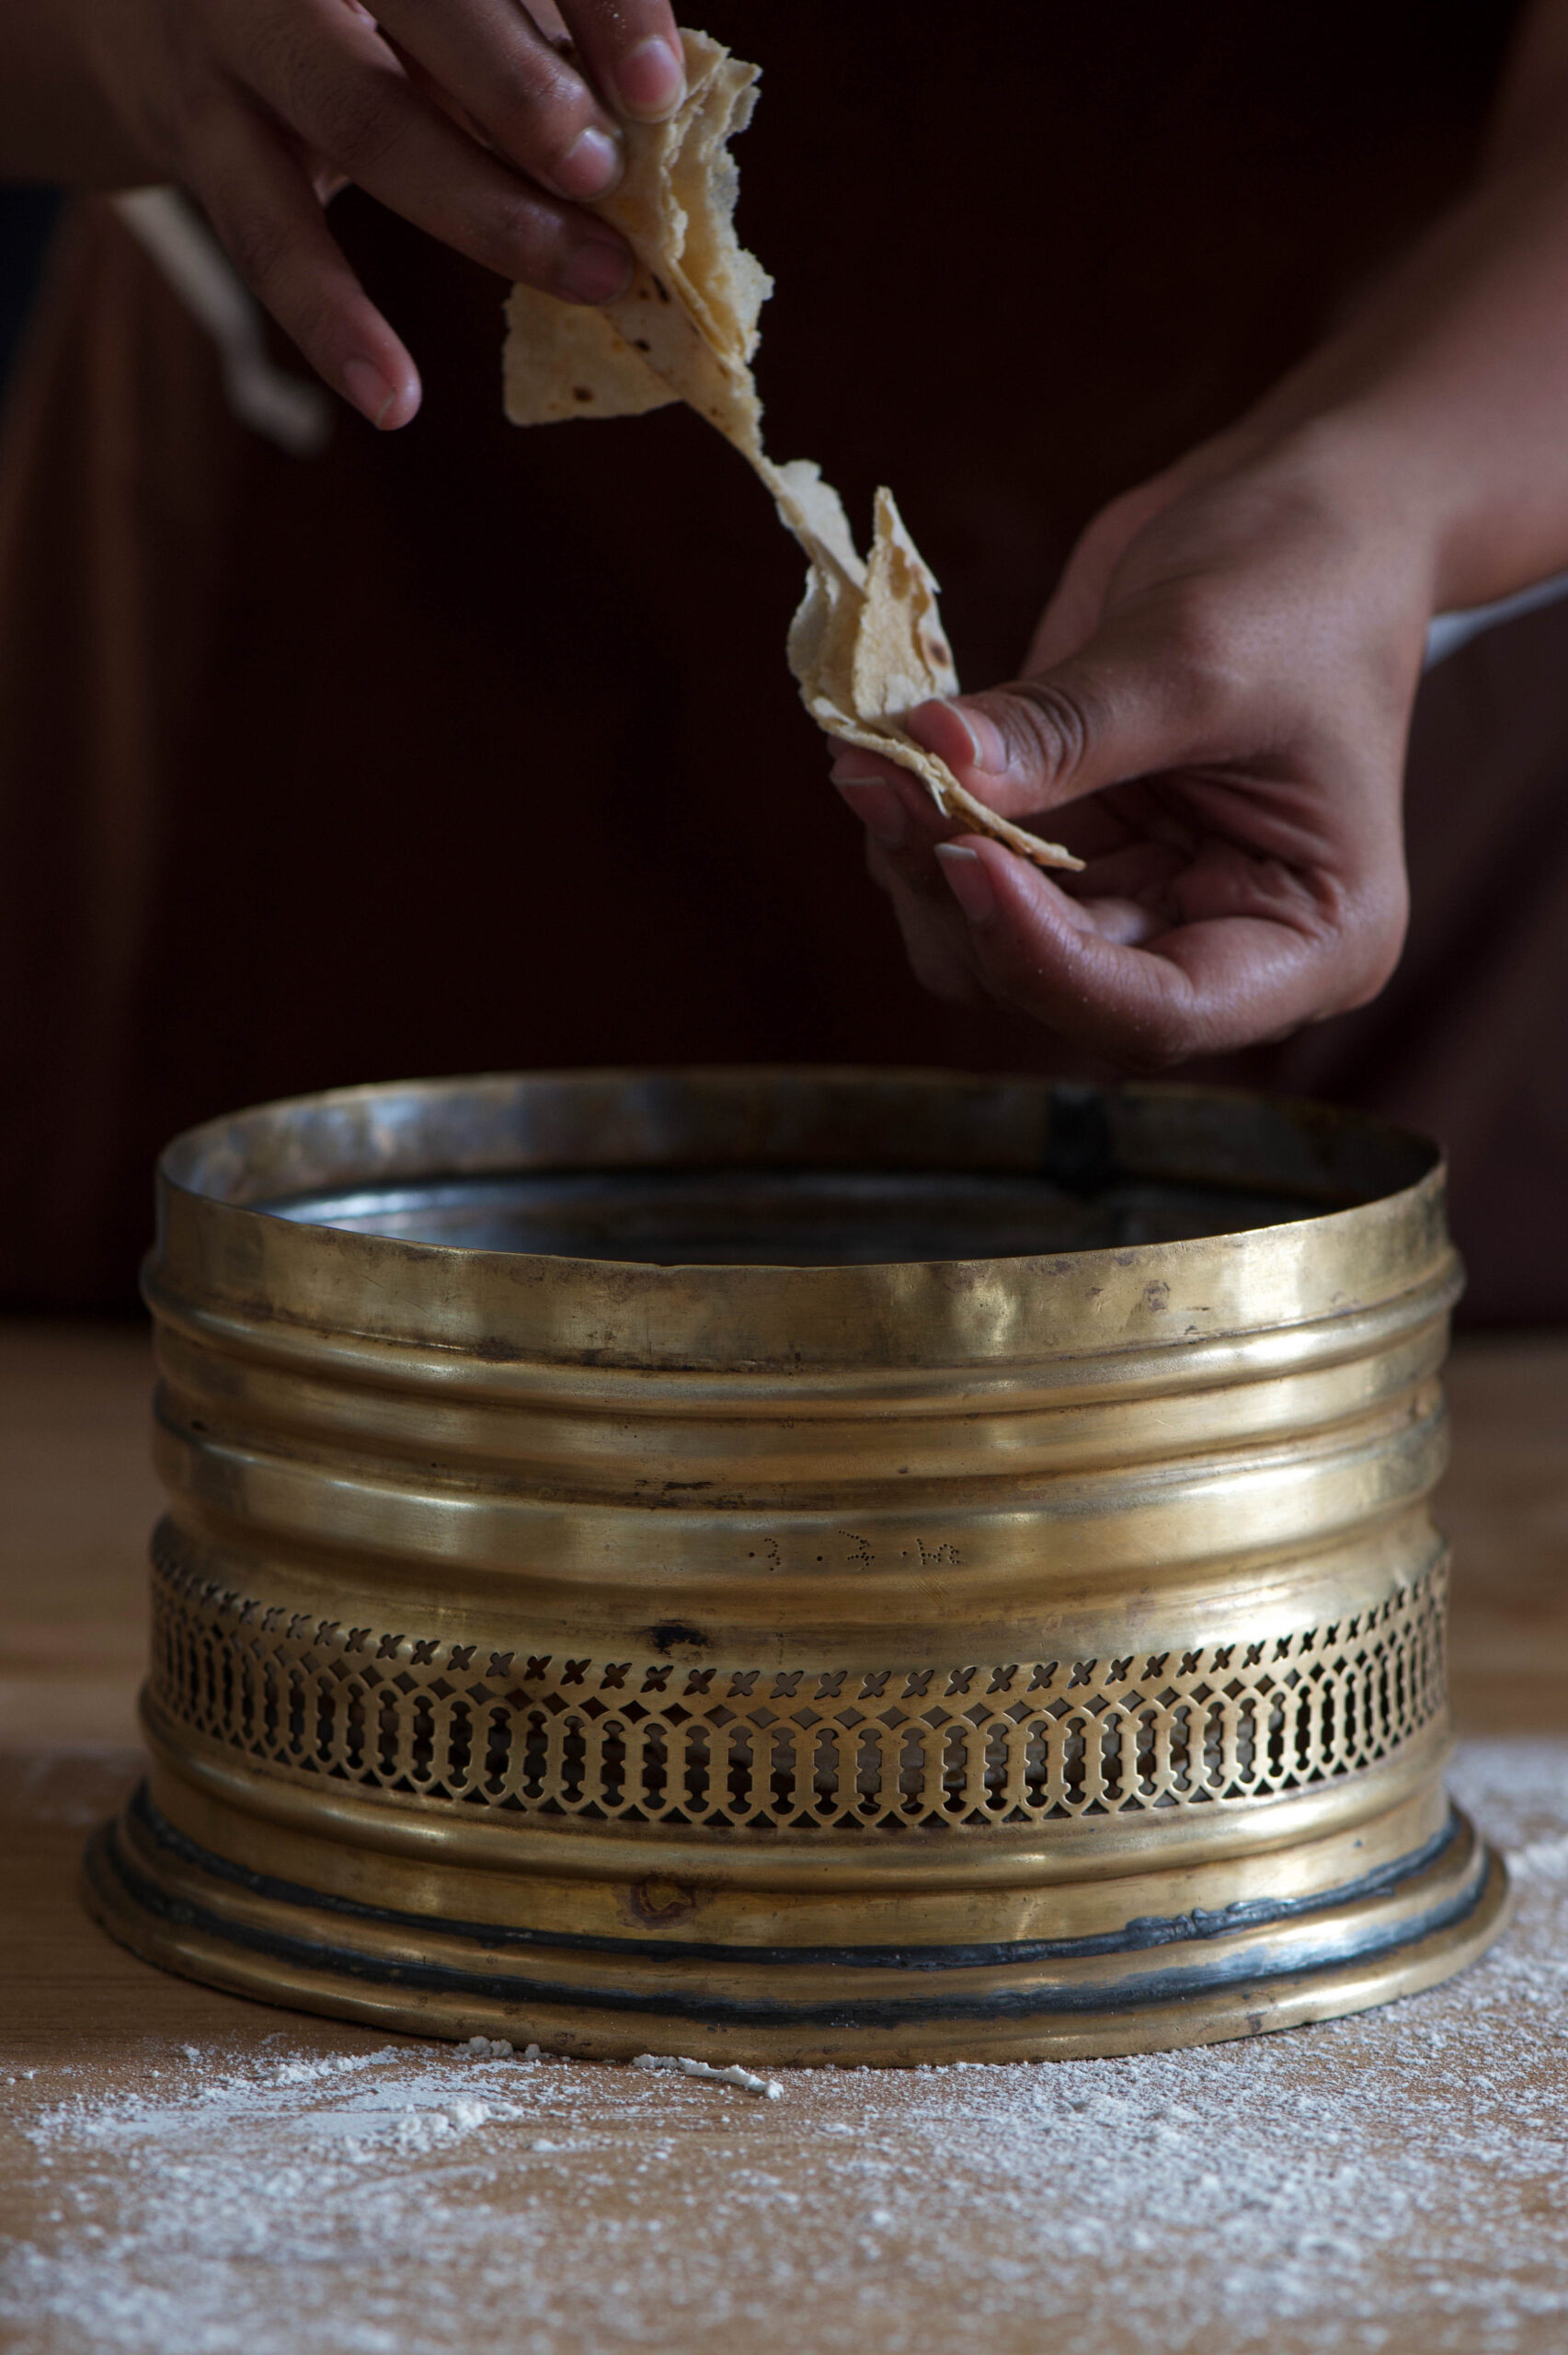
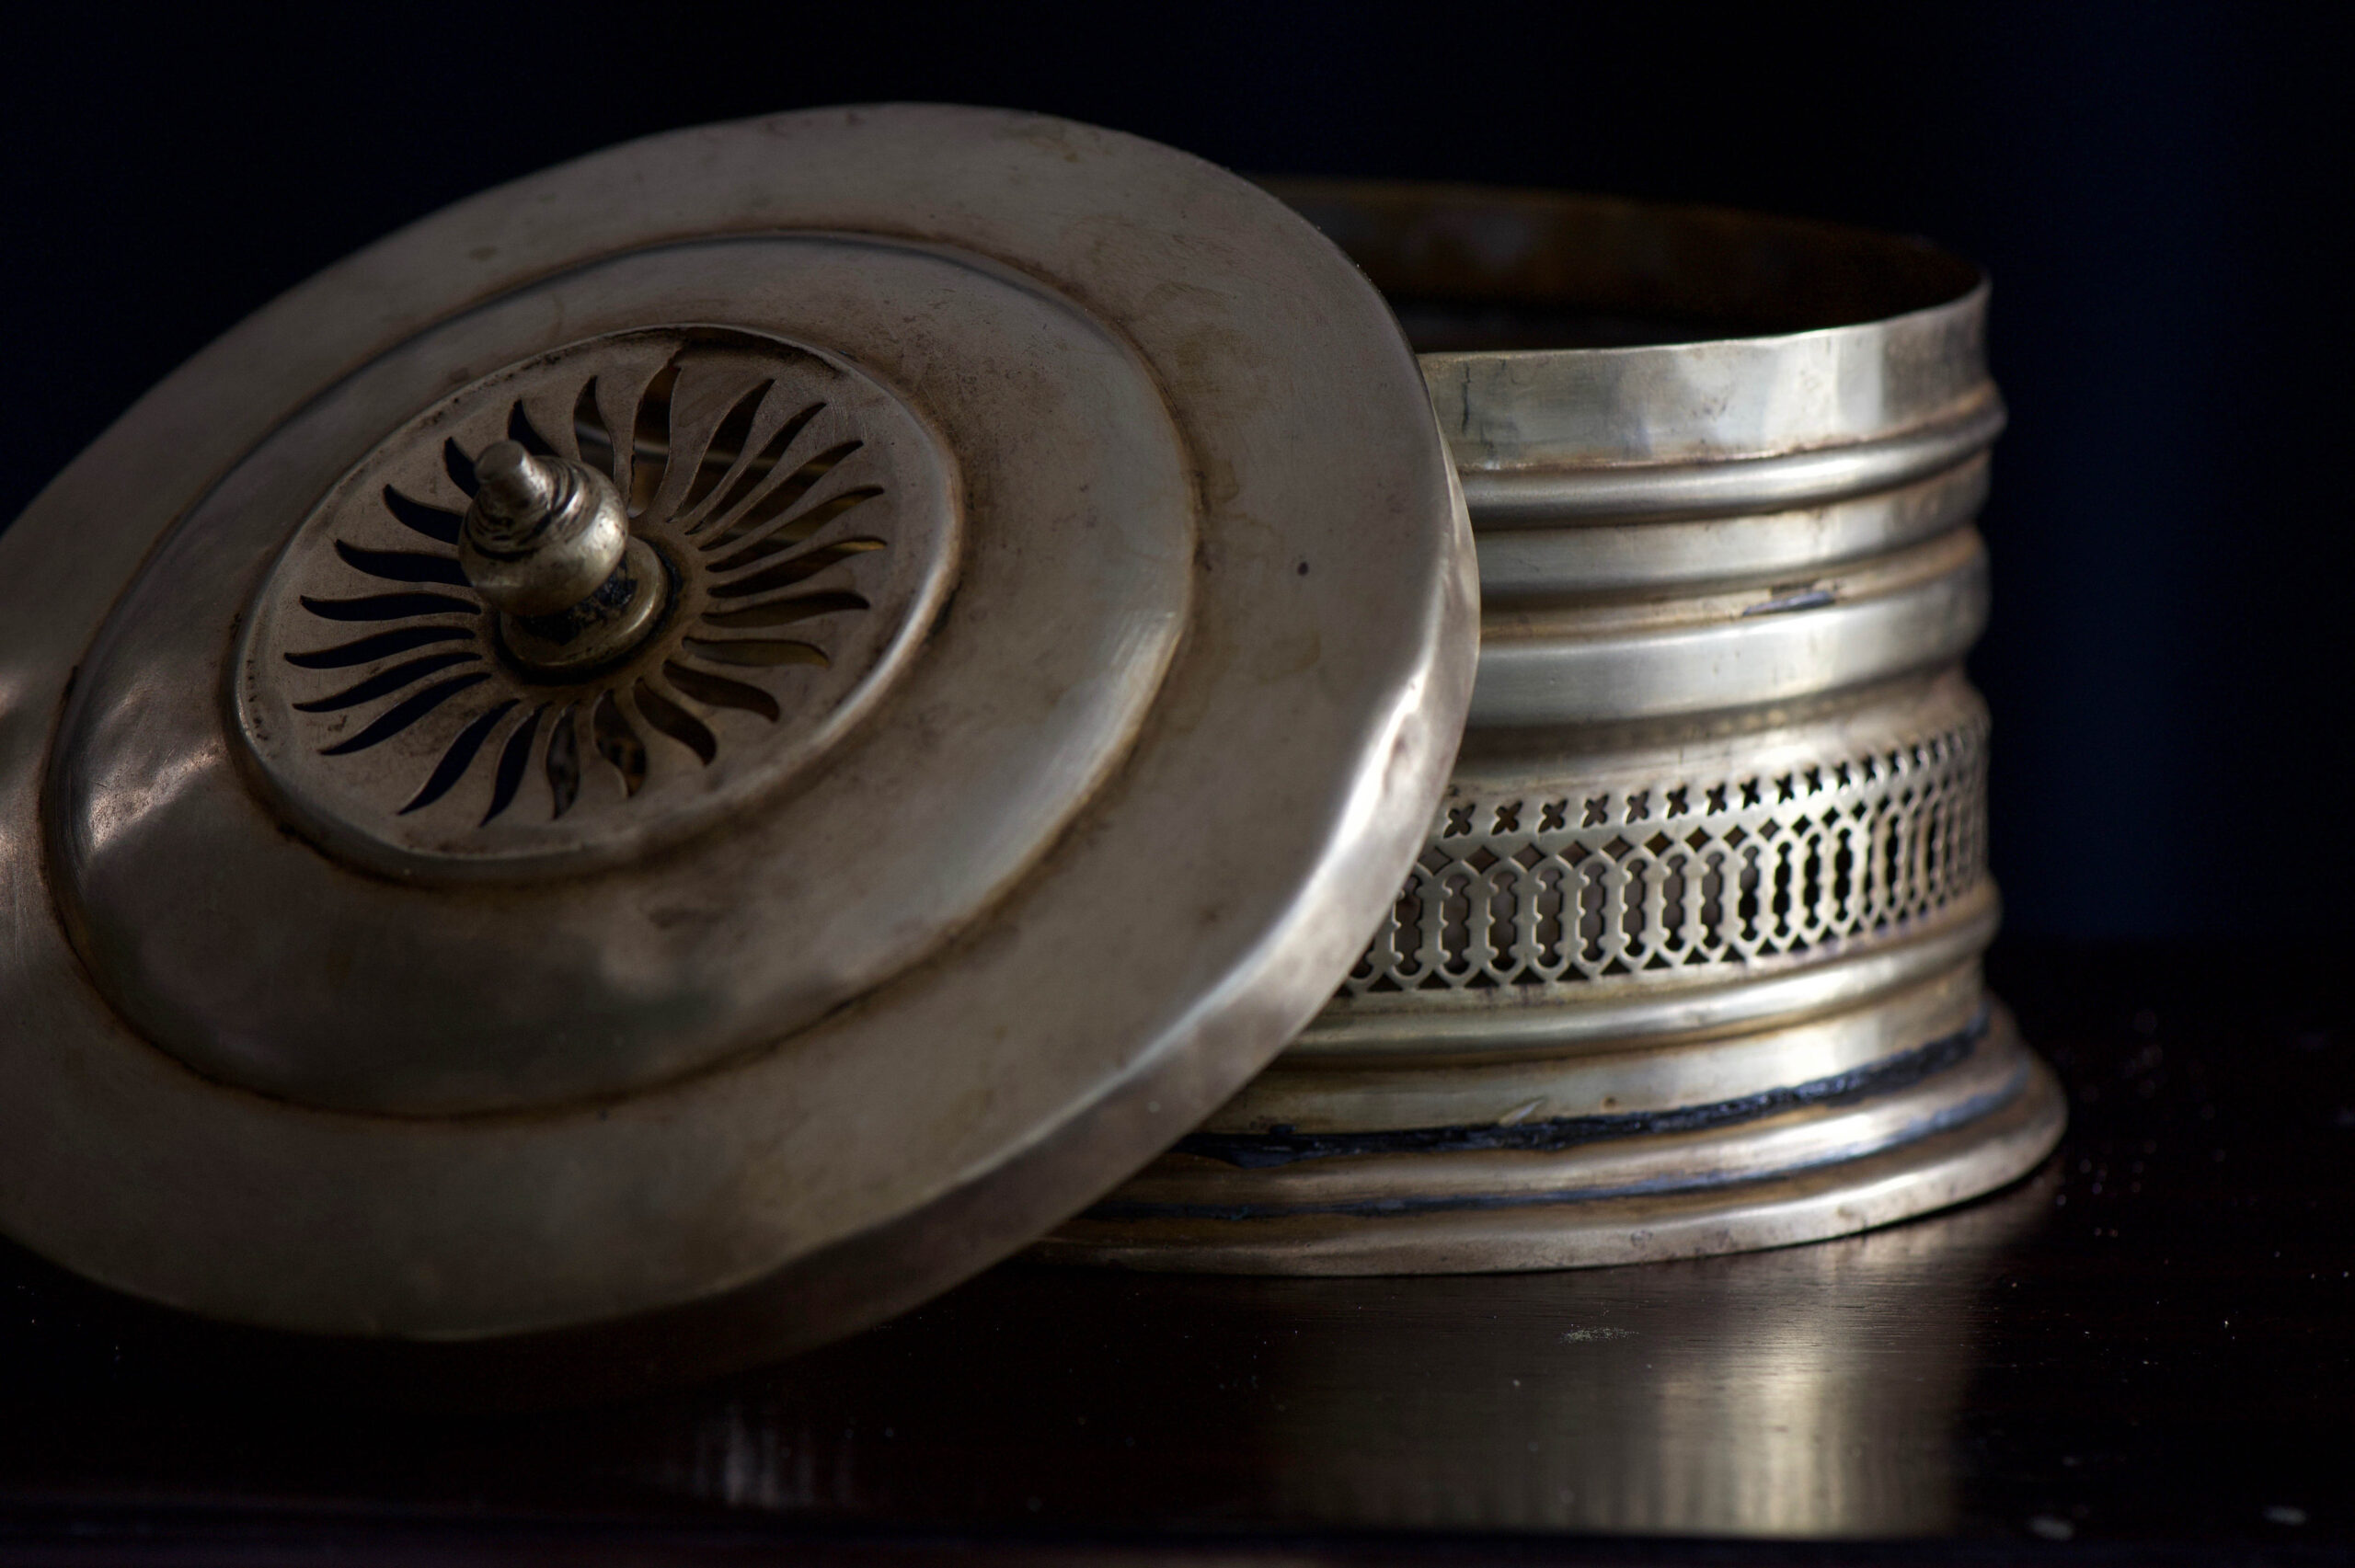
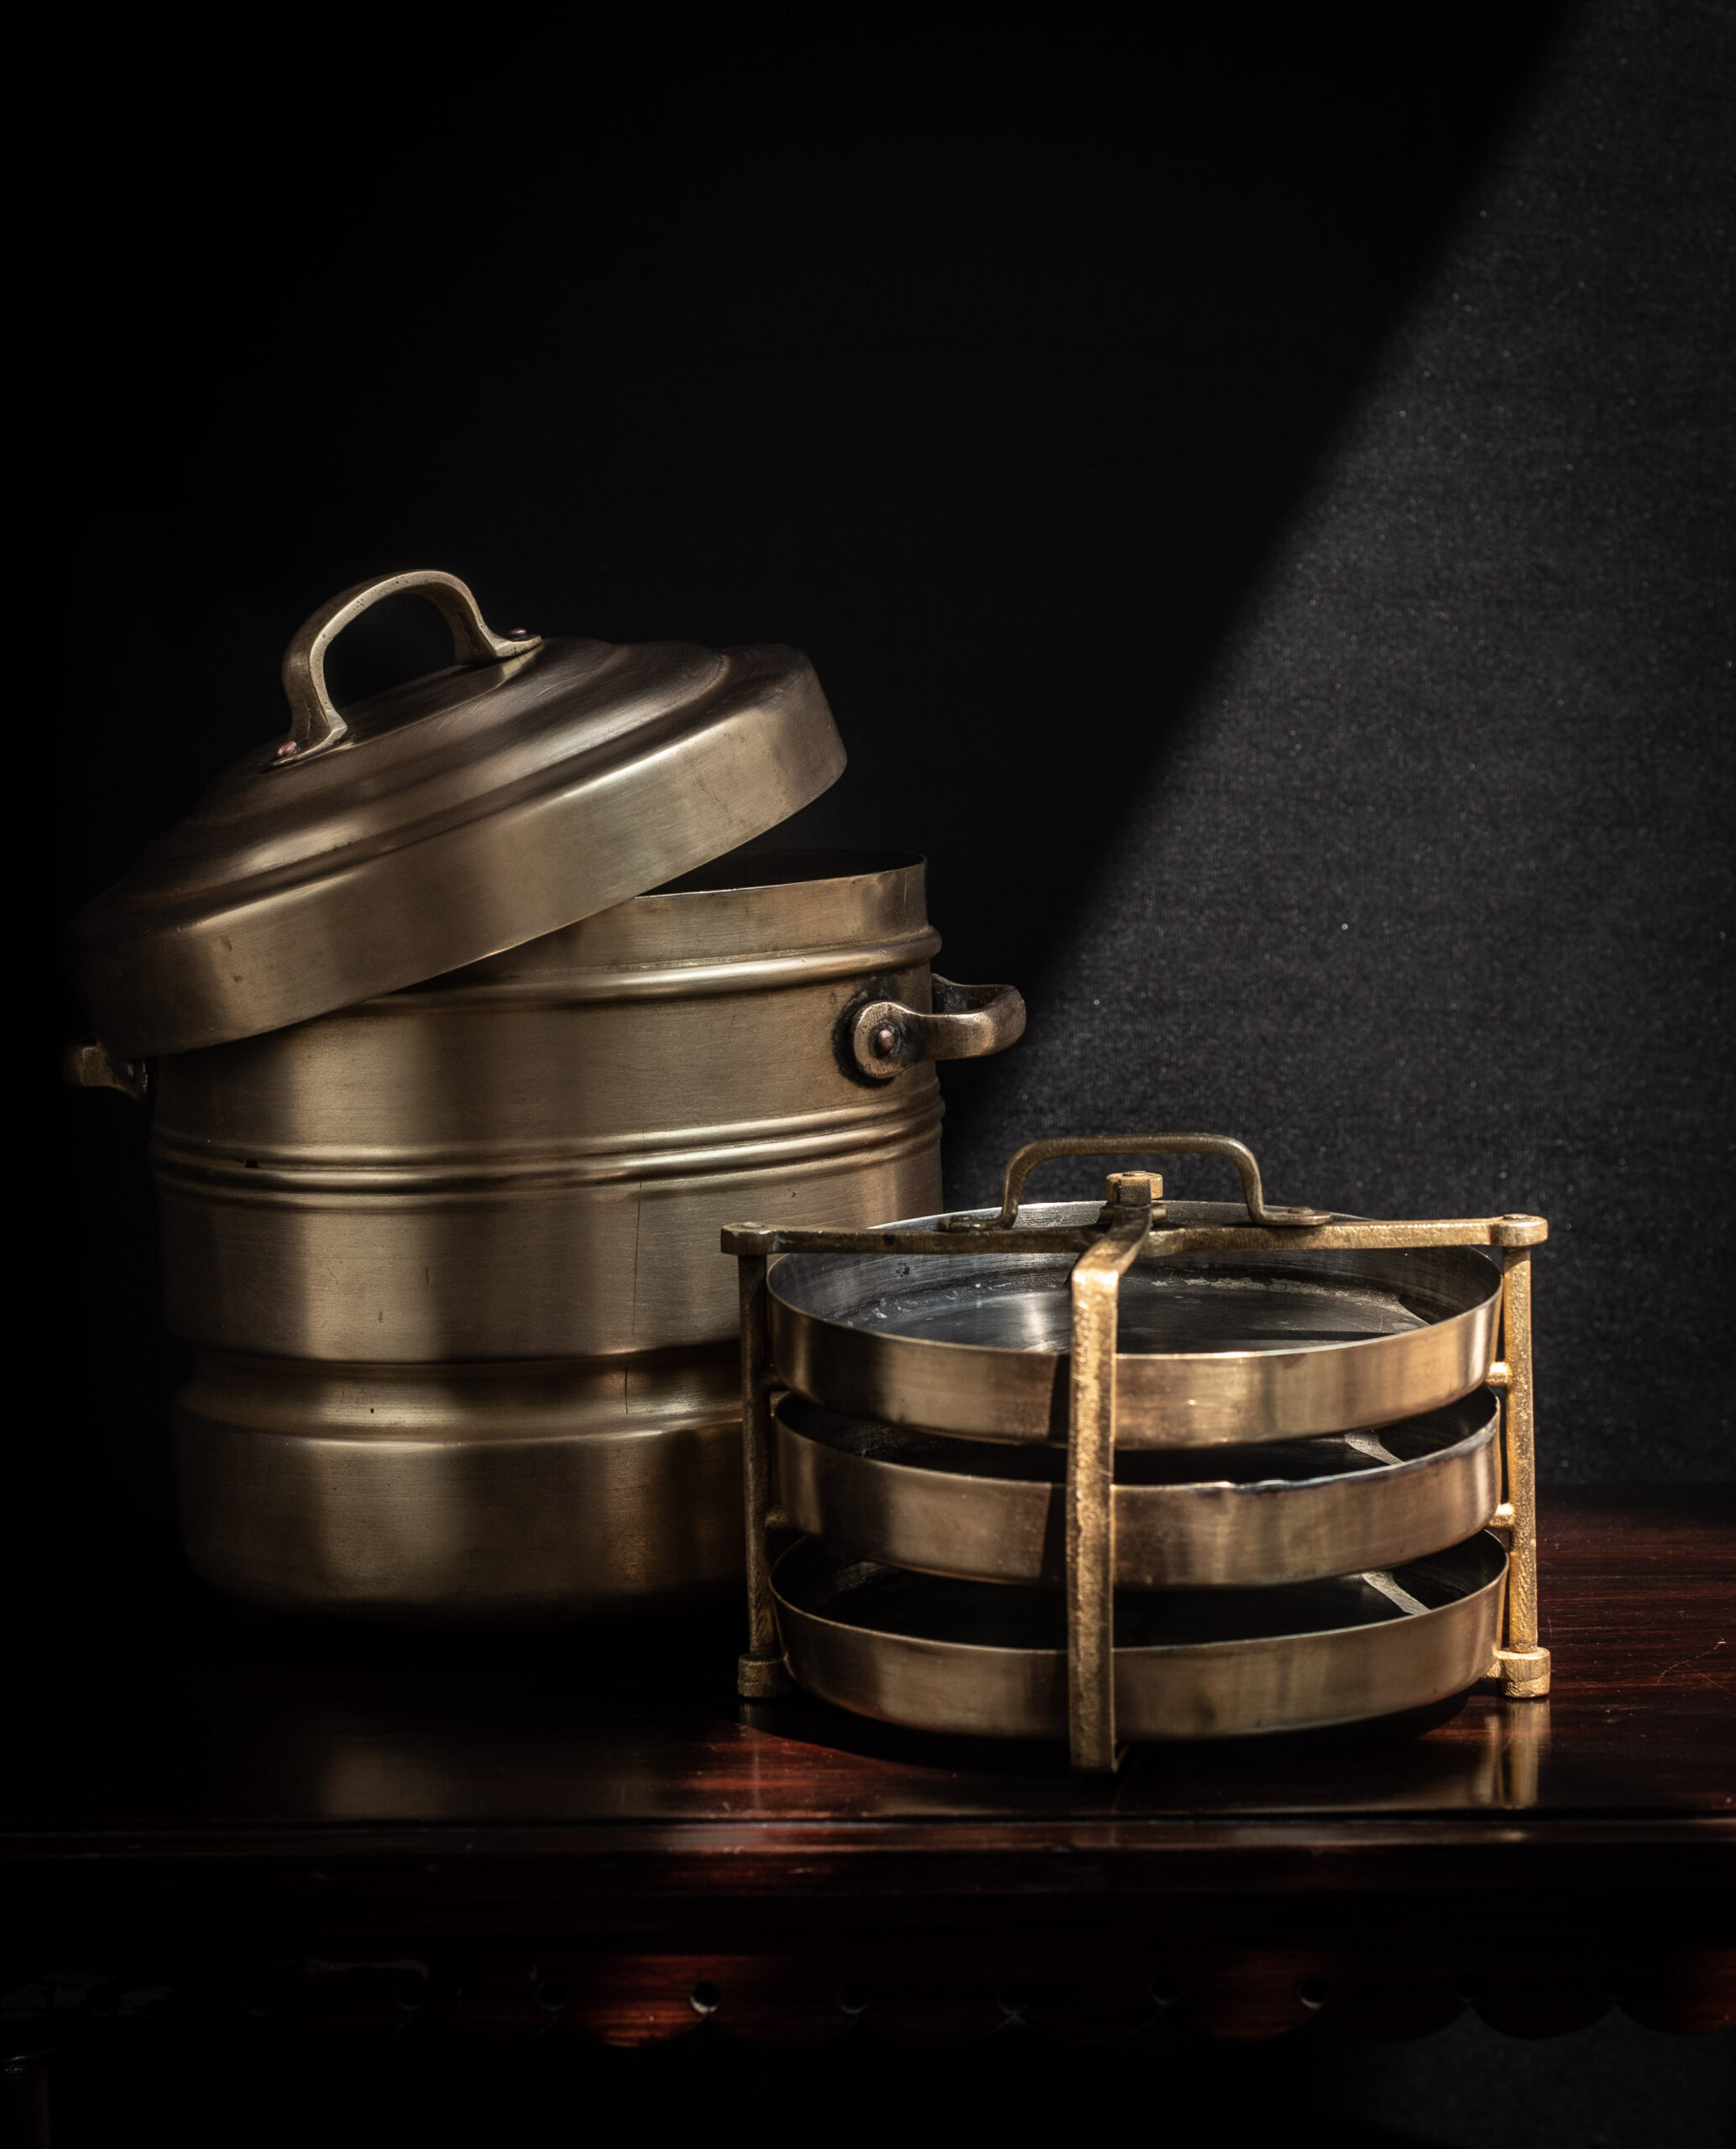
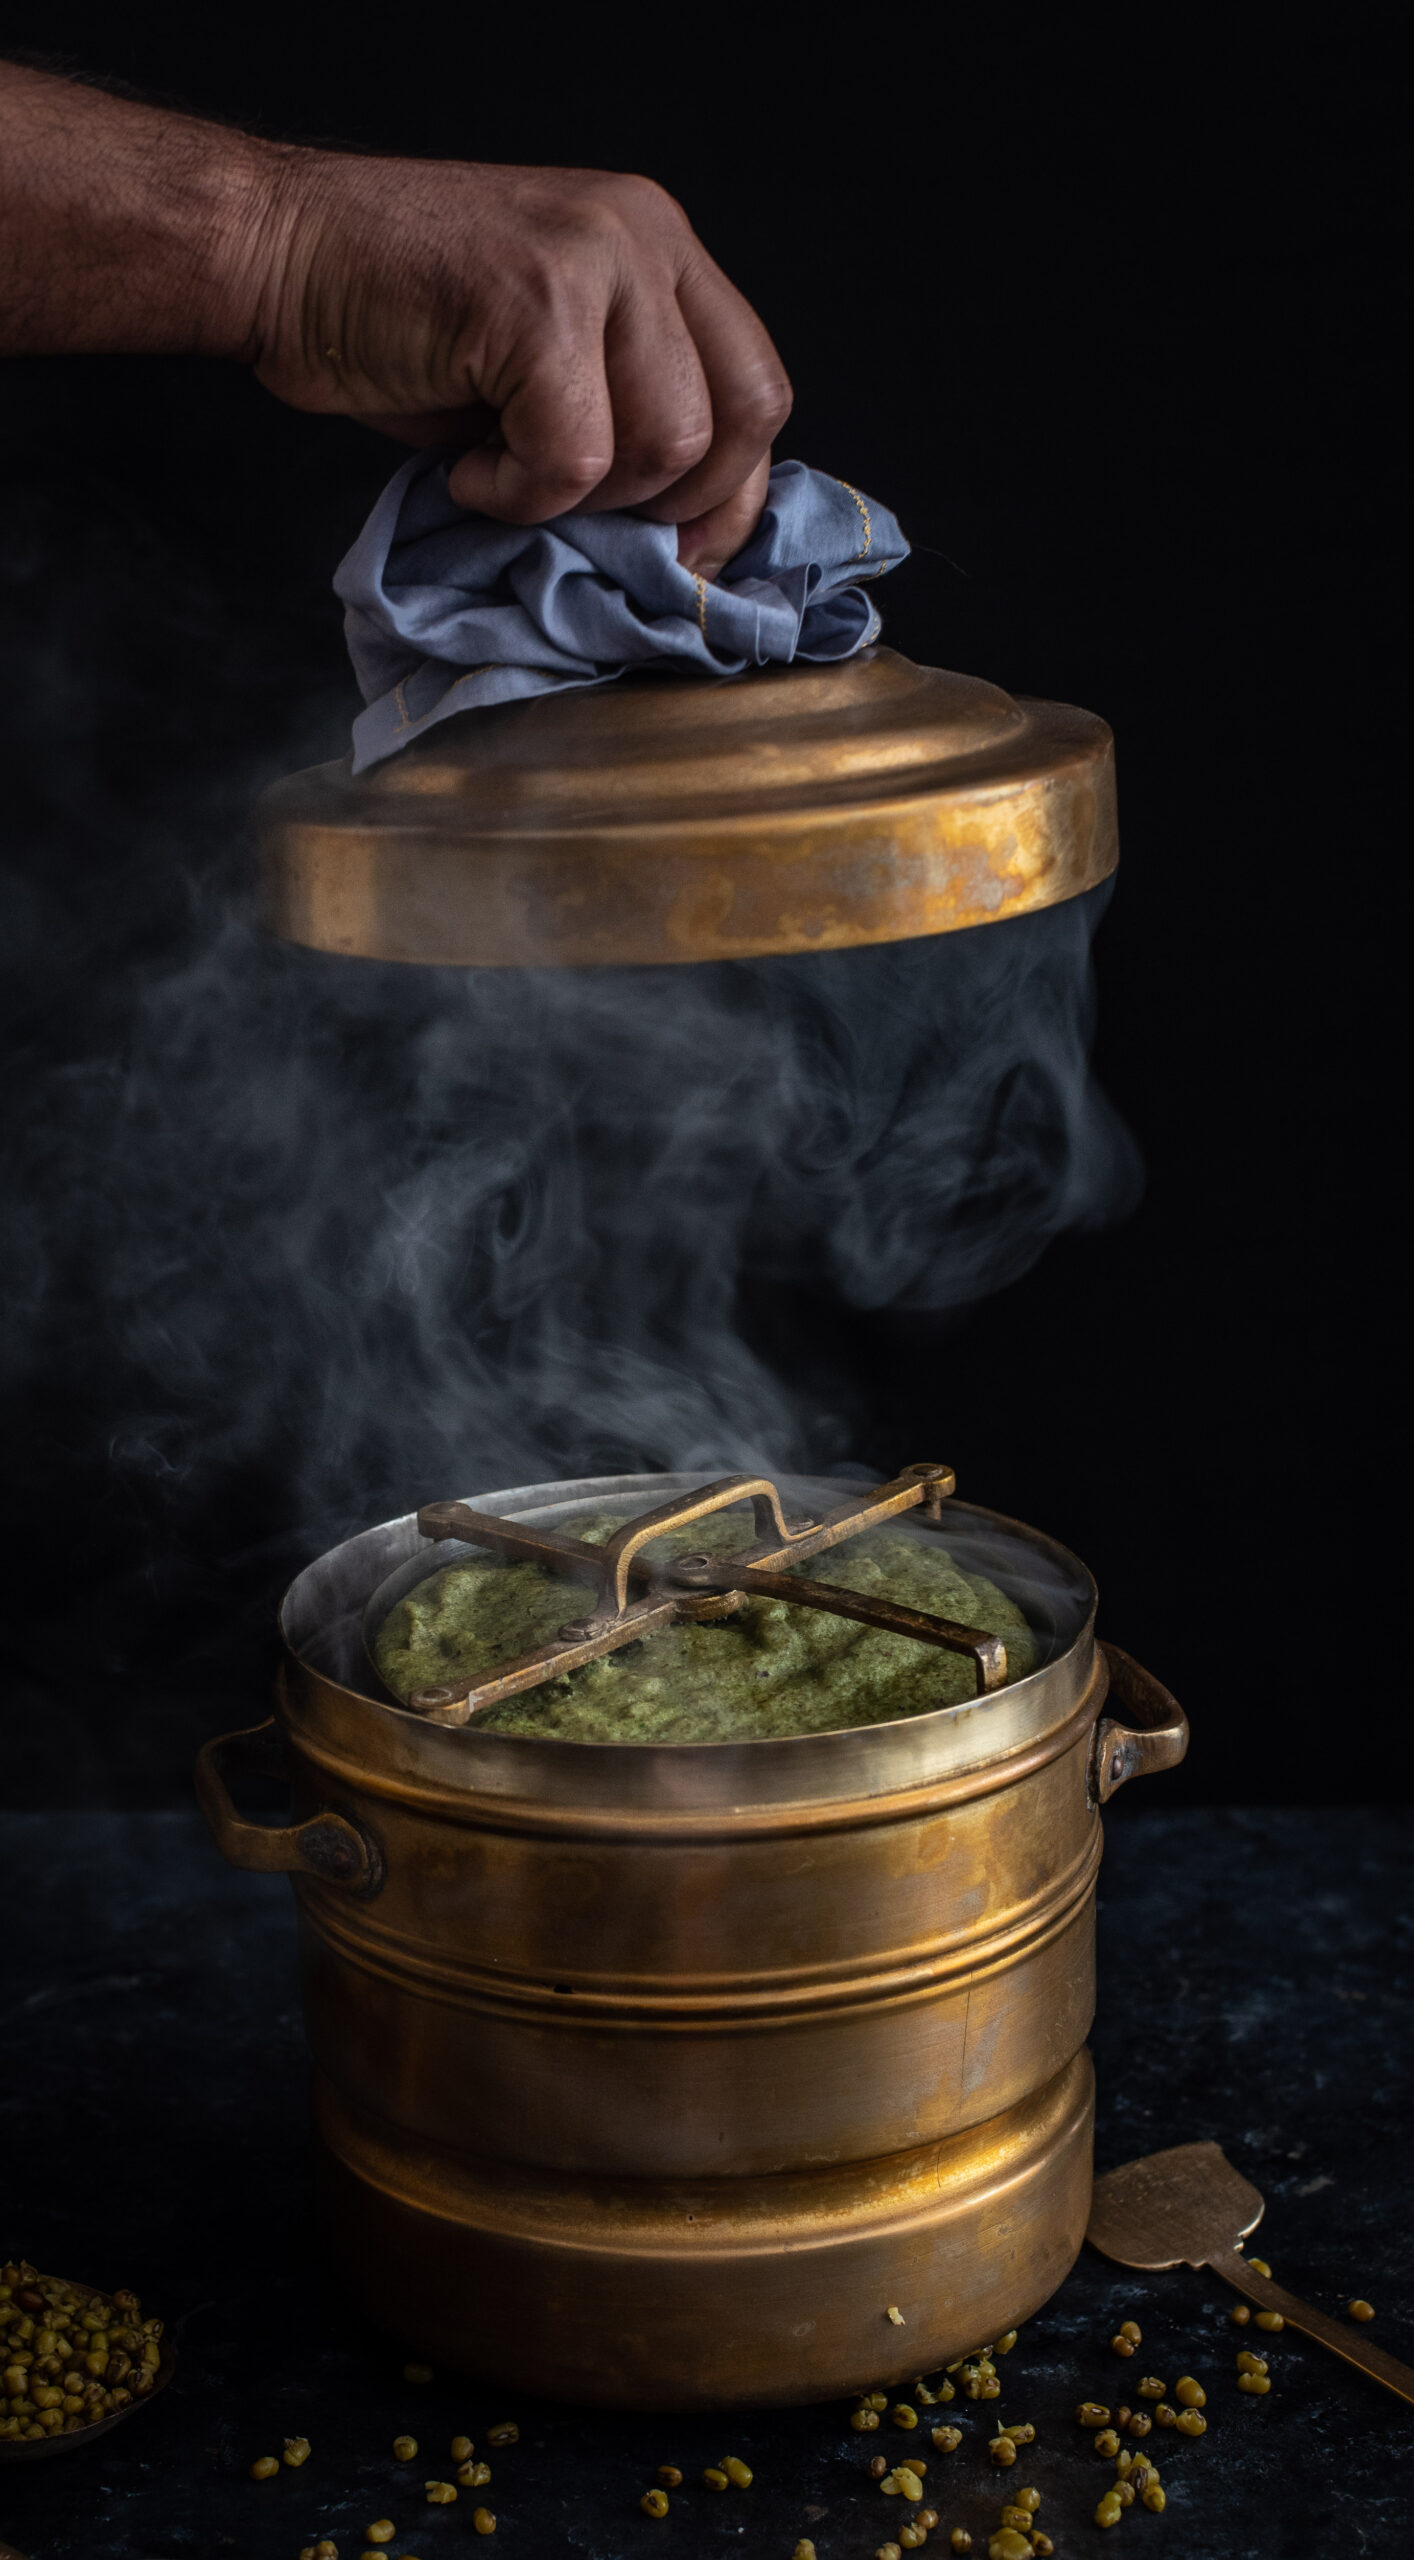
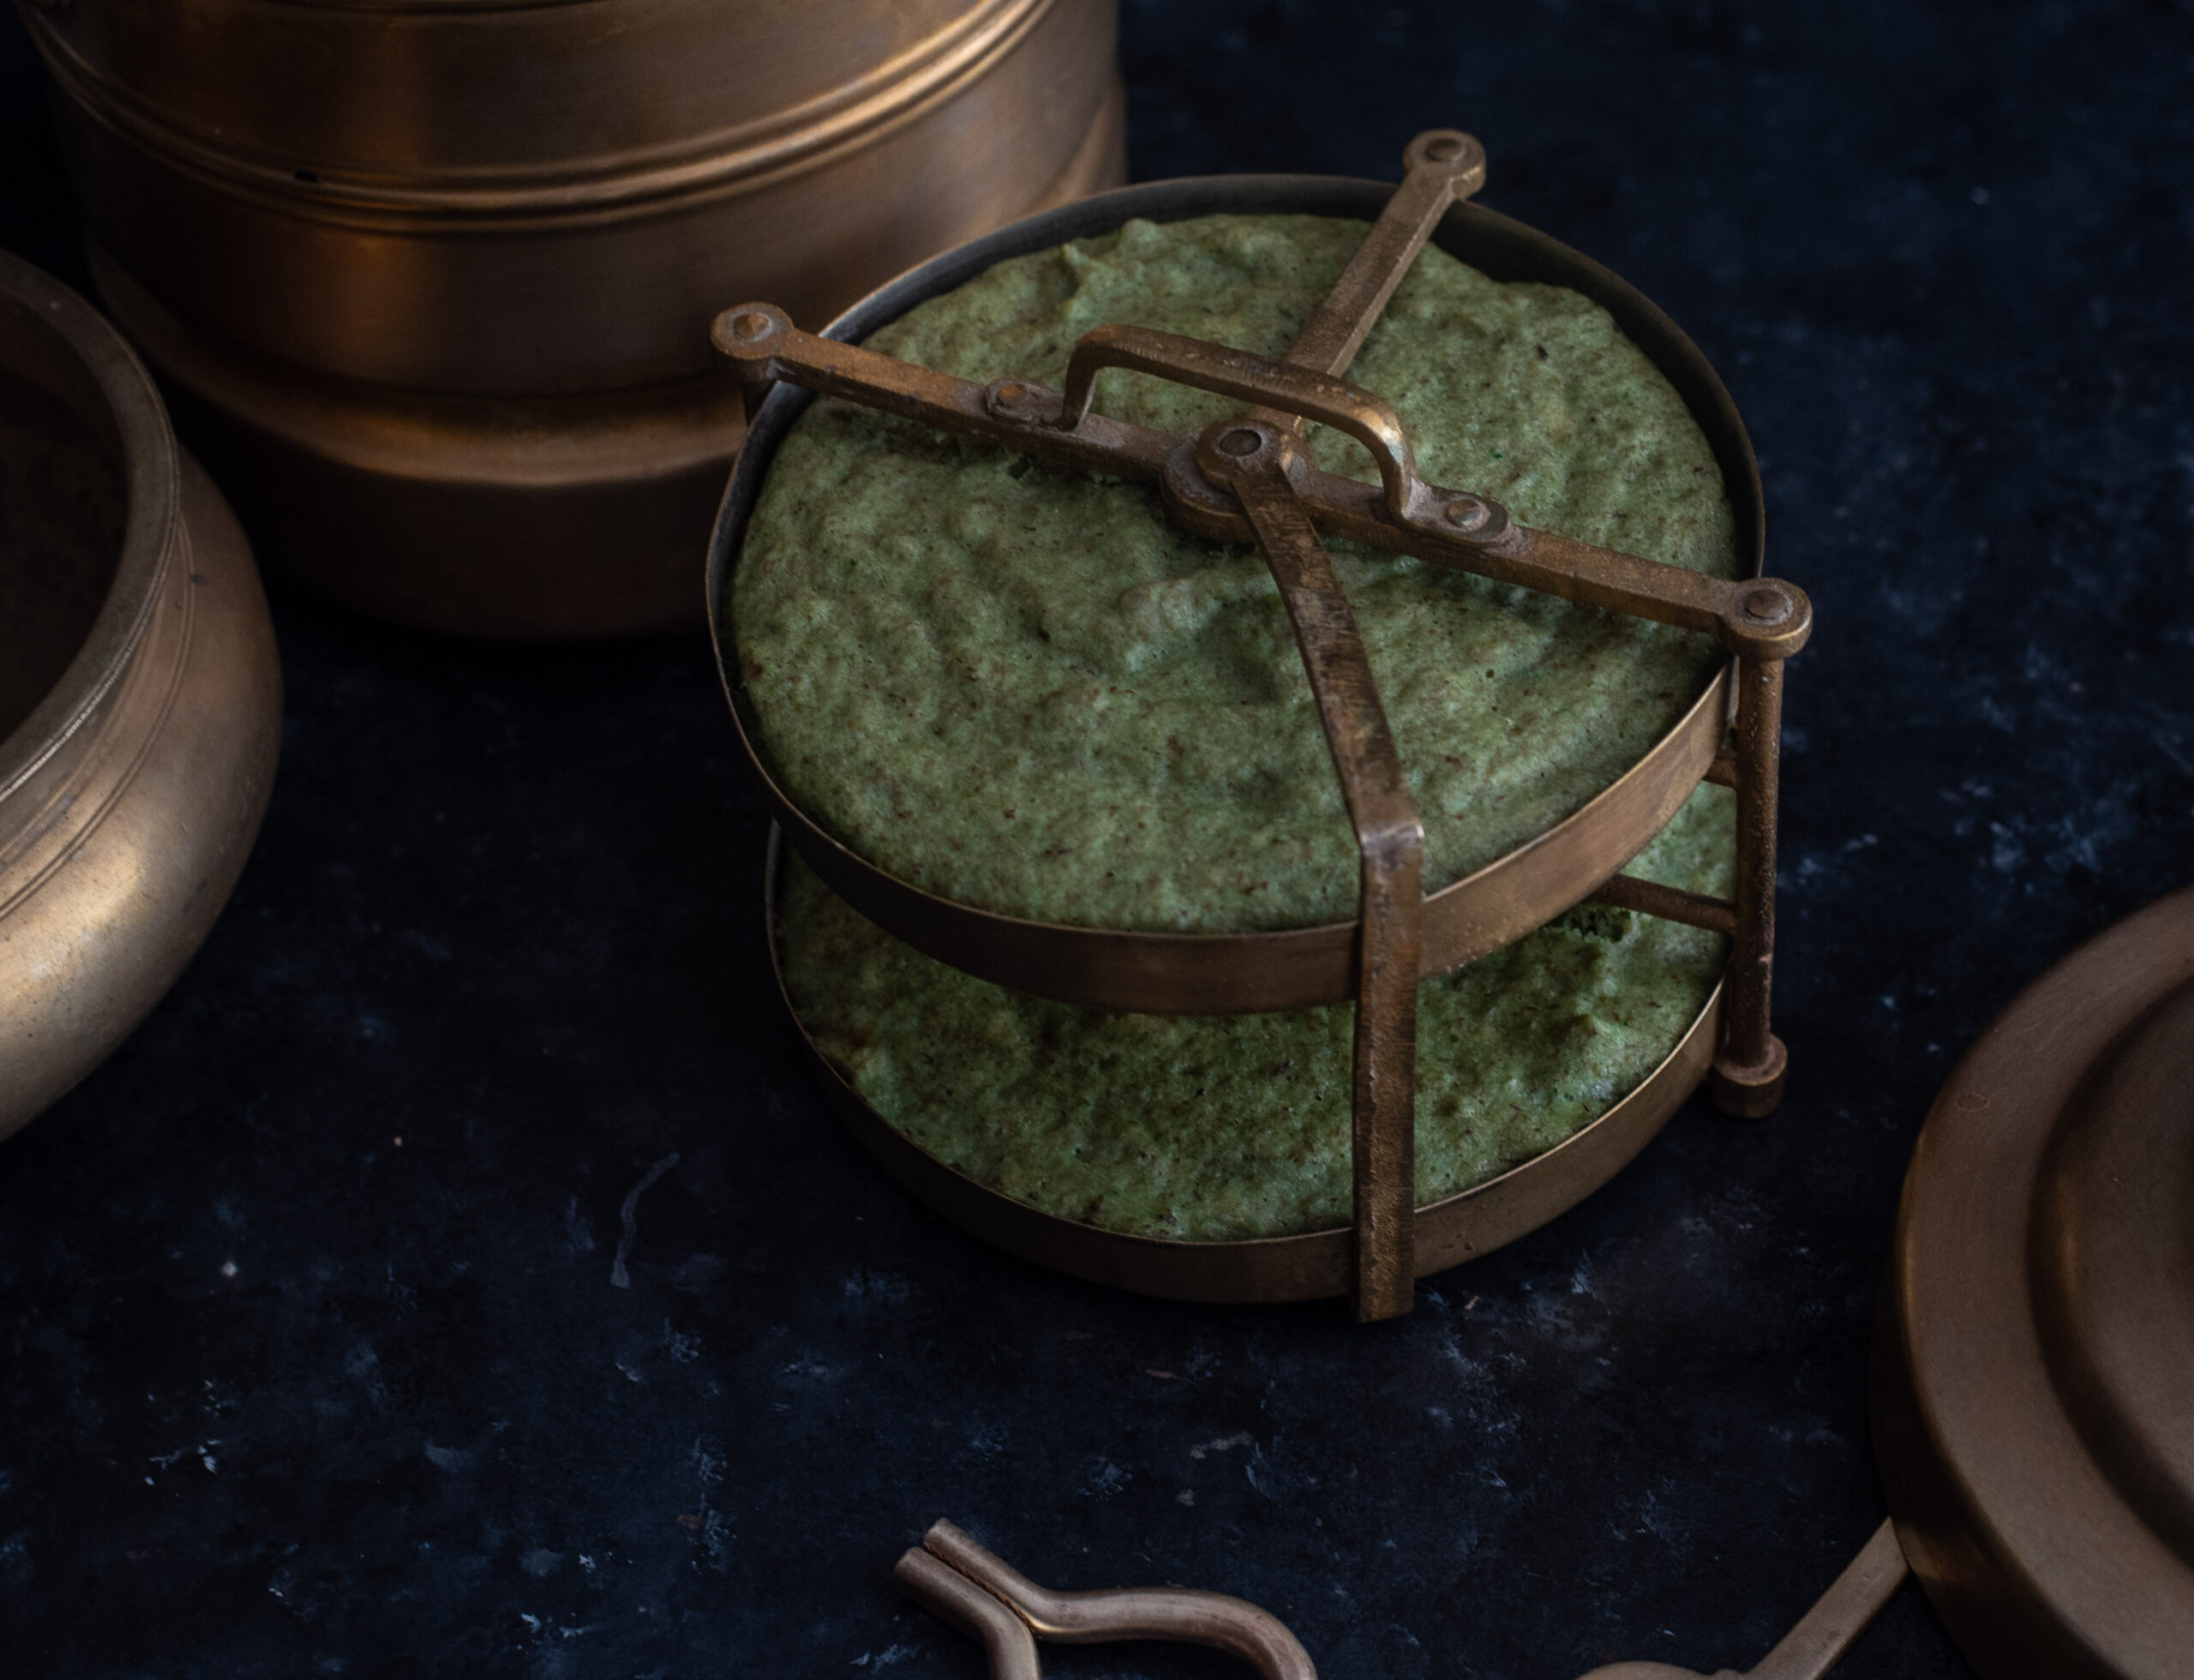
Grease a plate and keep ready. Now, add eno fruit salt to the batter and mix gently. Pour the batter onto the greased plate, cover it and steam for 15 minutes. Below, you can see a traditional Gujarati dhokla cooker which my mom gave to me. I believed it was a part of her own wedding gifts. I’d forgotten that I’d had it and could use it. It’s still in perfect condition, and so compact and ideal. You can also see how it allows for cooking in layers.

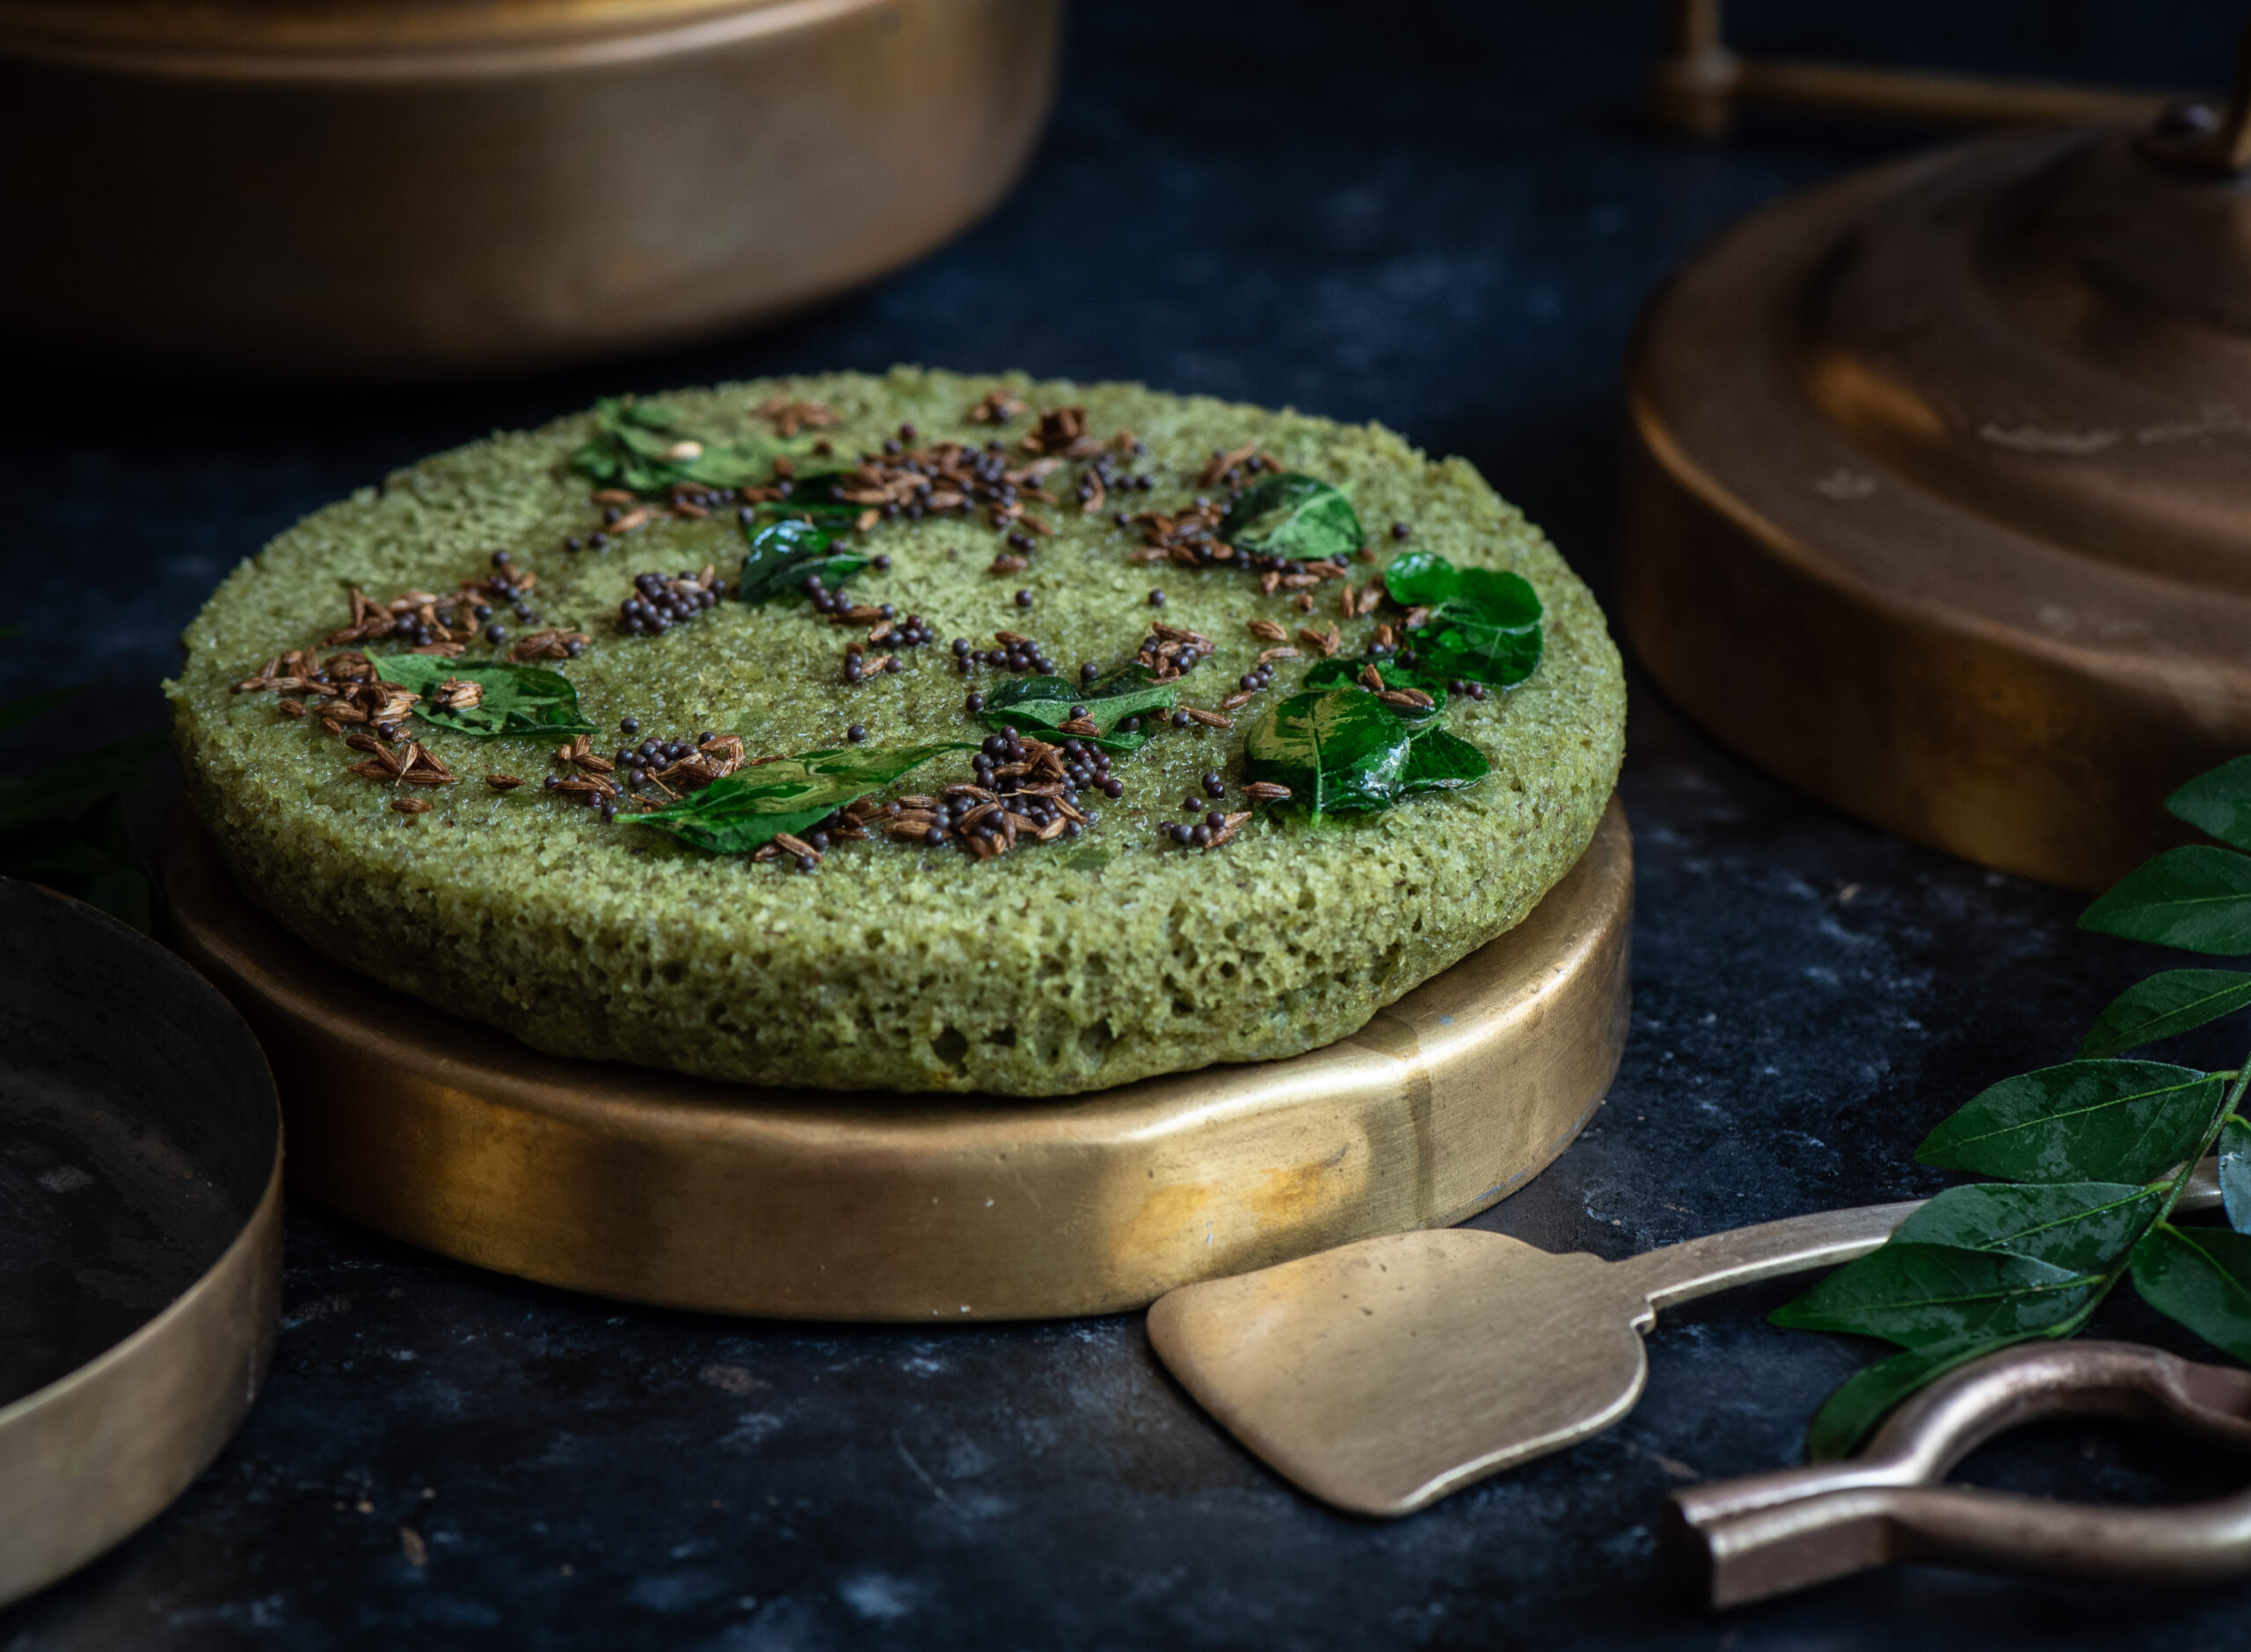
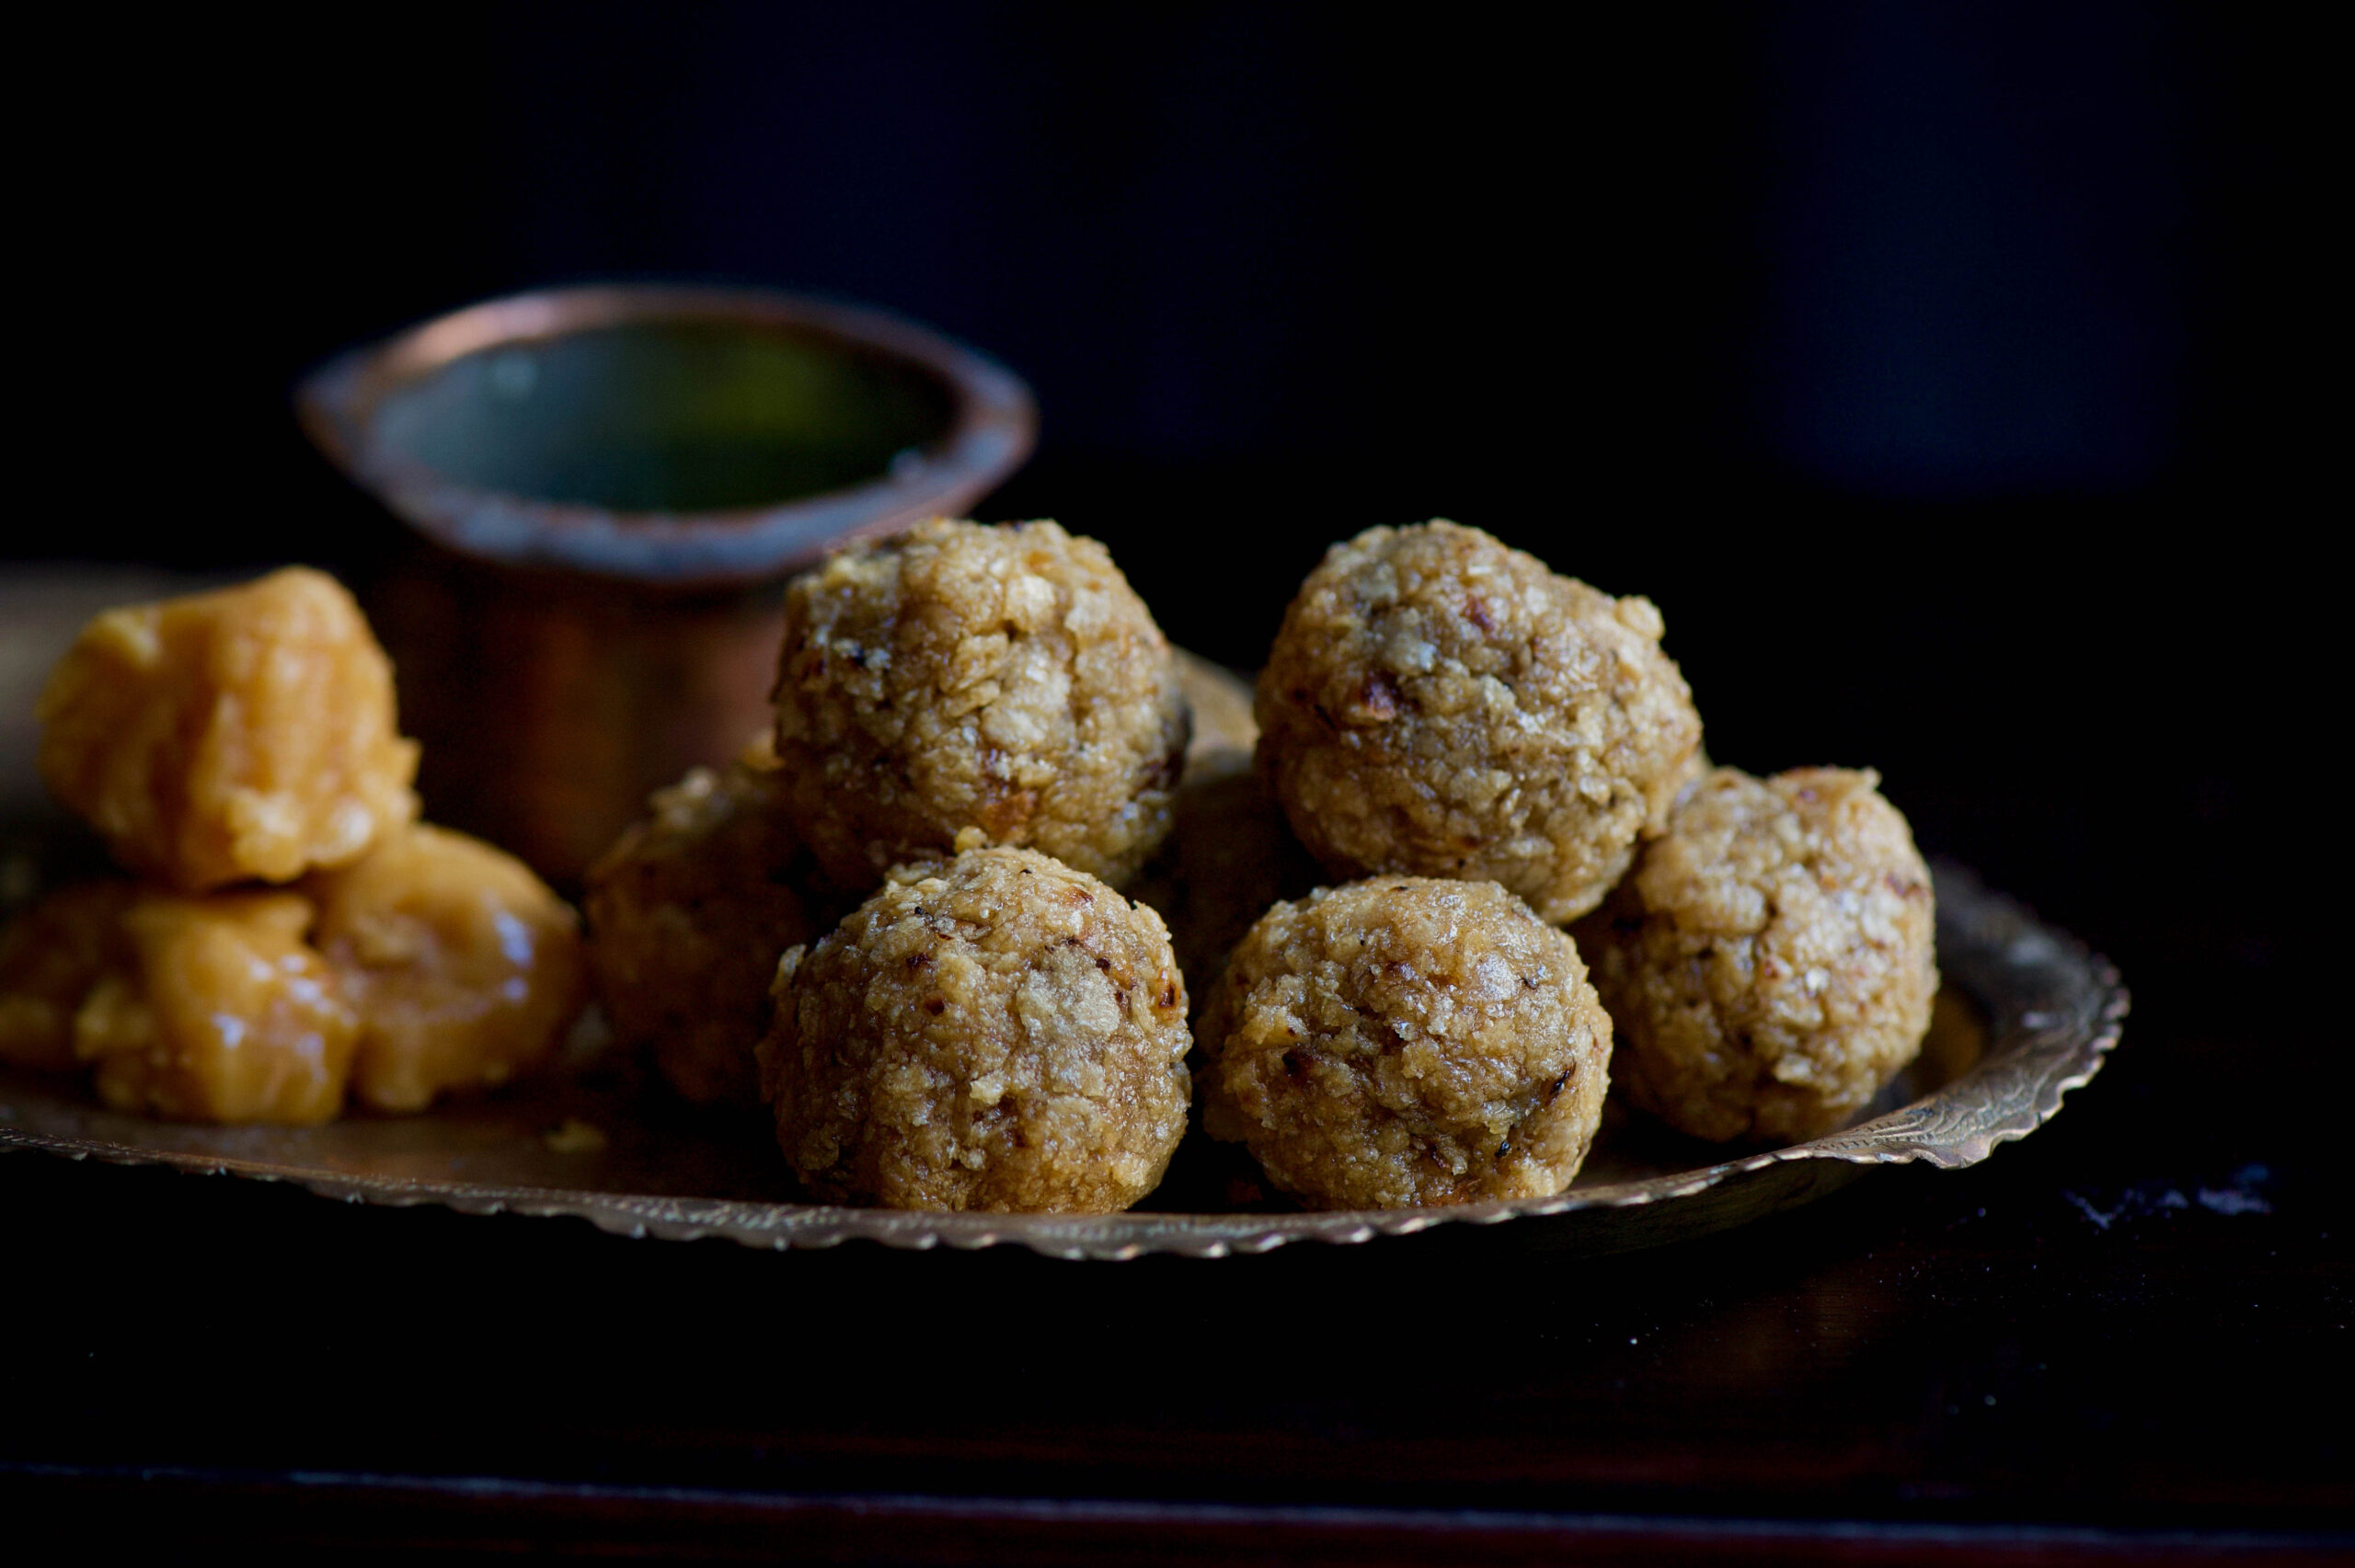
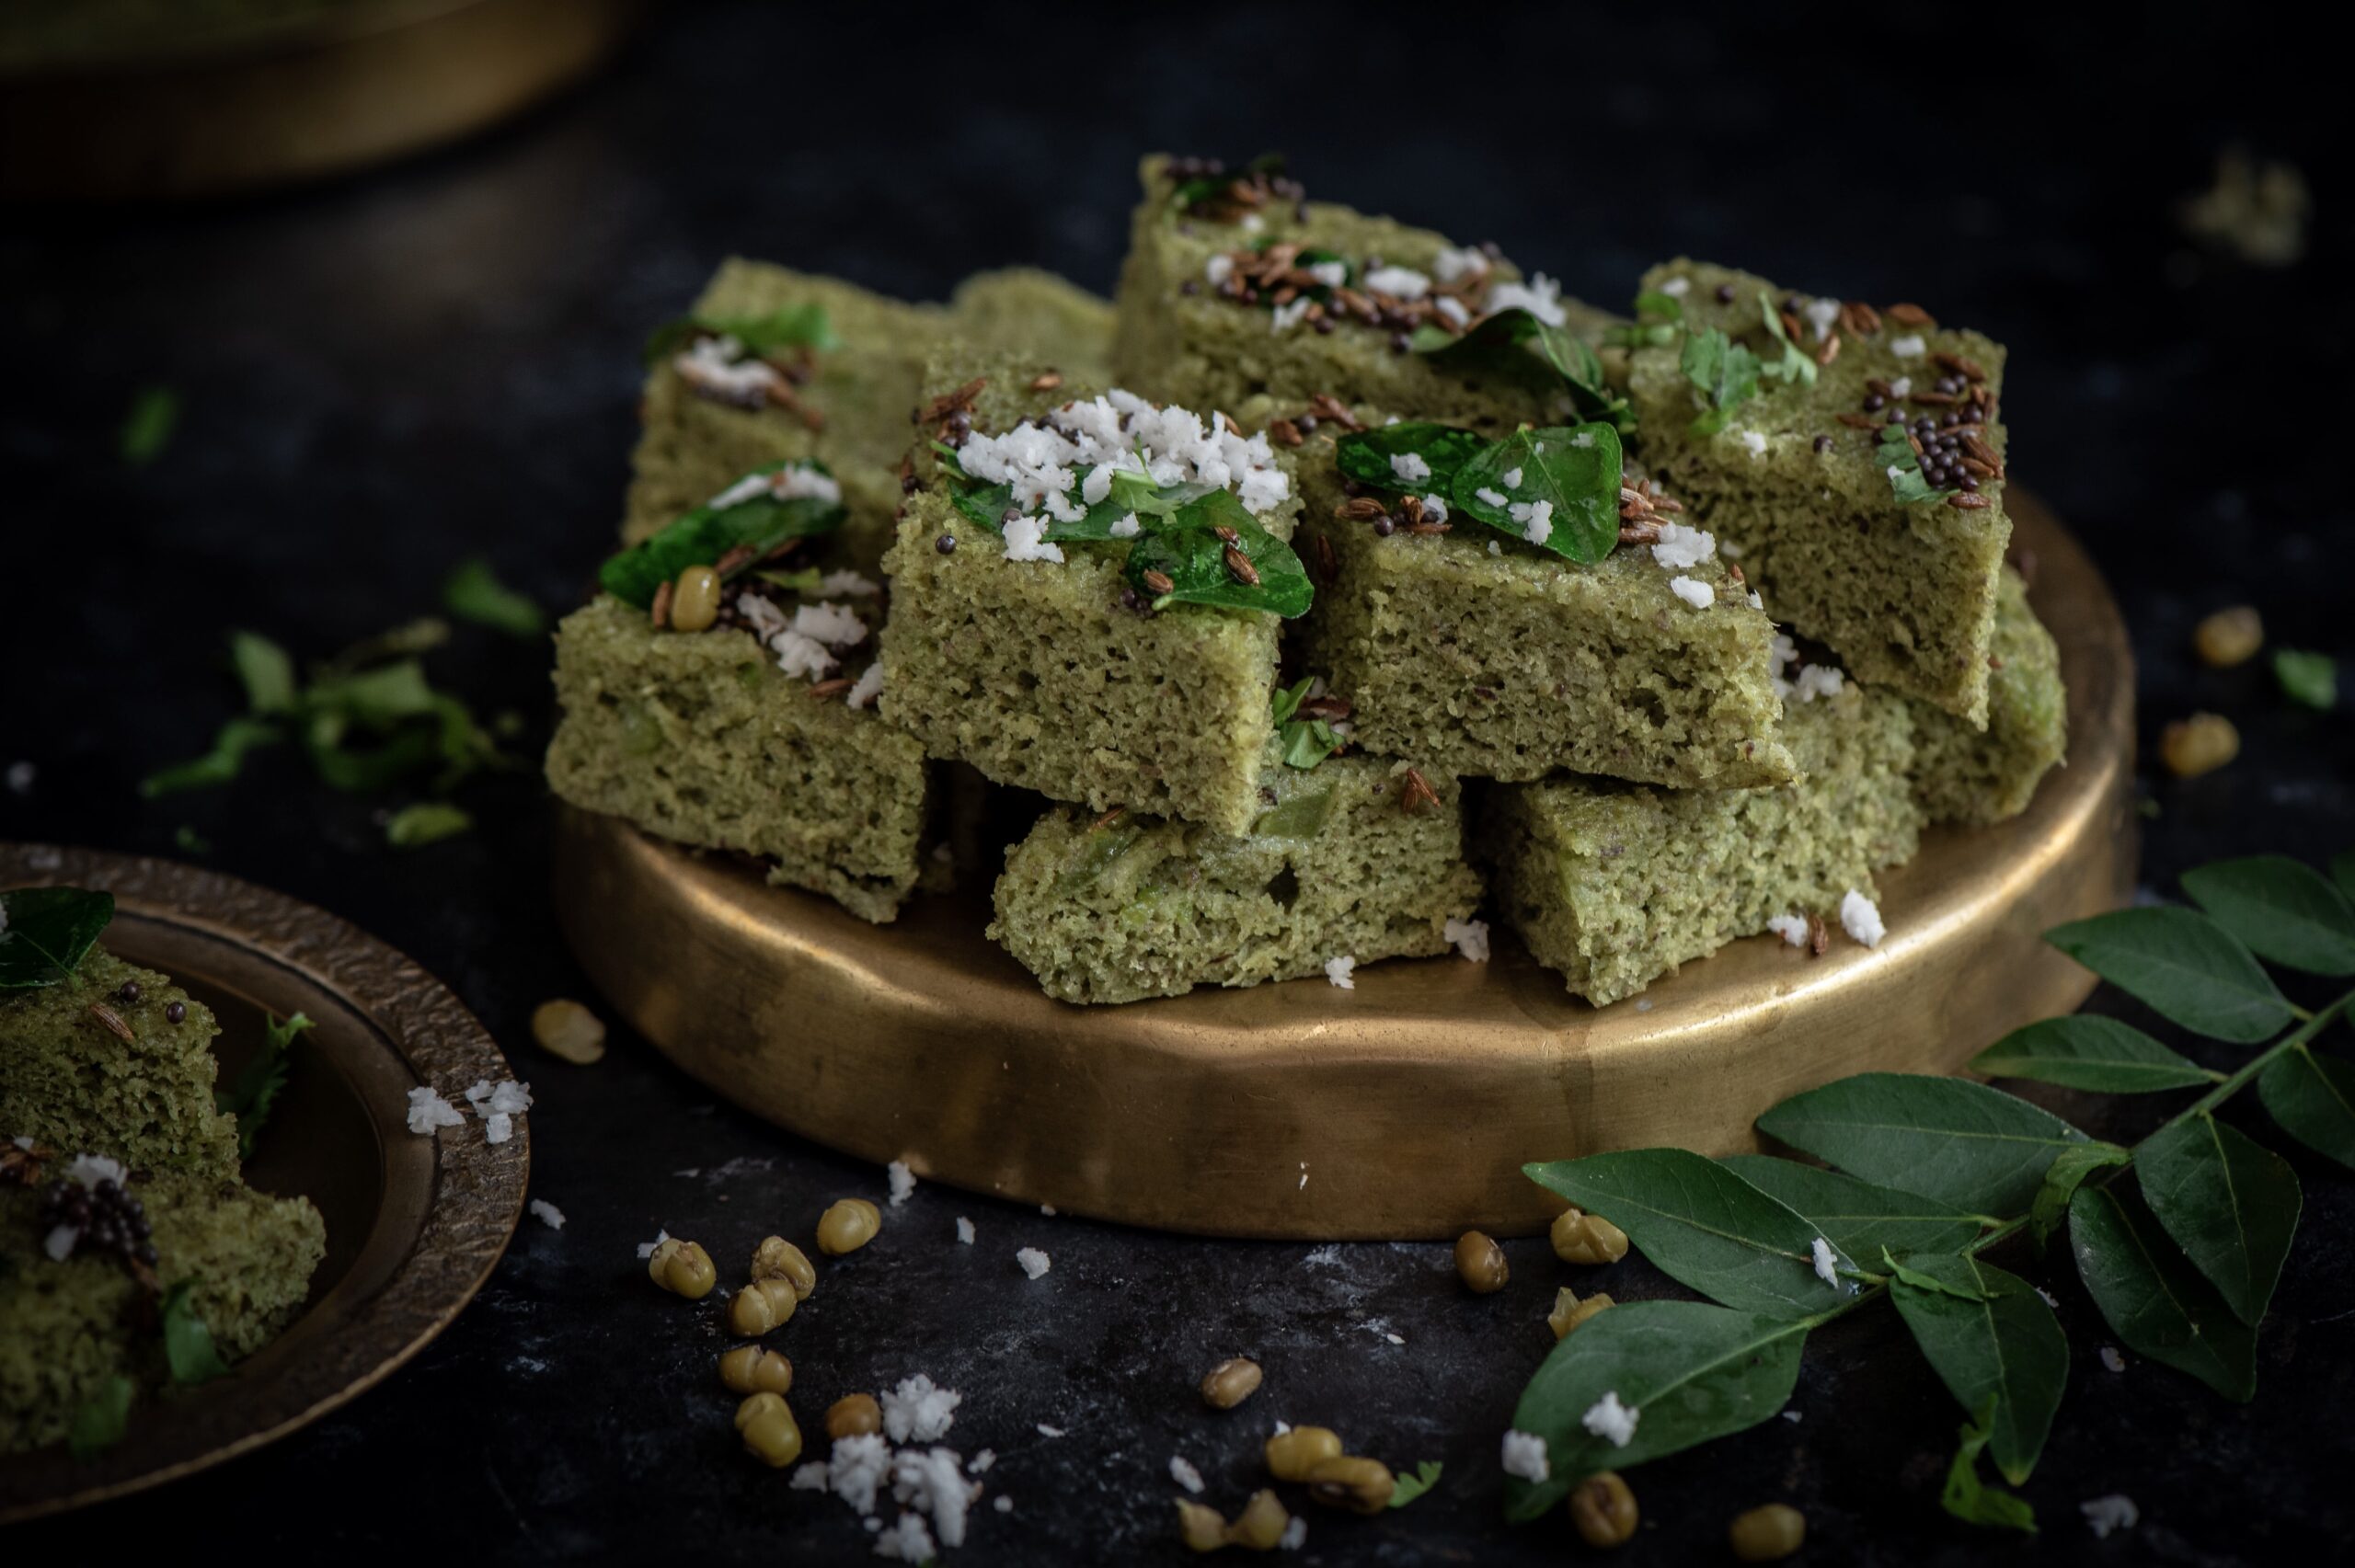
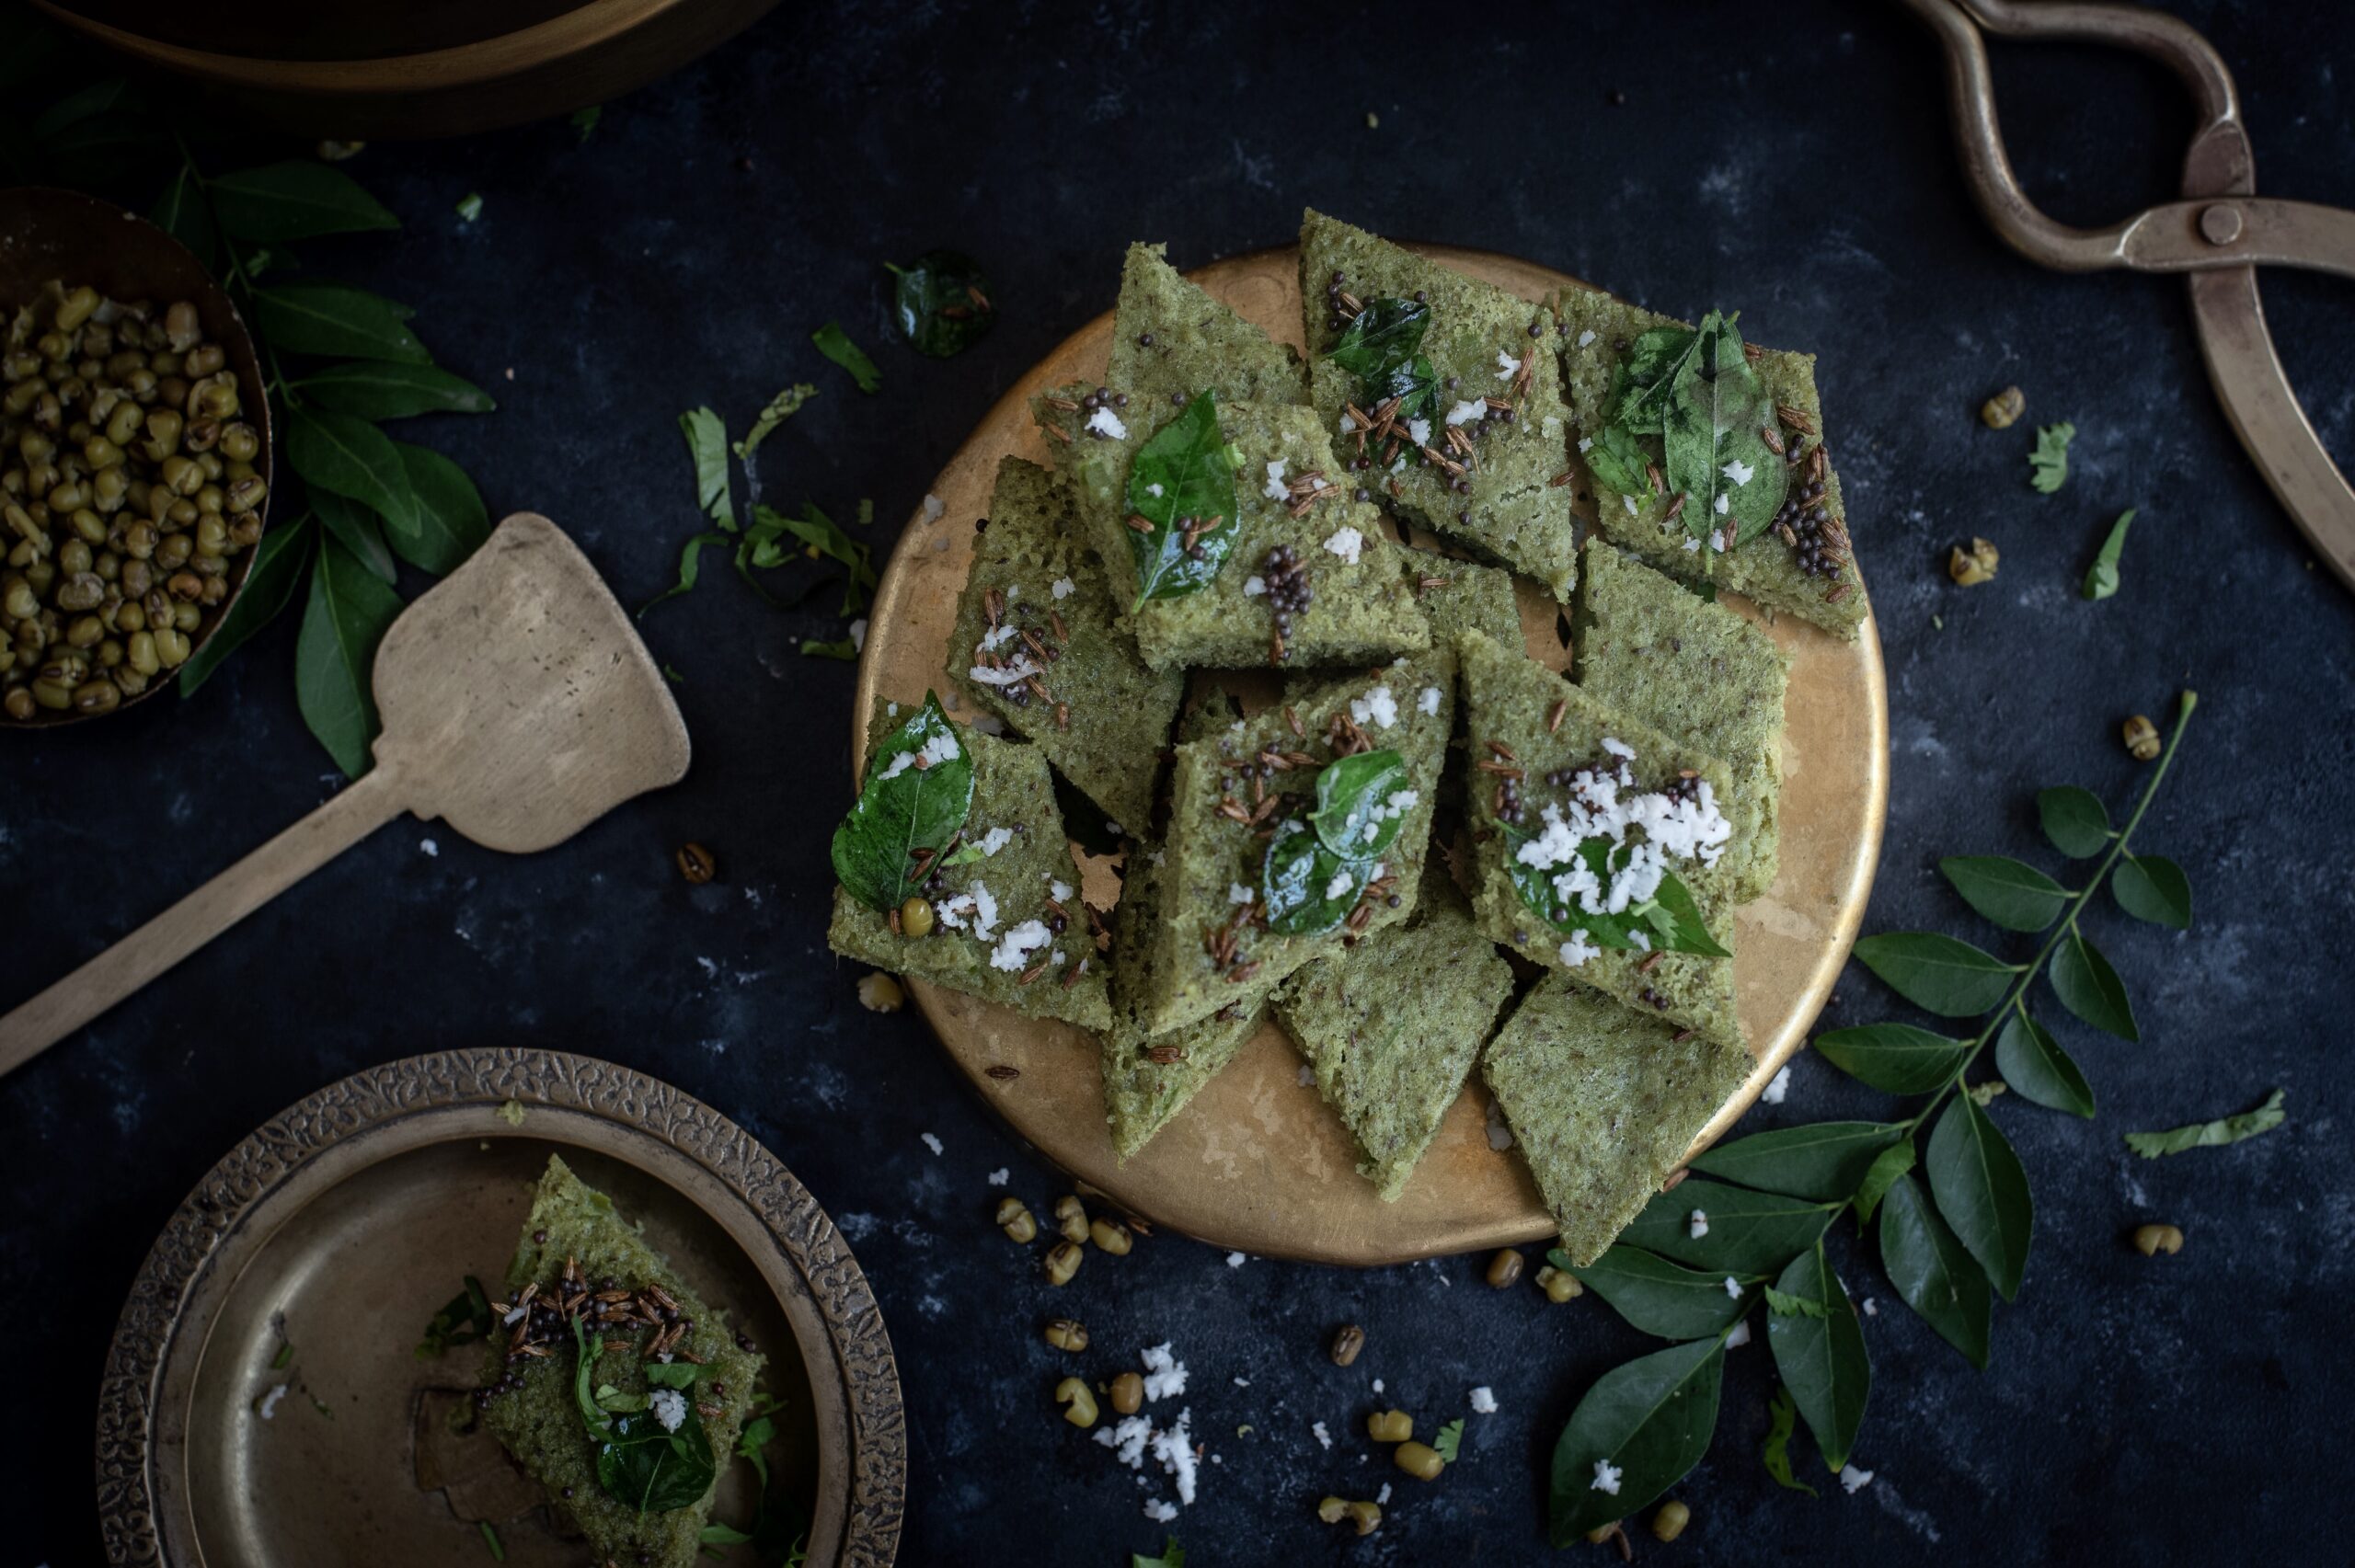
Once steamed, remove the plate and allow the dhokla to cool. Cut into a desired shape. Square or rectangular pieces are the standard. I’ve done diamonds here.

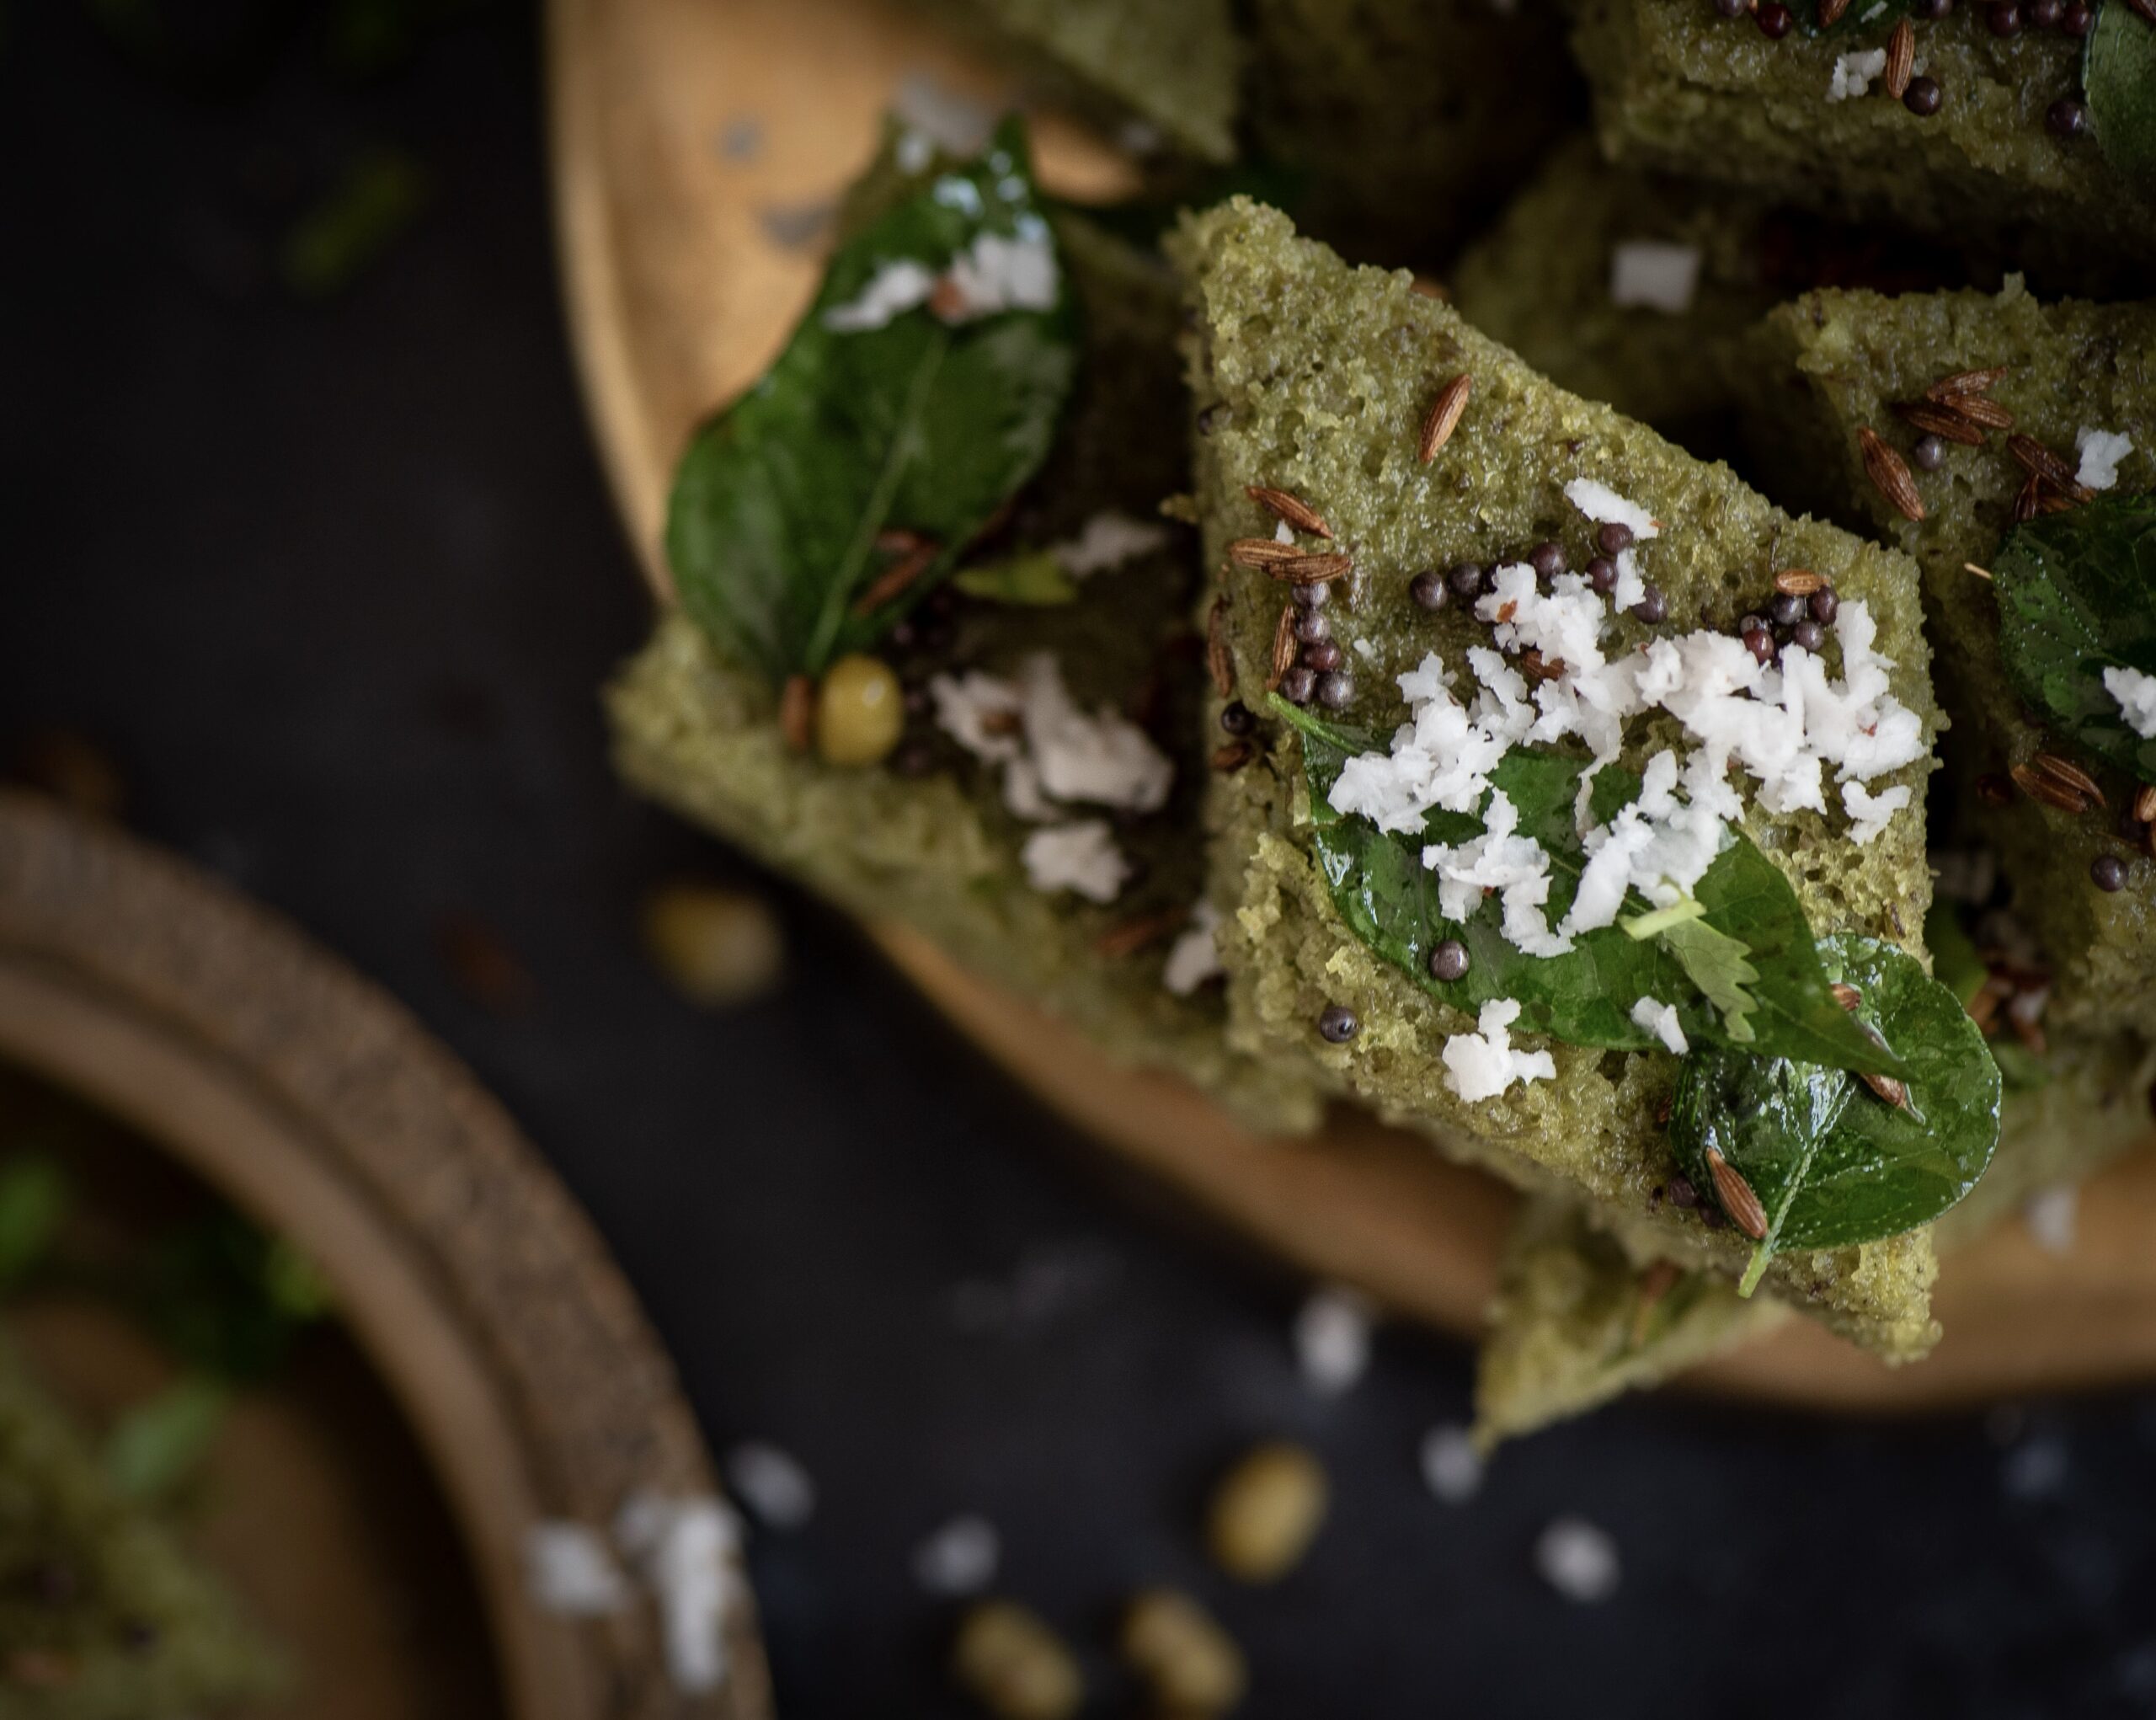
In a small pan, add the remaining oil and the cumin and mustard seeds and wait for them to splutter. Once they start to splutter, add the curry leaves. Then, pour these over the cut dhokla. Garnish with coriander leaves and some grated coconut.

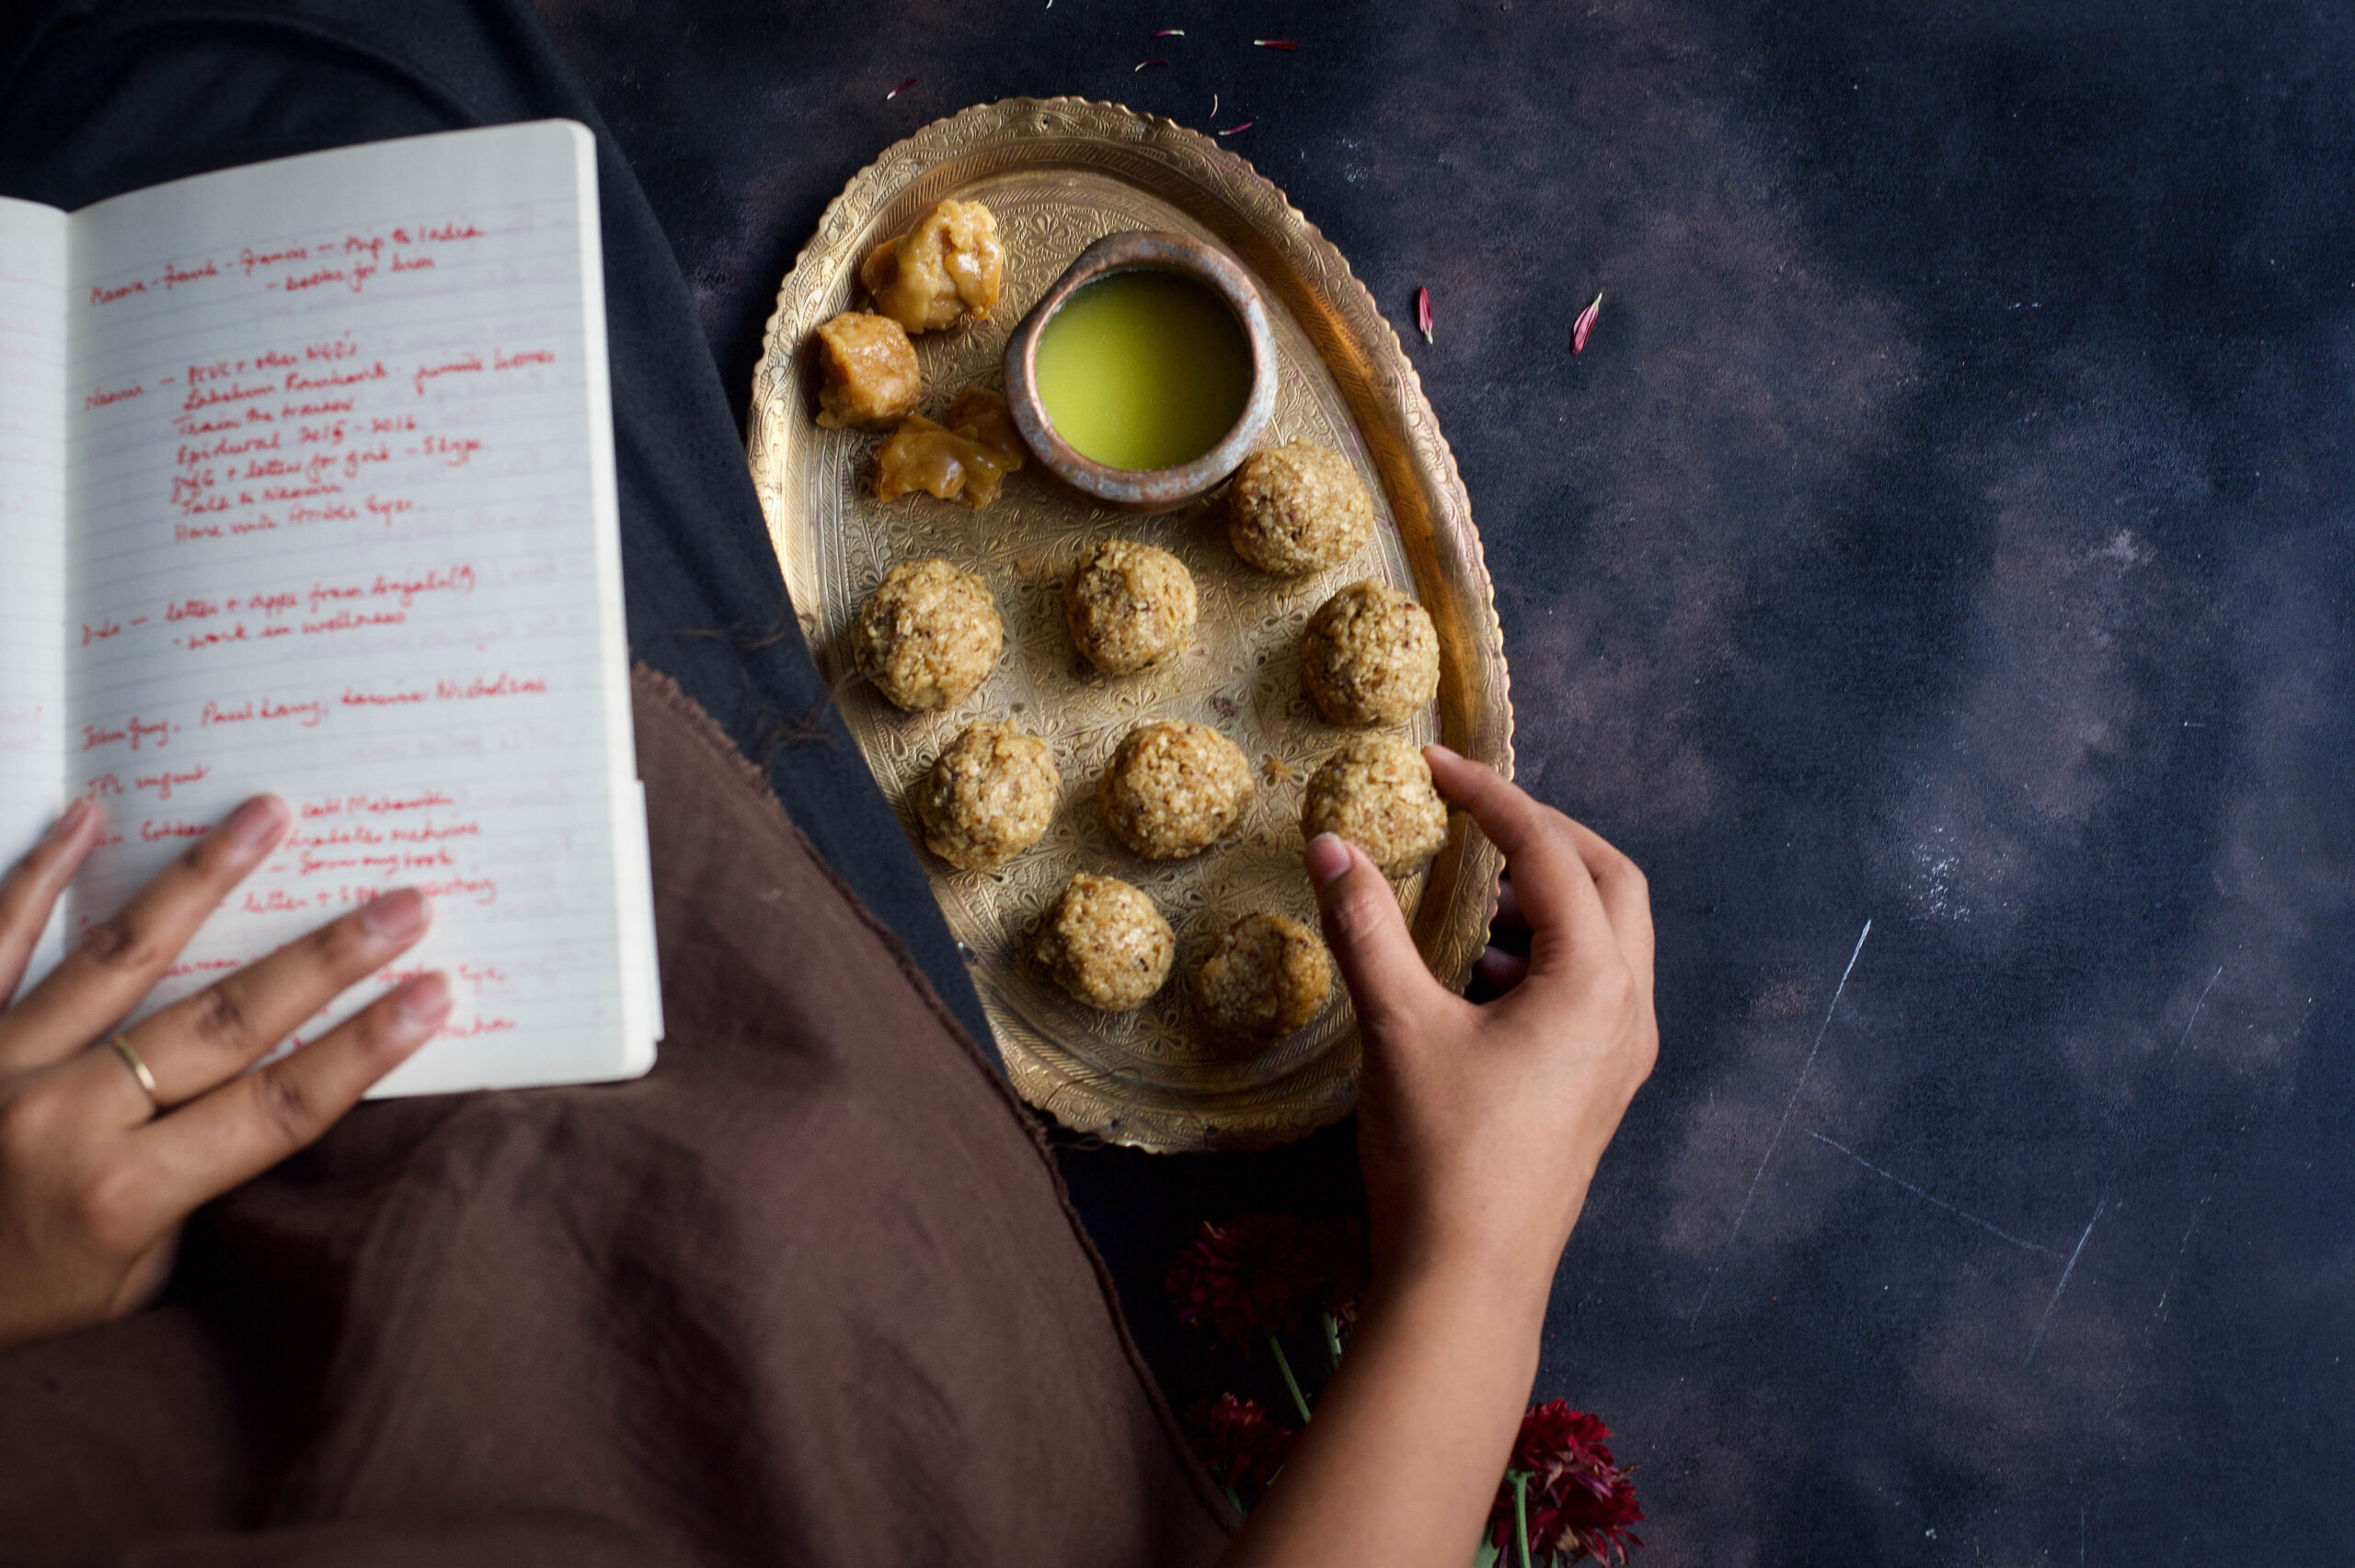
The green moong dhokla is now ready to serve. Spongy, spicy, and so very nice on the eyes with that gorgeous matcha cake colour. Like I said: have a piece as a snack, a couple as a side dish, or polish off the plate and call it a full meal. But honestly, I’d be surprised if you can stop at just one. These light, fluffy but very flavourful dhoklas demand to be devoured!


Sankranti, the harvest festival, is here and as we celebrate by giving thanks for the crops we eat daily, it’s til-ka-chikki that strikes me as a perfect dish for the occasion. The chief ingredient of this crunchy sweet is sesame, which is believed to have been cultivated in India for over 5500 years. As a form of produce that can grow with relatively little supervision, and in less than ideal conditions, there is no doubt to me that many of our ancestors would have considered it a perfect if not vital part of their Sankranti. Sankranti is known by various names throughout the country – it is also observed as Pongal, Bihu, Maghi and by other names depending on region. No matter where, it falls in mid-January and is a time when the sun is worshipped for its life-giving properties.

“Til” is the Gujarati word for sesame, as well as in other languages including Hindi and Punjabi. The English word “sesame” is from the Arabic “semsem”, indicating oil or liquid fat. This is because it is an oilseed produce. It’s an excellent digestive aid as it’s full of fiber, and also has high copper, manganese and calcium content, in addition to other vitamins and minerals.

Chikkis are a whole category of snacks, usually sweet thanks to the sticky jaggery that holds them together. We also make them with groundnuts, puffed rice (mora mora) and other variations, depending on the season. You can make them either in bars or in balls, and they also make a great ice cream topping when crushed. Til-ka-chikki is basically a sesame brittle, and today I’ll share the method to make them into bars.

I used to have a huge mental block about til-ka-chikki as I simply hadn’t known how to make it. My sister got married when she was just out of college, and she hadn’t learned how to cook yet. She went to her mother-in-law’s house, where she learned how to make the most beautiful traditional Gujarati dishes. I was still in high school at the time, and am still envious to this day about the culinary skills she picked up back then. Meanwhile, in my mother’s house, I was still studying but also began to slowly pick up recipes and techniques in the kitchen. I was probably inspired by my sister’s newfound talents, and our mother started me off on the basics, like rotli. Over time, I began to regard not only my mother and my own mother-in-law as my culinary teachers, but my older sister as well. My sister’s repertoire is vast. Even to this day, each time I visit her, I insist that she teaches me an entirely new dish  every time.

I overcame my mental block when I finally learned how to make this til-ka-chikki a couple of years ago, with her guidance. And I’ll admit that I am still learning. I don’t quite have the confidence to make it on my own yet, but every experiment has ended in happy mouths and sticky fingers. It would be great if you could learn it together alongside me. We could master it together, just as my sister has.

As with most traditional Gujarati sweets and snacks, this too requires only three ingredients. In this case, they are jaggery, sesame and ghee. If you’d like a vegan version, replace the ghee with a flavourless oil of your choice. Til-ka-chikki is also offered as a prasad, so while it is a simple dish it can also be a part of prayers for festive and special occasions. For Sankranti, of course, it’s a beautiful way to honour the sun that gave us this ancient and nutritious crop.


Til-Ka-Chikki (Sesame Brittle)

(Yield: 10-15 pieces)


Ingredients

½ cup sesame seeds

½ cup jaggery

1 tablespoon ghee

Grease an overturned steel plate and a rolling pin and keep these ready. Next, in a wok or kadai, roast the sesame seeds on a low flame. Occasionally increase to a medium flame for short spans. The sesame will take about 7 minutes to roast. Keep stirring until the colour changes.

Once roasted, transfer to a plate and allow to cool. Once cooled, taste a few seeds to check if they have a crunch to it. This means they are ready.

In the same wok or kadai, add the ghee. Then, add the jaggery and stir constantly on a low flame. As with the roasting of the sesame seeds, you may occasionally increase the flame to a medium for short spans, then immediately reduce it to a low again. Take care that the jaggery does not burn. Do see this video for reference: re:store sesame brittle video – 1

Mine took approximately 9 minutes to turn into a reddish colour. Once this happens, turn off the flame. Add the sesame seeds and stir well.

Drop the mixture onto the greased, overturned plate and immediately start to spread it out as thin as possible. You may need to use your fingers (dipped in water), while the rolling pin is coated with ghee. With this combination, try and spread it out in such a way that you mark lines for the pieces later.

Allow the spread mixture, striped with lines to form bars, to cool. Once it has completely cooled, place the plate on the stove and warm from below. The entire piece will come out as a whole. Break it along the marked lines. Store in an airtight container.


Here’s another process video: re:store sesame brittle video – 2

I want to say that this til-ka-chikki is easy to make, but I’ve already told you honestly that it’s not. But I love a challenge in the kitchen, and try again and again to better then perfect my dishes. Even with my photoshoots, it’s the same. When the end result comes out well, it’s all the more delicious when I know the effort that’s gone into it! Tell me how it goes when you try your hand at this dish. Wishing you and your loved ones a happy Sankranti!


Gujaratis love fried things. Full stop! We love them so much that we even start the day with them. Specifically, with pooris, which are our traditional breakfasts. We never feel guilty or bad about reaching out for our fried snacks either, which includes ganthia (fried mini pappad) and a variety of mixtures (popularly known as chevdo, which vary from region to region and can be sweet, tangy, or spicy). Ganthia and jalebi, a deep-fried sweet, are also popular as breakfast. It will come as no surprise that pooris – discs of dough which fluff up in hot oil – are another such staple. They also come in several variations. Crunchy, crispy-salty (to be had with tea), and soft. Today, I’ll be sharing how to make the soft version… with another typically Gujju twist.

That twist, of course, is sweetness. As you’d already have known from the long list of traditional desserts on this blog, Gujaratis love sweetness just as much or even more than we love fried things. The perfect combination of these two cravings is the kheer poori, which in simplest terms is a poori eaten with kheer, a milk-based sweet.

When I was growing up, cakes were not yet popular in Chennai, and this kheer poori was often a birthday treat that my mother made for us. Especially for me, because I just loved that combination of tastes and temperature: the saltiness and heat of the poori, the sweetness and coolness of the kheer. It was also something made for special occasions, which as you know are usually observed with an offering of sweets to the divine, as well as for weddings and other celebrations.

The frying of pooris is an art, and being a Gujarati, size does matter – in this case, the smaller, the more delicate and dainty, the better. My mother was strict about this. She always said that if a poori did not puff, if it did not bloom in the oil, then the person frying it just did not know how to make a good poori! Pooris are generally eaten hot and fresh. Not only did my mother tend not to serve unpuffed pooris at the table, but if a poori became flattened by the time it reached my plate, I would absolutely refuse to eat it as a child! Perhaps that’s why I became so keen on, and so good at, frying perfectly puffed ones later.

I’ve shared two kheer recipes earlier, and have linked to them below. So this recipe teaches you only how to make pooris – a standard in almost any Indian kitchen, but hard to perfect, as many will tell you! Alternately, you can eat your pooris with any accompaniment of your choice. Once you have the basics in place, it’s fun to experiment. If you don’t have a sweet tooth, you can always have pooris with a potato curry (like the Gujarati bataka-nu-shaak) or another accompaniment, like a pickle. Perhaps because it is so simple, a poori is also an incredibly versatile dish. And yes, you WILL need (and want) more than one, for sure!


Poori (With Kheer)

(Yield: 15-20 small pooris)

Ingredients

1 cup whole wheat flour

¼ teaspoon turmeric powder

½ teaspoon cumin powder

½ teaspoon chilli powder

½ teaspoon salt

1 tablespoon oil

¼ cup water

2 cups oil for deep frying


As I said above, I’ve provided two kheer recipes earlier, and you can pick which one to make based on seasonal availability and individual taste. Whether you go with the sitaphal kheer, the rose-coconut kheer, or your own variation, you should have this prepared and refrigerated first.

I don’t know if I’ve ever shared this with you before, but in most Gujarati homes, we regularly make fresh batches of green chilli and ginger paste. This keeps for two or three days, and we use a dollop of it in lieu of red chilli powder. If you prefer this taste, and have it on hand, you can substitute the red chilli powder in the ingredients for the same. I have fond memories of our helper when I was growing up using the stone rubi-kallu to make the paste. We rarely used the blender, and I can’t even remember if we had one at the time. Now, it’s such a necessity.

In a bowl, add all the ingredients (except the oil for deep frying) and make a dough. The dough should be equivalent to a tight smooth ball.

Now, divide the dough into round small balls ready for rolling out. Roll them out evenly shaped as far as possible. They should also have the same, even thickness. Take care that they are not too thin, as they will be unable to puff up if so. Did you get rolling practice when you made these rotis? If you did, it may be worth noting that this dough is similar to thepla dough, except we don’t add yoghurt.

Prepare the oil by heating it. You can check the heat by dropping a pin size drop of dough. If it gathers bubbles, then it means the oil is ready. On a high flame, drop the pooris in one at a time. Wait for each one to rise up, and then flip it over. You need to flip it over just once. The secret to the puffiness lies in a mixture of of the correct level of thickness, the heat of the oil, and timing. It takes practice, and despite my childhood aversion, deflated pooris are perfectly edible too.

The poori needs to fry for just 8-10 seconds after being flipped. When you remove them from the pan, you will notice that they will be darker on the bottom side, and this is normal. Place on a sheet to drain excess oil. Serve immediately with a generous helping of kheer, fresh from the fridge.

Hot, fluffy pooris are such wonderful comfort food. And when their heat melds with the chilled kheer, the combination is simply divine. The craving-busting deliciousness of fried dough and the sweetness of a Gujarati dessert – no wonder these were birthday treats when I was growing up! I hope you’ll enjoy this simple yet sinfully indulgent recipe. As always, I’d love to hear from you in the comments.

As I may have said a few times before: I’m very, very fond of yoghurt! Ever since childhood, it’s been an absolute requirement for me that every meal must contain yoghurt in some form. As I most often consume traditional Indian (particularly my native Gujarati) cuisines, this doesn’t require me to stretch my imagination or change my palate in any way. You may also recall that my yoghurt is homemade. It is made from a small amount of curd culture saved from the previous pot-full, allowed to set overnight, and consumed delicious and fresh every day.

I find that yoghurt enhances and adds flavour, and depending on how it is made can also add textures and tastes that go beyond what you imagine curd can do. Because it is such a staple in Indian homes, you will find that there are unique systems of making it that depend entirely on the people there. Even a religious view plays a role. For example, my mom’s home is Vaishnav and my in-laws are Jain. So the latter use onions and garlic very sparingly, whereas these were not restricted while I was growing up. The recipes I learnt in both homes were different. So although yoghurt is a vital part of the diet in both my homes, this particular dish is something I learnt after getting married.

From various previous posts, you would know about the Gujarati thaali, the set meal that contains a little bit of every flavour and texture. So you’d be familiar with raita, the thin yoghurt condiment that adds a bit of coolness of the meal, and helps with digestion. Raita is eaten throughout the subcontinent, in dozens of variants. For instance, an onion or kara boondi raita goes perfectly paired with a biryani, adding crunch as well. I have fond memories of long, lazy Sunday lunches during which I’d reach for more helpings of my mother-in-law’s banana-mustard-cucumber raita. I’m delighted to share the recipe for this simple but complexly flavoured dip today.

Banana, as you may remember from this banana-methi fritters recipe is a powerhouse of a fruit, packed with nutrients. It’s also a natural sweetener, and you know how Gujaratis love our sweets. In every kind of dish, you’ll find either jaggery or banana, or both! The sweetness of the banana in this raita naturally offsets the bitterness of the cucumber, which is another powerhouse. Cucumbers have a high water content, aiding rehydration, and are rich in potassium, magnesium and fibre. Adding a touch is spice is the mustard, which is a great source of selenium, zinc and calcium and known for its anti-inflammatory properties. Let me let you in on a secret – I never use the grinder to grind mustard as I don’t like the taste. Instead, I use the rolling pin that we use for rotlis. It’s lovely how such simple and clever innovations happen in the kitchen. I love picking up such techniques.

The flavours and textures of the three, as different as they are, blend very well in the yoghurt base: the banana soft and sweet, the mustard sharp, and the cucumber crunchy.


Banana-Mustard-Cucumber Raita

(Yield: 2-3 cups)


Ingredients

Raita:

2 cups plain yoghurt

1 cup finely cut banana

½ cup cut cucumber

1 tablespoon finely cut coriander leaves

1 ½ teaspoons mustard seeds

1 teaspoon roasted cumin powder

Salt to taste


Seasoning:

½ teaspoon sunflower oil

¼ teaspoon whole mustard seeds

¼ teaspoon cumin seeds


Take the mustard seeds and crush them using any simple method that you use at home. As I said above, I use a rolling pin and board, the same as I use to make rotlis. This crushes the seeds just the way I like it – not too fine, but uneven and broken. You can use the hand pounder too, if you prefer. Crush and set aside.

Place the yoghurt in a bowl and beat well until there are no lumps and the yoghurt is smooth. Now add the salt, cumin powder and crushed mustard powder. The fresh flavour is the key element to this raita.

Now, add the banana, cucumber and coriander leaves. Mix well.

Then, prepare the seasoning. Pour the oil into a small pan. Once hot, add the mustard seeds and cumin seeds. Wait till the seeds splutter, then pour over the raita. Decorate by sprinkling some chili powder for colour, along with some roasted cumin powder and some finely cut coriander leaves.

As I said earlier, there are numerous other kinds of raita, enjoyed all over India. And while I’m nostalgic for my mother-in-law’s Sunday lunch raita, this banana-mustard-cucumber combination I’ve shared above, the current favourite in my home is in fact the sweet and crunchy pomegranate raita. Do you have a variant that you make often? I’d love to know what you think of mine in the comments.


When I was growing up, Diwali was a time when my mother made an entire array of sweets and savouries, such that I cannot point out one as a single most important tradition. All that changed for me when I got married and moved into my new home, when I became introduced to what is now a 30 year tradition for me: the simple and sacred dish of laapsi.

Laapsi is a Gujarati sweet which, like sukhudi uses just three ingredients: jaggery, broken wheat and ghee. In modern versions, people often add nuts, saffron and other flavourings, but the original and deep-rooted traditional method is extremely simple. The three basic ingredients were and are frugal, humble and delicious. In the old days, every household could reliably find enough to make a festive offering. As with sukhdi, laapsi is also first offered as prasad to the gods.

Diwali always falls on amavasai day, or the new moon. Different communities observe their own sets of festivities. For Gujaratis, it begins with Baras (the 12th day towards the waning moon), then Dhanteras (the 13th day, during which we pray to the goddess of prosperity, Lakshmi), then Kali Chaudas (when the goddess Kali is worshipped, not only with a sweet, but with a fried vadai which is symbolically thrown over the shoulder at a crossroads, indicating that you wish to leave behind the previous year) – and then, we have Diwali, which is also Chopda Puja. Chopda means “books”, and this is the day on which we perform a prayer similar to Ayudha Puja in other communities, when all our instruments (from accounting books to cameras and ladles) are kept at the altar and blessed. The day after Diwali is the Gujarati New Year.

I lost my father-in-law earlier this year, and since Indian homes traditionally will not celebrate festivals for a year after a loss, we won’t be going the whole way this year. However, my father-in-law was full of life and spirit and did not believe in observing that grieving period. He believed the life cycle should continue. So while we won’t over-celebrate this year, I will also ensure that we won’t put a full stop to joy. I am sure that is how he would have wanted it too. We had a cool, chilled out relationship. We had many fights and arguments, but I always knew that everything would be taken in the right spirit. And he was someone who was a huge influence on me, in everything from changing my perspectives to gifting me my first camera.

I will certainly miss him this Diwali. Every Diwali, he would give everyone a special token, a crisp 50 rupee note. All of us considered it a lucky charm, and kept it in our wallets until the following year. Who will do it this year? Many recent incidents have reminded me how important roots and traditions are, and how necessary it is to respect them. This is why there are so many things that I insist on doing in a ritualistic way, like keeping the umbrella on Ganesh Chaturthi, and making laapsi on Diwali. I know my kids will not follow all the things that I follow, but at least a few of those traditions will become meaningful to them too…

And if I can be hopeful, I would absolutely name laapsi as one of the traditions I hope my children will keep and cherish. Although we have all became health conscious and started rejecting sweets, I still insist that everyone partakes of our Diwali laapsi.

This year, my mother-in-law has moved back in with us, and it is nice to have her home. It reminds me of all the times that she shared her culinary wisdom with me (such as when she taught me this kachori that many of you enjoyed too). Diwali is just a few days away, and I am calling to mind how I used to watch her make laapsi during the first ten or twelve years of my marriage. Slowly, she stopped coming into the kitchen as often and I began to manage more of the cooking. But for a long time, I would still ask her to come in for certain traditional dishes. Laapsi was, of course, one of them. Different families follow different methods in order to make their own traditions. I follow hers to a T: no garnish, no frills, just three simple ingredients made for God and family.

And just like my mother-in-law taught me, I will not serve laapsi on any day other than Diwali. I consider it sacred. My family and I wish you a very happy Diwali and festive season, and I hope that this special dish brings you sweetness and joy too.

Laapsi

(Yield: 2-3 cups)

Ingredients

½ cup broken wheat
½ cup jaggery
2 ¼ cups water
3 teaspoons ghee

Boil the water in a pot and add the jaggery to it. Stir until the jaggery melts. Then strain the liquid through a strainer, making sure that it is clean. Measure the liquid to check that you now have 2 cups of jaggery water.

Toast the wheat and ghee till slightly golden. This will take approximately 3 minutes. Now add the liquid to the wheat and cover with a lid. Place this in a pressure cooker for 4-5 whistles. Once you open the pressure cooker, you will find that the concoction is still soft. You can now place the pot directly on to a low flame. Cover and let cook until the liquid dries up and its grainy.

I prefer using the cooker as it lessens the cooking time. Alternately, pour the hot jaggery water into the wheat in the pan and allow to cook covered, on a low flame, so it does not stick to the bottom. Let it be on the stove until the grains are cooked perfectly and soft to the bite. Do not stir frequently as this may cause the grains to get sticky.

As I mentioned earlier, there are different ways to make this. I do hope you will find yours once you make this often enough. You don’t have to restrict yourself to an annual occasion like I do!

Typically, we serve the hot lapsi with ghee, powdered sugar and lentils.

Given the deep Gujarati-ness of this recipe and this post, I hope you’ll also take a look at some of my previous recipes that celebrate my traditional cuisine.


For someone who grew up disliking bananas, I’ve simply not been able to get enough of them this month! I hope you enjoyed my previous recipe for banana bread. There’s been a windfall of plantains on my farm, and so the fruit has found its way into several more dishes I’ve made lately. The recipe I’m sharing today adds a bit of crispiness to my traditional lunch thaalis. It’s so easy to make, and so difficult to resist. I really have gone bananas for these banana chips!

These chips don’t use the ripe bananas that we peel and eat when in need of a portable snack. Instead, they use unripe green plantains of the Monthan variety, which fruit in the 8th or 9th month after planting. They are not sweet, unlike ripe ones, but are edible both raw and cooked. Rich in potassium, iron and several vitamins, they are used in cuisines in Polynesia, Jamaica, and here in India of course. The banana tree itself is considered sacred in Hinduism, and is worshipped in some sects and used in wedding ceremonies. Not only the fruit but the flower too can be consumed, and food is traditionally eaten on a banana leaf itself.

I have a new gadget in my kitchen that I picked up on one of my travels – a nifty slicer that lets me quickly slice the banana directly over hot oil, so I was quite excited to use it when my sister taught me how easy these chips are to make.

Banana chips are made all over India, but they differ from state to state. The famous Kerala ones, for instance, are cut thicker and are bright yellow. These Gujarati-style ones are thin and reddish-coloured because of the spices used. They are called “kudkudiyas” – a bit of onomatopoeia, because of the “kud kud” crunch sound. They remind me of all my visits to Ahmedabad, and in fact my husband (aka The Dark Prince!) is so partial to them that I order them for him all the way from that city. Fortunately, everyone at home loves my banana chips too, so they can now have them fresh and not imported!

Gujarati-Style Banana Chips

(Yield: Approximately 1 bowl)

Ingredients

1 large raw plantain

Salt to taste

¼ teaspoon chili powder (or to taste)

¼ teaspoon powdered sugar

2 cups oil (for deep frying)

Heat the oil in a frying pan. Peel the plantain and wash it. Be watchful as it may be a bit sticky to the touch.

Slice the plantain and immediately drop the slices into the hot oil. If you use a gadget like I do, you can slice them directly over the pan.

Now reduce the flame to medium. Turn the slices around a few times until they turn golden.

Remove them from the oil, placing them onto an absorbent paper. Immediately sprinkle the salt, chili powder and sugar. Make them your way by adding spices of your choice, such as pepper or chaat masala. The trick is to add the spices as soon as they’re off the oil because this is the only way the spices will stick to the chips. Also remember that the thinner the slice, the crispier and tastier they’ll be. Store in an air tight jar. Enjoy the crunch!


This exact same recipe can also be used for sweet potato chips, if you prefer them to green bananas or find them more readily available.

I prefer using these homemade banana chips instead of any store-bought snack to add crispiness to our lunch thaalis at home. They are cleaner and healthier, and I know exactly what’s going into our mouths, so I don’t mind that they are deep fried.

Even though these banana chips are made in a popular and easy style, you will surely agree that every dish tastes different depending on the cook. Each home and each hand has its own flavour, despite the recipe being exactly the same. Even something as simple as banana chips will have a unique taste. When you try this recipe, be sure to let me know how yours tastes!

The Indian palate loves a good pickle, and Gujarati pickles are especially famous! Made from an endless assortment of vegetables and fruits, pickles became a vital element of the Gujarati thaali probably because they can be kept for long periods without fuss. For travelling communities like Gujaratis, this would have been a reliable way to enhance the flavour of any meal, anywhere.

Pickles are made based on seasonal availability, so there are no prizes for guessing that once again, it is mangoes  that feature in the recipes I’m sharing today. There are many varieties of mango pickles, depending on the region – today I share my takes on a spicy one, and a sweet one named chhundo.

Indian pickling methods are different from Western pickling methods, and primarily use oil rather than vinegar. Homemade pickles rely on the peak summer heat, and this is why mango pickles are especially popular throughout the subcontinent now, as the fruit’s harvest season coincides with the ideal climatic conditions to make them. When I was little, a year’s supply of delicious mango pickles would be left to roast on our rooftop for days at a time by my mother. I would go up there and watch them cooking under the sun, covered in fine cloth, and desperately want to stick my fingers in and take some out to relish immediately. Grated mango with the sweetness of sugar and the tang of salt, warmed by sunlight – irresistible!

What I share today is an “instant” version of this time-tested method, meant for immediate consumption. In our fast-paced lives, we don’t always have the right circumstances or patience for the traditional methods, but we can take inspiration from them. The time has come when I now make pickles for my parents’ home, all the versions – the sweet kind as well as the spicy kind, the kind for immediate consumption as well as the kind that can be preserved for up to a year, in glass jars just like the ones that lined the kitchens of my childhood.

And now, in my own kitchen, just like the spice boxes that many keep in theirs, there is a pickle box, very much a homage to my Gujarati heritage. Every friend who comes home asks to see it. It is a point of conversation: which one has jaggery, which one is spicy, where does each recipe comes from? I keep 5 or 6 in this box at a time, and chhundo is always the star.

Nowadays, despite all the masalas and spices from across India and the ingredients from abroad that fill our kitchens, we still reach for the humble pickle. Its sharp taste is a necessary element, without which a meal is not complete. I’ve watched countless times as Indian people are made to remove their precious jars of pickles from their luggage at airport security counters all over the world! The look on their faces as they watch their lovingly bubble-wrapped bounty being chucked into the garbage says it all. No matter where we go, the pickle must never be far from us!


Sweet Mango Pickle (Chhundo)

(Yield: 1 cup)

Ingredients

1 cup grated raw mango

1 ½ cups sugar

1 teaspoon coarsely ground cumin seeds

½ teaspoon salt

¼ teaspoon turmeric powder

1 teaspoon chilli powder


Place the grated mango in a pan. Add the salt and turmeric powder, and mix everything well using your hand, such that the juice is released from the mango.

Now add the sugar to the mango, and transfer to a pan. Place it on a medium flame. Stir gently to encourage the sugar to melt. In a few minutes, you will notice the sugar and mango bubbling away. Keep stirring until the sugar thickens slightly. When touched between your fingers it should be slightly sticky.  If you overdo this part, the sugar will crystallise, so be sure to turn off the flame before this happens.

My sweet mango pickle is usually stored for a few months, but this depends on the weather and storage conditions. I keep mine in a cool place, outside rather than in a cupboard. Always ensure that the utensils and jars you use when transferring or storing the pickle are clean and dry, otherwise it can quite quickly go bad.


Spicy Mango Pickle

(Yield: 1 cup)

Ingredients

1 cup finely cut raw tangy mango pieces

½ teaspoon salt

1 pinch turmeric

¼ teaspoon ground fenugreek seeds

1 teaspoon red chilli powder

¼ teaspoon mustard seeds

1 tablespoon oil


Place the cut mango in a glass bowl. Now sprinkle all the remaining spices. Keep aside.

In a small pan, add the oil and the mustard and cumin seeds. Wait till the mustard seeds splutter, and then pour the entire sauté into the bowl of cut mango. Mix well with a spoon.

This easy, spicy mango pickle is now ready. Store it in the refrigerator and it will last for up to a week.


Ripe mango, raw mango, spiced mango, sweetened mango – the possibilities really are endless for this beautiful fruit. These pickles are a way of incorporating this fruit into your daily meals. If you prefer it to be the star of the show, try out my ripe mango rasam or my curry leaf and raw mango cooler.

These lovely pickles are not only made for the traditional thaali, but can be eaten as a condiment for a variety of snacks. I even add the spicy pickle to cheese platters as it is quite versatile, and I recall how my friend Vikram once used the chhundo as a marinate for a shrimp starter. It was simply delicious. Be innovative, and be sure to let me know how you eat these pickles!

The lovely, versatile mung bean (also known as moong and green gram) found pride of place in one of my recent recipes for a street food-inspired snack, green moong bhel. If you tried your hand at that, its taste will be familiar to you even if you didn’t grow up eating it. The beauty of mung is that it can be in everything from a simple Sri Lankan breakfast to creamy desserts relished in South East Asia. Here in India, a Gujarati staple known as khatta mung is something I make quite often. It’s a particular go-to dish when I feel like I need to keep my weight in check, or to just bring a healthier balance into my meals. While it’s traditionally enjoyed with rotis or rice, I like to have it as a meal-in-a-bowl. Think of it as one more variant of an Indian salad, perhaps inspired by a more flavourful compact meal.

There’s a particular reason why khatta mung and other mung-based dishes are Gujarati staples. That’s because the humble mung bean is regarded as auspicious in my culture, and is even used in housewarming and other special ceremonies. It is a symbol of health, but is also affordable and accessible – so any family can have it. It is also of importance to Jainism, especially when devotees break their nine-day fasts. The very first thing that they consume upon doing so is a sip of mung water. Not only is it high in protein and energy-restoring, it also does not shock the stomach after the fasting period. You could think of mung as a traditional protein powder, accomplishing what modern glucose drinks do. Mung, both whole and split, is also consumed widely for every day meals, and some other classic dishes include mung dhokla (wholesome, steamed savoury cakes) and pesseretta (which is a crepe like a dosa).

“Khatta” literally means “sour”, and indicates the use of yoghurt in the dish. Yoghurt can be removed from the ingredients if you wish to make it vegan-style. There will not be much difference in the taste, especially if you add a twist of lemon for the tang. As with all Gujarati dishes, there is an interplay of sweetness and sourness in khatta mung, so I always add a hint of jaggery too. It lifts the saltiness of the dal and improves the flavours overall. Some people add garlic, onions and various condiments, but I personally feel that the more basic the dish is, the better it tastes. You’ll find that the spices remain the same for most dishes, but palates differ from family to family. I prefer simplicity, so that the original flavours are maintained and not doused with additives. Have you noticed how people today seek out cookbooks on how to simple eating and healthy cuisines, without recognising that that’s what was happening in their own kitchens growing up? As always, the unfussiness of my mother’s cooking style is what inspires my own work, although I am always curious and glad to learn – and always, to share what I learn as well.


Khatta Mung

(Yield: 3-5 cups)

Ingredients

½ cup whole moong dal

2+2 cups water

Salt to taste

1 teaspoon cumin powder

1 teaspoon dhaniya powder

¼ teaspoon turmeric

1 teaspoon jaggery

½ teaspoon chili powder

1 teaspoon ghee

¼ teaspoon mustard seeds

¼ teaspoon cumin seeds

2 tablespoons yoghurt

Soak the moong dal in water for an hour. Then, pressure cook the dal with 2 cups of water until the lentils are soft to the touch. Meanwhile, beat the yoghurt until it resembles a fine paste.

Empty the cooked dal into a pot and add the turmeric, water, salt, jaggery, yoghurt, cumin powder and dhaniya powder. Now, allow to boil for 7-10 minutes until all the flavours blend well.

In a small tempering pan, add the ghee. Once the ghee is hot, add the whole cumin and mustard seeds. They will splutter. Add the chilli powder and stir. Immediately, pour the sizzling tempering into the mung dal. Garnish with finely chopped coriander leaves. It is now ready to serve. You may eat it with rice, rotis and other kinds of breads – or even just by itself, a delicious and filling meal-in-a-bowl.

I like this spiced up version of the standard healthy meal-in-a-bowl which is usually comprised of millets, grains or legumes because it is flavourful without compromising on nutrition. And in true Gujju style, the hint of sweetness from the jaggery makes the whole pot irresistible! I like to finish mine off with a glass of fresh buttermilk… So filling, so heartening.

I hope you’ve been enjoying this series on traditional dishes made from leftovers (please see Part 1 and Part 2, if you haven’t already). To recap: in the absence of refrigeration, and because of the need to conserve resources, many cuisines in India and elsewhere developed sub-genres. These culinary sub-genres make use of extras either prepared during the initial cooking, or kept aside after the meal. Using these leftovers, a new dish is prepared. Fridges are really quite new for most of India. I remember visiting my grandparents’ home in Vijayawada one summer when they had purchased a huge fridge. It was such a novelty that neighbours would visit just to see the machine. Besides, not wasting food has long been considered a cultural virtue.

Today, the recipe I want to share with you is a classic go-to dish: masala curd rice, made in my mother’s Gujarati style. It was a staple in my house for Sunday dinner while I was growing up. This was because we had school the next day, and our mother would be busy helping us with our homework. In those days, we had no help at home, so our dad taught us how to iron our own uniforms and polish our own shoes. These tasks would keep us occupied on Sundays as we prepared for the school week ahead. By the time dinner came, we were usually too tired to think much. So we never minded the unfussiness of the meal. And mom, of course, was always relieved to make this easy dish.

Leftover rice is something that lends itself easily to a variety of dishes. For instance, there are theplas, which you may remember from this post on Indian breads. There are also muthias, which are made by adding flour and spices to the rice, rolling them and steaming them.

South Indians have their own methods too, including their own curd rice (known as thayirsadam), as well as pazhayachoru, in which rice is fermented overnight with a green chilli in it. This was originally a staple among farmers, who started their days early and needed to have a meal ready in the morning. You may be surprised to know that it is very healthy. The American Nutrition Association in fact recommends rice soaked the previous day as the best breakfast, with a host of benefits for the health including increased energy, decreased hypertension and good digestion.

This Gujarati Masala Curd Rice is yoghurt-based, which means that it is of course rich in probiotics and excellent for digestion. The spices used are available in literally every kitchen cabinet in India.


Gujarati Masala Curd Rice

(Yield: 1 ½ cups)

Ingredients

1 cup cooked rice

½ cup yoghurt

1 tsp chickpea flour

Salt to taste

1 dried red chilli (not too spicy)

A few curry leaves

¼ teaspoon turmeric powder

½ teaspoon coriander/cumin powder

Asafoetida (optional)

2 teaspoon oil

¼ teaspoon cumin seeds

¼ teaspoon mustard seeds

Remember: the key to the dishes in this Second Helpings series is their simplicity. This one in particular is so simple, yet so filling.

In a pot, add the oil and once it’s hot, add the cumin and mustard seeds. Wait till they splutter, and then add the red chilli and curry leaves. Immediately after, add the yoghurt and flour and stir so that the yoghurt does not split. Now, add all the remaining ingredients and stir.

Garnish with coriander leaves and serve hot. Gujarati Masala Curd Rice is a meal in itself, and is both flavourful and cooling. Ideal for summers, for light evening meals following afternoon feasts and as comfort food in general.

I hope you’ve enjoyed this Second Helpings series. I’d love to hear from you in the comments below about the dishes you make, or remember eating as you grew up, that fall into the resourceful, innovative category of “leftovers”. I’m sure your parents were so excellent at whipping up what seemed like a whole new dish that you didn’t always know that that’s actually what they were!

In my previous post, I gave you a fresh spin on the classic dal dhokli, a dinner staple made with leftovers from lunch. In fact, the use of leftovers was so well-designed in traditional cuisines that afternoon snacks would be planned in the morning, and dinnertime planned even while making lunch – and each would be built on the other. In India, no meal is complete without a sweet, and resourceful cooks through the generations also found ways to make sweet snacks using the remnants of a previous meal. Which brings me to the second dish of the promised trio in this series.

While I was growing up, my mother would often cook a little extra dal and rotli in the morning. Some of it would go into the lunch thali, and some of that would go into the evening’s dal dhokli. And she often found a way to make sure that there was just a little extra rotli to be turned into a wonderful after-school treat: rotli na ladoo.

Just as leftover-based dishes developed to fulfil practical needs like conserving supplies, snacks were often made at home because inexpensive candies and savouries were not freely available like they are now. The Chennai of my childhood wasn’t as developed as it is now, and we didn’t have the chips and junk food that the kids of today enjoy. But I consider myself all the more fortunate for it. From an early age, I was exposed to a culinary ethic that has kept me in good stead. Some of its features include: never wasting food as it is precious, using healthy and nourishing ingredients, and not tasting food while it is being cooked as it is first an offering to god (this trained me to be able to read a dish using sight and smell).

Today, my mother has difficulties with her eyesight but still cooks for herself and her family, using her hands and trusting the fragrances. There is so much wisdom in her kitchen, and when I visit her I still learn new things – and moreover, there are certain dishes, like her sabudana khichdi, that never taste quite the same to me when anyone else makes it. My daughter today makes those same demands of me, for things that taste of my heart and my love.

My very resourceful mother even attended a baking class when I was kid, a rarity in Chennai at the time. So our homemade snacks and sweets included some rather exotic treats occasionally, but the rotli na ladoo holds a place in my heart like no other. There are only three ingredients, and it takes all of three minutes to make it. Well, there is a fourth, secret ingredient. And you can guess what that is.


Rotli Na Ladoo

(Yield: approximately 10 pieces)

Ingredients

2 cups rotli (torn into tiny pieces or coarsely blended)

1/3 cup jaggery

1 tablespoon ghee

In a pan, add the ghee. Once it has warmed, add the jaggery. Allow it to melt, stirring continuously on a medium-low flame, making sure it doesn’t get burnt. When it starts to bubble after a few minutes, add the rotli bits and turn off the flame.

Once you’ve added the rotli pieces, mix everything properly. Now, it’s time to use your hands. Grease your palms and bind a handful of the hot rotli mixture together. Gently press between your palms to shape into a somewhat rounded shape, then very gently roll it. Be careful, as it may crumble. It’s as simple as that, but if you’re having trouble shaping the balls, you can eat the well-blended mixture in a bowl. It will taste the same, but will require utensils! Allow to cool, and enjoy.

The above three-ingredient method is assuming that you already have rotlis prepared. If you don’t, and are making them from scratch, the ingredients and method are below. Rotlis are essentially theplas without the masala and yoghurt, so if you’ve tried your hand at the recipes in this post on Gujarati breads, you should find this easy.

Don’t forget that if you have lots of leftovers from the method below, you can always make yourself some delicious traditional dal dhokli, or eat it with lavender shrikhand. The possibilities for breads are endless!


Rotli

Ingredients

(Yields: 12)

1 cup whole wheat flour

A pinch of salt

1 tablespoon sunflower oil

100 ml water or less

In a mixing bowl, blend the flour and salt. Now add the 1 tablespoon of oil. Slowly add water and continue mixing, until you feel the mixture is slightly tougher to the touch than bread dough. You do not need to use the entire 100ml. Allow to sit for half an hour.

Make small lemon-sized balls. Dust both sides of the ball with flour. Now, dusting more flour as you do, roll out the dough into discs. Make them as thin as you can.

On a heated iron pan, place the rotli on a medium flame for 30-40 seconds. Then turn it to the other side. Now increase the flame, lift the pan, remove the rotli using tongs and place it directly on the flame. Allow it to fluff or rise. Flip over so it cooks on both sides. Set aside and spread ghee over it. Repeat until all the rotlis are made.

I like storing these ladoos in a “rotli no dabbo”, a traditional box used for breads. It looks beautiful, but also serves a practical purpose. Notice the intricate “jali” work that rings the box. This is a form of ventilation that cools the rotli and removes moisture.


I have fond memories of eating rotli na ladoos in the afternoons, after returning home from school. They are so perfect with a glass of milk or a cup of tea after an exhausting day! It’s funny how torn pieces of bread can be turned into a delicious snack with a little jaggery, a little heat – and a pair of hands that make everything with love.

Do stay tuned for the third and final part of this Second Helpings series. Any guesses on what it might be?