Tag

India

Browsing

I think of begun bhajan, a crisp eggplant side dish, as being pan-Indian even though I know that it originated in Bengal. That’s because I have often encountered some version of it in South Indian meals as well. My own preparation uses long eggplants, typical of this region, rather than the big round ones that are used in authentic Bengali cooking. I love slicing and spicing the vegetable up to give a kick to a boring summer meal, when the heat makes us all feel more drained and something delicious and energising is always craved.

As a student of Macrobiotics several years ago, I learned early on that eggplant is a nightshade, and therefore only to be consumed in small quantities. The ubiquitous tomato is one too, by the way. My training remains in my mind in numerous ways, because of which I still find myself using eggplants only occasionally. Perhaps that’s why I find begun bhajan all the more exciting, since moderation is recommended. I’ve tried my hand at an eggplant parmesan before as well, and will share the recipe for that sometime too.

I also have a strong preference for consuming greens, so eggplants don’t feature that often in my market shopping anyway. That said, the vegetable is quite nutritious, as it is rich in antioxidants and low on carbohydrates.

In fact, I think that begun bhajan is a healthy alternative to dhoklas, which are commonly eaten in Gujarati households like mine as a tasty accompaniment. Of course, mangoes do the same job in this weather, but believe me when I say that begun bhajan is also a great pep-me-up. Or better yet, why believe me, when you can make some yourself?

My own journey with begun bhajan began in Kolkata, at the home of a friend who always has me over for a typically Bengali meal whenever I visit the city. After the first time I tried this dish, I began making a special request for it ahead of our meetings. She keeps saying that there is such a variety of other dishes she could prepare, but this is the one that I just keep asking for. My begun bhajan is not a patch on hers, but still I make it – more so because it always evokes memories of being with her in her lovely home, full of the art she collects, and with my friend herself always so well turned out in crisp sarees. Food is a complete experience. It’s never just what you’re eating, but also who you’re with, the space you’re in, the way it’s served. I hope this begun bhajan brings you much enjoyment too.

Begun Bhajan

(Serves: 4)

1 large eggplant

Salt to taste

1 teaspoon chili powder

½ teaspoon turmeric

1 teaspoon toasted cumin powder

1 tablespoon rice flour

½ teaspoon sugar

1-2 tablespoons mustard oil


Rinse and slice the eggplant. If making circular slices, each slice should be about 1 inch thick. I have used long eggplants, so I’ve sliced them lengthwise, as you can see in the images.

Mix all the spices, along with the rice flour, sugar and sugar. Sprinkle this mixture onto a plate. Place the eggplant slices over the mixture. Rub the mixture in well on both sides of each slice, using your fingers to spread the spices evenly.

Allow the spices to marinate for at least half an hour. The reason why I have added a bit of sugar to this is because it caramelises and gives the dish a nice colour. I also feel that it prevents the eggplant from becoming soft and soggy.

Once the slices have marinated, heat the oil in a shallow pan. Place the slices such that there is enough space to flip them over.

Allow to cook until they are golden and crisp on one side. Turn them over and allow to cook again.

Once they are golden on both sides, remove onto a paper and drain any excess oil.

Serve hot as an accompaniment to your usual Indian meal. This begun bhajan goes beautifully with dal and rice. By the way, if you are a pescatarian, you can use the same preparation method above for fish. You can also try the spice marination out with a variety of vegetables, including parboiled potatoes and cauliflower.

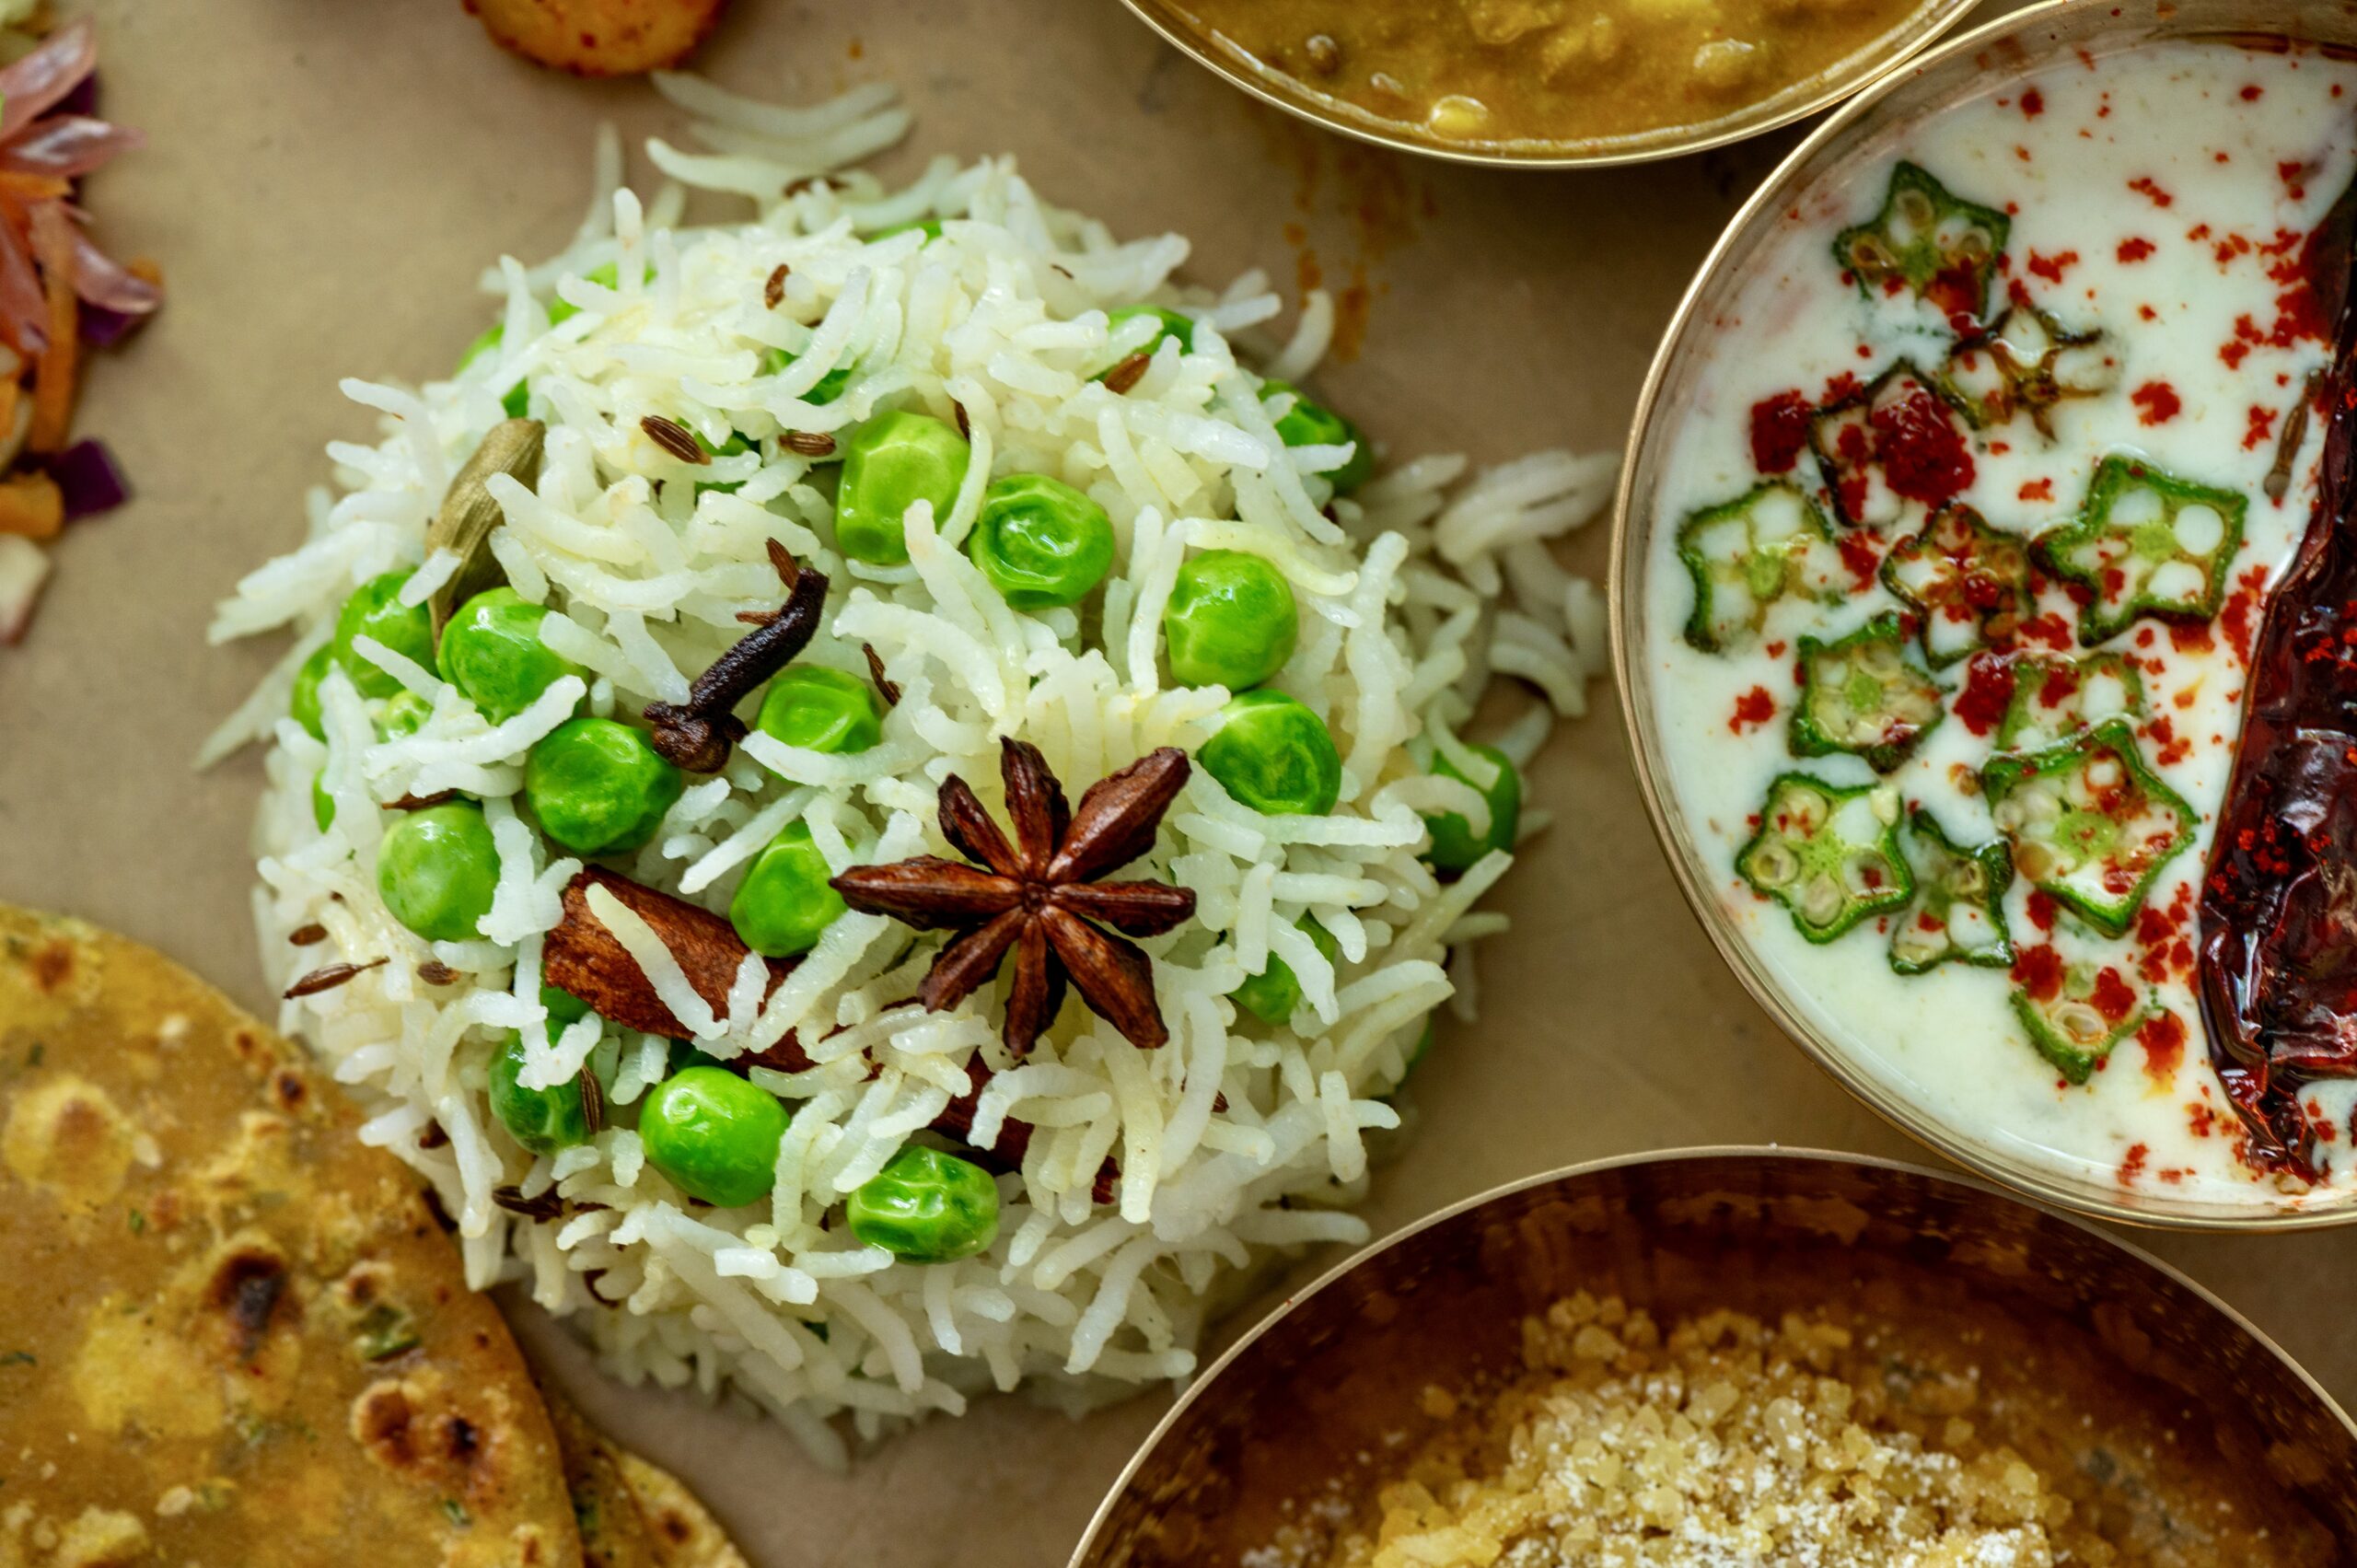
In the past, I have shared the recipes for Indian-style homemade yoghurt as well as for a typically Gujarati banana-mustard-cucumber raita and a slightly elevated cucumber raita. A raita is a cooling curd-based accompaniment that is usually served with biryani or any rice-centred meals, but I find it goes well even with upma and other dishes. Raita can be made in numerous ways, and as I keep reiterating on my blog when it comes to just about any popular food item, each household, each community and each region will have unique takes. I have tasted okra raita, which is quite delicious, as well as beetroot raita, which has a lovely colour. Today, because Spring is in the air and my mood too is bright, I have decided to make a colourful mixed vegetable raita.

When I say “Spring”, in my part of the world that means that we can feel the heat beginning to set in, and are in the phase immediately before the heat truly takes over. Here in Chennai, I am able to see lovely flowers everywhere right now: from mango flowers in the trees (the fruits will soon be in season, and you can expect several more mangolicious recipes from me soon) to hibiscus blooming in my garden.

Right now, it is a joy to go to the fresh fruit and vegetable market, as a variety of produce comes into season. When I travel, this happens to be my favourite pastime no matter which city I am in. I love to explore markets, taking photographs, admiring the colours, textures and arrangements. It feels like that here in my own city too right now – where strawberries, other kinds of berries and oranges are in abundance at the local market and inspire my creativity.

So this raita captures the vibrance that is around us during this time of year. I have used carrots, cucumbers, shallots and tomatoes along with mint and coriander leaves, so the raita has a mix of lively shades.

I have mentioned in the past that the desire to consume yoghurt at every single meal is the only thing that keeps me from going completely vegan. At the moment, I am trying to reduce my intake at least. Which means that if I’m only going to have some for one meal of the day, instead of all of them, why not make that dollop or two a little more exciting? That’s where this raita really comes to my rescue, fulfilling my craving while adding novelty to my basic but essential curd.

Mixed Vegetable Raita

(Yield: 1 bowl)

2 cups curd

2 tablespoons grated carrot

½ cup diced cucumber

¼ cup chopped purple shallots

¼ cup diced tomato

2 tablespoons coriander leaves

1 tablespoon mint leaves

Salt to taste

½ teaspoon ground cumin powder

¼ teaspoon chilli powder


Add the curd to a bowl along with the spices. Beat well.

Add the diced and chopped vegetables. Mix well. Adjust the flavours by adding more if required.

Pour into a serving bowl and garnish with some more of the spices as well as the green leaves. Serve as an accompaniment to a wide range of dishes.

This mixed vegetable raita is so simple and so summer-friendly that I am sure you will be preparing it often over the next couple months. It will be refreshing on your plate, especially if you like me are in a part of the world that’s getting hotter by the day!

In India, spinach is used in so many ways for so many types of dishes. There are hundreds of varieties of spinach that are grown here, and each is grown and therefore used during a particular season, and usually cooked in a certain way depending on the household or region. I have shared many recipes that use different kinds of spinach here on this blog in the past – from moringa (murungakeerai) in an omelette to amaranthus (araikeerai) in a savoury vadai and palak (Spinacia oleracea, what is known simply as “spinach” in the West) in a corn bake. This is a dal that utilises common purslane, or paruppu keerai, which is abundant in summers. This green grows at this time according to Nature’s wonderful logic: its thick leaves hold water and provide added hydration for us who consume it now.

Purslane is a kind of weed that has a range of health benefits, including reducing the risk of cardiac and digestive ailments. It is rich in antioxidants and minerals. Coupled with lentils, which are great for protein, this spinach dal becomes a nutritious dish that can be paired with rice or rotis. The Tamil word for this green, paruppu keerai, literally translates to “dal-spinach”, as that is its primary form of preparation.

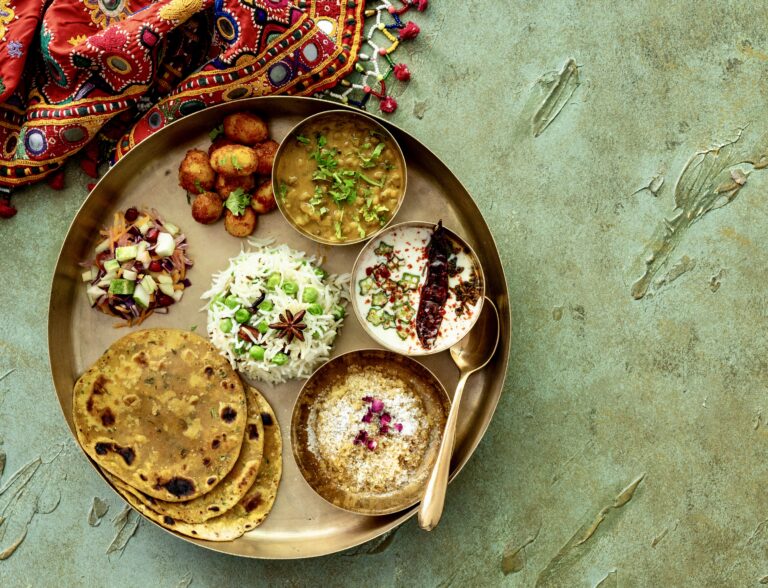
I would call it my good fortune to be a Gujarati who was born and brought up in Tamil Nadu, so I am able to understand the cuisines of both states. This is a typically South Indian recipe, and I enjoy it alongside my Gujarati-style vegetables, some rice and a dollop of ghee. This combination is a standard on my plate. I realise that my particular upbringing is what brings these eclectic dishes together, and I think about how that’s one of the things that is beautiful about India. Just like all kinds of distinct cuisines can appear within a single thali and complement each other, so too can we as diverse humans enjoy being together.

Speaking of being together and enjoyment, we just had a huge celebration in the family. As with any such occasion, we ended up eating so much rich food, and of course, lots of sugar. The time has come for us to eat light and healthy, to detox our bodies. Spinach features at home a lot right now, and it was only natural for me to want to share with you this particular dish that I’m making frequently. My daughter is here for a few days, post-celebrations, and eager to learn more recipes, and I’m teaching her this one on this visit too.

I went through a phase once when I wanted to have greens every single day. My understanding is that when a person has a craving like that, the body either has a deficiency or is heading for one. At that time, I heeded that craving without guilt, especially as greens are always good for us. Imagine if all our cravings were only for the most nourishing ingredients!

Nowadays, some kind of spinach appears on my table at least thrice a week, in one form or another. As I said earlier, there are varieties available year-round and interesting recipes from different parts of India to keep trying out. I’m thinking about the assortment that I know, and the new ones I want to learn, and also marvelling at how innovative it is that there is even a spinach pickle (using sorrel leaves or gongura, which are very popular in Andhra Pradesh and Telangana).

Right now, of course, it’s purslane that is popular in my own home, so to return to this spinach dal: the fragrance of this dish somehow always reminds me of being in the kitchen as a child when it was being cooked by my mother. I am not sure why, but I associate this dish with South India to the extent that even when I cook it myself in Ahmedabad or somewhere else, it just seems different. Despite that, I do enjoy it anywhere. It always brings me back to a sense of home, and when cooking and eating it while away, I can’t help but think, “Gujarat in the air, but South India in my thali.”

Spinach Dal

(Yield: Serves 4)

½ cup toor dal (pigeon pea)

Water to pressure cook

2 cups spinach leaves

2-3 tablespoons finely chopped onion

1 tablespoon finely chopped tomato

2 cloves garlic

1 tablespoon sesame oil

1 teaspoon mustard seeds

Salt to taste

½ teaspoon turmeric

1 green chili


Rinse the dal, then pressure cook with the required quantity of water. Set aside.

Heat a pan and add the oil. Now, add the mustard seeds and let them splutter.

Next, add the onion, garlic, tomato, salt and turmeric. Sauté for a few minutes on a medium flame and immediately after, add the green chili.

Finally, add the spinach and sauté again.

Once the spinach becomes tender, add the dal and allow it to boil for a few minutes until the flavours come together.

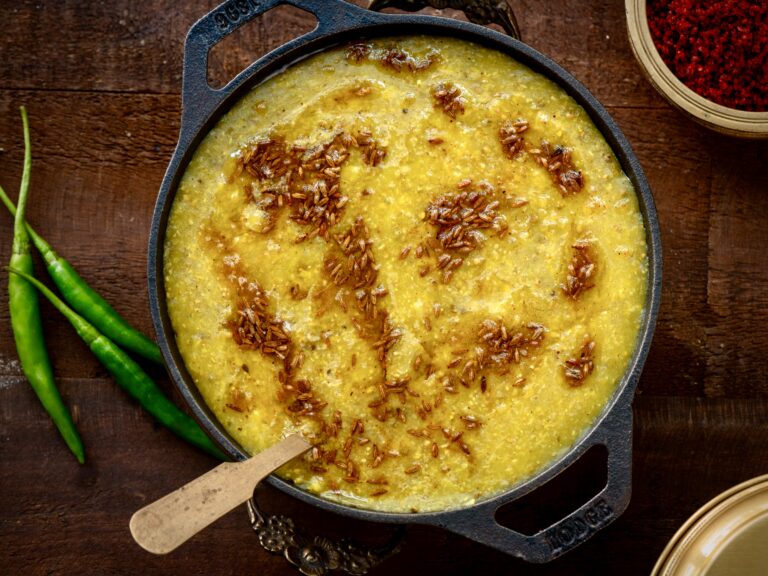
Your purslane dal is now perfect, and ready to be served hot alongside rice or roti. It will give you a great boost of nutrients. Perhaps it will even become one of your own most craved comfort dishes!

I am among a lovely group of friends who make it a point to carve out time from our respective schedules and meet often. We are always there to entertain one another, to lend an ear during times of trouble, and to celebrate birthdays and other special occasions. At least once a month, we get together just to catch up – sometimes these are wine evenings, and yes, sometimes these are “whine” evenings too, but all said and done we just love to have fun! A part of having fun means taking the pressure off any individual to cater and host, so we usually have potlucks. We come from different backgrounds and have different culinary skills and styles, so we wind up enjoying an eclectic spread. My forte is homemade cakes and desserts, although I’ll occasionally bring a salad along. One particular friend in this group is famous for her paneer and corn cutlets, and in the spirit of creating even more fun, here is the recipe for it.

Whenever she brings her cutlets to our gatherings, we simply swoop down on them as they are amazing. We never tire of eating these, and she was generous with the recipe so that we could all have them more often too. For me, they called to mind my mom’s cutlets, which utilized potatoes rather than paneer. I made some tweaks, as I usually do, and this recipe is a combination of both of theirs.

This is a bit different from the usual cutlets that have only a single main ingredient. You can choose to substitute either the paneer or the corn with a filling of your choice. For some inspiration, you can check out some of my cutlet recipes from earlier too.

I chose to use paneer as I try to avoid using gelling agents like potato, cornflour and breadcrumbs in my cutlets to make them healthier. You can certainly use these if you prefer, especially as you will get a firm and thick cutlet with a proper shape if you do. Mine are softer, and cooking them in a flat pan can be a bit more difficult. I use a non-stick pan with very little oil and cook each cutlet on both sides. I don’t deep-fry them, so that they make for a somewhat more nutritious snack or starter.

Aside from my girly gang, my family also love these corn paneer cutlets, so I try to use them in versatile ways. Aside from being served with a dip or chutney, they also work well as patties. The large ones can even be served as the main part of a meal when you are avoiding grains. To make them bigger, you’ll need to dip them in egg and breadcrumbs, in that order, and pan-fry them. Then, layer them with vegetables and bread and have them as burgers or sandwiches. The mini ones can be turned into sliders too.

Corn & Paneer Cutlet

(Yield: 6-10 pieces)

1 cup grated paneer

½ cup whole corn (finely chopped)

1 teaspoon ginger green chili paste

1 teaspoon garam masala

1 teaspoon chaat masala

2 tablespoons coriander leaves (finely chopped)

Salt to taste

2 tablespoons oil

In a bowl, mix all the above ingredients using your fingertips.

Now, make small discs. Press them well so that they do not split while cooking and are slightly flat.

Add some oil to a heated pan and place the flattened discs on it.

Do not move them too much or flip them too quickly. Allow to cook on one side and only then gently flip them. Let them turn a golden colour on both sides.

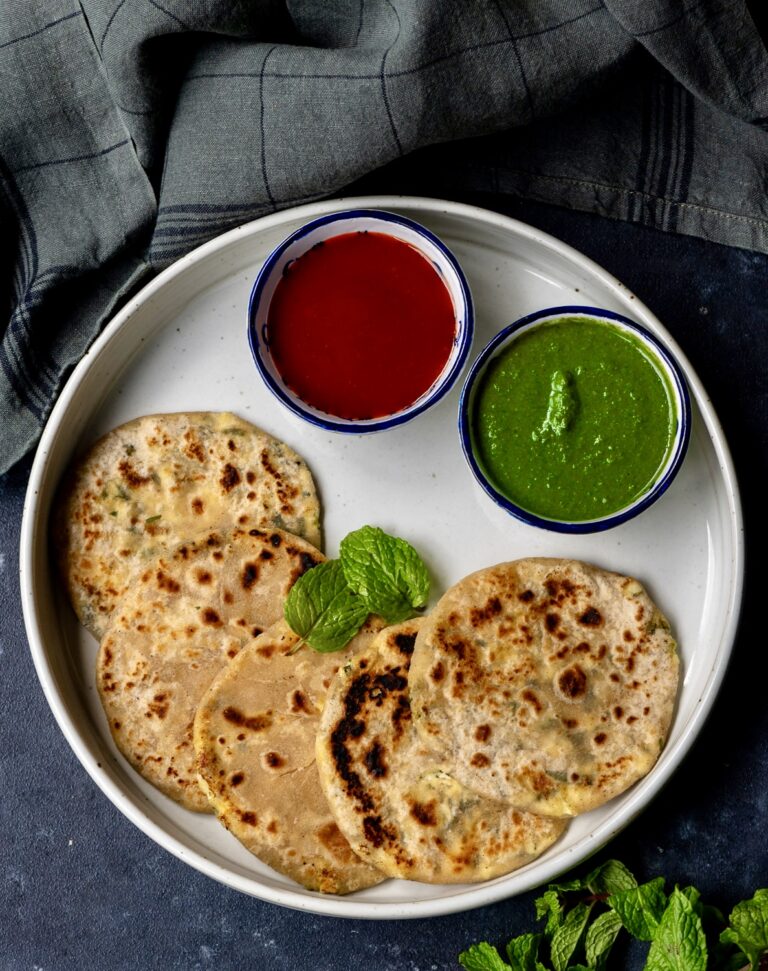
Remove them and serve hot with a chutney of your choice.

Personally, I love making them bite-sized and popping them into my mouth with green chutney. As with many things, these corn and paneer cutlets are even better in the right company! I hope these make their way into your potlucks and parties too.

We entertain very often at home, or at least we used to – especially when our kids were growing up. With three kids, some friend or the other of theirs would invariably always be around, and I was constantly thinking of what to put on the table that would entice them all to eat well. Some idly and dosa batter, made from scratch as I shared in my previous post, would always be in the fridge, and I discovered many years ago that I could use it innovatively. Most children are attracted to waffles because of their aesthetic, and I found that presenting a dosa with veggies in this form was quite appealing to them. While it was not the sweet treat they were used to, they enjoyed the presentation itself – and dosas of course are always tasty, too.

My last batch of dosa batter, which I prepared for my photoshoot for the previous recipe, inspired me to take my waffle iron out and return to this nostalgic favourite of the family’s. I recalled having made handvo with this device in the past too. I am sure that parents all over the world have similar recipes and tricks to keep their kids intrigued by food, while also eating nutritiously. I have always loaded my dosa waffles up with carrots, coriander and bell peppers, so that there is more goodness in every bite, and still do. They pair with any type of chutney that you would usually consume a regular dosa with, and I have quite a few options among those for you to explore on this blog as well.

I too enjoy how these dosa waffles present themselves, in attractive shapes that are just as good for a bit of novelty for your guests or for yourselves as they are to serve to children. They have started to become a dinner dish for us nowadays too, just for fun.

Speaking of fun, I must confess that I have a weakness for buying gadgets for the kitchen, and often have to control myself when it comes to these appliances. My latest affection has been for a Cuisinart food processor. I may have too many such items, but occasionally one of my now grown-up children will drop by and say “Hey, cool gadget”. Then, I’m happy to give them the device and downsize, knowing that I’ll be contributing to their own kitchens and culinary memories.  I fondly recall how the time when I first acquired a waffle iron was very exciting for me, and I enjoyed how it also doubles up as a sandwich maker. Then, I learnt it can make quirky dosas too!

While I share below a simple recipe for how I make dosa waffles, remember that you can experiment with ingredients of your choice. I think that if they are spiced right, they can even replace teatime sandwiches. They’re just as good for breakfast. And of course, I know for a fact that they are perfect to put in children’s lunchboxes to send them off to school with!

Dosa Waffles

(Serves 5)

4 cups dosa batter

½ cup grated carrots

2 tablespoons coriander leaves (finely chopped)

¼ cup chopped onions

A pinch of salt

1 green chilli (finely cut)

2 tablespoons green bell peppers (finely cut)

1 tablespoon oil

In a bowl, add all the ingredients and mix well.

Heat a waffle iron and drop a ladle full of batter in each section. The batter will spread. Use the waffle iron as per manufacturer instructions. Close gently.

Cook until golden. Serve your dosa waffles hot, with a chutney of your choice.

I hope the look of the waffles brings novelty to your mealtimes and brings a dash of innovation to your daily dosas!

Growing up in Chennai, idly and dosa and other South Indian dishes were home food for us, comfort food alongside Gujarati dal and dhokla. Of course, home food – usually made from scratch – was the norm as there weren’t as many restaurants back then and going out to eat was a luxury. This applied even for staples and simple fare, which are now just as easily available as fine dining. While you can now buy dosa and idly batter at a drop of a hat, and the convenience is great, I still prefer to make it myself. This recipe is for those who, like me, would like the reassurance of knowing exactly what goes into every plate you serve yourself and your loved ones.

Dosa and idly batter is much easier to make than many think. It uses rice which has been boiled and processed in a mill after harvesting, which is sold as idly rice. It requires fermentation, and the humid temperatures in this region are conducive to that. You can use the same batter for kuzhi paniyaram, a kind of dumpling, too. In fact, when I was growing up, this is usually the order in which we consumed each batch: the first day was for idlys, the second for dosas and the last leftover batter was used up in kuzhi paniyarams.

To this day, I find a special joy in waking up in the mornings and seeing that this batter has risen overnight, sometimes so high that it knocks the lid off the pot! That’s the sign of a great breakfast to come, although the delicious things you can prepare with this can be eaten at any time.

You can get fluffy, soft idlys and crispy dosas from the same batter. It’s all about the preparation method. In the recipe below, I share the method for making dosa, which is pretty straightforward and which pairs well with chutneys and sambars too. As for idlys, they are steamed; some people do this in a microwave, but I’m not a fan of that gadget and I love hot idlys from a traditional steamer with my preferred chutney or a sambar. The trick to them is to not beat the batter, as one does for a dosa, but to be gentle both while mixing and while dropping the batter into the tray. In the next post, I have a bit of a surprise, using the same batter. First, however, this is how you make the batter, and how you make a dosa!

Dosa & Idly Batter

(Serves: 6)

3 cups boiled rice

1 cup urad dal

2 teaspoon methi (fenugreek) seeds

2 + 2 cups water

Salt to taste

Wash and soak the rice, urad dal and the methi seeds separately for at least 6 hours or overnight. I recommend around 10 hours.

Dispose the soaking water. Add 2 cups of fresh water and grind the urad dal and methi seeds finely, using a wet grinder or blender. Set aside.

Now, grind the rice with 2 cups of fresh water until you get a fine consistency.

Pour the rice batter over the dal batter. Add salt and mix gently using your hands.

Cover in a big pot and allow to ferment. The size of the pot matters so that the batter has space to rise. Well-fermented batter doubles in quantity and is sour. When stored in the fridge between uses, it will remain fresh for 3-4 days.

Here are a few more tips: the trick behind making a batter that can yield both a crisp brown dosa and a soft white idly is the proportion of rice to lentils. To make dosas even crisper, add some poha or rice flakes to the batter while grinding. Some people also add rava. However, I personally feel that the use of a heavy iron pan and adequate ghee or oil contribute more to crispness than these other techniques. Use only parboiled or boiled rice to make dosas, and only husked urad dal. Adding fenugreek increases the fermentation and makes for a tastier dosa.

As I said earlier, you can use this for dosas, idlys and kuzhi paniyarams. Here is the method to prepare dosa, a South Indian crepe that is staple in this part of the world.

Remove the required quantity, and gently mix the batter with a steel spoon. Heat a cast iron pan or tava.

Once it is hot, sprinkle some water on the pan. When it sizzles, you know that it’s the right temperature. Take a ladle full of the batter and pour it into the centre of the pan. Gently, using a circular motion, spread the batter on the griddle, similar to making a crepe. Use a teaspoon of ghee or oil and spread drops of it onto the dosa.

Allow it to cook on high heat, until you see it turn golden at the bottom. Gently, with the help of a spatula, lift from the edges and flip for no more than a few seconds. Now fold the dosa and serve hot. Accompany it with sambar, chutney, curry or podi – the choice is yours.

I hope you’ll begin making your idly and dosa batter from scratch too. It’s an easy process, and I am sure you’ll enjoy both the preparation method as well as consuming the results!

As I mentioned a few posts ago, we have a new addition to our family: a daughter-in-law, as one of my sons is getting married. There is newness all around me right now: a new year, with new changes and new surprises. There is a lot of mutual love and acceptance, but there is also a great deal of learning – both on a personal level as well as in the form of new experiences. This is true for every one of us at this time, as the family expands and we adjust to that expansion, even if joyfully. This coconut chutney, which has a twist, comes from my daughter-in-law’s culture in Coorg, South India. It is a delicious take on a classic, and we love it so much that it has now become the only kind of coconut chutney that we make at home.

I have shared a wide range of chutneys on this blog: from peanut chutney to plum chutney, and much in between. Despite also sharing a variety of coconut posts over the years, the two had not come together so far. So I’m thrilled to share this less-than-typical, and very tasty, coconut chutney. The method is exceptionally simple, and if you already have a standard coconut chutney in your own repertoire, you will find this an easy upgrade.

I would love to share more recipes from Coorg as I myself begin learning more over the coming years. I hope you’ll enjoy doing so alongside me, too.

As I said earlier, the learnings are myriad. Becoming a mother-in-law is a whole new chapter of my life. I am sure it won’t always be easy, but I look forward to a lot of togetherness. I hope to apply all the lessons I have learned over the decades about open-mindedness, warmth and sincerity. When I think of my kids and how I have accepted their loveliness and their quirks both, and how they have also been welcomed by so many, I know that we can all find it in our hearts to grow together. I wish also that we can be caring and thoughtful towards each other in the world at large, and instil harmony everywhere.

It’s about accepting differences, of course, but it’s also about celebrating them. I can think of no better way to do this than through food. So without further ado, here is a Coorg-inspired coconut chutney to usher in bright times for us all!

Coorg-Inspired Coconut Chutney

(Yield: 1 cup)

½ cup grated coconut

Marble-sized tamarind pulp (soaked)

2 green chillies

A small piece of ginger

2 tablespoons water

Sugar to taste

Salt to taste

In a blender, add all the above ingredients and blend to a smooth texture. If you require the consistency to be thinner, add more water.

That’s it. Now that your chutney is ready, serve with dosa or idly. Stay tuned for upcoming posts on preparing the batter for these, as well as a special and fun way to enhance your dosa experience!

Kesari is a very common Indian sweet, one that can be prepared in a jiffy. Thus, it is perfect for when unannounced guests show up. Rava or semolina is the core ingredient, and most Indian kitchens will have some, alongside the other required basics. I find that it’s very useful to know a few simple desserts – whether to serve to guests or to satisfy one’s own cravings – and this kesari perfectly matches both requirements.

Kesari is named because of the traditional use of saffron or “kesar”. It is known in Gujarati as “sheero” and is also called “sooji halwa”. Saffron imparts a light yellowish tinge to the sweet, which is usually heightened by colouring. That is, if the spice is used at all, since it is an optional flavour and can be quite expensive. I have chosen to stick to the natural appearance of this sweet, and to avoid artificial ingredients. I have also used saffron – authentic Kashmiri saffron from my trip there this year. I have been fortunate to receive as gifts several boxes of saffron from other parts of the world, but I remain partial to what is grown in this region. However, you can prepare this recipe with colouring and without saffron, based on your preference or convenience.

And convenience really is the basis of the popularity of kesari. It can be made so quickly, and as I said earlier, its main ingredients are usually on hand. The reason why rava is almost always in an Indian kitchen is because it is so versatile. You can make upma, dhokla, porridge and so much more with it – which means it is ideal for savoury food as well as sweets like this one. It can be the base for either dessert, or for dinner – or both. There are numerous variants: refined wheat rava, wheat rava, rice rava and so on. I have used sooji, which is refined wheat rava.

Our mom seemed to make kesari very often in our childhood. It was what she whipped up as a treat whenever we came home from school with good grades or an achievement. While this demonstrates how kesari is ideal for celebrating unexpected joys, I also recall how it was made lovingly and with anticipation for certain special occasions too. For instance, it was usually kesari that was served to us as a greeting when we arrived at our dear grandparents’ home in Vijayawada. It was that “something sweet” that they had ready to welcome their daughter and her family – all of us – after our long journey to meet them. In these ways, it is a part of many memories of mine. If you make it frequently, it will become a part of many cherished moments of yours too.

Kesari

(Serves 4)

1 cup rava

¾ cup sugar

3¼ cups milk + water

8-10 split cashew nuts

8-10 raisins

75 grams ghee or clarified butter

A pinch of cardamom powder

A few strands of saffron in 1 tablespoon of milk


Add the ghee to a kadai. Once it has heated, add the split cashews and stir until golden. They darken quickly, so keep the flame low. Remove the cashews and set them aside. Repeat this process with the raisins.

Add the rava to the remaining ghee in the kadai. Roast on a low flame. Simultaneously, in a separate pot, add the sugar and water and stir until the mixture starts bubbling. The sugar water will be boiling while the rava turns golden. This will take about 15 minutes. Keep stirring the rava, ensuring the flame remains low.

The sugar quotient I have used is minimal. Add more if you prefer. I have not added colouring, but you may if you prefer to.

Then, gently add the boiling sugar water to the rava. Maintain a little distance between yourself and the pot as the contents may splutter. Stir. Add the saffron. Cover with a lid for five minutes.

Next, add the cardamom powder, along with the toasted cashews and raisins. Mix gently.

Your kesari is now ready to be enjoyed. You may wish to spread and slice it and then use cookie cutters to make shapes, or simply scoop it out and serve it. I suppose it depends on if you’re making it with or without advance notice. I hope you find this process simple and quick, and will now be able to add this easy dessert to your repertoire!

The monsoon returns to South India around Deepavali and the festive season, yet it causes no dampener at all to our spirits of enjoyment and our desire to cook – especially when it comes to snacks. Vadais are deep-fried dumplings that are common in South India, and can be made in a number of ways. To make this type, I reached out for a delicious local green, known in Tamil as araikeerai and in English as spleen amaranthus. Deep-fried it may be, but the use of this regional spinach can give one the sense that this dish is at least remotely healthy! We absolutely love it at home, and eat araikeerai vadai more often than we do traditional Gujarati treats of a similar kind. I’m quite sure that once you try this recipe out, you will feel just as addicted too.

Spinach varieties are aplenty in Tamil Nadu, and araikeerai is currently in season. It is a protein-rich green, and is also great for digestion as it is rich in fibre. Iron, vitamin C and antioxidants are some of the other nutritious elements of this vegetable. I love to add a large amount to my vadai batter. I find it really enhances the taste. Araikeerai has a pleasant flavour, one that isn’t very distinct and doesn’t take away from the crunchy yumminess of the vadai. You may wish to substitute it in this recipe with a local, seasonal green of your choice.

As you may already have guessed, this is the kind of snack that sneakily convinces your children to consume more greens, a bit like the way this roasted tomato soup incorporates gourds and carrots, or perhaps more straightforwardly like this kid-friendly spinach and corn bake. I’m glad to say that it is also pleasing to the elderly, who can be just as fussy in their tastes as little ones. My octogenarian mother-in-law is crazy about araikeerai vadai, and it’s a frequent feature at home these days as she enjoys it so much.

As far as accompaniments go, a coconut chutney is traditional. I recently started making mine with a twist that was learnt at my new daughter-in-law’s home. I will share that recipe soon, to add to the collection of chutneys on this blog.

I said earlier that rainy weather doesn’t get in the way of our desire to cook, but actually, it is a little more than that. I have noticed that Indians have this thing – somehow, rain inspires us to prepare and consume more! All across the country, I have seen families whip up bajjis, vadais and all kinds of fried tastiness at the first sight of a drizzle. To be honest, I’ve never understood the association between the weather and the food made, but to me it feels like an extension of the festive season. Come January of course, everyone seems to run to the gym and talk about calories – but such is the cycle of life! In the meanwhile, during this season, we are free of guilt – and free to gorge on the good stuff.

Araikeerai Vadai

(Yield: Approximately 10 pieces)

1 cup chana dal (split chickpeas)

1 bunch araikeerai (equal to 2 full cups of spinach)

Salt to taste

1 onion (finely chopped)

1 green chilli (finely chopped)

1 tablespoon ginger and green chili paste

A handful of curry leaves

Oil for deep frying


Soak the chana dal for 4 hours or until tender to the touch. Drain the soaking water. Rinse.

Remove the stalks and chop the araikeerai finely. Rinse in running water.

Add the dal to a blender and grind coarsely. Do not add water. Put the ground dal into a bowl. To prepare the batter, add the salt, green chili, araikeerai, ginger and green chili paste, curry leaves and onions. Mix well. Allow this to sit outside for 1-2 hours, or refrigerate if frying later.

Heat the oil in a kadai. Once it’s hot, make discs the size of a lime and flatten them, using your palms. While making the discs, ensure that the edges are perfectly rounded. Drop each into the hot oil gently. Fry on a medium flame. If you feel the vadais are crumbling as they fry, add a spoonful of rice flour. Allow to cook on both sides, flipping them occasionally, until dark golden. Drain onto a paper.

Serve hot with a chutney or a dip of your choice.

I hope this delicious araikeerai vadai gives you something to look forward to on a rainy day – or any day, really!

There are numerous milk-based sweets that are very popular in India, and several have made appearances on this blog over the years, as you can see here. While they are all fantastic, for this Deepavali I was thinking about making something that doesn’t require milk. This recipe is great for lactose-intolerant people, and can be tweaked and made vegan (all you have to do is to replace the ghee with your usual alternative). Additionally, the dessert I came up with is millet-based, so it is extra nourishing. Here it is: foxtail payasam.

Foxtail payasam, strictly speaking, is not quite my own recipe, even though I’ve substantially played with the basic ingredients. As a payasam, it can be said to be traditional in South India, where they are a well-known category of dessert, eaten often and not just on festive occasions. Here in Tamil Nadu, foxtail millet is known as thinai and is a widely-known native produce. Like all millets, it is nutritious and versatile.

Many of us have become conscious about our eating choices and have brought millets into our diets over the last few years as a white rice replacement. Even the Tamil Nadu state government has been promoting their use, and so has the United Nations. This is something that I’ve advocated for as well, across many recipes.

In terms of payasam, I think the paruppu payasam (made with dal) is probably the most common. I always reach out for it whenever I have a banana leaf meal at a South Indian restaurant. It uses dried coconut bits and also contains jaggery, which is healthier than sugar yet satisfies my sweet tooth. Drawing inspiration from it, but adding my own twist, I have opted to use coconut milk in my foxtail payasam. The coconut milk, along with a cashew garnishing, adds a richness to it. You may also wish to use raisins, and reduce the jaggery quantity accordingly. Or you may want to use coconut sugar instead of jaggery. You may even want to replace the millet itself, just as you can also replace the moong dal with toor dal.

If you are a young adult making festive goodies for the first time, this is an ideal recipe for you to try wherever you are. It is simple and utilizes easily available ingredients. The world has become a smaller place, and I have no doubt that you’ll be able to find them even if you’re spending Deepavali away from home.

I have a South Indian daughter-in-law now and I wanted to prepare something this year that is familiar to her and the region she comes from. Thus, this foxtail payasam serves as a welcoming sweet for her as she enters our family. It is her first Deepavali with us, so it is really special. This recipe is for her, most of all. It is also for my sister, who always asks me to show her something new from South Indian cuisine whenever she visits me, and is very curious about what I am making at this time of year. It goes without saying that it is also for you: I wish you and your loved ones a blessed festive season, and much joy ahead!

Foxtail Payasam

(Serves 4-5)

25 grams moong dal (green gram)

60 grams thinai millet (foxtail)

¾ cup jaggery

2 + 1 cups water

1 cup coconut milk

1 teaspoon ghee

A handful of cashews

Rinse and soak the moong dal in water for at least an hour. Strain the water and set aside.

Roast the thinai in a pan for a few minutes or until it releases an aroma.

Next, add the thinai to the strained dal and add two cups of water. Place these in a pressure cooker and cook until tender. Remove the pot once cooled.

In another bowl, add jaggery and to it add one cup of water. Boil this mixture until the jaggery has melted. Strain this liquid and add it to the dal-thinai mixture.

Allow to cook until it all comes together. Finally, add the coconut milk, mix well and turn off the flame.

To garnish: heat the ghee and add the roasted cashew nuts. Toast until golden. Sprinkle over the payasam. Serve hot.

I hope you’ll enjoy this delicious, nourishing sweet this Deepavali and for many years to come!