Tag

food

Browsing

Egg fritters are a new discovery of mine. I encountered them on some travels in the last year or so and have been enjoying them ever since. In addition to enjoyment, there is the nutrition aspect too. I may sound like a stuck record when I talk about increasing protein intake, but I truly believe that it’s a necessity for most if not all of us. This is true especially if we do any form of exercise, but even otherwise. We need to rethink our thaalis and our misconception that dal fulfils our protein requirements. The entry of more egg dishes into my own diet is how I’ve been meeting these needs. These egg fritters also bring some novelty in for me, something different from the same old, same old (which can get boring). That sense of uniqueness is what makes exploring new dishes interesting.

I first tasted egg fritters in London, where I had ordered them off the menu because I was intrigued by their name. I was quite pleasantly surprised by how good they were. As I ate, I tried to deduce what had gone into the recipe. This is a habit of mine when I go out to eat and when I particularly relish a new dish or a refreshing version of a familiar one. I have a constant curiosity when it comes to anything culinary, and where it isn’t possible to ask for a recipe (as I would if I was eating in someone’s home), I usually try to figure it out myself.

I did the latter in this case, and that is how I came up with an egg fritter recipe that sated my curiosity, my cravings as well as my nutritional needs.

This is a relatively new recipe to me, so I have yet to make a lot of memories with it at home, with my friends and family. I love this rendition, but I do still order the egg fritters at the eatery in London where I first tasted them whenever I’m in the city.

In this version, I have used green vegetables because they are aesthetically attractive, as well as really good for us. You may want to substitute the vegetables I have listed for ones that you prefer. Colourful bell peppers may work nicely. Just make sure that all the veggies used are chopped well so that the fritters cook better.

These egg fritters are obviously a breakfast dish, but they’re also great in case you need to pack something quickly for a commute. I think they would also work very well in lieu of a burger patty. That’s something I’d love to try out myself. It could also be interesting to have them on an open sandwich along with toppings or dressing. Now that these egg fritters have entered my life, I’m excited about the many ways I can enjoy them!

Egg Fritters

(Yield: 6 pieces)

3 eggs
Salt to taste
1 full cup zucchini (grated)
½ cup onions (finely chopped)
2 tablespoons coriander leaves (finely chopped)
½ cup broccoli (grated)
2-3 tablespoons rice flour
2 tablespoons bell peppers (finely chopped)

In a bowl, add the eggs, grated zucchini, broccoli, coriander leaves, onions, rice flour, bell peppers and salt. Mix well.

Add some oil in a heated flat pan. Using a ladle, drop a big spoonful of the mixture onto the pan. Press with the back of the ladle to make a thick fritter. Use a cup or a ring if you can. Here is a tip: while pouring the batter on the pan, the egg may drain on the sides. Once the egg cooks a little push it back with the help of the ladle. This will help in making the fritter achieve an almost round shape.

Add as many as you can on the pan. Cover for a few minutes on a low flame and allow to cook on the inside. Remove the lid and allow to cook until golden on one side. Flip and repeat on the other side.

Enjoy these tasty egg fritters by themselves, on toast or a bun, as a side to a meal or any way you like them! You may also want to check out a few other recipes I’ve shared earlier in which eggs are a core ingredient!

There is a universal love for paneer makhani or for paneer butter masala among those who frequent Indian restaurants anywhere. These are the two most popular dishes when it comes to paneer, and it would be rare to find an Indian eatery that doesn’t offer them. When my kids were growing up, we ate paneer makhani all over the world because that is what they ordered straightaway, without having to check a menu. You may also remember my recipe for paneer makhani, one which our relatives also learnt so as to make my son happy when he visits them. However, as much as I enjoy these dishes too, I believe that the fact that they are the standard go-tos gets in the way of exploring the wide and diverse range of paneer preparations that actually exist. My own personal favourite is kadhai paneer, or a paneer stir-fry that is so named because it is made in a kadhai (a deep, flat-bottomed pan), and that’s the recipe I am sharing today.

I recently shared a recipe for chilli tofu, and this one is distinct from that one because of the spices that I use. What makes my version different from a restaurant version is that it also incorporates some vegetables. In fact, I think this is true when it comes to most household paneer preparations anyhow, if not in the dish itself then in accompaniments. Paneer dishes I have eaten at people’s homes always tend to be healthier and to utilize more greens and vegetables rather than just paneer. When it comes to home cuisines one doesn’t usually see oil floating at the top of the gravy or other such excessive uses, which are delicious during an outing but better avoided regularly. There is more variety too, as there is so much more to paneer than what has been popularized by restaurants.

I’m a big advocate of home-cooked meals, always: you know what goes into every dish, and will take care to make sure it’s good for you and for your family. I believe there’s a world of difference between restaurant food and household preparations in terms of healthiness. All that said, one nutritious paneer dish that is also available at eateries is the palak paneer, which features spinach. Of course, if you make it at home, which you can with my recipe [hyperlink], it’s even better!

Paneer really does pair well with most vegetables, taste-wise and not just as a way to make meals healthier. Here, I have used chopped bell peppers. I usually like to cut them tiny as they look beautiful, but this time I decided to do bigger cuts. This is because bigger vegetable cuts require us to chew better, which makes our digestion easier. However you choose to cut them, I would suggest adding an array of any vegetables you enjoy, keeping in mind that a colourful presentation is pleasing to the eye, to the tastebuds and to your overall well-being too. As many have said before, “eat the rainbow”.

This will certainly not be the end of the paneer recipes that I will share on this blog, especially as I’d like to highlight more diverse preparations. I am sure there is more to come, as and when a recipe strikes, a mood hits or a desire to eat a particular food occurs. Sometimes the inspiration is creative: a visual will come to mind and I will write it down quickly so that I don’t forget, and then recreate it in a photoshoot later. For me, these recipes are so that nothing is lost amongst the memories in my head, and so that my children can retrieve them whenever they wish to – and so can you.

Kadhai Paneer

(Serves 2)

2 cups bell peppers (different colours)
1 cup diced paneer
1 tablespoon oil
1 teaspoon cumin seeds
½ cup onions (finely chopped)
2 cloves garlic
1 green chilli
1 large tomato finely chopped

1-inch ginger (grated)
Salt to taste
½ teaspoon turmeric
1 teaspoon Kashmiri red chili powder
1 teaspoon garam masala
1 teaspoon coriander powder
1 teaspoon kasoori methi (crushed)
1 tablespoon milk

Garnish
Kasoori methi
Cream (optional)
Beaten yoghurt
Coriander leaves

Heat a kadhai and add the oil. To this, add cumin seeds, grated garlic and onions. Roast until golden. Now add the green chilli, ginger and tomato. Sauté until tomatoes are tender. Add the salt, turmeric powder and red chili powder.

Add the bell peppers. Sauté, then cover until they are tender but not releasing water. Once they cook a little, add paneer followed by garam masala and coriander powder. Finally, add kasoori methi and milk.Garnish with beaten yoghurt, kasoori methi and coriander leaves.

I find that this kadhai paneer is best with plain roti and works well as a tiffin box item as well as served hot and fresh. I hope you’ll enjoy it as much as I do, and I also encourage you to explore the other paneer recipes I’ve shared here over the years.

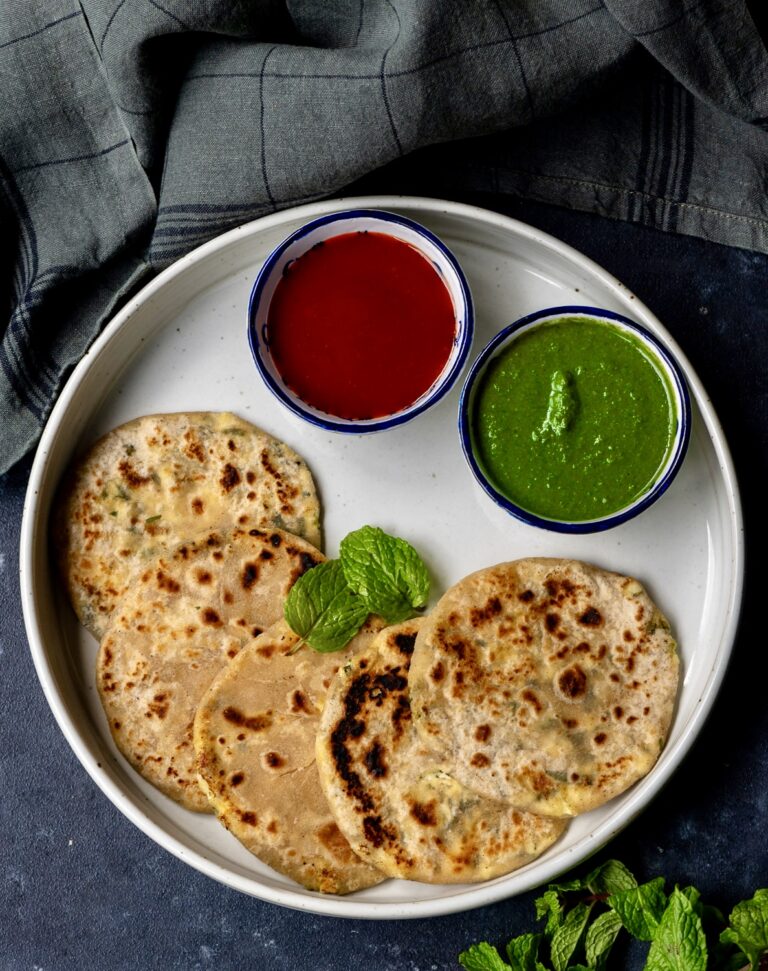
In my last post, I shared a recipe for a delicious stuffed paratha using radish, something I first began enjoying on my trips to Delhi. Today, I share another paratha, but this one is made differently. This lovely vegan palak paratha (using spinach) is a healthy upgrade on your regular parathas, and is perfect for those who often eat flatbreads at home.

The spinach is blended into the dough directly, which gives this paratha a lovely green colour. This also means that it is an excellent way to get people to eat their greens – not just school-going children, but even young adults or anyone who is picky about them, really. I imagine that the very first palak paratha must have been put together by an inventive mother who was trying to trick her kids into getting more nutrition. So this recipe is dedicated to everyone who is on a quest to serve healthy food to their children. Another thing that helps is to make the parathas in an unusual shape, to add a touch of fun.

You would think that I would have lots of childhood memories of palak paratha myself, but I don’t, and the reason is that my mother didn’t resort to this particular trick. Two or times a week, some kind of leafy vegetable would be spooned onto our plates, and we just had to eat it. That was that. Growing up in South India, this meant that a large selection of seasonal greens was a part of our diets. I may have made a fuss about it as a child, but I am grateful for it now. As I got older, I began to genuinely enjoy the different varieties of local spinach, and I understood just how much our bodies love the chlorophyll too. If you’d like to explore a few dishes that utilise South Indian greens, you could also take a look at my recipes for purslane dal and araikeerai vadai.

Speaking of stuff that’s good for you, I like to make these palak parathas with ghee, which has begun to shake off its bad reputation and is now being embraced everywhere as a superfood. That’s right, our humble ghee that we health-conscious Indians shunned is back with a bang, and is being acknowledged as being not just tasty but also nourishing. However, I have provided the recipe below with oil so that it remains vegan. Substitute accordingly, if you prefer.

Visually appealing, full of goodness and so very delicious – what more could you ask of this dish?

I feel that this palak paratha is best eaten hot off the griddle, and it goes very well with a dry roast paneer (which I will share the recipe for soon). A dal will also pair nicely. Sometimes I have this with a small bowl of tomato soup and a few scoops of that paneer stir-fry, and everything that’s on my table looks so beautiful. The reds, the greens and the aroma of them all together make for a gorgeous meal, in every way.

Palak Paratha

(Yield: 8 pieces)

1 bunch palak (spinach)
1½ cups whole wheat flour
1 teaspoon cumin seeds
1 teaspoon sesame seeds
Salt to taste
A pinch of turmeric
A handful of coriander leaves
1 tablespoon green chili ginger paste
1 teaspoon aamchur (raw mango) powder
2 teaspoons oil
Oil for cooking

Clean the spinach thoroughly. Put the spinach in hot water for a minute. Squeeze, remove and immediately place it in cold water. This will help retain the colour of the leaves. Squeeze the water out.

Place the squeezed spinach in a blender jar and add cumin seeds, a pinch of turmeric and coriander leaves. Blend. This will give you a ¾ cup of spinach purée.

In a bowl, add 1½ cups wholewheat flour.  To this add the aamchur powder, salt to taste, chili ginger paste, sesame seeds and 2 teaspoons oil.

Now, add the spinach purée to this mixture. Using your hands, make a smooth, pliable dough with the help of a few drops of oil. Cover and set aside for ½ an hour.

Make balls of the dough. With the help of dry flour, roll these out in any shape you desire. The paratha needs to be a little thicker than the regular rotis to get the most of the spinach flavour. Place on the griddle, and ensure both sides are cooked.

Serve hot with yoghurt or pickle or a vegetable of your choice.

If you’d like to explore more spinach recipes, do try out this spinach and corn bake and this spinach rice. As for parathas, my recent radish paratha and earlier peas paratha recipes may catch your fancy too!

Let’s face it: most children dislike radish. I did too, and it was only when I was studying Macrobiotics about a decade ago that I really began to appreciate the vegetable that was known to those of us in the course as daikon. After that, I began to look at the humble Indian mooli – which we get here in pink and white, and which are used in salads, curries and sambars – differently. There’s one particular usage of it that is my absolute favourite, and that is the mooli paratha or radish paratha.

Parathas are an excellent way of getting kids to eat ingredients they may not be fond of, which is probably how this particular one came into being. The stuffings also vary across regions – in Bengal, for instance, I believe that fish is commonly used. I once had some that was stuffed only with fresh cream, which was fascinating to me. They can be made quite healthy, as well as flavourful. They don’t need an accompaniment, but a pickle may sometimes complement them.

Radish paratha is popular in North India as a Punjabi street food, and along with peas paratha is one of my two favourite versions of stuffed Indian flatbreads. To me, it is synonymous with some of the best food that Delhi – a city that I’m rarely in, but in which I have had many cherished moments and meals with loved ones – has to offer.

The radish paratha came into my life at a time when my dear friends Sujatha and Michael lived there. They would take me to a famous parathawalla near a railway station, a roadside vendor whose enterprise had grown quite large. There was always a crowd and a queue there. To me, it looked like there were hundreds of options on the menu. We would each order what we liked, and sit in the car and consume our stuffed parathas while they were hot. They all came with pickled onions, and were served rolled in a newspaper page with some kind of leaf inside it to mop up the oil. They were just such a joy to eat. Those experiences of sharing food and laughter in a parked vehicle became great memories, too.

I tried some different options out on occasion, but always came back to the radish paratha. It was absolutely delicious, and filling enough to count as a meal. That’s the thing about street food in India. The fancy restaurants have their charms, but there’s something about the food prepared by roadside hawkers and railway vendors that just hits the spot every time.

In the years since, I began recreating the radish paratha at home, and it has become fairly frequent at our dinner table. I have found that while radish is pungent on its own, it is also absorbent, which means that adding a good masala to it makes it very appealing. Try it out and see for yourself!

Radish Paratha

(Yield: 5 pieces)

150 grams radish (3 medium-sized)
Salt to taste
1 teaspoon green chili+ginger paste
½ teaspoon garam masala
1 teaspoon aamchur powder
1 teaspoon cumin powder
¼ teaspoon ajwain
3 tablespoons coriander leaves (finely chopped)
1½ cups whole wheat flour
1 teaspoon oil + oil for sautéing paratha

Clean and grate the radishes. Add ¼ teaspoon salt. Mix well and squeeze out the water really well. Set the radish water aside.

To the grated radish, add the cumin powder, pinch salt, coriander leaves, aamchur powder, ajwain, chili+ginger paste and garam masala. Mix with your fingertips.

In a bowl, add the flour and the squeezed-out water from the radish so there is zero waste.  Make a tight and smooth dough of the flour with the help of a little oil.

Now, it is time to roll out the parathas. Divide the dough into 10 small balls and set aside. Dust and roll a ball. Set aside and roll another.

Now, fill one flattened disc with 1 tablespoon of the radish filling and cover with another rolled out disc. Make sure you pinch the edges well. Using a rolling pin, roll gently over the paratha. Roll out 5 such filled parathas.

Heat a griddle and place one of the parathas on it. Allow to cook until a few spots are formed. Flip the paratha. Once it turns golden brown on both sides, apply a few drops of oil onto both sides and allow to cook until darkened. Transfer it onto a lined plate. Repeat with the remaining parathas.

Serve hot, with or without accompaniments. Yoghurt and pickle go well, but as I said the radish paratha is itself quite flavourful. It is also rather filling, so I wouldn’t be surprised if you also begin serving it for dinner, as I do.

A bhurji is basically a scramble, so egg bhurji is Indian-style scrambled eggs, made super delicious with the use of local spices. I first ate them on a recent holiday in the hills of North-East India, where I took one bite and thought, “Oh, this is such a simple recipe – why didn’t I think of it earlier?” I already knew how to make bhurji, having done so with paneer plenty of times and with tofu more and more often, but I just hadn’t considered making eggs in this method. Egg bhurji is now frequently enjoyed in my home, and I thought you may want to make some as well.

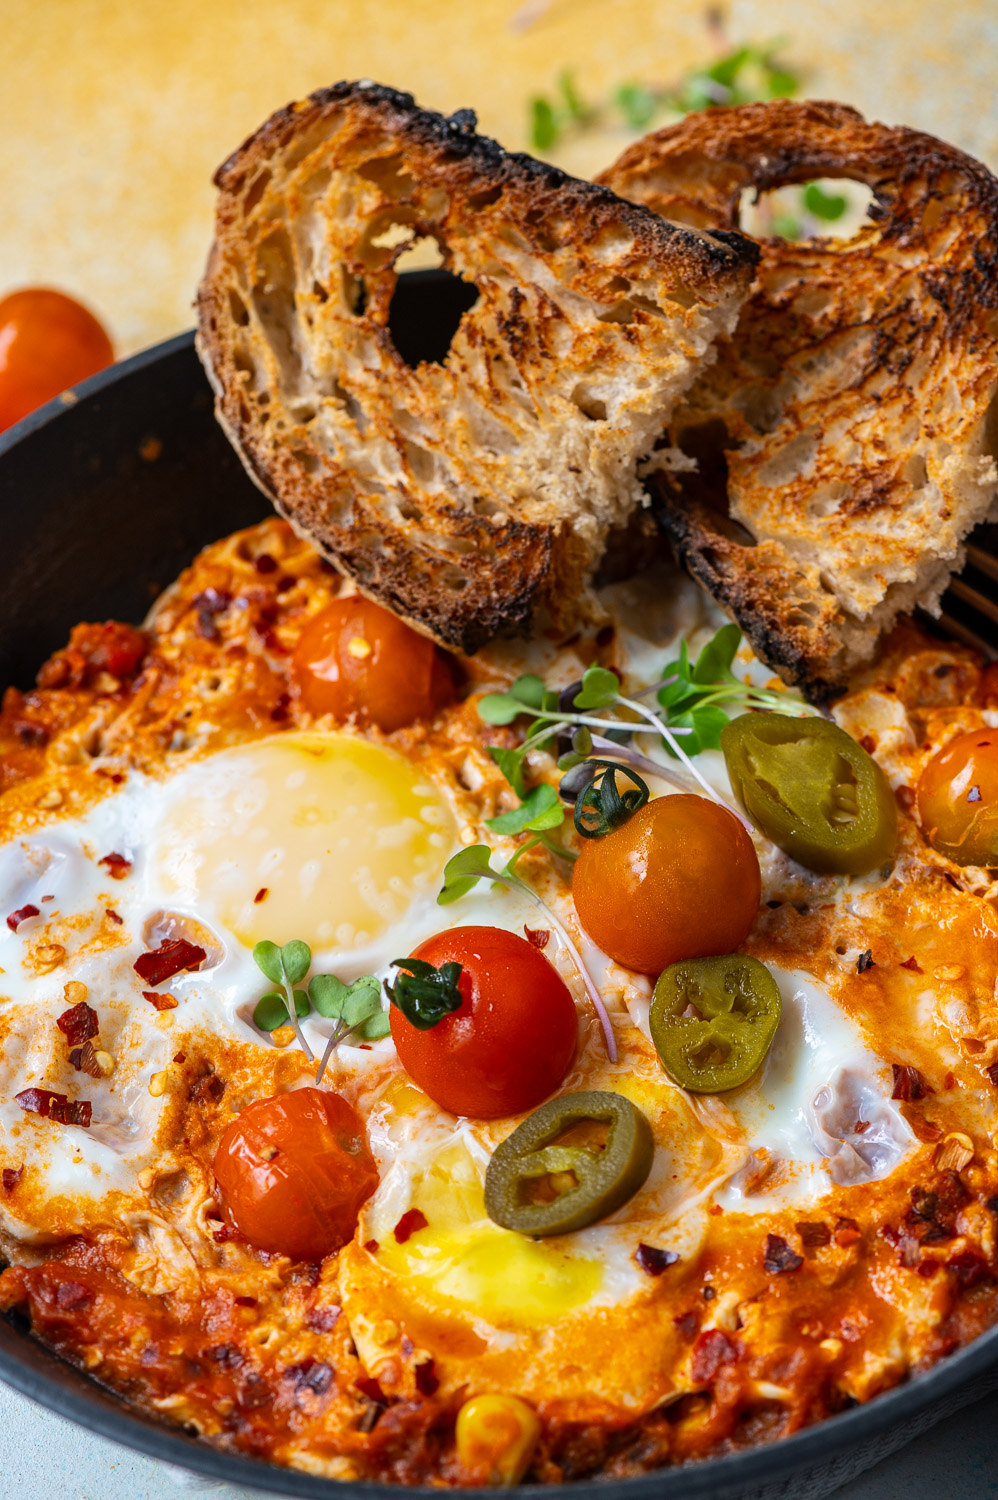
The reason why egg bhurji has become a staple at my dining table is because of the protein boost that is provided. I have been rather good at sticking to my workout routine lately, and it’s important that I consume more protein to support it. Eggs are a fantastic, and very easy, way to do this. I have been looking at more exciting ways to consume them rather than just having a plain omelette or a sunny side up, which can get boring on a daily basis. You may remember the moringa omelette recipe that I shared once, in which two nutrient superfoods came together. You may also remember the recipe for shakshouka, which is more ornate and a lot of fun over Sunday brunch.

This bhurji is not at all elaborate, but is interesting because it is so flavourful. It has all the same spices as a standard subzi (Indian-style vegetable accompaniment). If you’re vegetarian, you don’t need to be left out. Just substitute the eggs in the method below for paneer or tofu, and your bhurji will still turn out delicious!

This new routine of eating eggs daily reminds me fondly of my late brother, who used to bolt six of them at a time when he was a rower. I’ve written about his large breakfasts before. Even though I am not an athlete like he was, now that I’ve gotten disciplined with exercising and am consciously eating eggs for this reason in particular, I can’t help but smile thinking of how I have once again followed in his footsteps.

I prefer my egg bhurji freshly made – warm and straight from pan to plate. But I know that it works well in a tiffin carrier too, so you can make it in the morning and have it for lunch. It’s also simple to prepare, which will mean that your cooking will be quick even when you’re getting ready to head out to work.

Egg Bhurji

(Serves 1)


1 tablespoon milk

2 eggs

1 teaspoon oil

1 teaspoon ginger (grated)

1 tablespoon tomato (finely chopped)

1 onion (finely chopped)

2 green chillies

Salt to taste

½ teaspoon coriander powder

¼ teaspoon garam masala powder

½ teaspoon chilli powder

A handful of coriander leaves


Break the eggs into a cup and add milk. Stir well. Set aside. Heat a pan and add the oil. Add the onions and ginger. Sauté for a minute or until tender.

Next, add the tomatoes and green chilli. Sauté well until soft and then add salt, turmeric, coriander powder, garam masala and chili powder.  Mix well. Add the eggs and milk mixture. Continue stirring for less than a minute. Serve hot, garnished with coriander leaves (or put it into your lunchbox). Egg bhurji goes really well with rotis.

Eggs don’t make that many appearances on this blog, but here are a few more recipes that feature this protein-rich powerhouse to the fullest!

Recently, when sharing a recipe for tofu broccoli rice, I wrote about how tofu is a healthier replacement for paneer, which is an ingredient that vegetarian Indians simply adore. As mentioned there, tofu is not only higher in protein, but it is also lower in fat. Moreover, it helps those who are aiming for a vegan lifestyle or who are lactose-intolerant to avoid dairy too. Despite its reputation to the contrary, it can actually be very tasty. It all depends on the flavours you cook it with, and this chilli tofu is a perfect representation of exactly that.

You will probably be familiar with chilli paneer – a famous and ubiquitous dish on Indo-Chinese restaurant menus. This is essentially a more nutritious take on the same. I have mentioned in earlier posts that my daughter is a pro at Indo-Chinese as well as certain Asian cooking styles, and whenever she visits me, we love experimenting with these cuisines in the kitchen together. I made some trials of this one ahead of her next visit, and they came out great.

One significant difference is that I have only pan-fried the tofu rather than deep-frying it, which is what most Indian restaurants do when they do serve tofu. Lately, wherever I’m able to find it while dining outside, I have been opting for mapo tofu, in which the tofu remains soft and is marinated rather than cooked. It may be an acquired taste, but it is enjoyable. This pan-fried version meets both those methods in the middle, and results in a lovely dish.

Me being me, ever inquisitive about cooking techniques and all things food, I couldn’t resist giving making my own tofu a shot. I had tried making soya milk once before, and that didn’t work out, so I was thrilled that my tofu turned out well. I prepared it using soya beans and a coagulant called nigari. Perhaps I will share the recipe for this in future too.

Of course, readymade tofu will work just fine to prepare the recipe below. It’s just that in my case, tofu has been making an appearance on my plate more and more often, and for this reason I became intrigued about whether I could make it at home. I really love knowing exactly what goes into a dish, rather than always relying on store-bought items which may be processed in certain ways or contain unhealthy ingredients.

That said, I have noticed that the Indian market continues to expand with more options for all of us who want to increase our protein intake. For instance, there are now homegrown as well as imported brands selling tempeh here. You can cook tempeh using the method below, too.

Another ingredient that I hope to see in the shops soon is seitan, which was invented by Buddhist monks in East Asia who were on strictly vegetarian diets. While it contains gluten, seitan is also good for those who are trying to cut down on their meat consumption, as it is known to have a similar taste and texture, and is even called “wheat meat”. It is made of whole wheat flour that is stripped down, through a repetitive process, to its protein strands. I learned to make it when I was a student of Macrobiotics, but the process is rather long and the outcome is a large quantity. I’m the only one at home who wants to eat seitan, so it isn’t worth my while to make it myself.

Just like tofu has become more widely available, I am sure that tempeh and seitan – as well as other exciting options – will also become popular in time. So many of us are more health-conscious and are eager to explore new tastes. As I’ve said before, replacing our regular paneer with some lovely tofu is a great place to start. Which brings us back to today’s recipe…

Chilli Tofu

(Serves 2)

1 tablespoon rice flour

125g of tofu

½ cup bell pepper (finely chopped)

2 tablespoons spring onion (finely chopped)

½ teaspoon red onions (finely chopped)

½ teaspoon ginger (finely grated)

4-5 cloves garlic (crushed)

1 teaspoon chilli paste

1½ tablespoons soya sauce

2 tablespoons hot water

1 teaspoon vinegar

1 teaspoon lemon juice

1 teaspoon brown sugar

Chilli flakes (to garnish)

Coriander leaves (to garnish)

½ teaspoon sesame seeds

1+1 tablespoons sesame oil


Cut the tofu into the desired size. Coat the tofu pieces with the rice flour and allow to sit for 30 minutes.

Heat a pan and add 1 tablespoon of sesame oil. Once the oil is hot, add the tofu and sauté until the pieces are golden brown on both sides. Remove from the pan and set aside.

In the same pan, add 1 tablespoon of sesame oil. Once the oil is hot, add the sesame seeds and then the ginger and garlic. Sauté until they release their flavours and then add bell peppers, spring onions and red onions. Sauté on a high flame.

Now, add the golden tofu to the sautéed vegetables. Add soya sauce, hot water, vinegar, brown sugar, chilli paste and lemon juice and stir together until all the flavours mix well. Garnish with spring onions, chili flakes and coriander leaves.  Serve immediately as an accompaniment, usually to rice.

I hope you’ll enjoy this chilli tofu, which is simply bursting with flavours. It makes a beautiful addition to any high protein diet, especially for vegetarians and vegans. While most of the posts on this blog are vegetarian, if you are a vegan, you may want to explore some more recipes here.

In recent years, oats – which were unheard of when I was growing up – have become quite popular in India as a breakfast dish. Due to that classic Indian innovation, oats here are therefore served enhanced with masalas, spices, tastes and flavours, making them more suited to our palates and generally more exciting. However, according to me there is a misconception that oats are exceptionally healthy. While they are rich with nutrients, they are a form of carbohydrates and contain starch. Quantity therefore matters, as does preparation. This is where the oats uthappam comes in, and I prepare it in a way that boosts its healthiness as much as possible.

It doesn’t surprise me that oats have become a favourite for many in India precisely because they contain carbs. This appeals to us because if you take a look at any Indian thaali, you’d be able to see that rice, wheat and carbohydrates are the central point. My preferred approach is to work with this knowledge, about culturally ingrained preferences, rather than against it. Don’t forget that we need complex carbs for our bodies to function well and to have energy for the active lifestyles of today. So I don’t say No, I just try to shift the focus. This can be in little ways, like the use of chia seeds in an overnight oats porridge to the vegetables I use in this uthappam.

Now, for the big reveal: it is the use of millets that make my version of oats uthappam good for us. I have used jowar or sorghum, but you can use any millet of your choice. Rice flour is what would be normally used, but if you’ve followed this blog for a few years, you may have noticed me writing about millets before. They are traditional foods in the region I live in, and everyone from the Government of Tamil Nadu to the United Nations have of late been talking about their benefits to us. If you’re interested in switching to millets in more dishes, you could explore the link shared for a range of other recipes.

Uthappams, if you aren’t familiar with them, are a thicker variant of the famous dosa. On a pan-Indian level, we are now familiar with dosa batter. When it is fresh and new, we make thin and crisp dosas. When it’s a couple of days old, it suits uthappams better. You can make the batter from scratch too, and use it for idlys as well – take a look here. Here, because of the use of jowar, the batter is made from scratch.

Coming to the oats themselves, there are a variety available on the market, from whole oats to quick and easy oats. Take your pick. Similarly for the vegetables: just use what you like to use, and what you have on hand.

These oats uthappams – which you can call oats fritters if you like – are a great way to start the day and to avoid a sweet and sugary breakfast. As someone whose version of cereals was leftover millet rotis, and who had neither idea of nor access to oats, this dish evokes a sense of my childhood uthappams while also enticing my need to explore and innovate too.

Oats Uthappam

(Yield: 12 small pieces)

1 cup oats

½ cup flour (I have used jowar/sorghum)

1 cup grated bottle gourd (+ grated carrots, optional)

2 teaspoon ginger + green chili paste

Salt to taste

2 tablespoons curd

¼ teaspoon turmeric

¼ cup coriander leaves

½ cup water

Oil for cooking

In a bowl, add the oats, flour, grated gourd, grated carrots (if you are including them), salt, coriander leaves, curd, ginger + green chilli paste and turmeric. Mix well. Add ¼ cup water and mix. Add the remaining water as required. The batter needs to be a little thick.

Allow the well-mixed batter to sit for half an hour, so that it can sit and ferment for a bit.

Heat a griddle and add two teaspoons of oil. Add two tablespoons of the batter and press down with your fingers and make a disc shape. I like making smaller discs, but you can make them bigger and cut them into slices like a mini-pizza. Allow to cook on a medium flame. Once golden on one side, flip and let fry on the other side.

Repeat and cook as many as the griddle will allow, depending on the size.

Remove from the griddle and serve hot with chutney of your choice. Alternately, these are great to be packed into a tiffin lunchbox for the office or school too.

I hope you’ll enjoy this filling and nourishing oats uthappam and make it a part of your repertoire, just as you may have already become very familiar with the now ubiquitous oats upma!

The concept of pasta salads is pretty new to me. I had not imagined them as a possibility until I came across one while randomly scrolling online one day. I was intrigued, as I am always on the lookout for healthy recipes. The minimal pasta quotient used appealed to me, as it offered a way to get a tasty carb fix without making carbs the focus of the meal. In fact, portion sizes are what differentiate a pasta salad from a pasta with sides. A pasta salad will have a larger quantity of vegetables. Also, while pastas are ideally freshly prepared and served hot, a pasta salad works well at room temperature and even after a few hours or up to a day in the fridge.

So, inspired by the pasta salad as a concept, I set about putting together my own version. This one has mostly Mediterranean flavours, and brings together a delicious and nutritious combination of vegetables, nuts and carbs. It is a meal-in-a-bowl by itself, as the pasta makes it more filling than a standard salad might.

I used vegetables that were on hand in my kitchen, and chose ones that came together well. You could say the Mediterranean theme came after the vegetable selection, not beforehand. Apply this logic when you prepare your pasta salad too. You can mix and match and play around. By the way, the actual volume of pasta should probably be less than what you see in these photographs. Let’s just say it was a shoot day treat over here!

I decided to highlight the tomatoes while putting this dish together, which is why there are two kinds used: cherry tomatoes and sun-dried ones. Cherry tomatoes have lately become more popular in my local markets, and I was surprised to see them available in colourful varieties too. I have gone with the simple red ones, which pack a punch.

To me, the difference between a plain tomato and a tasty one is in the roasting. Whether you use regular-sized ones or the cherry kind, they simply burst with flavours upon roasting. Raw tomatoes just don’t impart the same deliciousness, at least not to me. This is true for a multitude of vegetables, of course, so keep that in mind whenever preparing this type of salad. So, these cherry tomatoes have been blistered in oil so that their taste is much enhanced. Meanwhile, the sun-dried tomatoes add a certain tanginess to the overall bowl.

The basil pesto in this dish was homemade, and I have shared the recipe for this earlier so that you can use the same. It’s easy to make, and I really feel that there is a big difference versus store-bought ones in terms of taste, freshness and quality. There’s nothing like knowing exactly what you’ve put into an ingredient, a dish or a meal. This is especially true for the health-conscious and for those who want to cut down on compromises in food quality for themselves and their loved ones. If you’re not a pesto fan, you could use a different sauce that is more to your liking. Or you could even skip the pasta sauce and just go with seasoning, or take the aglio olio route.

I have used a bow-shaped pasta, which is quite pretty, but you can use almost any other kind. Spaghetti will not work in a salad, but you can take your pick otherwise. I find that a nice grating of Parmesan cheese brings it all together beautifully. I love its nutty flavour, which is quite unlike, say, cheddar. For me, it’s Parmesan or no cheese at all in a salad like this. Your preferences may differ, of course! Adapt accordingly. That’s something I say over and over when it comes to most recipes (with the exception of baking, which is more scientific).

Pasta Salad

(Serves 2)

2 cups uncooked pasta

¼ cup olive oil

Salt to taste

A pinch of pepper

8-10 walnuts

A few basil leaves

2-3 cups cherry tomatoes

2-3 cloves garlic

A handful of sundried tomatoes

1½ tablespoons pesto


In a tray, add the cherry tomatoes and garlic. Drizzle with olive oil and sprinkle salt. Bake or grill in the oven until the tomatoes blister.

Cook the pasta according to instructions. Set aside.

In a bowl, add the pasta, pesto, sundried tomatoes and walnuts. Finally, add the blistered tomatoes.

Stir gently and top with slivers of Parmesan cheese and basil leaves.

Serve at room temperature or chill in the fridge to have later. You could even make a bigger bowl of this pasta salad to eat over a couple of days. In fact, the first time I prepared it at home, it was such a hit that I was requested to repeat it the following day. That may well happen in your home, too – in which case, you could save yourself some time and just make a larger quantity!

During hot days, I sometimes find that my body needs to eat lighter. So while one meal will invariably be my traditional thaali, the other will usually be something different, like this pasta salad. It works perfectly for me, and I hope it will for you too!

As I’ve gotten older, the importance of increasing my protein intake has become a big part of how I plan my meals. In fact, making this a habit from when one is young can have more benefits, but as they say, better late than never. If you, like me, are on a similar health journey, and especially if you consume a vegetarian diet, this tofu broccoli rice will make an excellent addition to your repertoire.

Bringing an adequate amount of protein into our meals is not that simple, which is why I will not make any major claims about what this dish may do for you. Speaking about protein is trendy on social media right now, but the truth is that no one can give you the actual numbers and amounts other than a good nutritionist, whom you work with directly. I have been guided by one who has helped me determine my individualized protein needs based on a variety of factors and who has made sure that I have upped my consumption. I have since become much more aware in general about how to ensure I get enough.

The shift is quite a difficult shift for us, as Indians, because it has been ingrained in us for centuries that rice or roti must be the main course of every meal. Carbs form the centre of every traditional plate. I would actually suggest that we make a departure from what is traditional here and instead take inspiration from youngsters. I can see how the next generation is much more conscious about their eating habits and are choosing to change the composition of their daily thalis. It is not as straightforward as just throwing in an ingredient. Rather, it’s about tweaking all the components of the meal, and the specific portions. So, while this dish contains rice, it highlights the tofu, which gives us protein, and the broccoli, which gives us fibre. When I prepare it, I include 30% tofu, 30% broccoli and 40% rice, rather than 60% rice as I would have in the past. These small adjustments are a great way to start incorporating larger amounts of protein into our regular cooking.

I would also have used paneer rather than tofu earlier, and I include myself when I say that getting Indians to shift from paneer to tofu is another challenge in itself! Paneer is always regarded as the ultimate dish at a vegetarian table. The Indian reverence for milk plays a part, but so does the fact that the higher fat content in paneer does make it tastier. Still, tofu is a fantastic replacement, and the trick is to cook it separately, adding specific flavours to it, as I’ll describe in the method below.

In addition to tofu, soyabean chunks and tempeh are also great protein-boosting vegetarian options. Nowadays, I can vouch for excellent organically produced soya on the market, and also that there is quite a variety of brands available.

This tofu broccoli rice is bursting with goodness already, but you can also turn it into a Buddha bowl by adding a few more ingredients. You can also check out the archives for some more ideas on how to put together a well-rounded meal-in-a-bowl.

Tofu Broccoli Rice

(Serves 2)

1 cup broccoli

1 cup tofu

½ cup cooked rice

1 teaspoon soya sauce

1 teaspoon sesame seeds

1 tablespoon sesame oil

Salt to taste

½ teaspoon chilli paste

A handful of mint leaves

½ cup chopped carrot

Add oil to a pan. Once it has heated, add the sesame seeds. Now, add the tofu and allow the pieces to turn golden on both sides. Add the soya sauce. Stir and set aside.

Using the same pan, add the broccoli and the carrots and allow these to cook for a few minutes, like a stir fry. Add the tofu to the pan again, as well as the cooked rice. Add salt to taste. Remember that soya sauce is already salty, so be careful to adjust the quantity you use accordingly.

Mix well and serve hot. I have added mint leaves and chopped carrots as a garnishing, and to bring more colour to the dish.

As always, I encourage you to use my recipe as a base on which to design your own. I often reiterate about using up what’s already in your fridge or your pantry, so feel free to replace broccoli with another vegetable or even several other vegetables. As for the rice, here’s a tip: fried rice always tastes best when it has been cooked the previous day, chilled, then stir-fried.

Of course, you may want to replace rice altogether with quinoa or another grain. Personally, I have gone with small grain white rice as I find it quite flavourful and believe it works well with tofu. In my mind, the two ingredients are associated with South East Asia and certain travels and experiences there. Bringing them together feels intuitive to me. Food is often like that, is it not? Even when fulfilling our nutritional requirements, we can also fulfil our nostalgic meanderings, and of course, our cravings too.

I always prefer to treat myself naturally if I can help it, and completely avoid pharmaceutical medication as far as possible, even painkillers and such. It isn’t that I won’t take them if necessary; it’s just that if I can there is a natural medication or a home remedy, I would much rather go down that route first. Not long ago, I had a stomach bug that went on for quite some time, so when the home remedies didn’t suffice, I visited a naturopath. She was a lovely lady who had come down from the US, and upon seeing my bloodwork, she diagnosed me with some kind of minor bacterial infection. She said that the best way to treat it would be through neem tablets. I came home and sat in my garden to think about this, and about what I wanted to do, which was when I realised that I was sitting right under a neem tree. I thought, “How silly of me to buy tablets, when the tree itself is right here!” I decided to consume different parts of it, including the leaves obviously, to treat my ailment. The direct, natural, literally homegrown approach appealed to me. During this phase, I came upon innumerable neem flower recipes, and began experimenting with concocting my own versions. One I particularly enjoyed was this neem flower rasam.

A rasam is a soup-like staple prepared in South India with a range of spices. It may be consumed with rice, or it may be consumed as a drink. It is often prepared when a person is ill with a cold, which means that when I was exploring the naturopath’s advice, rasam’s known medicinal qualities made it especially interesting to me. It has all kinds of good ingredients that help infections dissipate. To those known qualities, I added the healing touch of neem flowers, which are especially beneficial for gut health. They are antiseptic in nature and aid with cleansing the digestive organs.

The neem flower is often overlooked – it is a small, whitish-yellow, and only occasionally in bloom. While neem trees themselves are common in Chennai, since the flowers aren’t eye-catching, we don’t always notice when they are in season. As for me, during the time when I was preparing this recipe more often, I was only concerned with the collecting, drying and cooking of the neem flowers – and forgot to pick up my camera. This is why I do not have images of the fresh flowers. I do encourage you to take a closer look at the neem trees around you, if they are there where you are too, especially in very early summer. I know I will be appreciating them much more from now on.

What I did was to spread an old sari out under the neem tree and leave it there overnight. In the morning, a large quantity of fallen neem flowers were in the cloth. As they are difficult to pluck directly, this is the best method to harvest them. Then, I lay them to dry in the sun, which makes them last longer. Alongside those, I dried raw mango for amchur powder, and some turmeric too. When the flowers were well-dried, I stored them and began sprinkling them into different dishes. They made their way into salads, of course. I found that the flowers do not have much of a flavour, and are less bitter than the leaves. This makes them ideal for versatile usage. A little pinch here and there – into a soup, or onto rice, isn’t going to dramatically alter the taste of your food, but it will give you an additional boost of healthiness on your plate.

This neem flower rasam is a dish in which they are the featured ingredient – providing an unusual twist to a very common preparation. The other thing is that I did not use off-the-shelf rasam powder, but ground all the required spices at home. The recipe below provides this from-scratch method. I am sure you too will realise that it does not take much effort at all to do this. There’s nothing like a truly homemade recipe, and this is all the more important when it comes to home remedies.

Neem Flower Rasam

(Serves 2)

½ teaspoon pepper

½ teaspoon cumin

½ teaspoon mustard seeds

¼ teaspoon asafoetida

A handful of curry leaves

1 teaspoon neem flowers

Salt to taste

2 dry red chillies

1 tomato

1 lemon size ball tamarind (for the juice)

4-5 cloves garlic

1 teaspoon oil

¼ teaspoon turmeric powder

½ litre water

2 tablespoons chopped coriander leaves

In a mortar and pestle set, add the cumin, black pepper and garlic and crush coarsely. Set aside.

Soak the tamarind in half a cup of water and remove the juice. Crush with the tomato to form a paste. Set aside.

Heat a kadai. Add the oil and then the mustard seeds. Once they splutter, add asafoetida, neem flowers, red chili and curry leaves. Sauté for a few minutes. Then add the mixture that was crushed earlier.

Next, add the crushed tomato and tamarind paste and allow to cook for few minutes. Add the remaining water and allow to reach boiling point. Add salt to taste. Finally, add chopped coriander leaves. Cover and remove from the stove.

Serve this neem flower rasam hot, preferably with rice and any other sides of your choice.

I have shared various other South Indian recipes on this blog – both traditional ones as well as inspired ones, including this ripe mango rasam. I hope you’ll enjoy exploring them too.