Tag

vegetarian

Browsing

The cultures around us always have a huge influence on us especially while we are growing up, and this influence often remains through life. Certain recipes and food habits are the most common evidence of this influence, in my opinion. As a Gujarati who was born and brought up in Chennai, Tamil cuisine is obviously one I have immersed myself in, just as much as my native one. Additionally, with a Sindhi member of the family and numerous Sindhi friends, Sindhi cuisine is another one I have an abiding love for. This recipe – a vegetable curry known as sai bhaji – is from the same.

Sindhis are a community who are mostly originally from the Sindh region of Pakistan. The majority of Indian Sindhis are believed to have migrated from there during Partition, a highly significant event in subcontinental history. Subsequently, they also moved to many other countries, and are known – in addition to delicious food – for being very enterprising. It is often said that a Sindhi-owned company can be found no matter where you travel in the world, such is the community known for its business acumen.

My exposure to Sindhi food began in childhood, as I mentioned, through a friend who now lives in Mumbai. Whenever I visit her, she asks me what I would like to eat, and I will invariably request sai bhaji. It is a dish that I recall fondly not just from ordinary meals at her house, but even from birthday parties and such. Back then, these parties were always in homes, and featured homemade food. The only special or exotic thing would be a cake, while even the other treats would all be items prepared by the family. In India, proper food is served at every such gathering, as feeding guests well is a valuable tenet of our culture. A sai bhaji – a healthy item! – would certainly not be out of place.

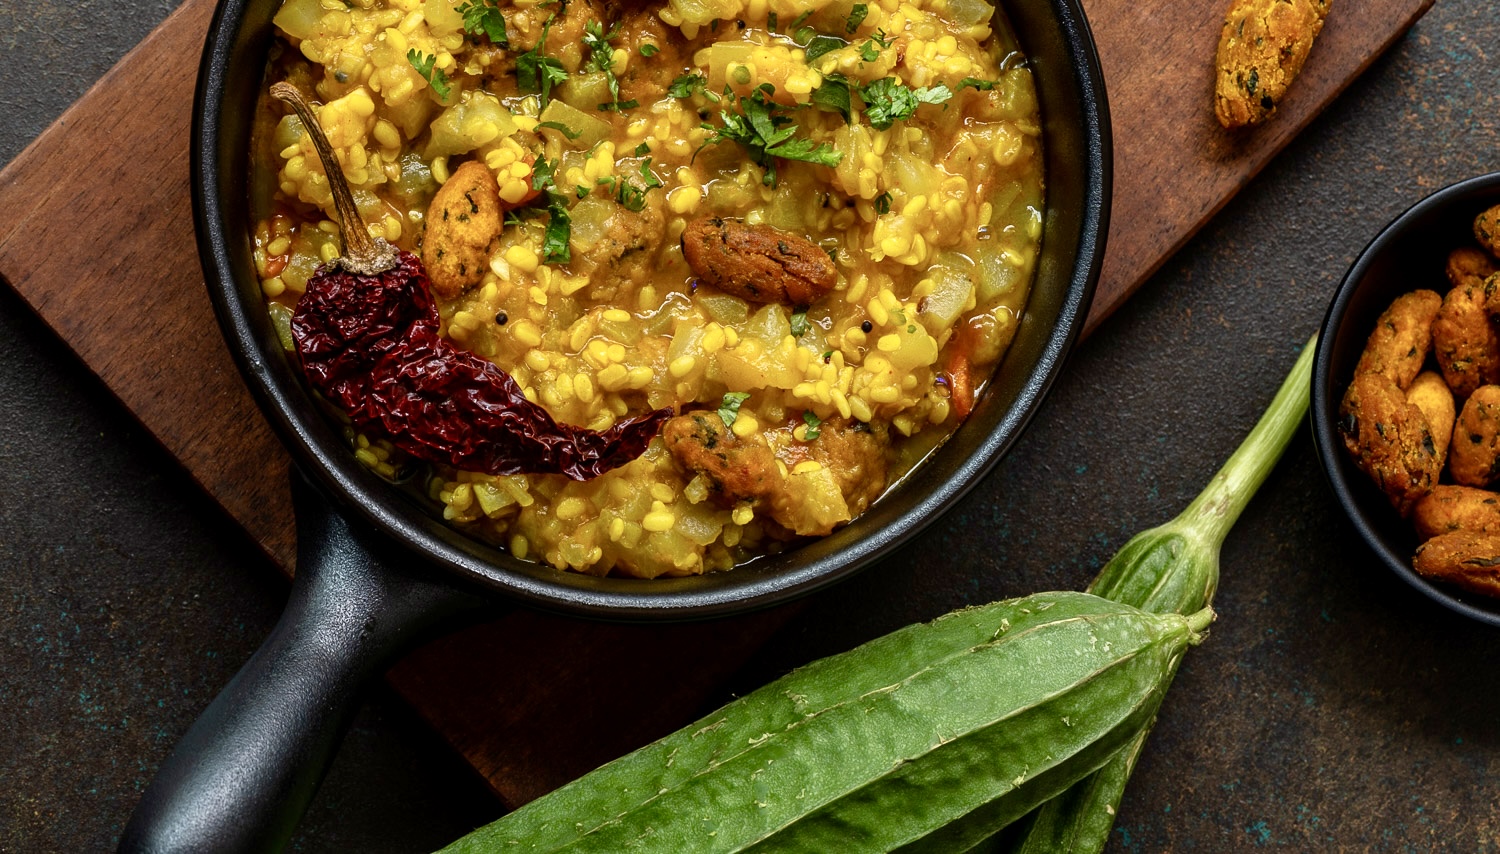
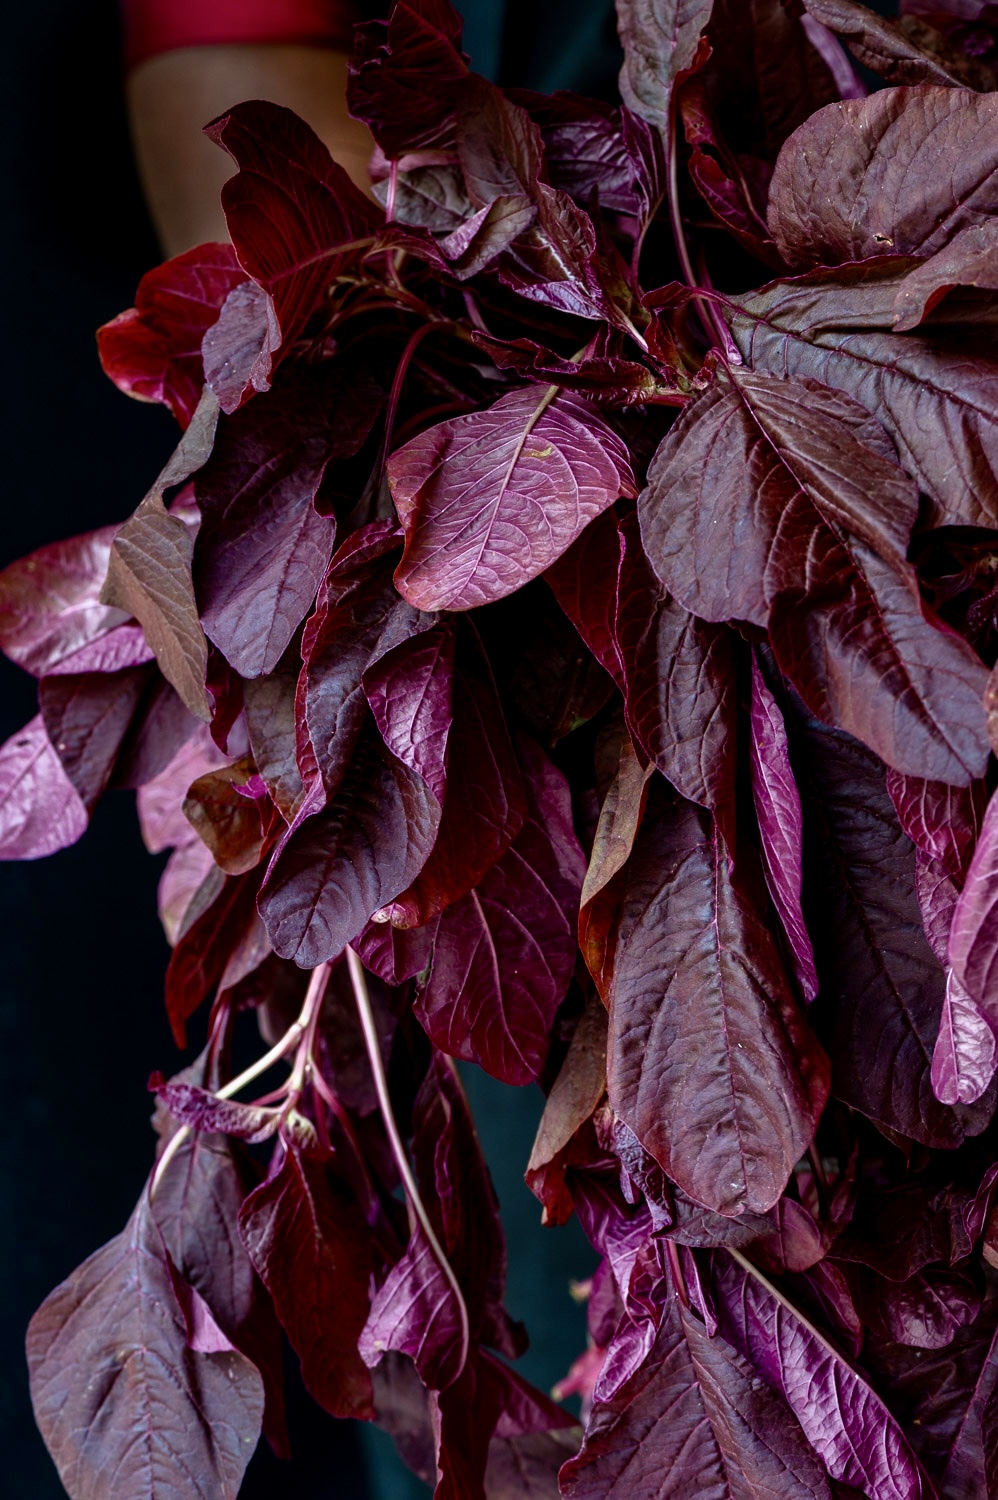
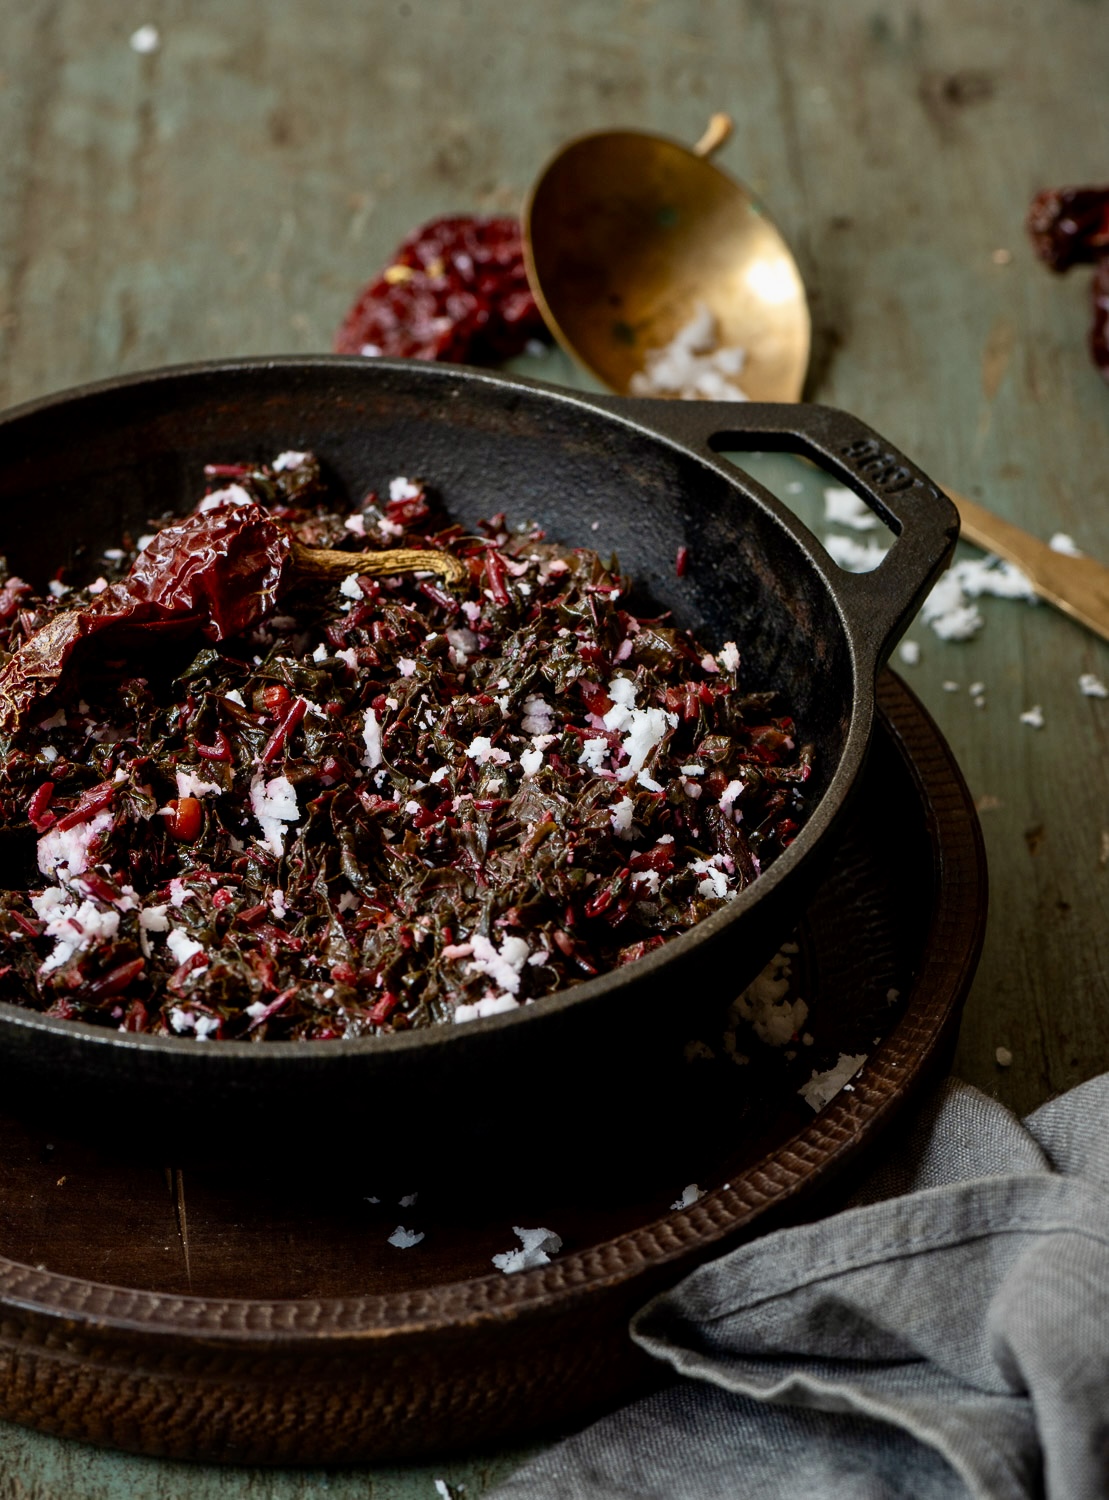
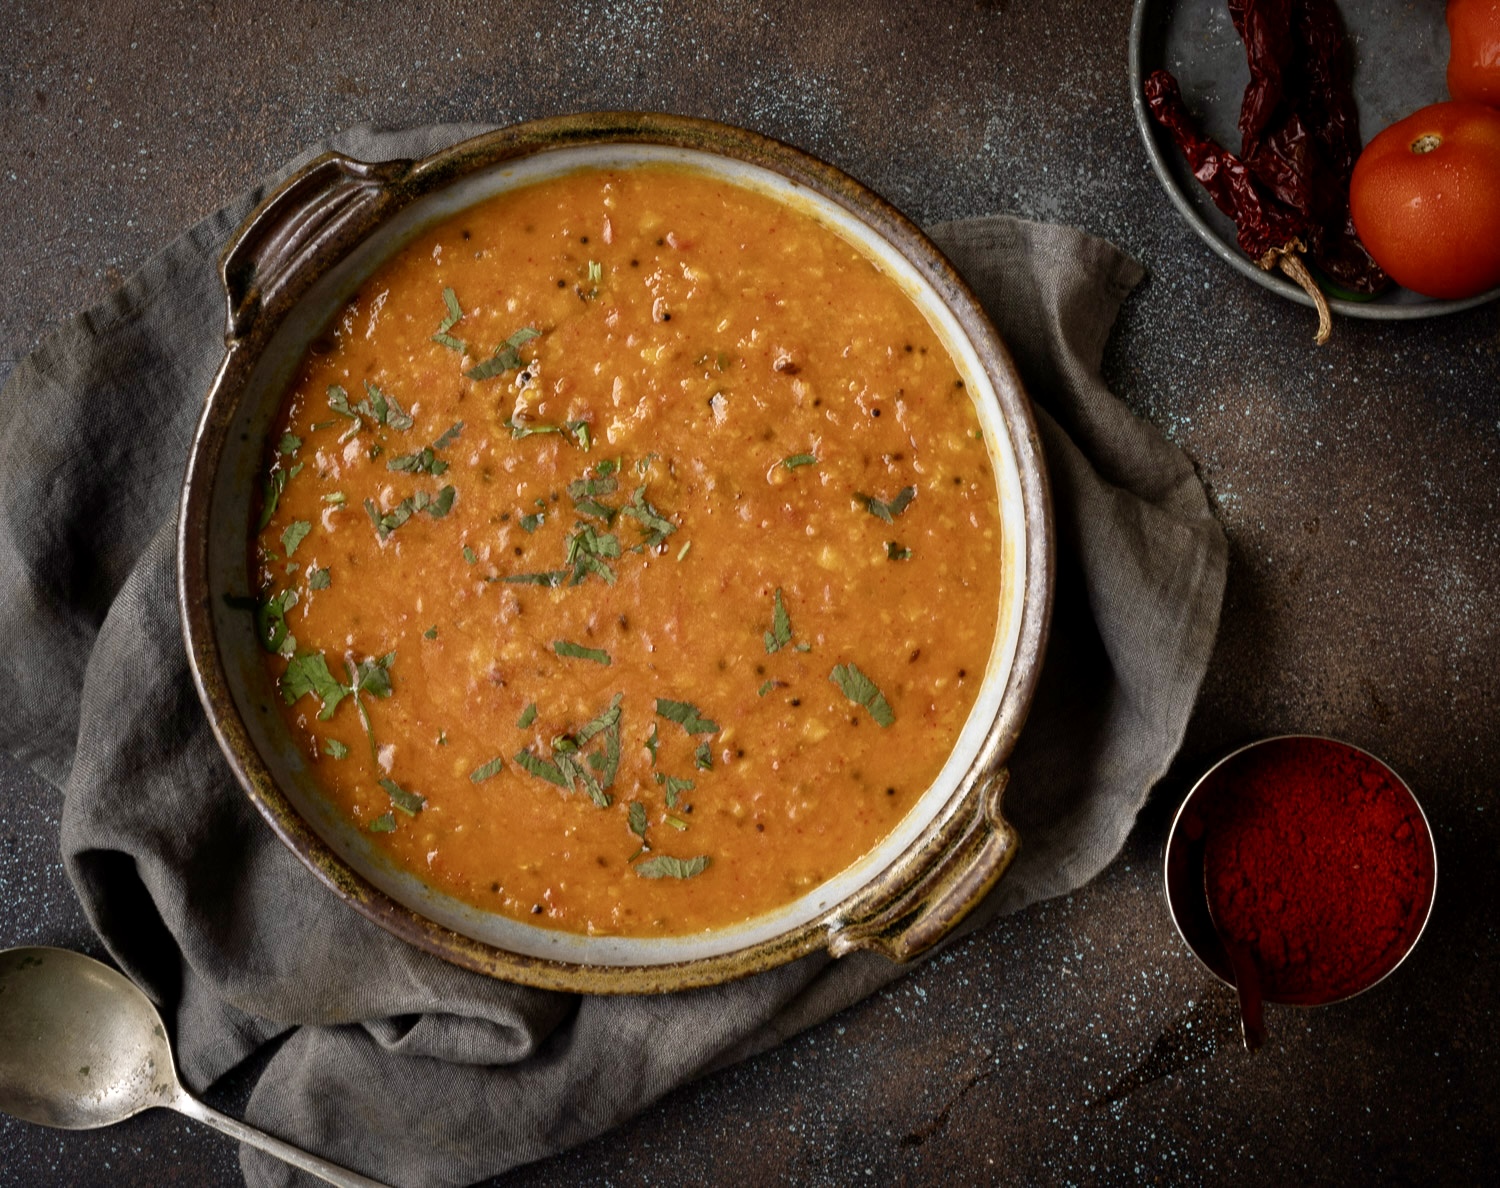
“Sai” means “green” and “bhaji” means vegetables. The dish is spinach-based, and also contains a variety of leftover ingredients. A little leftover brinjal, a little leftover carrot… All these will be pressure cooked along with dal in order to prepare this nourishing dish.

When I said earlier that feeding guests a hearty meal is a part of Indian culture, across all communities, I was thinking specifically of how this is a collective choice in spite of a history of droughts, famines and lack of economic power. Perhaps because of this history, we are very cautious about not wasting food and use leftovers very sensibly. Some years ago, I did a series called “Second Helpings” of traditional recipes that innovate using leftovers. We turn around every little bit that sits in the fridge, and have done so since well before the invention of fridges, in fact!

To me, how we treat food and how we treat knowledge are the real wealth of India. We hold both in such regard, because the fact is that many generations have had to do with less of both or either than they deserved. To us, throwing food into a bin is as much of a sin as stepping on a book or a newspaper. The respect we have for such objects, the respect we have for guests: we know what is precious, whether or not that preciousness is measurable on material terms.
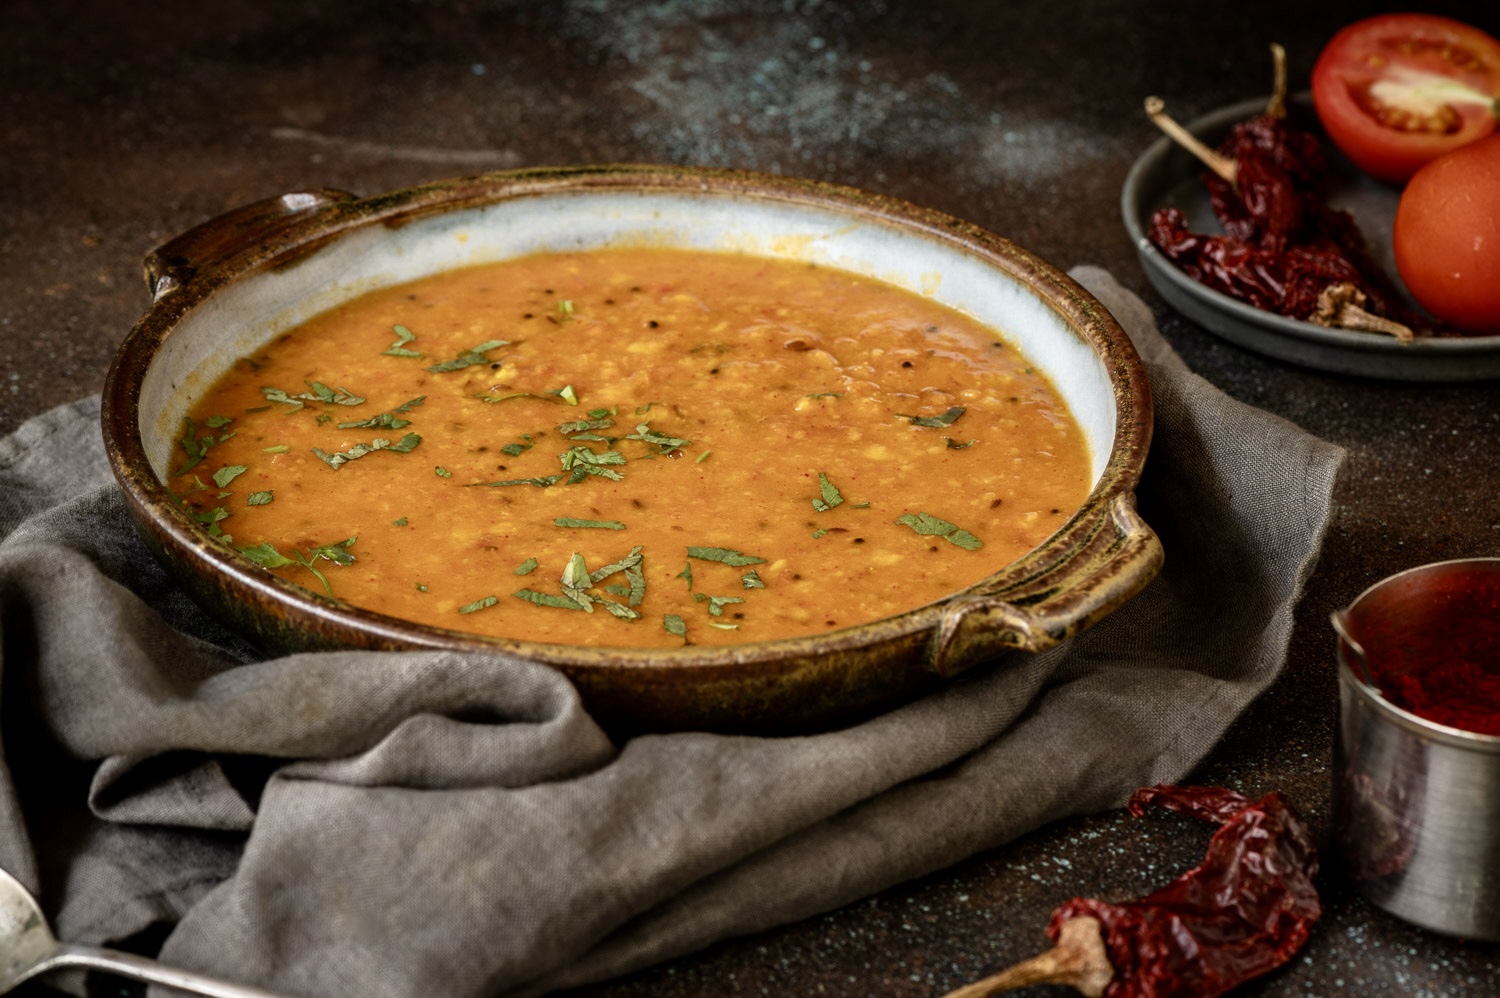
Sai Bhaji
(Yield: Serves 4)

1 medium-sized onion
1 medium-sized tomato
1 tablespoon ginger (grated)
1 teaspoon garlic (grated)
1 green chilli
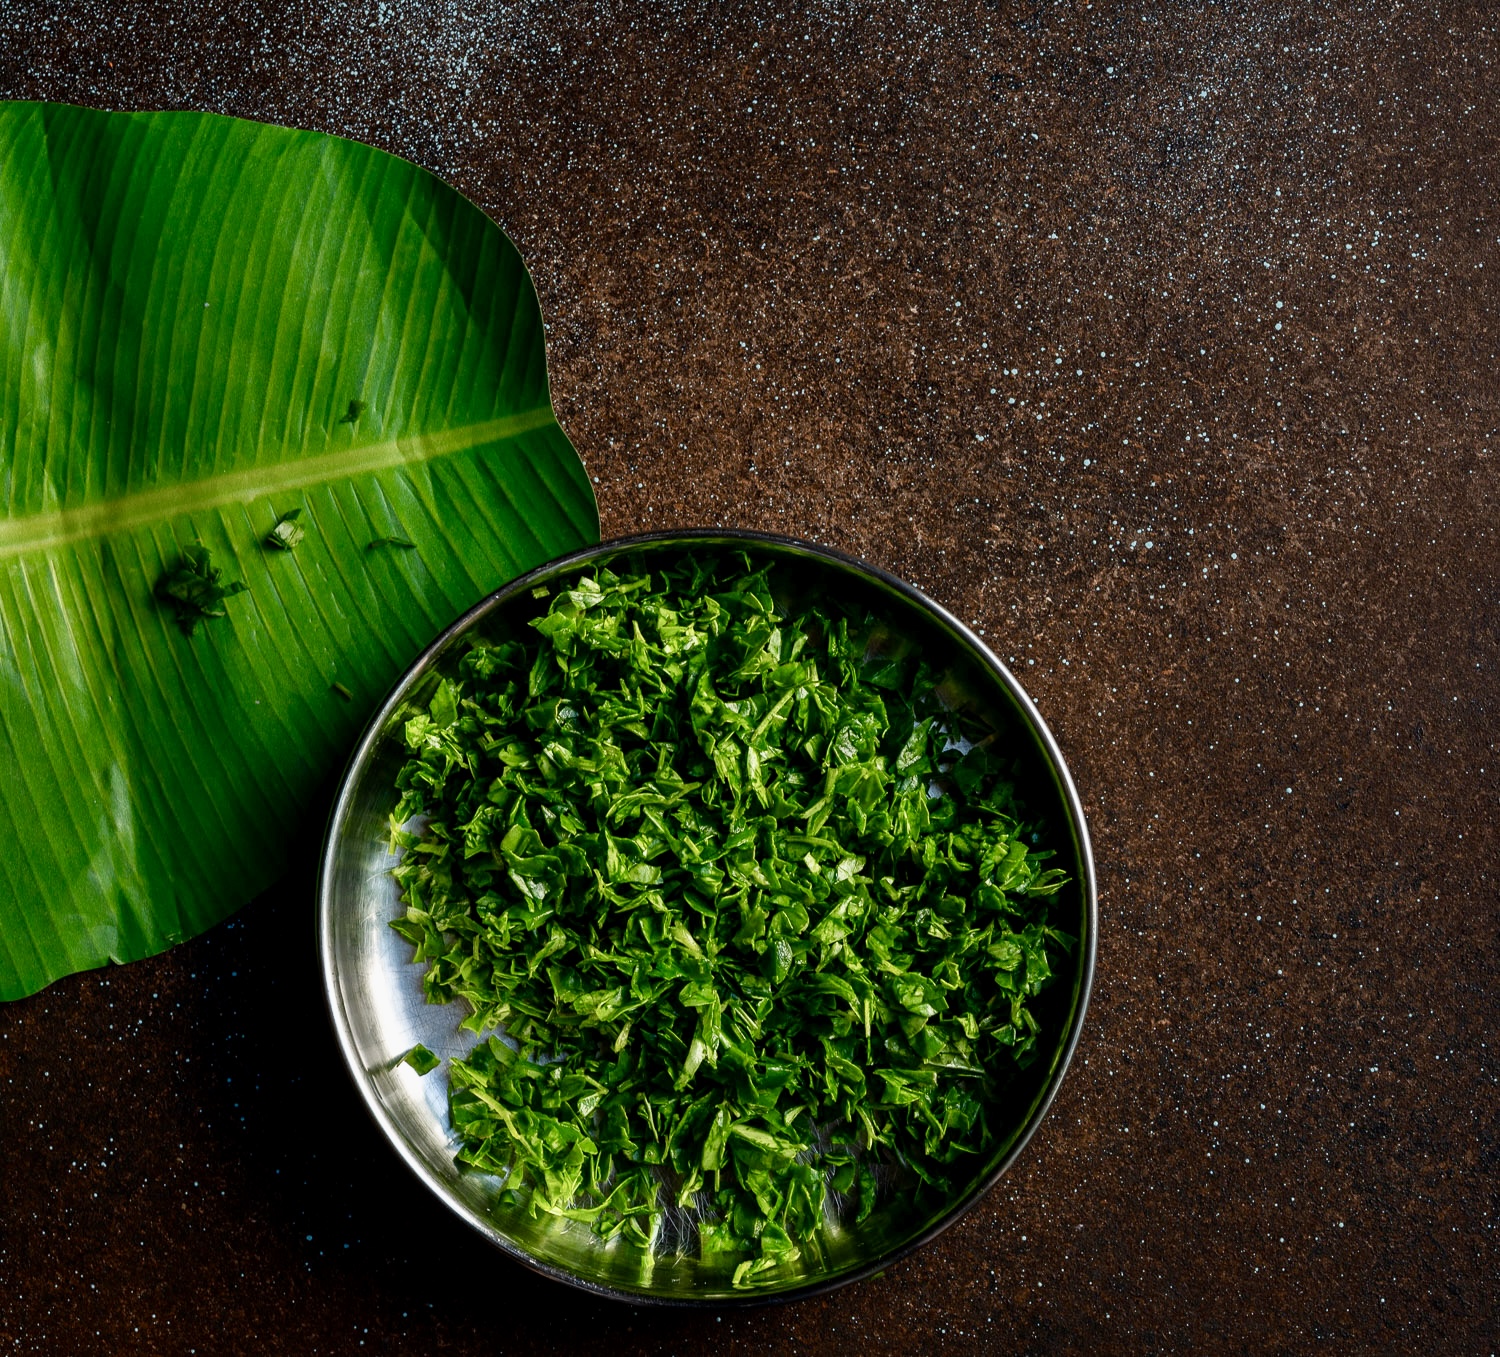
1 bunch spinach (palak)
3 tablespoons yellow moong dal
1 medium-sized potato
1 medium-sized carrot
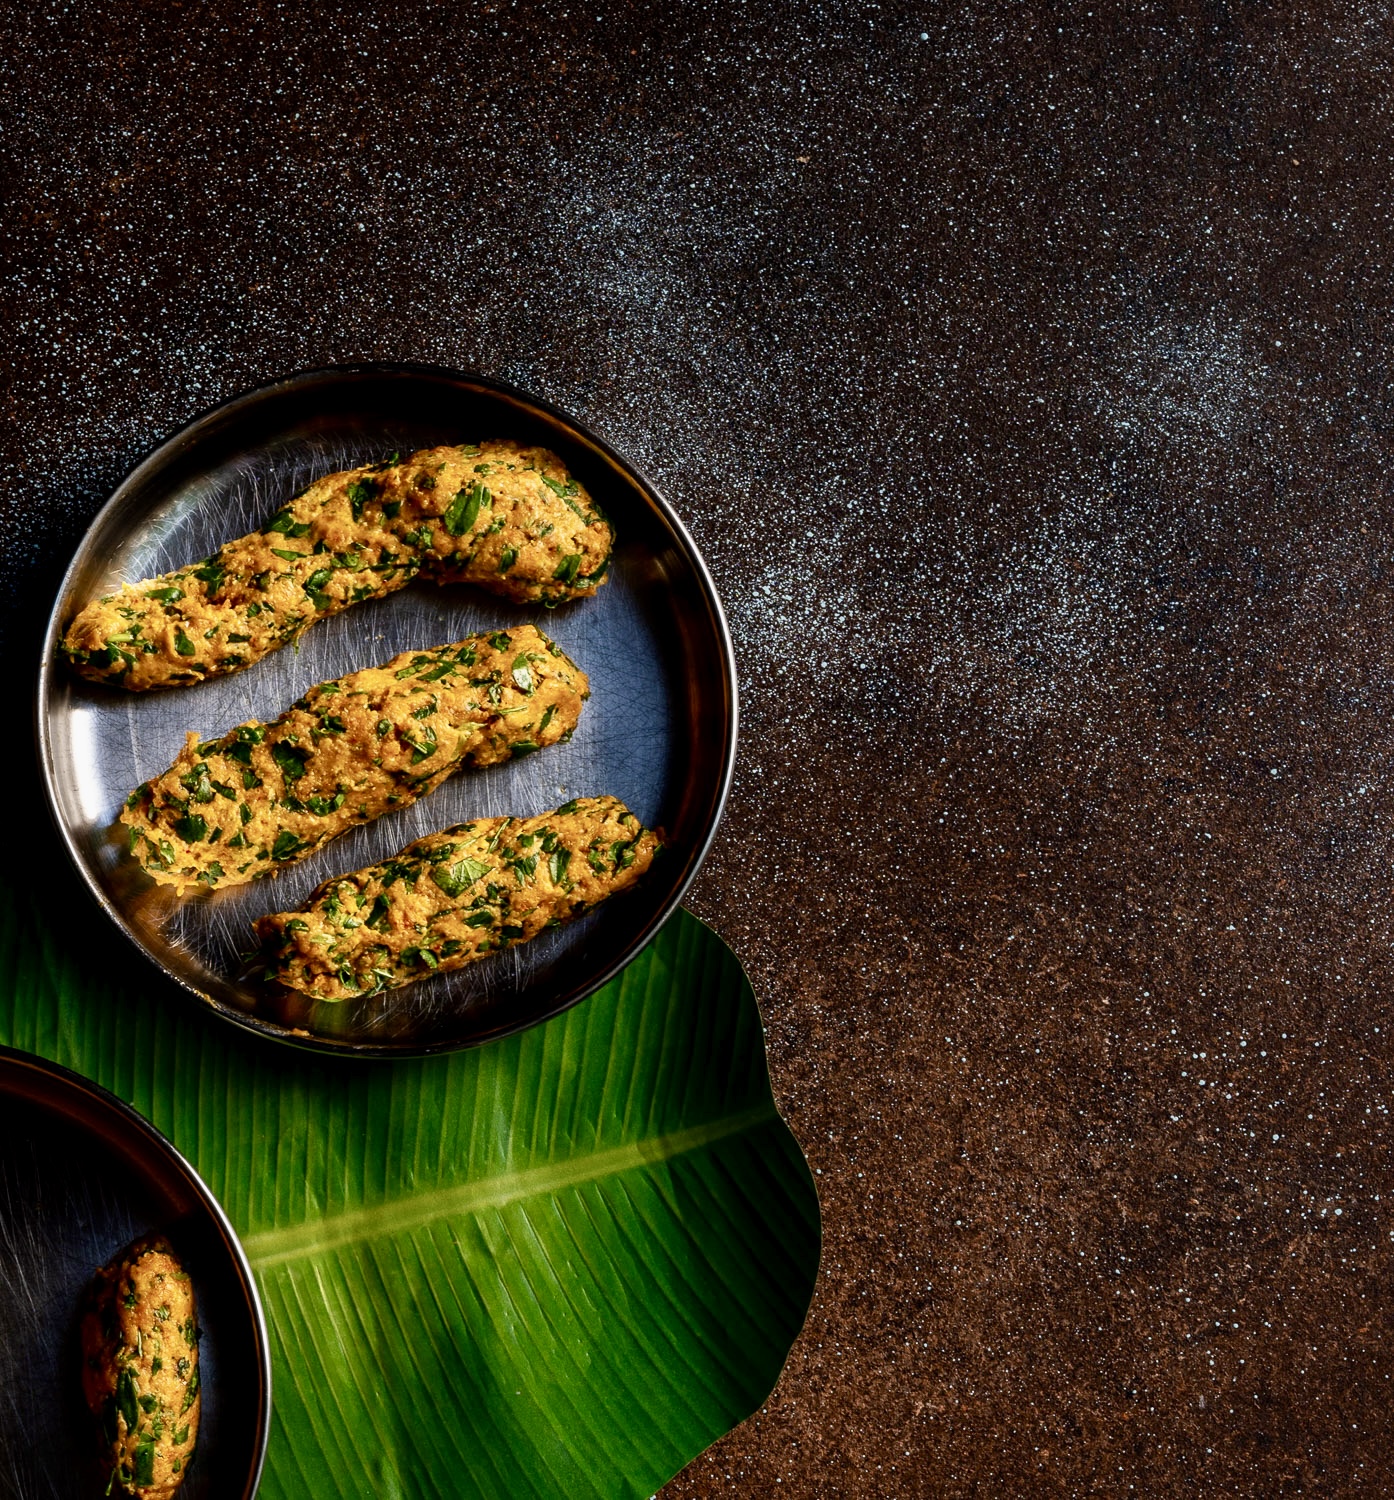
Any vegetables of your choice
2 tablespoons oil
Salt to taste
½ teaspoon turmeric powder
1 teaspoon chili powder
1½ teaspoons coriander powder
½ teaspoon cumin powder
2 tablespoons water

In a pressure cooker, place the dal followed by the vegetables and finally the spinach. Add 2 tablespoons of water and allow to cook or whistle until tender.

Meanwhile, chop the onion and tomato.

Heat a kadai, add the oil. Then, add the onion, garlic and ginger. Finally, add green chilli and sauté everything until golden.

Next, add the chopped tomato. Sauté and add all the spices. Stir well.

Open the pressure cooker and mash all the vegetables until they come together.

Finally, add the vegetables to the onion-tomato mixture and mix well.

Add a dash of water if you prefer it to be less thick.

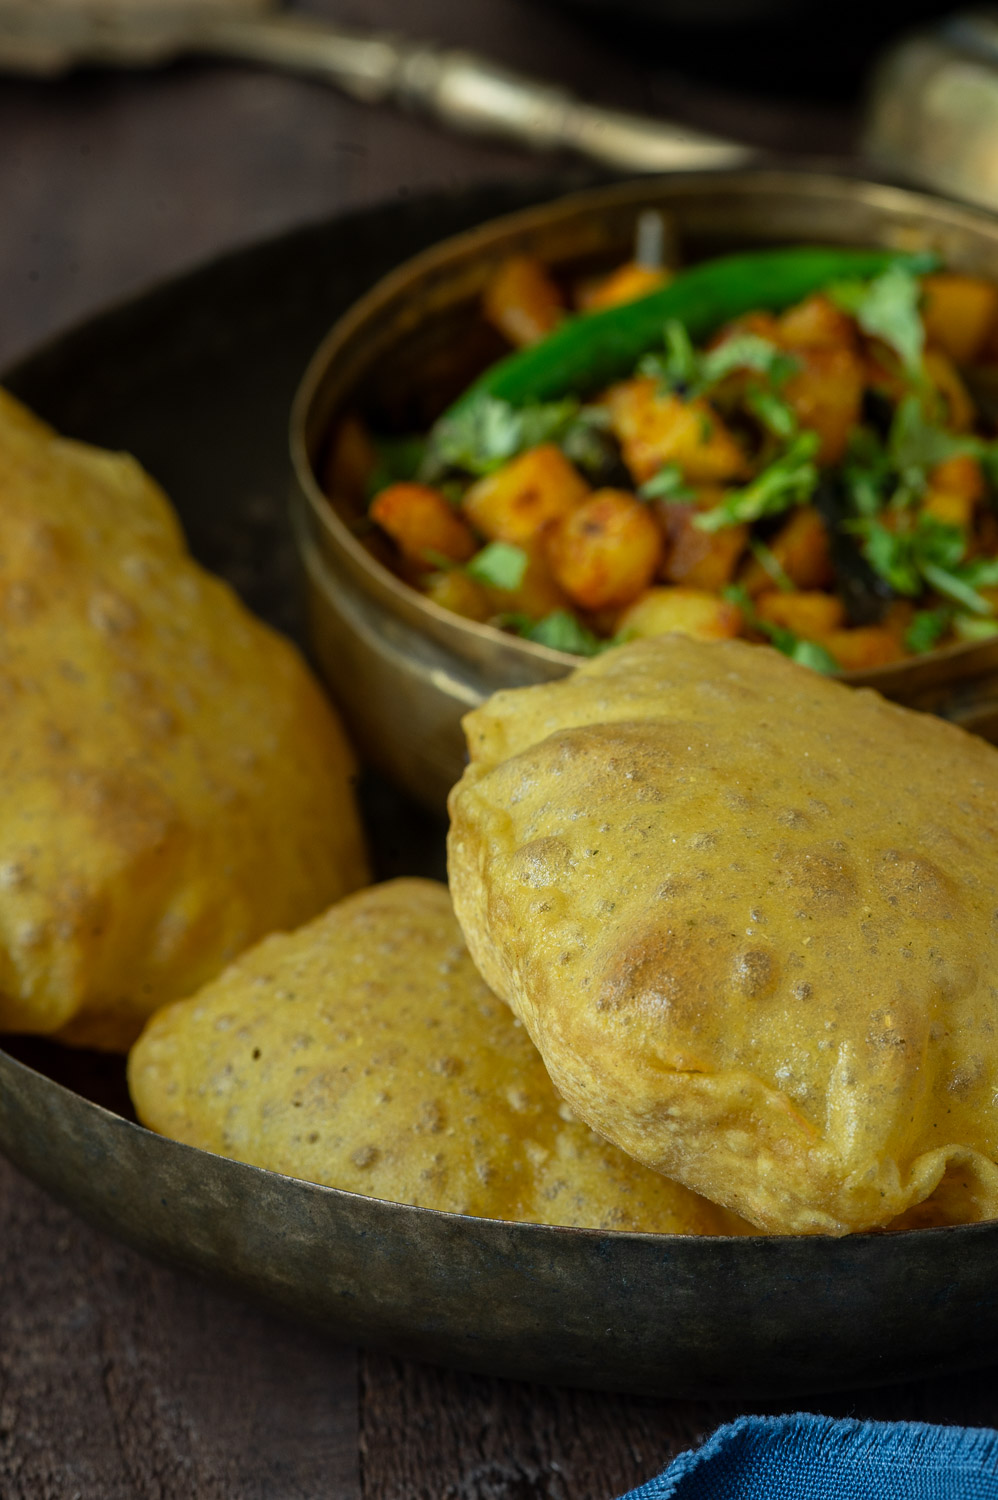
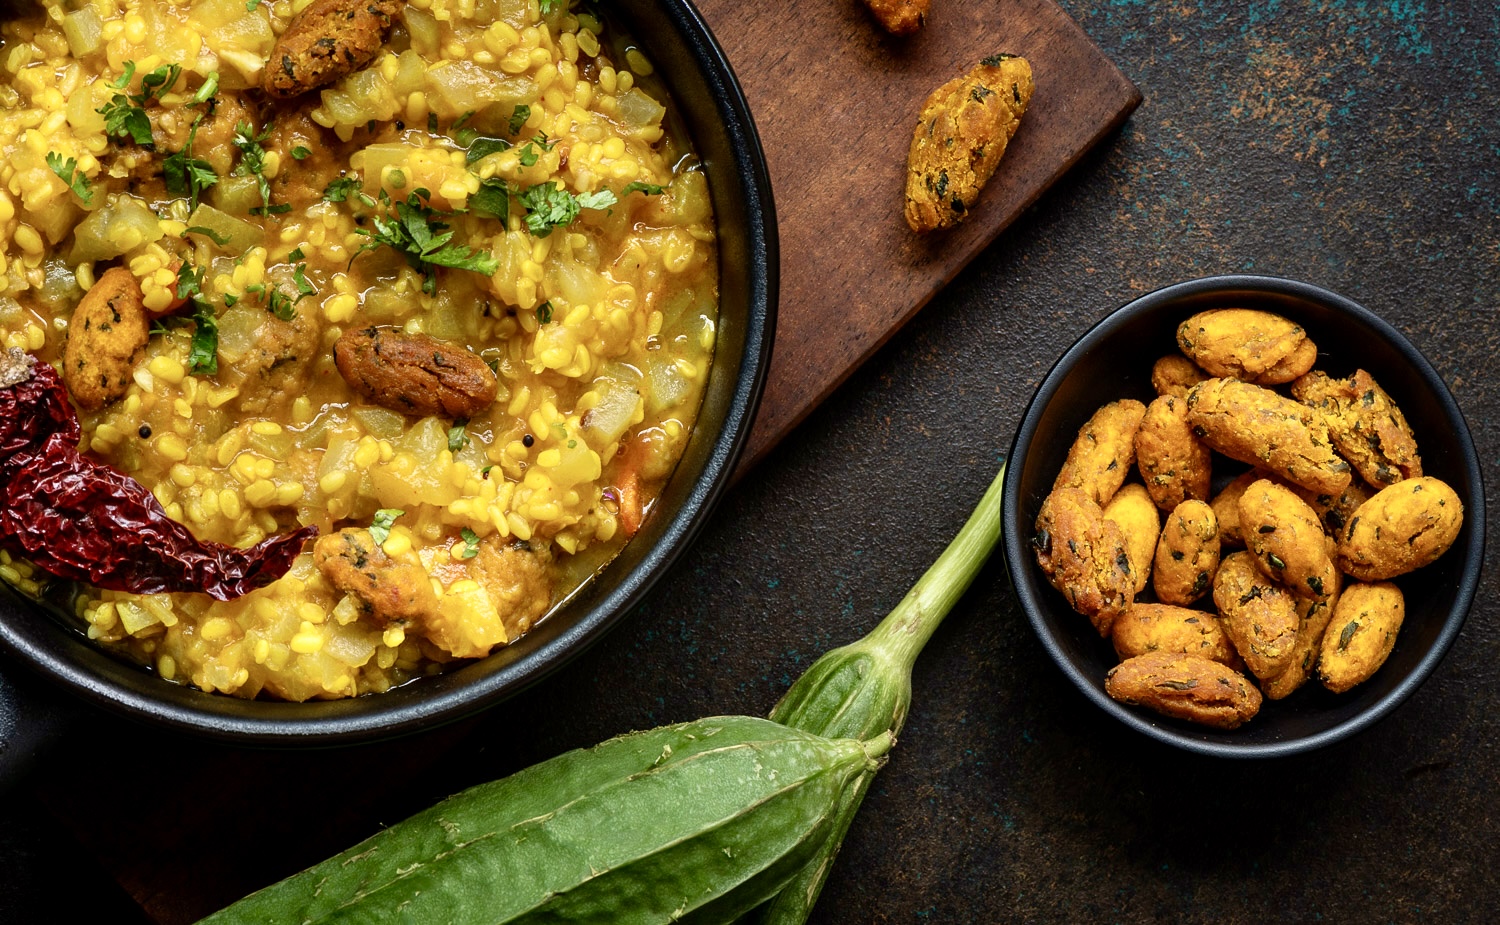
Your sai bhaji is ready. I enjoy eating it alongside hot rice, with kadhi and curd on the side. I hope you’ll enjoy this lovely recipe from Sindhi cuisine. I am sure you will find, as I do, that it pairs beautifully with other dishes from across the Indian subcontinent.

Time and again, I have spoken on this blog about how eating seasonal produce is the best thing for our bodies. We are a part of Nature, and it is intrinsic in us. We cannot look at it from the outside, or even objectively, because we belong to it. We cannot go against its flow, which is what we often try to do today. However, I believe that even as the world changes and decentres Nature, in our own lives we can actively choose – at the very least – to listen to our bodies. When we do, we will quickly realise that our hunger cravings have a rhythm with climatic cycles. Here in India, while the peak of summer is behind us, the winter is still far enough away that lighter grains are what we need. Hence, jowar (known in English as sorghum) is something I am making meals from these days. This jowar roti is an excellent use of the same, incorporating the ingredient into a daily staple.

I am fortunate to have access to very good quality, homemade jowar flour through my sister. She has a small mill in her kitchen, which she uses to prepare her own flours and powders. I have observed many other households in Mumbai doing the same. When I visited her recently, she was making jowar flour. What intrigued me was that she added a handful of soyabeans to it. I found this an interesting, and very healthy, combination. I don’t have a mill of my own back in Chennai yet, but as I teased my sister, I don’t need to, as I can just keep asking her for homemade flours. She gave me a kilo of jowar flour on that visit, and it’s being used liberally – and I’ll soon need more, as I’ve already warned her!

If jowar is used in warmer months, it is bajra (known in English as pearl millet) that is preferred in winters. Jowar is not only lighter on the digestion, but in flour form also easier to fold into roti dough. It really is so simple to make, requiring no pre-prep. All you do is add warm water, which brings out a glutinous consistency, then make the dough and roll it out immediately in order to fry it up. Bajra flour, on the other hand, tends to break apart as you roll it out due to a complete lack of gluten.

Both jowar and bajra rotis are eaten in my home. Depending on the season, one or the other will be served at lunch – except during the height of summer, when rice replaces roti altogether. Other than during that time, these two are staples, even though a wide variety of other flatbreads are brought into our meals too. I have been rolling out rotis since I was a young girl, and am able to handle different flours, but it does take practice. The trick is in the hand, and in being patient.

Jowar roti, despite being made of a lighter flour, is very filling. Just one piece, with a cup of dal or two cups of vegetables, is a perfect lunch. You don’t need anything else for hours after.

This may be why my mother would have some jowar roti during days on which she performed certain kinds of fasts, for instance. I am not entirely sure because the truth is that I paid very little attention to some of the items that my parents ate when I was a kid, and jowar roti was one of them. My siblings and I would screw up our noses when we saw it, so our mother always prepared regular whole wheat rotis for us instead of these healthier ones. I regret not having eaten jowar roti back then, but I am grateful that I learned how to make it.

Exposure plays such an important role in what we reach out to – or return to – in terms of food as we grow older. What we saw being prepared or consumed as children, whether we appreciated it or not, stays with us and informs our choices later on. Sometimes, I think about whether my kids – now grown and with homes of their own – will ask for these recipes when they have children of their own, whom they will of course want to provide the best of everything to. That is one of the core reasons behind this blog: it is my legacy to my loved ones, just as much as it is my offering to anyone in the world who seeks the comfort of a well-made meal.

Jowar Roti
(Yield: 3 pieces)

1 cup jowar flour

1/2 cup water

A pinch of salt

In a bowl, add the flour. To this, add water and salt. Mix all the ingredients with your fingertips and massage well, binding them all together. Make 3 balls of the dough and set aside.

Using your palms, roll out the balls. Sprinkle some flour onto the rolling board, and add some flour on top of each ball as well. Gently roll out the balls into flat discs. 

Heat a roti pan and add 1 disc at a time. If the roti is thick, then keep your flame on low or medium and cook the roti on both sides.

Now, with the help of tongs, place the roti on the stove or directly on the flame and allow to cook until spots appear. Set aside.

Repeat with the remaining balls.

Serve with hot ghee and/or along with subzi or pickle.

Stay tuned for another jowar-based recipe that I’ll share here soon. You may also wish to explore other millet dishes that I’ve shared over the years.

There have been many paneer recipes on this blog over the years, including most recently a lunchbox-friendly paneer tikka roll. The ingredient is a reliable staple for most Indian vegetarians, maybe even more deliberately so now that the importance of consuming protein has been understood by more people. However, I feel it has long been cherished, even before modern health-consciousness, as it is a dairy product. Hindu culture considers milk to be holy. It is offered to the gods and is valued almost as a kind of nectar from the heavens, which is why the cow is also sacred, being the creature that provides it. Today, I’m sharing my recipe for homemade paneer. It is a quick, convenient and simple method to ensure a regular, high-quality supply of an ingredient that you may already be eating a lot of.

It is of course exceedingly easy to just buy paneer. There are decent brands available, and your nearest organic market will also offer choices beyond the commercial ones. I used to rely on the same, but in more recent years the number of adulteration issues in Indian products has made me become even more cautious about what I purchase – because it becomes what I prepare, and what my body processes. With loved ones to feed, the concern is all the more. To me, it comes down to this: just make sure your source is a reliable one, when it comes to any ingredient. If you have the time and inclination to make something at home, do. Or else, just be discerning about what you reach for at the store.

My son who lives abroad uses store-bought paneer in his Indian meals. I am happy that he still enjoys and wants to prepare dishes that he grew up on. This recipe for homemade paneer is especially for him, to encourage his next steps in his culinary journey.

I hope it will be the same for you. As mentioned earlier, I have found that this is the most trouble-free method for making paneer frequently. In terms of contraptions, there are many paneer-making boxes available nowadays, but I use a simple muslin cloth, as is traditional. You must find a method that works for you. When it comes to certain ingredients or dishes, I believe that anyone who really wants to make some will find a way. Paneer is one of them, for sure. It’s a question of whether you feel the effort is worth it, even if it’s fairly easy. Where there’s a will, there’s a “whey”, shall we say!

Speaking of whey, I ensure that I gather the whey that is a byproduct of this process and do not throw it away. I add it to dal or else to atta to make rotis, which will subsequently be paired with a paneer dish. Whey is a form of protein, and doesn’t have a flavour in itself, which means it can be added to a number of dishes easily to boost their nutritional quotient. It could even go into a soup, for instance. Depending on what else I am making in the kitchen that day, I will make sure I use it up. There’s no wastage when you make paneer. You can also soak it in water and keep it in the fridge for up to four or five days, which means that it’s very unlikely that you’ll waste the paneer itself. Who would, really? It’s just too tasty to not finish up!

Homemade Paneer
(Yield: 125 grams)

 ½ litre whole fat milk
Juice of 1 lime OR ½ cup sour curd OR a few drops of vinegar

Equipment
1 strainer
A muslin cloth
1 large bowl

Boil the milk in a pot. Stir occasionally so it does not burn at the bottom.

As soon as it is ready to boil, add the curd /lime juice / vinegar. Stir very lightly. You will soon notice the milk will begin curdling.

Now, pour the contents through a muslin cloth placed over a strainer and collect the whey at the bottom.

You will notice the whey is not milky but looks yellow. Set aside the whey. You may wish to use it in other dishes, as mentioned earlier in this post.

 Rinse the paneer under cold water for a few seconds. Then, gather the cloth around it and close tightly.

Place this bundle on the strainer. Place a weight over it to set the paneer. Allow to sit this way for about an hour.

After an hour, remove the weight and the cloth. You will see that a beautiful block of paneer is ready to be cooked. If you’re in need of ideas about how to use it, do explore some recipes I have shared before.


There was a time when I thought that once my children had grown up and had gone away for their higher studies, my job as a preparer and packer of tiffin boxes would come to an end. Clearly not! Now, I still find myself making daily choices regarding healthy lunch options that they can enjoy at the office, and still struggle now and then with figuring out good ones that are tasty, nutritious and can keep well for a few hours. In frequent rotation is this paneer tikka roll, which fulfils all those criteria.

I know that this challenge is one faced by many people around the world – whether they are packing for themselves, or for a loved one who is going to work or to school. My son also requests homemade meals that he can carry on flights, and packing for travel is its own culinary category – wouldn’t you agree? We all want our families to eat well, even when we can’t personally serve them hot food.

I think in my case, my belief that fresh food is always best has sometimes made it all the more difficult for me to accept that anything else quite comes up to the mark. Even after all these decades of practice with tiffin boxes for my children and my spouse, all at different ages and stages of their lives and of mine, it’s a feeling I can’t entirely shake off. I remain practical, however. At night, I ensure my refrigerator is empty of cooked food, but any kind of prep that makes the morning easier is kept ready. The next day will invariably be busy as I rush about preparing something that is both appealing and healthy.

In this case, I marinate the paneer on the previous day and keep other required ingredients handy, so that there will only be minimal cooking and assembling the next day.

While this paneer tikka roll is a smart way to carry a protein-rich packed lunch, it is reminiscent of homemade meals in the sense that it is in some ways a reconstruction of the standard paneer sabzi and roti that in eaten in many homes across India. This is the kind of meal that I always make extra helpings of, because it is appreciated across generations. The roll solution really is genius, I feel. What makes it even better is that it can be stuffed with extra vegetables, making it distinct from street food or store-bought rolls. I like to add colourful bell peppers, which add a crunchy texture.

I must confess that when I prepare paneer tikka for myself, I eat it more like a salad with lots of veggies than in the traditional way. I avoid the roti – i.e. carbs. At other times, I serve it to my aged father alongside rice instead, as this combination is easier for him to consume. You can use the paneer tikka itself in a number of ways, other than in a roll format. You can also replace the paneer itself with tofu or your preferred protein. On that note, I often prepare paneer at home, and will share the recipe for the same in an upcoming post.

Paneer Tikka Roll
(Yield: Serves 1)

100 grams paneer
Salt to taste
¼ teaspoon turmeric powder
½ teaspoon dhaniya (coriander) powder
A pinch of garam masala
½ teaspoon chili powder
¼ teaspoon garlic paste
¼ teaspoon ginger (grated)
1 tablespoon yoghurt
1 teaspoon oil
1 teaspoon ghee
½ cup bell peppers (sliced)
½ cup onions (sliced)
2 big size rotis (for reference see the post here)
Green chutney (optional)

Marinate the paneer in the yoghurt. To this, add chili powder, dhaniya powder, turmeric, salt, garam masala, garlic paste, grated ginger and oil. Allow this to marinate for at least 30 minutes. You can also do so overnight, as mentioned earlier.

Heat a pan and add a teaspoon of ghee. Add bell peppers and onion. To this, add the paneer and cook until it is soft and golden.  Do this on a high flame. Once soft and slightly golden on both sides, remove the paneer onto a plate and set aside.

To assemble the paneer tikka roll, cook the rotis on both sides. Remove them from the griddle and place them flat. Apply green chutney or other condiments, if you would like to.

Place the paneer mixture in a line at the centre of each roti. Fold both sides of the roti over the same. Wrap in parchment paper.

Cut into half and serve fresh, or place into the lunchbox or tiffin carrier to be enjoyed later in the day.

I know there are many lovers of paneer who read this blog, and I hope you’ll explore more paneer-based dishes in the archives!

Garam masala is one of India’s quintessential spice blends, a staple of the Punjabi kitchen and popular in the north of the subcontinent. Traditional Gujarati and Tamil cuisines don’t use it, which means it is not a masala that features regularly in my own cooking. That said, I do enjoy the flavour profile immensely in certain dishes. Until recently, I would purchase readymade garam masala, but an increasing number of spice adulteration scares in India when it comes to commercial brands have convinced me that it is safer to prepare it at home myself. I found the process easy and the outcome fulfilling, and in some ways, this means that garam masala features a little more often in the recipes I choose too.

There is a vast amount of nuance when it comes to Indian spicing techniques and spice blends. There are differences between whole forms and powdered versions, and seasonality and availability also have an impact on what became considered traditional. Certain combinations are region-specific. Additionally, while many assume that red chillies are the base spice, this is historically inaccurate. The chilli family came to the subcontinent with the Portuguese. The core spice in this part of the world prior to this was pepper.

Garam masala has had only a scattering of appearances on this blog, used sparingly for dishes like roast potatoes and radish paratha. I have also used it in place of chana masala when making chole, rather than buying readymade chana masala. It traditionally features in black dal, moong dal and even certain meat preparations. I find that the flavour is very potent, so it is best to use a very small quantity, especially when the blend is homemade, as it will be purer. Adjust the quantity as required, based on your preferences and on what the dish calls for.

Nowadays, I roast the spices, but I clearly remember when my mother used to dry them in the sun in the summer heat. We were fond of chana and black dal and rarely went to restaurants, so garam masala was definitely a presence in her kitchen cabinet too. As I have said many times over many posts, my cooking skills came from her. She was as fond of exploring different cuisines and increasing her own repertoire as I am.

You may recall from prior posts that the more elaborate method of sun-drying is also something I do now and then or for specific spices, but this is of course climate-dependent. I presume that exposure to the elements may add more to the flavour, but overall I certainly lean towards homemade rather than storebought and that fact alone elevates any powder I prepare – roasted or sun-dried. I always make my powders in bulk, not only so that they may be used for a longer period, but also so that I can give them to my kids, who will utilise the same in their own kitchens. This gorgeous garam masala is now in all the places they live, and perhaps will be welcome in your home too.

Garam Masala
(Yield: Approximately 1 cup)

½ teaspoon nutmeg
2 strands mace
4 cloves
¼ cup coriander seeds
2 tablespoons cumin seeds
½ tablespoon black pepper corn
1 tablespoon fennel seeds
¼ teaspoon ajwain (carom) seeds
1 teaspoon methi (fenugreek) seeds
4-5 whole cardamom
6 cinnamon sticks
2 star anise

Begin by roasting all the big ingredients on a low flame. These would be cinnamon, star anise, nutmeg and mace. Add the smaller grains second: cardamom, methi, fennel, cumin, ajwain, coriander, pepper, cloves.

Once the ingredients release their fragrance, turn off the stove and remove the pan from the flame.

Allow to cool and blend in a spice grinder.

Store in an airtight glass jar. Use in curries of your choice for a well-rounded and deep flavour.

Over the years, I have shared numerous spice powder recipes, from to curry leaf podi to coconut podi and more. More will soon follow, so do stay connected!

Aloo poori used to be a regular dish served in daily meals throughout India. That’s how I remember it. Increasingly, I notice that it has become more of an item enjoyed at celebrations. This is probably because people have become more health conscious, or at least that is what I believe based on what I observe. Poori is a kind of fried flatbread, usually puffed up and on the oily side. “Aloo” means “potato” in Hindi, indicating the curry it is eaten with. Together, they are delicious, and I understand both why people used to want to eat aloo poori frequently earlier, and why it plays a role in feasts today. Here, I share a masala aloo poori recipe.

As I said, aloo poori is really a pan-Indian dish. I am particularly familiar with two versions: Gujarati style and Tamil style. In Gujarati, the dish is known as “batata poori” (“batata” means “potato”), while here in Chennai I have encountered it in many restaurants under the name “poori potato”. There may be a Tamil name for it, of course. I have also enjoyed some more versions around the country. Every time I’ve been to Kolkata, I’ve ordered what they call “luchi aloo”, which happens to be a dish I really love. Marwaris often eat pooris with aam ki loonji, a mango condiment that’s neither a chutney nor a pickle, yet somehow both at once. It’s another interesting combination, and I’ll be sharing that recipe soon.

Regular poori, rather than spiced poori, is eaten everywhere, but I want to share a typically Gujarati version, which is masala poori. Traditionally, the poori and potato combination is eaten alongside a third party: a kheer. A kheer is a kind of milky dessert you may have encountered on this blog before. The savouriness of the masala poori contrasts well with the sweetness of the kheer. Potatoes always make people happy, of course. All together, masala poori with batata and kheer are just unbeatable.

I have shared many flatbreads from the Gujarat region earlier, most notably in this post [hyperlink] featuring a number of variants. They are usually made petite and two-bite sized. Pooris are also made small, but unlike some other flatbreads, like theplas [hyperlink], they are not travel-friendly. They are meant to be eaten fresh.

In fact, they aren’t even flatbreads, technically, since the whole proof of a well-made poori is that it fluffs up in the oil, rises and turns into a hollow ball. A flat poori is one that hasn’t been prepared well. A puffy poori is achieved when the dough has been made to the right consistency, neither tight nor soft. It needs to be pliable and well-massaged.

I learned the nuances of making a good poori from my mother. She showed me how they should puff up perfectly and always be served hot. Here, I’ve chosen to keep the potatoes very simple, since the pooris themselves are spiced and the kheer brings in its own rich range of flavours to complete the meal.

I also associate potatoes with my brother, and have many childhood memories of him preparing batata nu shaak or batata poori for us.

He genuinely enjoyed being in the kitchen. Although he was very macho, and was an athlete too – a rowing champion, in fact – he showed us early on that there’s no shame in a man cooking or doing household work. He loved to make the potatoes while our mother handled the pooris, and my sister and I would sit happily at the table, waiting to be served.

When I think about this now, it occurs to me how cooking together – even watching loved ones cooking, everyone being in the kitchen together – was a kind of bonding activity for us. We often talk about the importance of eating meals together as a family – but why not extend that to preparing them together, too? Such little things are the stuff of quality time in the moment, and such precious memories down the line…

Masala Poori With Aloo
(Serves: 3-4)

Masala Poori

1 ½ cups whole wheat flour
1 heaped tablespoon chickpea flour
13 teaspoon turmeric powder
1 teaspoon dhaniya (coriander) powder
Salt to taste
¼ teaspoon kasoori methi (fenugreek leaves) powder
1 pinch asafoetida
1 tablespoon curd
1 tablespoon oil
1 teaspoon ginger-green chili paste
13 cup water

Take the flours in a bowl. To these, add all the spices, along with the curd and the oil. Mix well using your fingertips and slowly add water as required to make a medium-soft dough.

Massage the dough well so it becomes smooth. You can use the help of a little oil on your palms to achieve a good dough.

Cover and set aside.

Heat the oil for frying. Make small rounds and start by rolling each one out.

Once the oil is hot enough, drop a rolled-out dough piece into the hot oil gently. Soon, it will fluff. Flip it over so it is cooked well on both sides. Repeat for all the dough circles.

Your masala pooris are now ready to be served hot.

Potato

350 grams potato
Salt to taste
2 tablespoons oil
1 teaspoon mustard seeds
½ teaspoon cumin seeds
¼ teaspoon turmeric powder
1 teaspoon cumin or coriander powder
½ teaspoon ginger paste
½ teaspoon green chilli paste

Wash, peel and cut the potatoes into small pieces.

Heat a kadai and add oil. Once the oil is hot, add the mustard seeds and cumin seeds. After they begin to splutter, add the potatoes. Stir and add salt and turmeric. Mix again, then cover with a lid. Allow to cook on a low flame, stirring occasionally until the potatoes are tender and cooked.

Now add the remaining spices and mix well. Cover and allow to cook once again for a few minutes until all the flavours come together well.

Garnish with coriander leaves and serve hot with pooris.

Don’t forget that you may want to enhance your meal even more with some kheer. I have shared several kheer recipes on this blog. Feel free to prepare one of your choice and serve it along with this masala poori with aloo!

I shared one version of muthiya in my recipe for turiya muthiya shaak recently. In that dish, the muthiyas were small, deep-fried dumplings which contained fenugreek leaves, and which were soaked in the vegetable gravy. I mentioned in that post that larger deep-fried muthiyas are often enjoyed with snacks. There are even more kinds of muthiya out there too. There is one with grated bottle gourd, another version with fenugreek leaves, and even ones that utilise leftover khichdi or leftover rice – these are bound with flour, greens and spices, rolled and steamed and had as a wholesome, single-dish meal. I am sure more of these muthiyas will be explored on this blog in the time to come. Today, I want to share a steamed variant.

While steamed muthiya can certainly work well as a snack, I would recommend that these be had for high tea or even as a meal, as they are heavier than the smaller, deep-fried kind. Steamed muthiyas happen to be the hot favourite at home right now. I find myself preparing them at least once a week, usually for dinner. While many of us in India have the privilege of employing cooks in our home kitchens, in mine, there are certain recipes that only I will prepare even though I have help. Although my cooks over the years have been skilled and pick up my techniques, I get more satisfaction from making some meals from scratch. This is the case with many traditional Gujarati recipes. Somehow, not only do I enjoy the process, but the process itself evokes childhood memories and nostalgia, and a sense of connection to my late mother. I like to make such dishes as close to authentically as I was taught. Any kind of muthiya belongs to that treasured category.

Looking back, it’s obvious to me that our mother had really spoiled us all when we were growing up. Food was served to us fresh off the griddle, and always prepared with such attentiveness and care. Regardless of whether we enjoyed a dish or demanded another, she just didn’t cut corners when it comes to cooking. Steamed muthiya was something that my siblings and I didn’t like at all, and I remember that we often asked for pasta instead (funnily enough, we were not fond of pizza, but we did love a baked casserole with white sauce that our mom sometimes made). To us, what was exotic was most appealing. While my culinary curiosity and search for novelty remains, I have since learned to appreciate the traditional and the simple too.

While we kids didn’t like steamed muthiya, it was one of our father’s favourite dishes. As soon as the dumplings came out of the steamer, he would cut one up and dip it in methi masala, a traditional Gujarati condiment which contains chilli powder ground with fenugreek leaves. I have clear memories of how much he relished the freshly steamed muthiya. Another, possibly more popular method, is to take it off the steamer, slice it and sauté it in oil with mustard and sesame seeds. These steamed, sliced, sautéed muthiya are then eaten with green chutney. The healthier version, of course, is to have them as my dad did back in those days.

As we age, our tastes not only change, but so does the way that we perceive food. When I look back, it’s true that even our snack options were relatively healthy when I was growing up, because most items were homemade. Now that junk food is vastly available, I am glad to not be attracted to it, perhaps because of habits inculcated in childhood. I also consciously reach out for more nourishing options, not just in terms of snacks but even for our daily meals, our beverages and so on. I am happy to circle back to my mother’s ways.

This particular steamed muthiya recipe is hers. Other versions, equally authentic and traditional, will be different. This is true for any dish, as I’ve said before. It will be prepared differently in every family, community or region. For example, I have come across steamed muthiyas which contain chickpea flour. It’s not something my mother added, so I skip it just like she did, but you can incorporate some if you wish.

Steamed muthiya really is very simple to make. Prepare the dough, which is enriched with various spices (and in this case, fenugreek, which grows abundantly in Tamil Nadu in the summer, and is a staple of Gujarati cooking). Roll out the pieces, steam them, and eat them as soon as they’ve cooled enough. Or else, sauté them for added flavour. You’ll see what I mean below.

I have provided both the steamed and sautéed versions in the method. What I have observed is that when I have friends over for lunch, they seem to enjoy the steamed versions more (not just this kind, but those which use veggies or khichdi too). While the muthiyas are very filling, the fact that they are steamed makes them feel lighter. I notice that my guests reach out for more helpings. I am sure that the knowledge that they are healthier than fried goodies is reassuring. Despite being better dietarily-speaking, they are delicious.

I wonder which version you’ll enjoy more. Why not try both?

Steamed Muthiya
(Serves 2-3)

1⅓cup whole wheat flour
⅓ cup rava
1 full cup methi/fenugreek leaves (finely chopped)
2 tablespoons oil
Salt to taste
¼ teaspoon turmeric powder
¼ teaspoon asafoetida
1 teaspoon dhaniya/coriander powder
2 teaspoons sugar
1 teaspoon ginger (grated)
1 green chili (finely chopped)
Juice of ½ lime
2-4 tablespoons water

Sautéed style
2 tablespoons oil
½ teaspoon mustard seeds
½ teaspoon sesame seeds

Chop the methi leaves finely. Rinse in water thoroughly.

Add the methi leaves to a bowl. Add oil, salt, turmeric, asafoetida, dhaniya, ginger, green chili, sugar and lime juice and massage well.

Now, add the flour and rava. If required, use 2 tablespoons of water to help mix into a soft pliable dough or batter.

Make long strips of the dough and place in the steamer. Steam for 20 minutes.

Once done, remove the muthiyas and allow to cool. Then, slice them into discs. You can serve them now, accompanied by condiments of your choice, or you can prepare the sautéed version if you prefer.

To sauté, heat a pan and add 2 tablespoons of oil. Add mustard and sesame seeds. Once the seeds splutter, add the sliced muthiya. Stir often and allow to turn golden on both sides. Serve hot with a chutney of your choice.

I have shared numerous traditional Gujarati dishes on this blog over the years, and you’ll find a wide selection from appetizers to desserts in my archives. I hope you’ll enjoy exploring them!

Ridge gourd, a water-based vegetable known in Gujarati as “turiya”, happens to grow abundantly all year-round in Tamil Nadu. Here, it is called “peerkanga”. While it is a seasonal vegetable in other parts of the country, it seems to be available locally almost all the time. This means that I get to eat turiya muthiya shaak, a Gujarati dish that is among my favourites, almost whenever I want to. It’s an especially delicious way to consume a nutritious vegetable, and I think you’ll also enjoy trying it out.

The weather here in Chennai tends to be hot, hotter, monsoon or briefly pleasant – and ridge gourd grows abundantly in hot weather, which is why it’s easy to find locally. We have it at least twice a week in a few preparation styles. I have shared one recipe before, cooking it in coconut oil and with grated coconut, in the regional way. Right now, as the temperature rises, water-based vegetables are a must in order to keep our bodies better hydrated, and I strongly encourage you to include ridge gourd and similar ingredients in your diet too.

If you have explored my earlier recipe for ridge gourd, I would liken the addition of grated coconut there to the addition of muthiya here. Muthiya are small fried dumplings. Tiny and round, they could be likened to miniature vadas or bhajis. They are made with chickpea flour, and deep-fried before being added to the cooked vegetable. They soften up in the gravy, and add a great deal of flavour to it. Ridge gourd is itself plain-tasting, so seasonings and additions like muthiya in Gujarati cuisine or coconut in Tamil or other South Indian cuisines please the palate. I’d certainly be curious to know about more ways to enhance ridge gourd dishes.

Here, I have opted to make the muthiya healthier by incorporating methi, or fenugreek, which also imparts its own flavour to the dish. By the way, you can also prepare the muthiya a day in advance in order to save time on the day of serving. In fact, muthiya by itself can be a tasty snack. Here, size does matter: smaller ones will be added to a vegetable gravy like this one, whereas they need to be made bigger if they are to be eaten as snacks. The method, however, is essentially the same.

When I was growing up, my mother would often make a tin of bigger muthiya and we would have it with chai. When we had turiya muthiya shaak for lunch or dinner, my sister and I would fight over the deep-fried, deliciously soaked muthiya. We never cared much for vegetables, although our mother drilled it into us that they are good for us.

Now that we are older and wiser and mothers ourself, we value and appreciate how strict she was with ensuring that we ate them whether we liked them or not. This system is passed from generation to generation. Now, with adult children of my own, I am all the more aware that children do follow their parents’ eating habits – if not when they are growing up, then eventually. To all the young parents reading this, I want to say: show your kids how to eat healthy, eat clean and to respect food through your own example, not just with words. It makes a difference. The same goes for all our traits. If you want your kids to become caring individuals, you have to show them what it’s like to be one yourself. As parents and elders in a family, we need to be conscious about how generations after us adopt our habits and even our nature. Probably the simplest way to embody this knowledge well is by teaching them about the goodness of fruits and vegetables in your daily intake. As they grow, you will see the effect, even if it’s difficult to convince them right now.

In fact, a part of the inspiration behind my sharing this recipe is that I visited my son’s office space the other day, where as mentioned in another post, a small garden is run by the factory workers. There was fresh organic ridge gourd being harvested, and that’s what I brought home to prepare for us all, even though I grow some on my terrace too. I was glad to see my son’s support for this venture, and I hope that the lessons I inculcated in him about eating well continue to yield good things.

All these years since our childhood later, my sister and I both make, serve and eat lots of delicious vegetables – every day. We certainly aren’t fighting over muthiya anymore. In fact, I grew to love turiya muthiya shaak, turiya and all, and my sister happens to prepare it better than I do. She has long stopped asking what I want to eat when I visit her in Mumbai, having gotten familiar with my cravings over the years. Turiya muthiya shaak is invariably on the table at some point during my stay, and I relish it all the more because it is prepared by her.

Turiya Muthiya Shaak
(Serves 2-4)

Methi Muthiya

1 cup methi leaves (fenugreek leaves; finely chopped and rinsed well)
¼ tsp asafoetida
Salt to taste
½ teaspoon red chilli powder
¼ teaspoon turmeric
2 teaspoons sugar
Juice of 1 lime
A handful coriander leaves
1 teaspoon ginger (grated)
¼ cup whole wheat flour
1 full cup besan (chickpea flour)
2 tablespoon oil
Water as required

In a bowl, add the methi leaves and all the ingredients except the flours and the oil. Massage well.

Then, add the flours and make a dough. Sprinkle water as required. Add more besan if required.

Add the oil and massage well. Make small, elongated balls (as shown in the photographs), using more water if required to make them tight.

Deep fry these on a medium flame until golden. Set aside.

Turiya Shaak

4 cups chopped ridge gourd
¼ cup yellow mung dal
½ teaspoon turmeric
1 cup water
Salt to taste
1 small tomato (chopped)
1 teaspoon dhaniya powder (coriander powder)
1 green chilli
2 tablespoons oil
½ teaspoon mustard seeds

Soak the mung dal until soft. Set aside.

Peel and chop the ridge gourd into cubes.

Heat the oil in a small pressure cooker. Add the mustard seeds. Once they splutter, add the dal and the chopped gourd along with the water. Next, add the turmeric. Mix and cook for 1 whistle, or until the dal is tender.

Allow to cool, then open the cooker.

To put together your turiya muthiya shaak, take another kadai. Add a little oil and add more mustard seeds, the green chilli and the tomato and stir until the tomato pieces are tender. Now, add the vegetable and dal mixture to this. Allow some amount of gravy.

Finally, add the muthiya and allow to soften. Cook for a few minutes. Adjust the salt if required.

Remove from the flame and serve with rotis or rice.

This blog has a large and growing selection of traditional Gujarati recipes – sometimes authentic, sometimes with a twist – and I hope you’ll take some time to explore more of them!

Often, I find that I have cravings to eat leafy greens. Yes, cravings for dishes that most of us start out rejecting! As we grow older, we come to appreciate their tastes better, as well as begin to understand the numerous benefits that come from consuming them. Now, I am eager to discover the subtle flavours of each variety I encounter. When I say leafy greens, I don’t necessarily mean lettuce, arugula and the like. Here in India, we have hundreds of varieties of what can broadly be called spinach. Amaranth is one of them, and this simple red amaranth stir-fry is a lovely way to add more greens to your meals. Or in this case: reds!

These amaranth leaves are reddish-purple, which make them quite eye-catching both fresh and once they have been cooked. I would describe red amaranth as being bold, both in its hue and its flavour, which is quite savoury. Green amaranth also exists, but the red variety has more antioxidants, as well as more protein as compared even to spinach. It has become quite a popular vegetable of late, and while I don’t have that many memories of it in particular, it’s possible that I’ve eaten it innumerable times in the past without thinking too much about it – until I really began to get interested in leafy goodness, that is.

Red amaranth has been catching my eye at my local market lately, which is why I picked some up. I often do this. I visit the market and explore whatever is in season. Through the year, I find different kinds of leafy vegetables, and am often curious to learn their names and uses. In Tamil, all greens are broadly defined as “keerai”. Amaranth is “thandu keerai”, “aru keerai” or “senkeerai”. My daughter always makes fun of me because every other month I say she should be eating “this keerai” or “that keerai”, and it’s a running joke in our house that she constantly has to learn the names of new keerais – and eat them too, of course.

Both of these – learning about food and eating it – are activities I enjoy, so of course I hope to spread the love of both. For instance, I know that my local market, while perfectly sufficient for my usual needs, does not actually bring in all the varieties of greens available in this region. I know this because I have seen other culinary bloggers post online about certain kinds which I haven’t had access or exposure to. It’s always so inspiring to see the amazing work that people are doing when it comes to returning to roots and eating traditionally, locally and seasonally. I’m intrigued by what interesting new-to-me ingredients are out there, and sometimes I keep an eye out for a particular one that I’ve heard about and hope to experiment with, especially when I am travelling within the state.

I like to cook most of the greens that I work with in a simple way, one that is adaptable across varieties. You can use the method below for greens other than red amaranth too. It’s a basic South Indian stir-fry style, specifically Tamil Nadu style, that I use here, which results in a spicy side dish that is both delicious as well as healthy. No matter what kind of greens I prepare, I like to have a big cup with my lunch, which is more often than not a Gujarati thaali.

This is where my own roots come in. While I will prepare a South Indian spinach, I’ll enjoy it with a Gujarati kadhi. This is my preferred combination for summer, as the yoghurt-based kadhi offsets the flavour of the stir-fried greens. I find that a dal will make the meal too heavy at this time. But a cooling kadhi and a bold red amaranth stir-fry are just perfect together.

Simple Red Amaranth Stir-Fry
(Serves 3-5)

5 cups chopped red amaranth
3 tablespoons gingelly oil
½ teaspoon urad dal
¼ teaspoon mustard seeds
1 green chilli
¼ cup grated coconut
Salt to taste

Rinse the red amaranth, or any spinach or greens of your choice. Do so well, in 2-3 changes of water. Set aside.

Heat a kadai and add the oil. Then, add the urad dal. Once it turns golden, add the mustard seeds. When they splutter, add the green chilli. Sauté these, and then add the spinach. Stir, then cover with a lid for about 5-8 minutes.

Remove the lid and allow the water to evaporate.

Next, add the salt and the grated coconut. Mix well.

As I said, this is indeed a simple stir-fry, and I’m sure you’ll find that the preparation method works for most kinds of greens. I would recommend enjoying your stir-fried red amaranth leaves with warm rice or rotis.

If you would like to explore more greens-based recipes from my archive, I’d recommend starting with purslane dal or spinach rice, in keeping with the South Indian theme, and then following the tags to discover more dishes for you to enjoy!

On our first wedding anniversary, decades ago now, my husband and I went out to dinner with our entire family. We went to a lovely fine dining restaurant in Chennai which serves South Indian fare. It was during this evening that I tasted tomato pappu for the first time. I relished it. While I have eaten it numerous times since, over the years – although not very frequently, because this is still a place that we save for special occasions – it took a long while before it occurred to me to try replicating it at home, which I did only recently. It surprised me to learn that at its heart tomato pappu is a very simple dish, using everyday ingredients and requiring a familiar preparation style. I’m glad to be able to share it with you too.

Tomato pappu is essentially a dal which has equal quantities of tomatoes and lentils. It originated in Andhra Pradesh. Telugu cuisine is not one I know much about, but I am eager to learn more, and I think this dish is a good place to start.

Interestingly enough, while I have lived in Tamil Nadu all my life, my mother had grown up in Vijayawada, in Andhra Pradesh. But when I first took her for a meal at this restaurant and ordered tomato pappu, it turned out to be her first exposure to it. While she spoke the language and knew the culture well, she had also been brought up in a very traditional Gujarati household and it was clear that Telugu food itself was a bit unfamiliar to her. It was lovely to introduce her to a dish from the region she grew up in. She had a curious mind that I inherited, and I remember her saying, “We should learn how to make this too.” Like me, she had absolutely loved it.

I went back to that restaurant recently, and only then did I decide to make good on my mother’s suggestion and finally learn to prepare tomato pappu. Although my dear mother is no longer around to enjoy it with me, the dish is imbued with so many memories over the years of celebratory meals with loved ones. Now that I have begun to make it at home, we will no doubt savour it more often, and it will come to be a part of even more of our experiences together.

As I sit here and write this post, my curious side emerges yet again, and I wonder whether the tomatoes can be replaced with some other vegetable. This is what I do all the time at home and for the re:store blog – innovating existing recipes while also exploring traditional ones. I’m thinking that carrots or perhaps spinach would be good substitutes. Both will certainly be healthy and tasty. I’ll keep you posted about how my experiments go, as always.

That’s the thing about cooking: one can get so very creative in the kitchen. Once you have mastered the basics, you can use your intuition and expand your repertoire. It’s all about having a sense of which ingredient might work, which flavour, what goes well with something or really doesn’t. For instance, I would not attempt a capsicum pappu as I am dubious about if that might work. At the same time, I’ve been marvellously surprised by dishes I’ve tasted around the world that bring seemingly incongruous elements together. The challenge is finding out what is complementary, through trial and error. Sometimes, though, you just know something will work, and it does.

When I think back to how I didn’t know anything about this delicious tomato pappu when I first tasted it, and couldn’t even identify its ingredients beyond tomatoes, I can see what a long way I have come in my culinary life. Now, this dish is no longer something I eat only at restaurants. It’s become something even better: a part of my regular meals.

Tomato Pappu
(Yield: Serves 2-4)

½ cup toor dal
2 cups water
2 medium-sized tomatoes
3 cloves garlic
A handful of curry leaves
Pulp from a lime-sized ball of tamarind
Salt to taste
½ teaspoon turmeric
1 teaspoon red chili powder
2 green chillies
1 tsp grated ginger
½ teaspoon asafoetida
2 teaspoons oil

Tempering
1 tablespoon ghee
1 teaspoon mustard seeds
1 teaspoon cumin seeds
¼ teaspoon asafoetida
1 dry red chili

Rinse and clean the dal. Add the dal to water and turmeric powder and pressure cook until tender. Set aside.

Heat a kadai. Add the oil. To this, add ginger, garlic, curry leaves, asafoetida, turmeric powder and salt. Sauté for a few minutes. Next, add the tamarind pulp. Allow to cook a little and then add the tomatoes.

Sauté until the tomatoes are tender. Mash it all well together.

Now, add the dal mixture and give it a good stir. Allow to cook a little. Set aside.

Prepare the tempering by adding ghee to a heated kadai, then adding all the remaining ingredients. Once the seeds splutter, add the tempering to the dal mixture.

Serve this tomato pappu hot, with rice. I also find that it pairs nicely with dosa or idiappam. If you’re a fan of dals or of South Indian cuisines more broadly, there are many more recipes on this blog for you to enjoy!