Tag

vegetables

Browsing

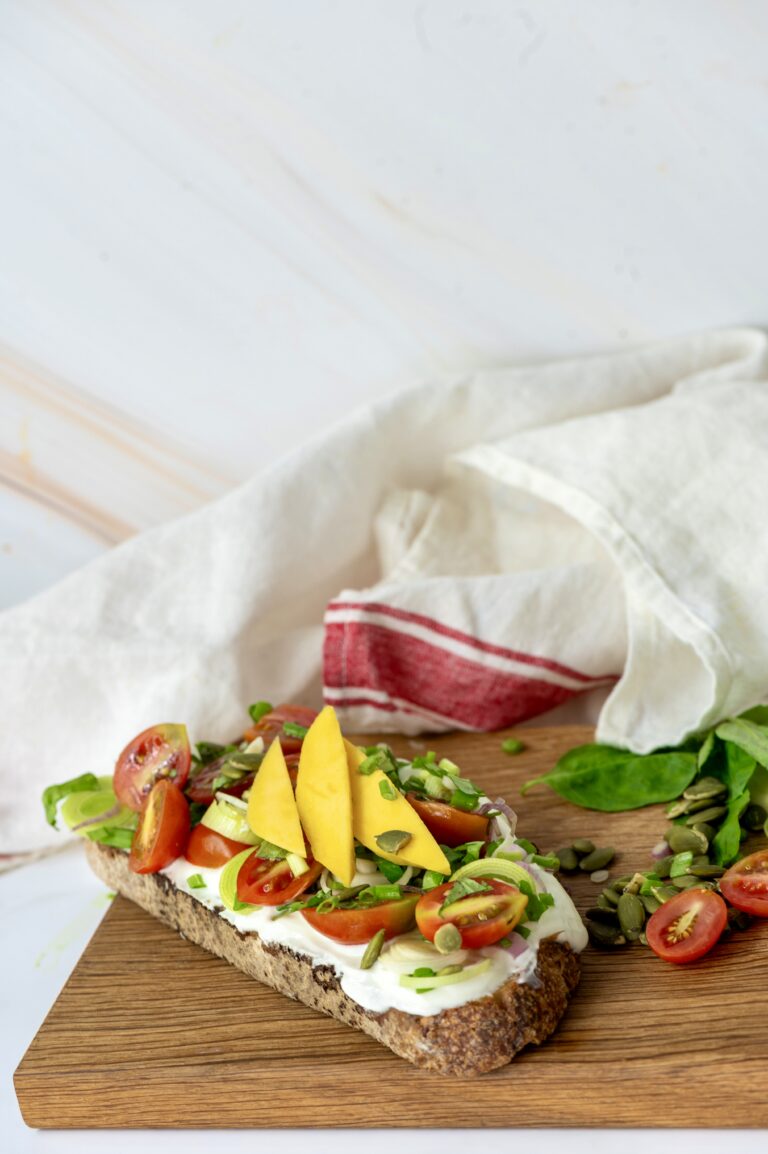
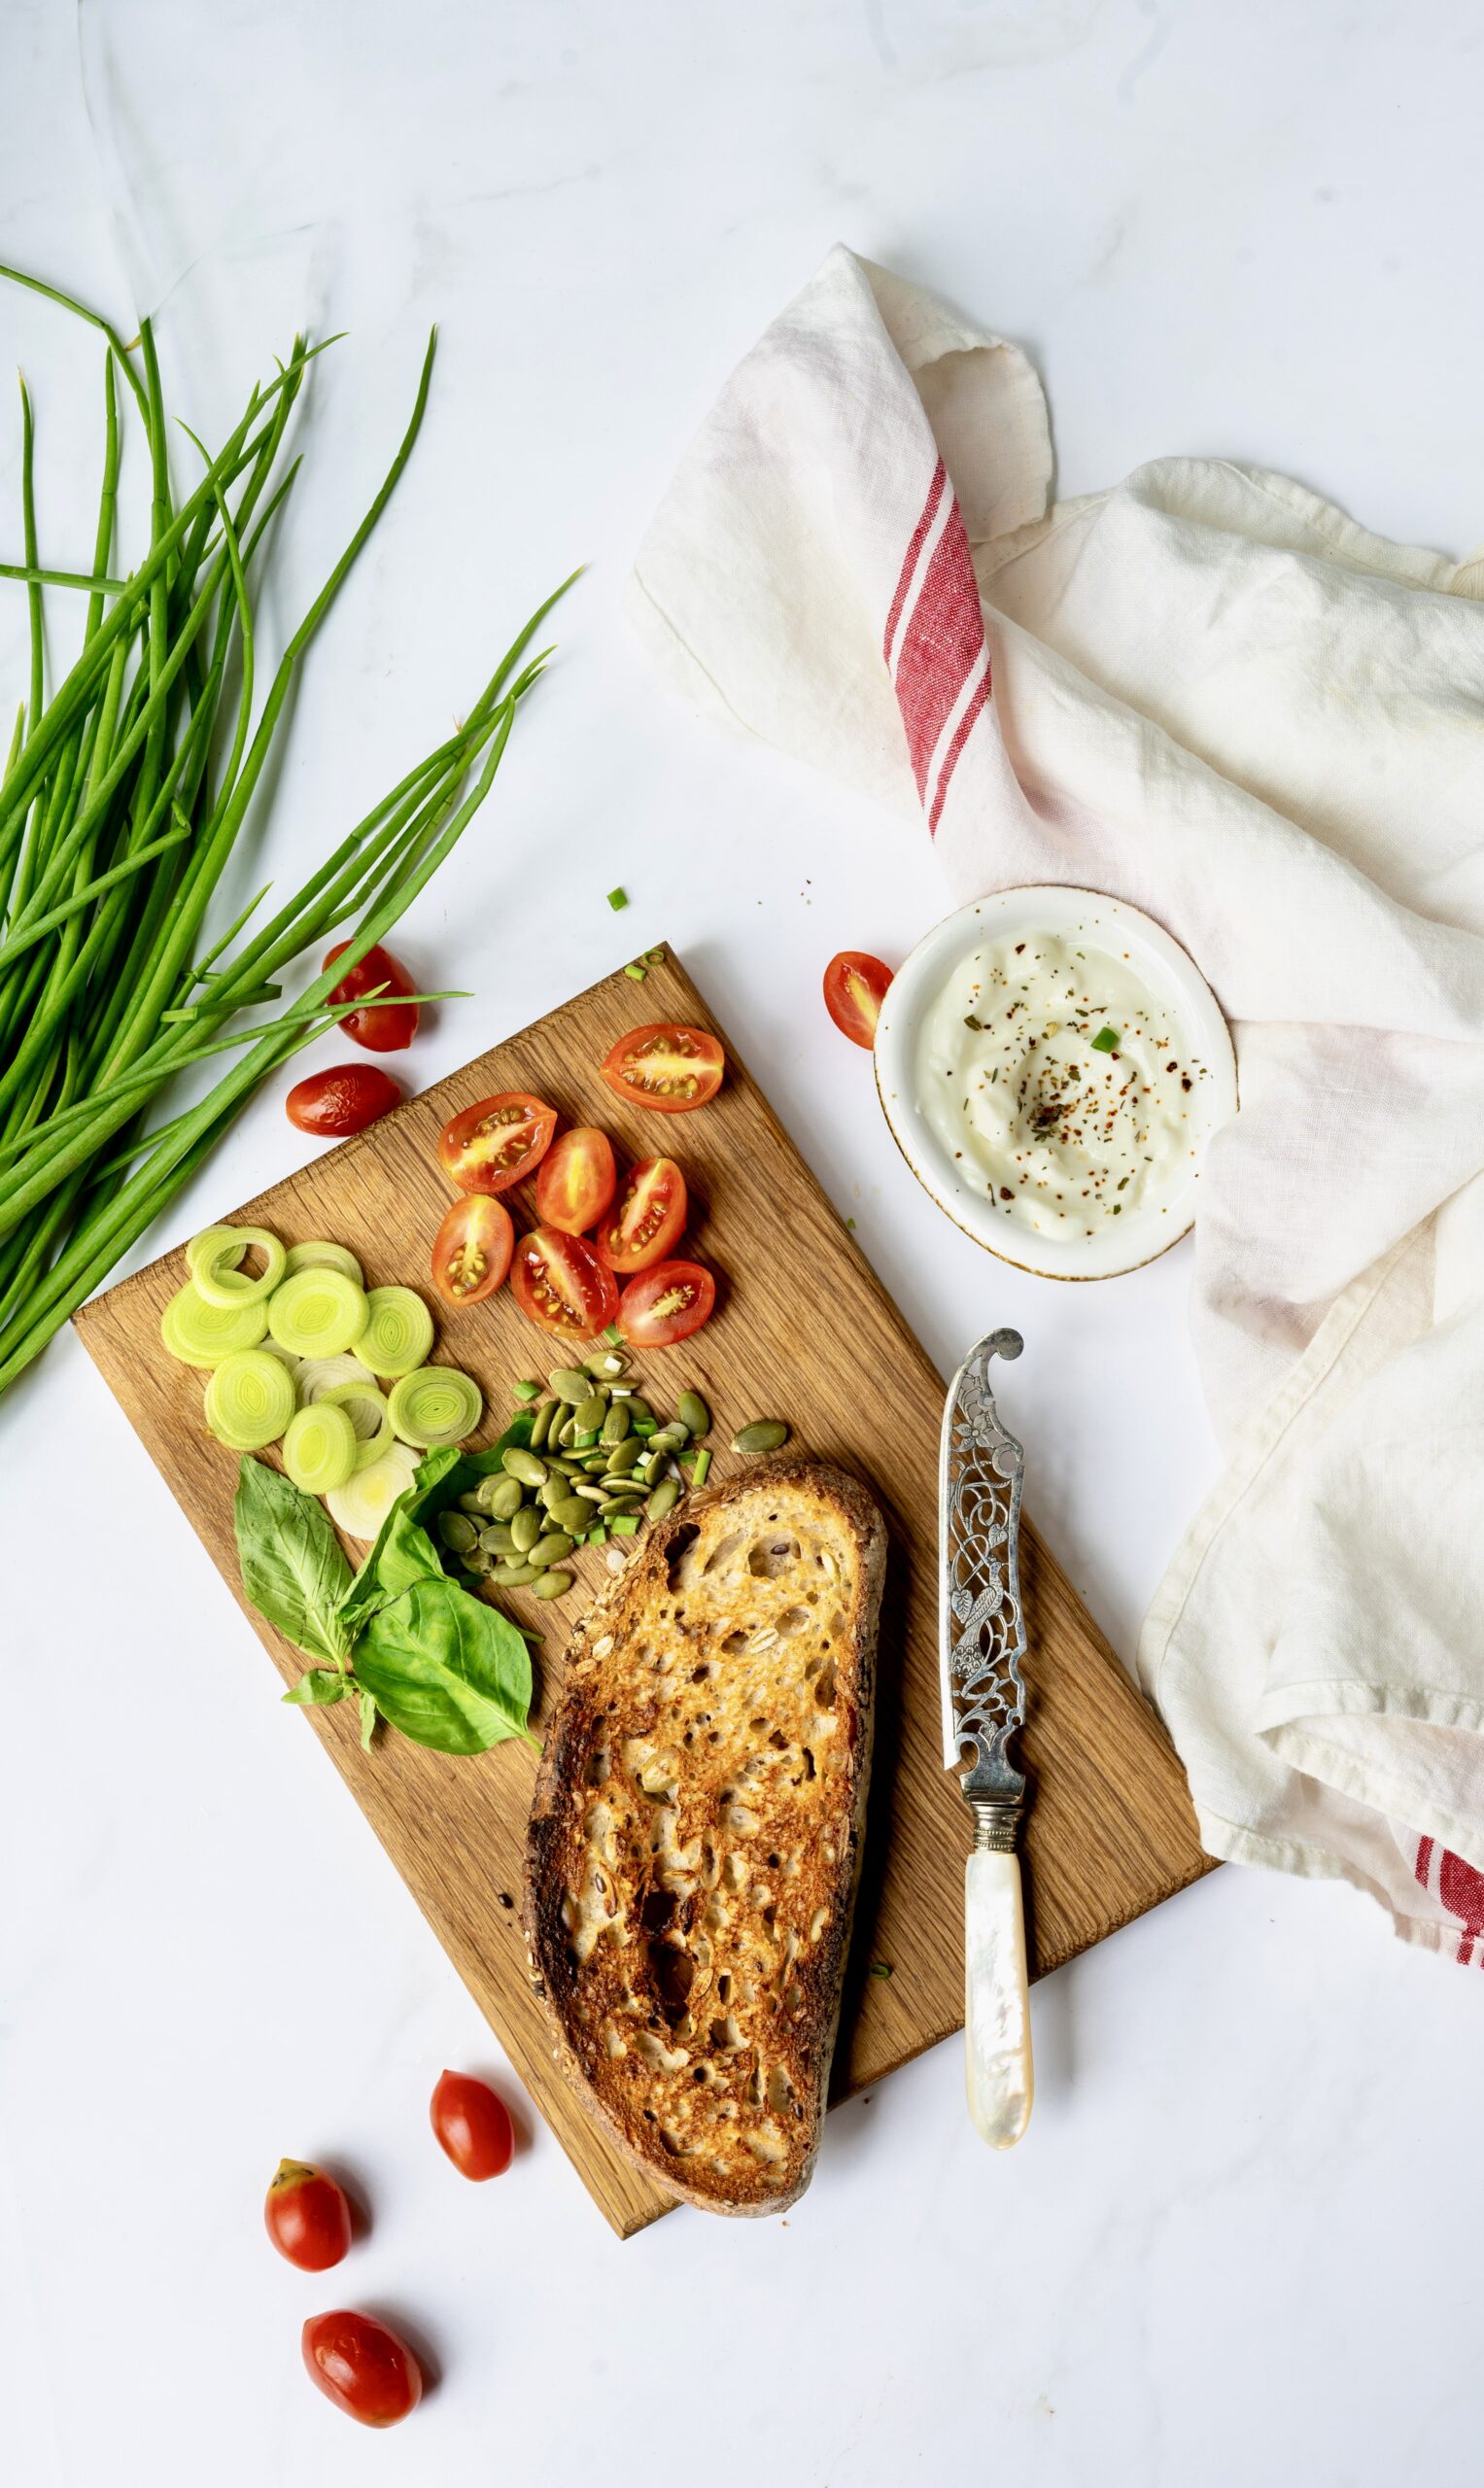
I went through a phase of being obsessed with open toasts, made using homemade sourdough bread. I shared some recipes during that time, including cherry tomato yoghurt toast and pesto Parmesan toastie. With mangoes being in season right now (and like many if not most Indians, my love for mangoes is well-established!), I thought: why not mango toast? I decided to make mine healthy and loaded with nourishing ingredients, with the fruit adding a touch of sweetness and fun. So here’s a recipe for a healthy veggie toast with mango, one that brings the best thing about the summer into your breakfast!

During my open toast era, I also tried to make reels for Instagram. I was quick to realize where my forte lies: in photography, and not in videomaking. To be more accurate: my interest lies there as well, not just my forte. I began to focus – pun intended – then on what I enjoy most, and incidentally do better, and decided to keeping trying to do even better. I wrote about this recently too, and I continue to muse about the role of photography in my life. It is an artform that has given me so much, and I continue to learn and to grow within it. To aspiring artists of any kind, including the culinary forms, I want to say that the key to longevity is in figuring out and forging your strengths. For instance, I had various short-lived attempts at using the ever-popular Photoshop, but found that Lightroom suited me much better as a photo editing software. I would love to master Photoshop, for it has some excellent features and tools, but I use what I am most comfortable with for the majority of the time, and it yields good results.

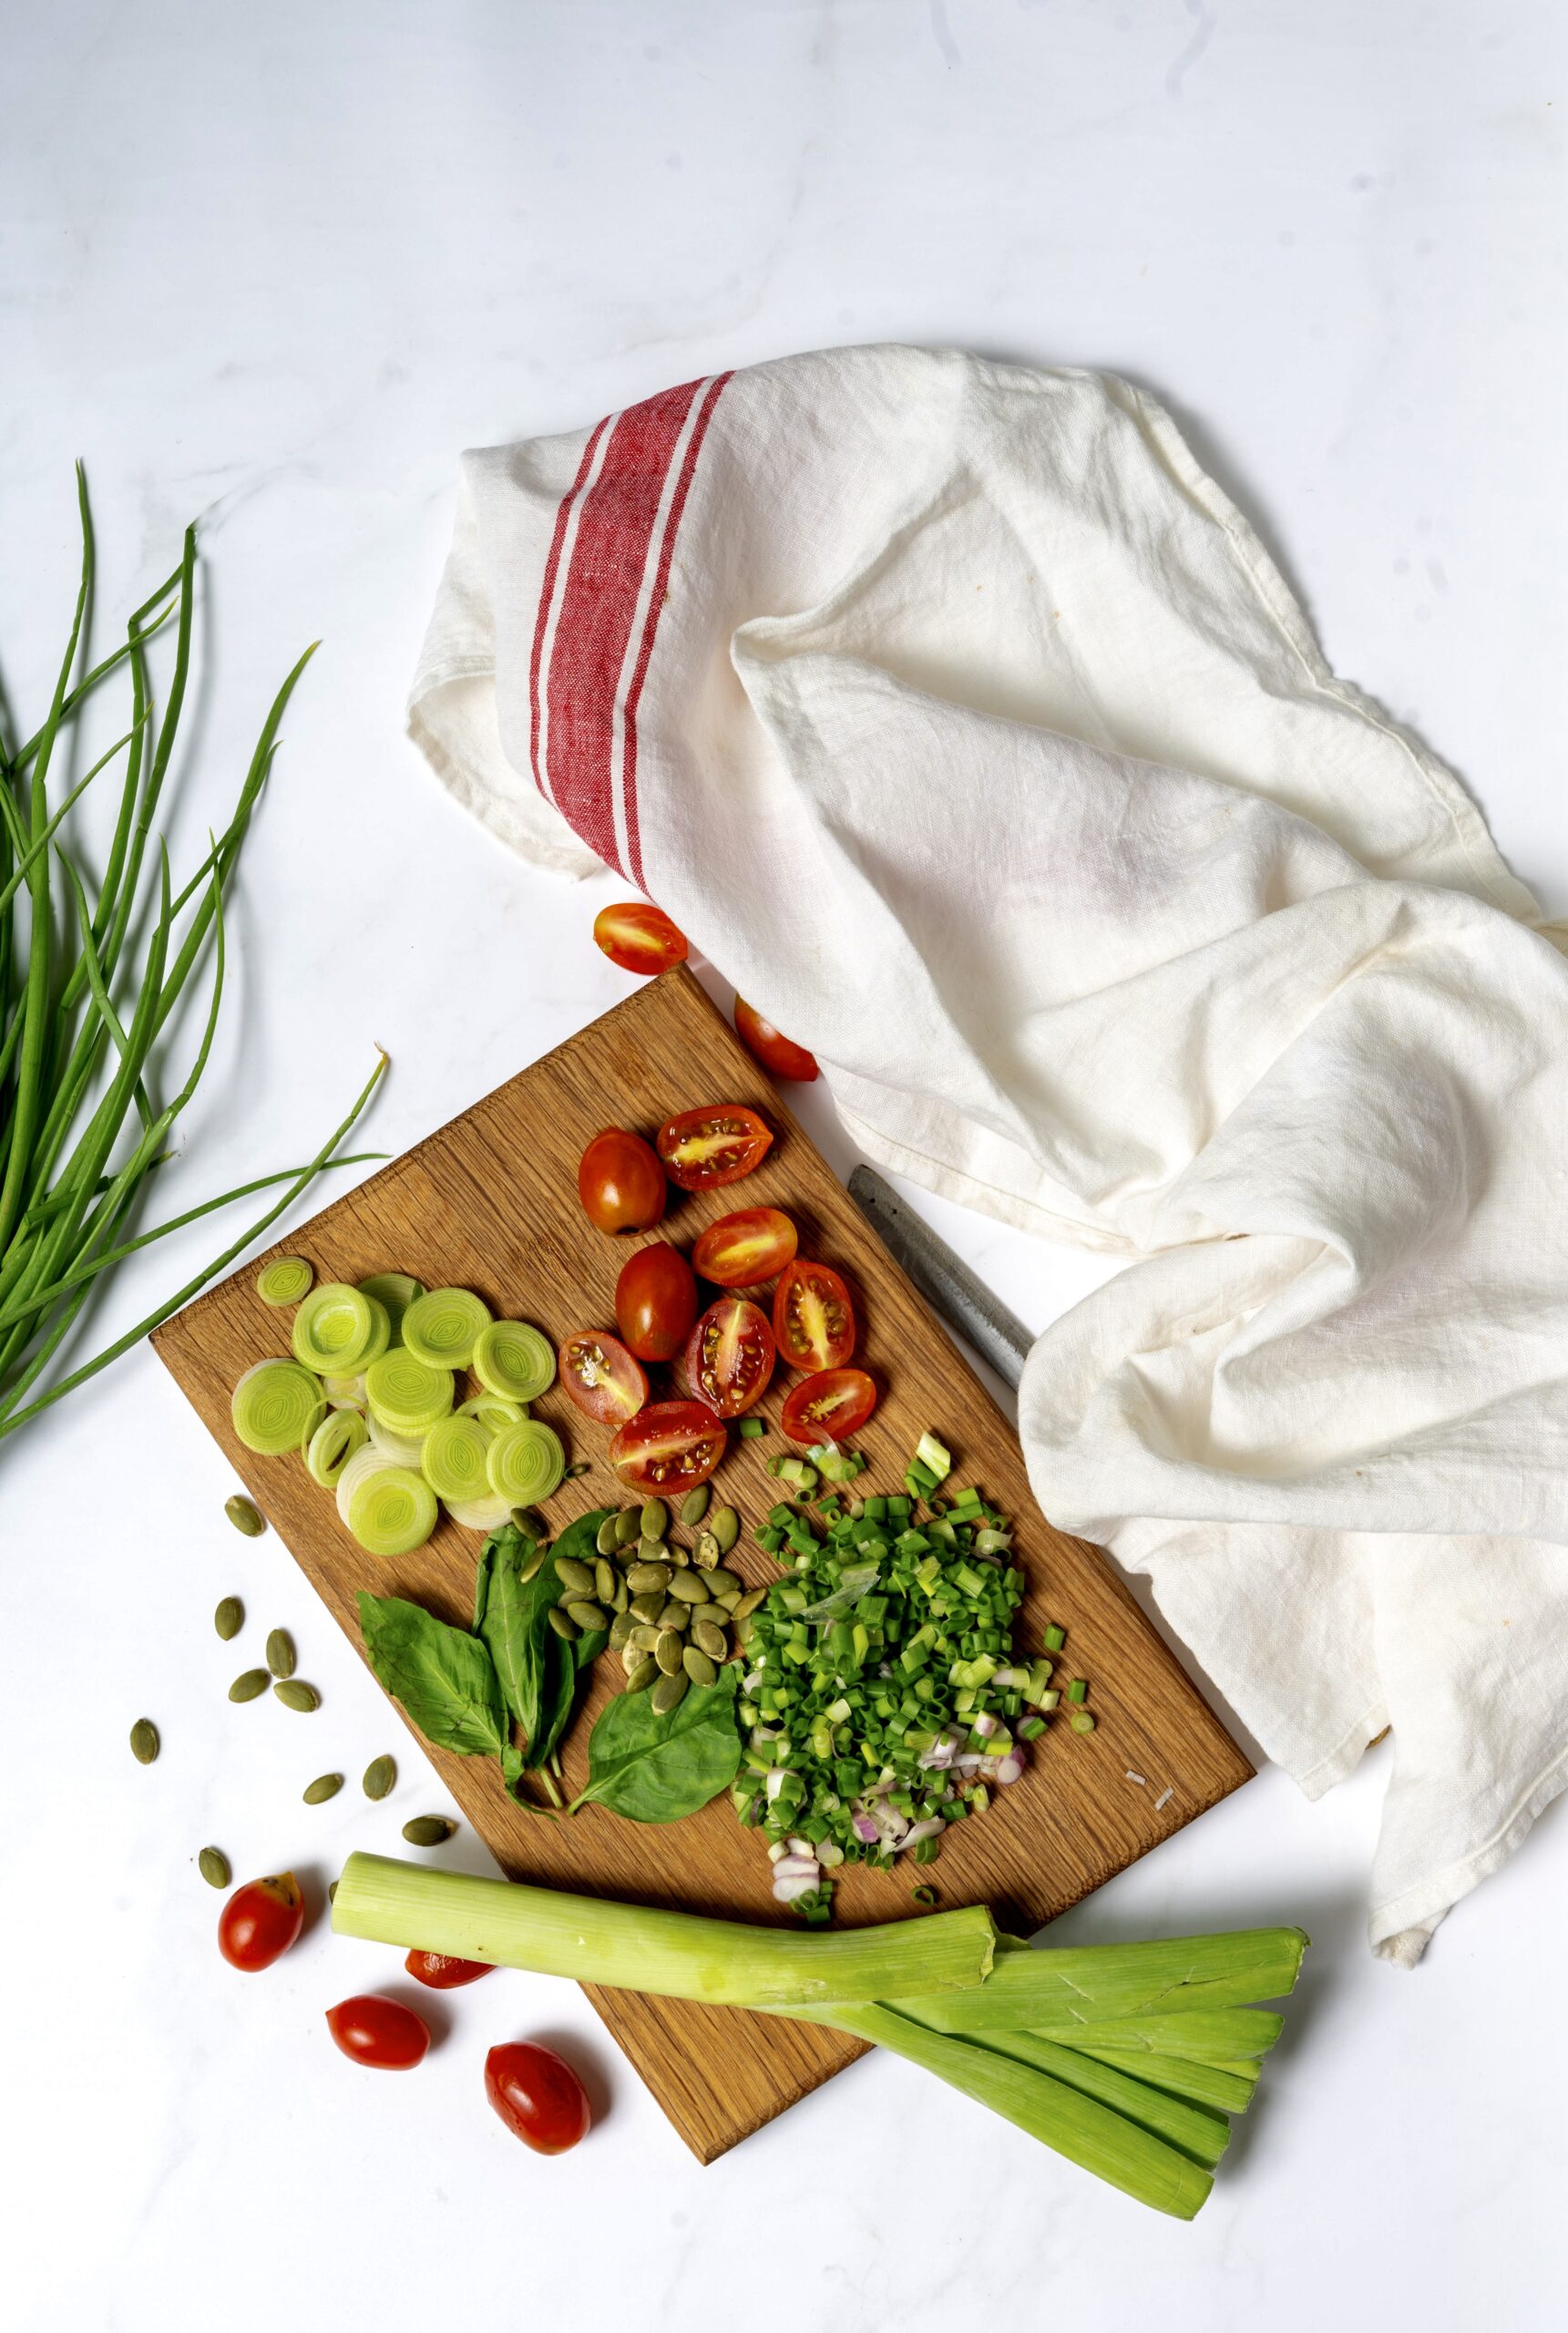
Coming back to this healthy veggie toast with mango, the ingredients used were also selected based on what feels right. I am going through a pumpkin seed phase right now, so of course there is a generous sprinkling of those. There’s some yoghurt, so that there’s a protein boost right in the morning (I have used Greek yoghurt). Then, an assortment of leaves and staples found in my fridge. You can replace any of these with something more to your liking, or depending on what you have on hand. As for the mango itself: Alphonso is probably the best cultivar for this dish, but I have a particular South Indian favourite called Banganapalli which is also very sweet, and that’s what I’ve gone with.

This year, climate-related changes did impact the quality of some of the fruits on the market. Here in Chennai, I was a bit saddened by the effect of recent rains on my own mango trees, which were at peak flourishing. During the very hot days, however, I had been quick to make all my sun-dried spices – including amchur or raw mango powder, which is used as a souring agent in place of lime in many Indian dishes.

Speaking of seasons and phases, and as I mentioned earlier too, our menu at home also goes through these. Sometimes, as a family we develop a fancy for one item and simply must have it every single day for months. For a little while at one point, we started every morning with poha. At the moment, every morning begins with mango for us – specifically, this healthy veggie toast with mango. It’s a nutritious and delicious all-rounder, which makes it perfect for breakfast. How lucky that the fruiting season and our own foodie phase have coincided!

Healthy Veggie Toast With Mango

(Serves 1)

1 large slice sourdough

1 tablespoon yoghurt

A handful of cherry tomatoes

Lettuce leaves of your choice

Spring onions

Leeks (sliced)

1 tablespoon pumpkin seeds

2-3 basil leaves

3-6 slices ripe mango

Olive oil (for drizzling)

Salt and pepper to taste

Toast the sourdough slice and set aside.

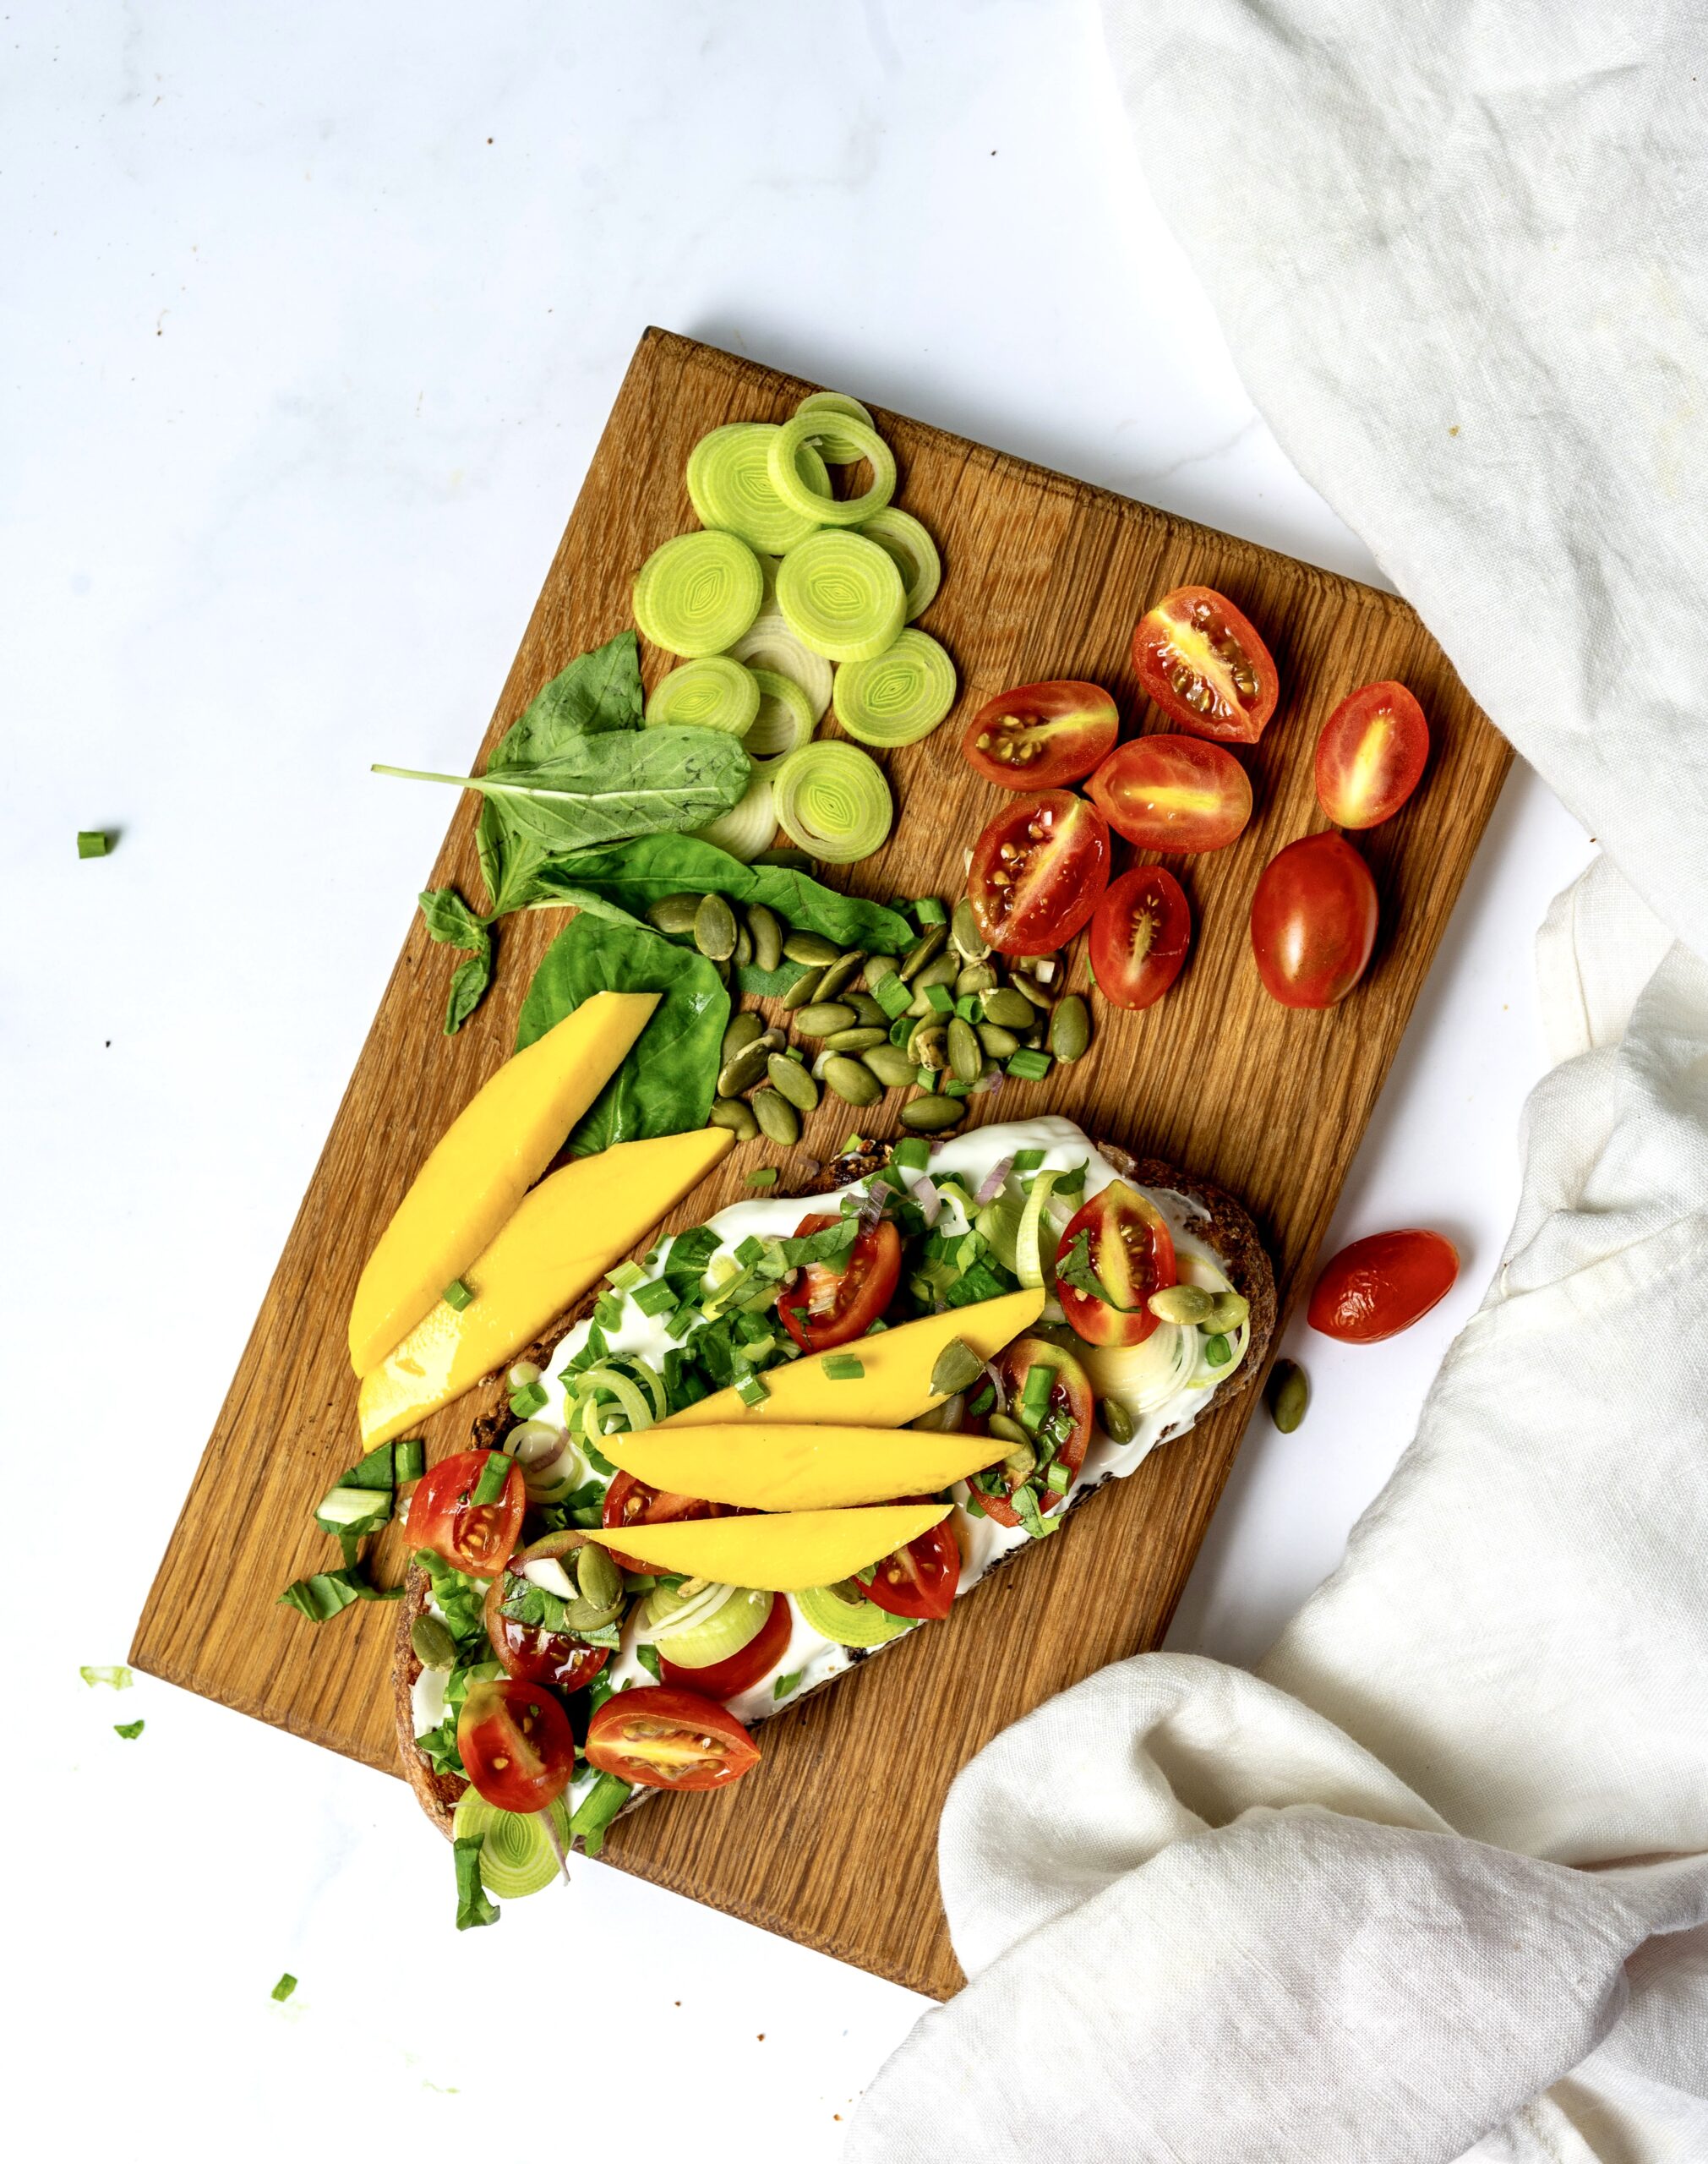
Prepare all the veggies. Use what you like, in the amount that you wish to use. This is why I have been vague about the quantities in the ingredients list, and just given you the gist of what goes into mine.

Now, top the toast with the yoghurt, followed by the prepared veggies. Layer the mango slices at the end, then drizzle with olive oil. You may also want to add a sprinkling of salt and black pepper.

Your healthy veggie toast with mango is now ready. Savour the mix of flavours and textures, from the sweetness of the fruit to the crunchiness of the seeds and everything else in the mix!

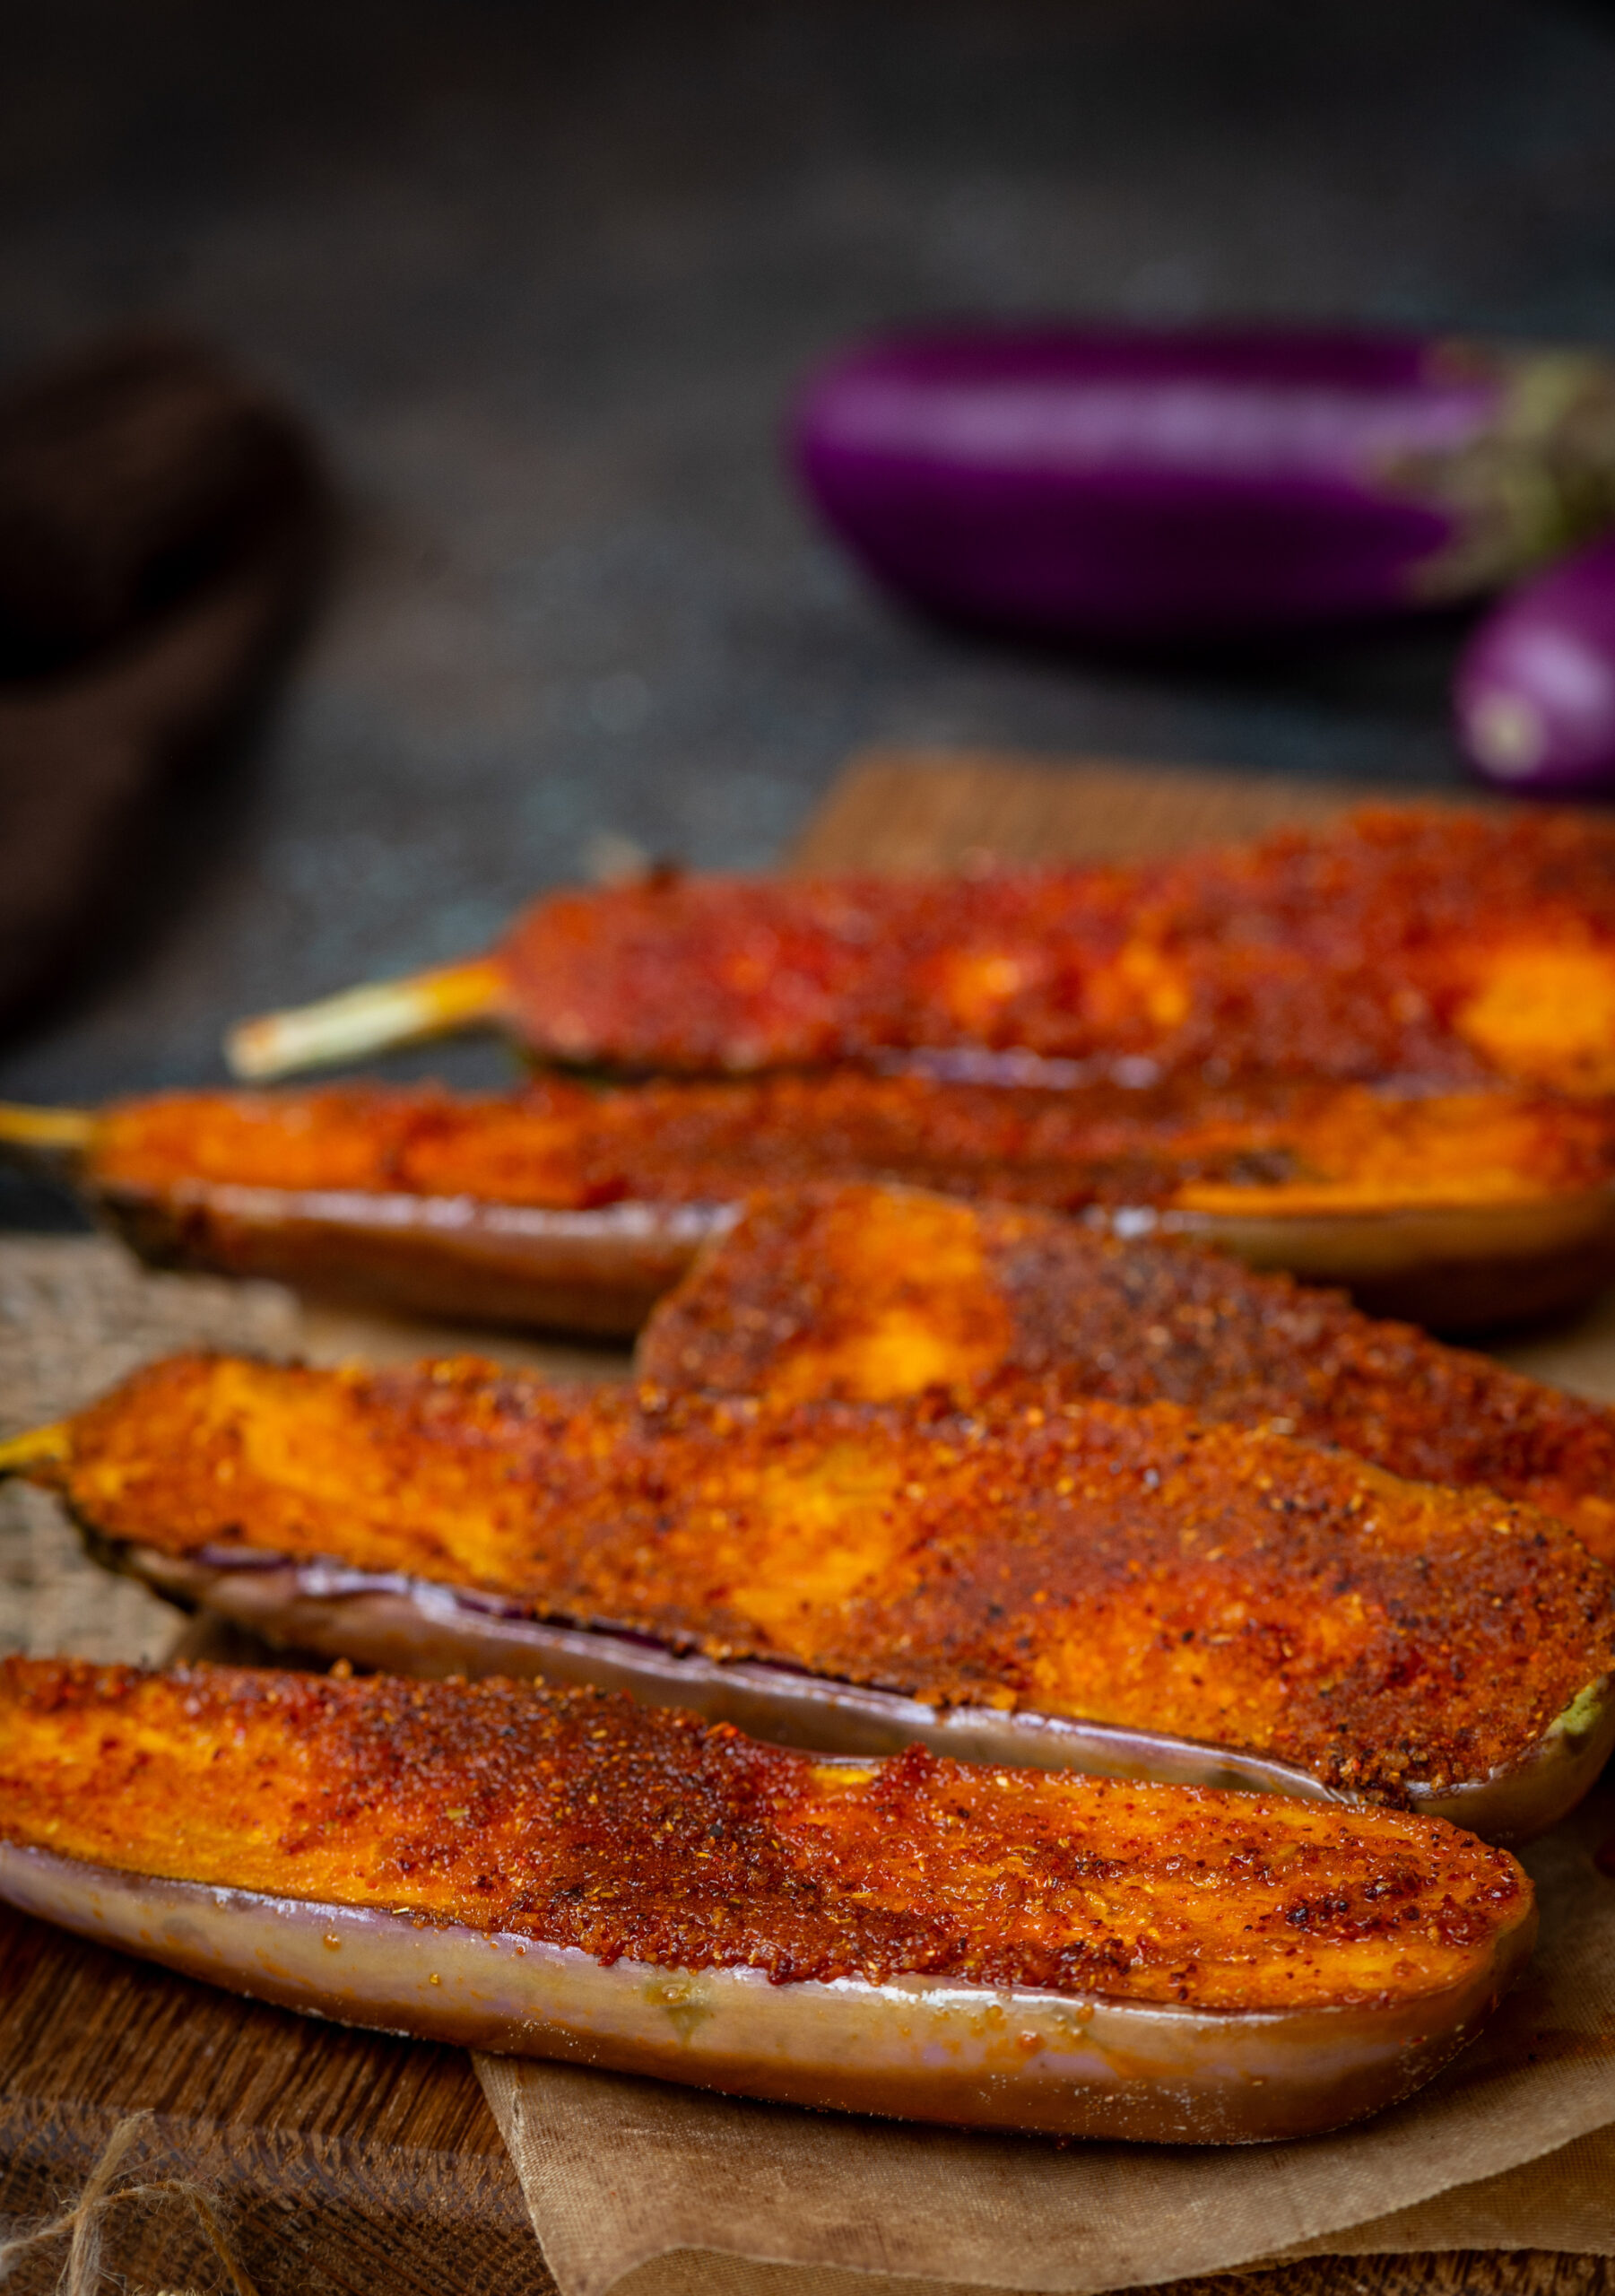
I think of begun bhajan, a crisp eggplant side dish, as being pan-Indian even though I know that it originated in Bengal. That’s because I have often encountered some version of it in South Indian meals as well. My own preparation uses long eggplants, typical of this region, rather than the big round ones that are used in authentic Bengali cooking. I love slicing and spicing the vegetable up to give a kick to a boring summer meal, when the heat makes us all feel more drained and something delicious and energising is always craved.

As a student of Macrobiotics several years ago, I learned early on that eggplant is a nightshade, and therefore only to be consumed in small quantities. The ubiquitous tomato is one too, by the way. My training remains in my mind in numerous ways, because of which I still find myself using eggplants only occasionally. Perhaps that’s why I find begun bhajan all the more exciting, since moderation is recommended. I’ve tried my hand at an eggplant parmesan before as well, and will share the recipe for that sometime too.

I also have a strong preference for consuming greens, so eggplants don’t feature that often in my market shopping anyway. That said, the vegetable is quite nutritious, as it is rich in antioxidants and low on carbohydrates.

In fact, I think that begun bhajan is a healthy alternative to dhoklas, which are commonly eaten in Gujarati households like mine as a tasty accompaniment. Of course, mangoes do the same job in this weather, but believe me when I say that begun bhajan is also a great pep-me-up. Or better yet, why believe me, when you can make some yourself?

My own journey with begun bhajan began in Kolkata, at the home of a friend who always has me over for a typically Bengali meal whenever I visit the city. After the first time I tried this dish, I began making a special request for it ahead of our meetings. She keeps saying that there is such a variety of other dishes she could prepare, but this is the one that I just keep asking for. My begun bhajan is not a patch on hers, but still I make it – more so because it always evokes memories of being with her in her lovely home, full of the art she collects, and with my friend herself always so well turned out in crisp sarees. Food is a complete experience. It’s never just what you’re eating, but also who you’re with, the space you’re in, the way it’s served. I hope this begun bhajan brings you much enjoyment too.

Begun Bhajan

(Serves: 4)

1 large eggplant

Salt to taste

1 teaspoon chili powder

½ teaspoon turmeric

1 teaspoon toasted cumin powder

1 tablespoon rice flour

½ teaspoon sugar

1-2 tablespoons mustard oil


Rinse and slice the eggplant. If making circular slices, each slice should be about 1 inch thick. I have used long eggplants, so I’ve sliced them lengthwise, as you can see in the images.

Mix all the spices, along with the rice flour, sugar and sugar. Sprinkle this mixture onto a plate. Place the eggplant slices over the mixture. Rub the mixture in well on both sides of each slice, using your fingers to spread the spices evenly.

Allow the spices to marinate for at least half an hour. The reason why I have added a bit of sugar to this is because it caramelises and gives the dish a nice colour. I also feel that it prevents the eggplant from becoming soft and soggy.

Once the slices have marinated, heat the oil in a shallow pan. Place the slices such that there is enough space to flip them over.

Allow to cook until they are golden and crisp on one side. Turn them over and allow to cook again.

Once they are golden on both sides, remove onto a paper and drain any excess oil.

Serve hot as an accompaniment to your usual Indian meal. This begun bhajan goes beautifully with dal and rice. By the way, if you are a pescatarian, you can use the same preparation method above for fish. You can also try the spice marination out with a variety of vegetables, including parboiled potatoes and cauliflower.

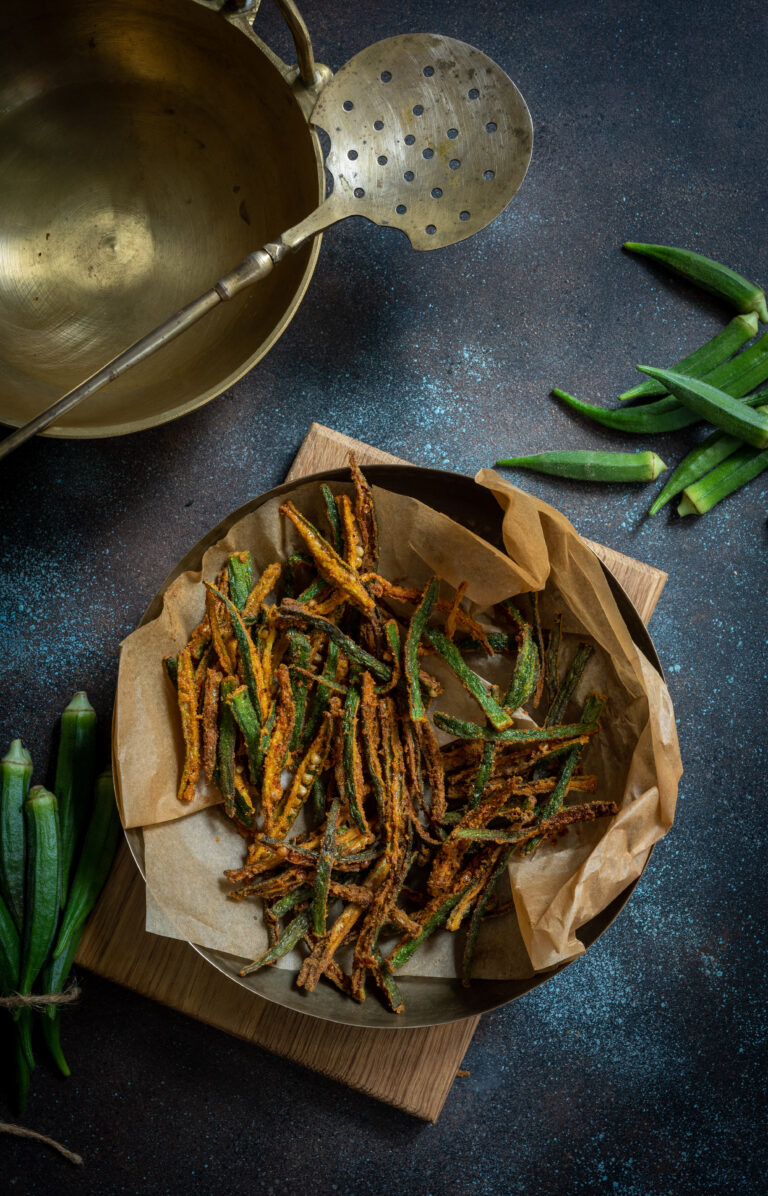
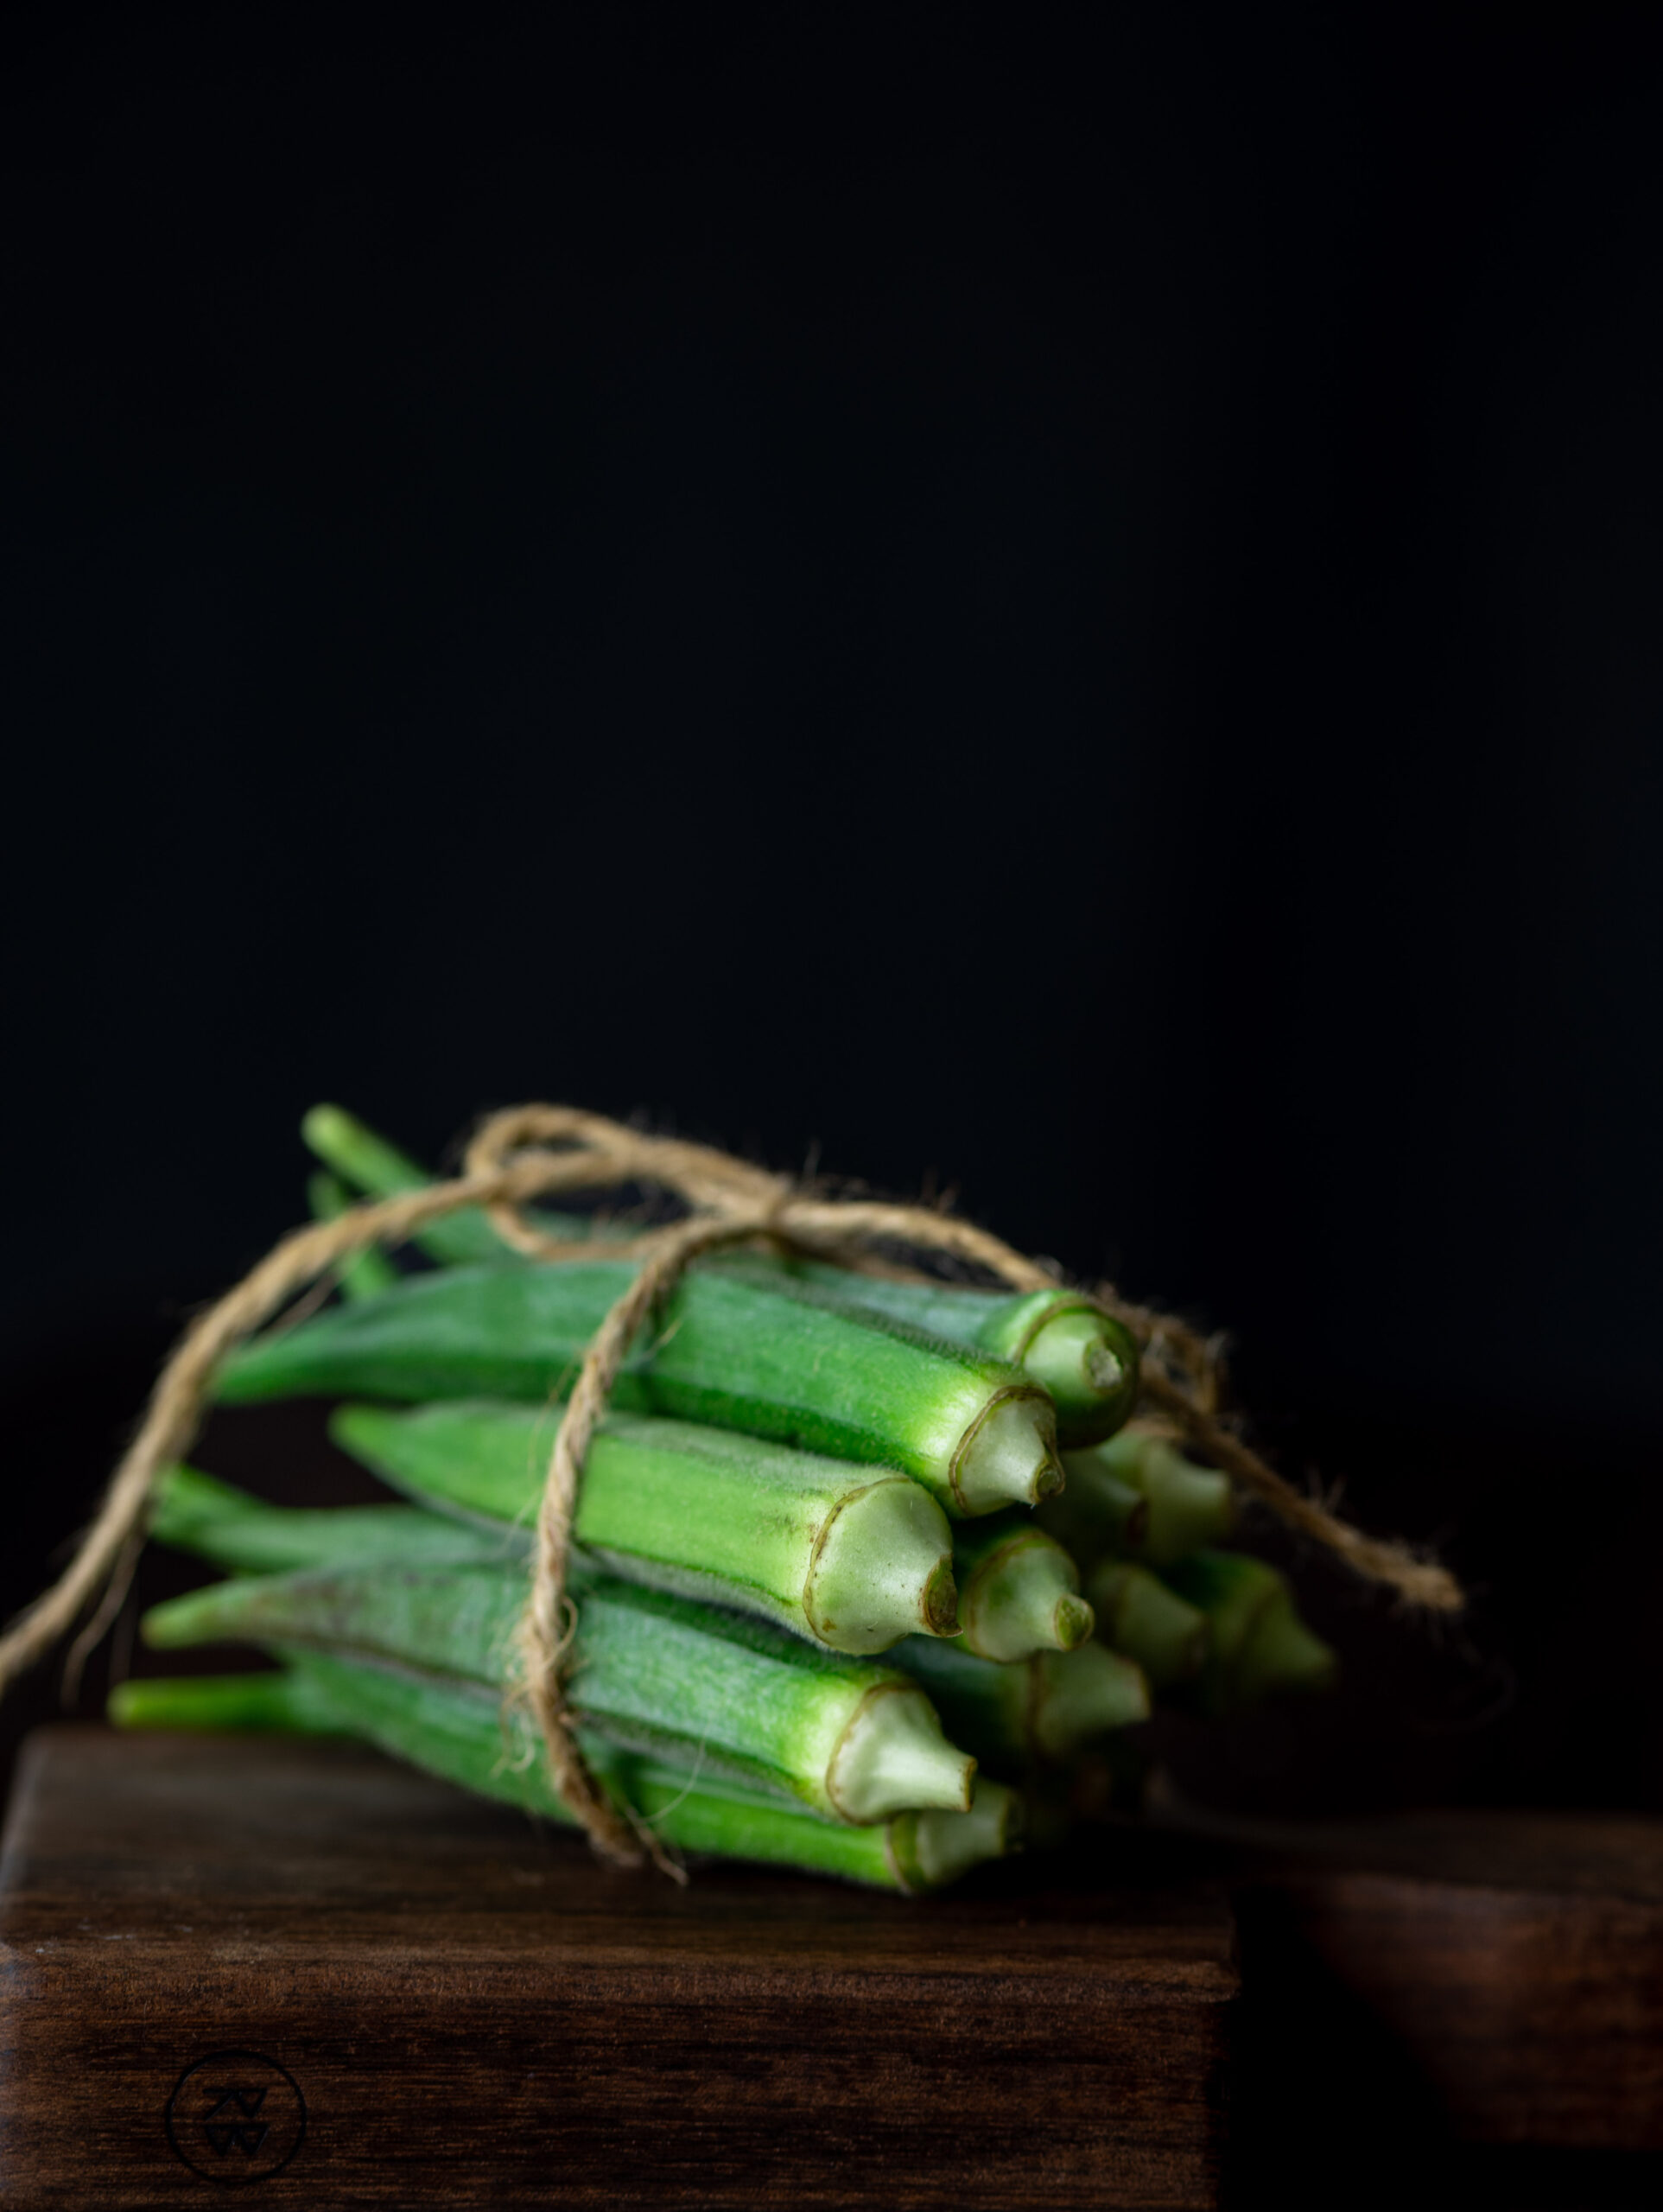
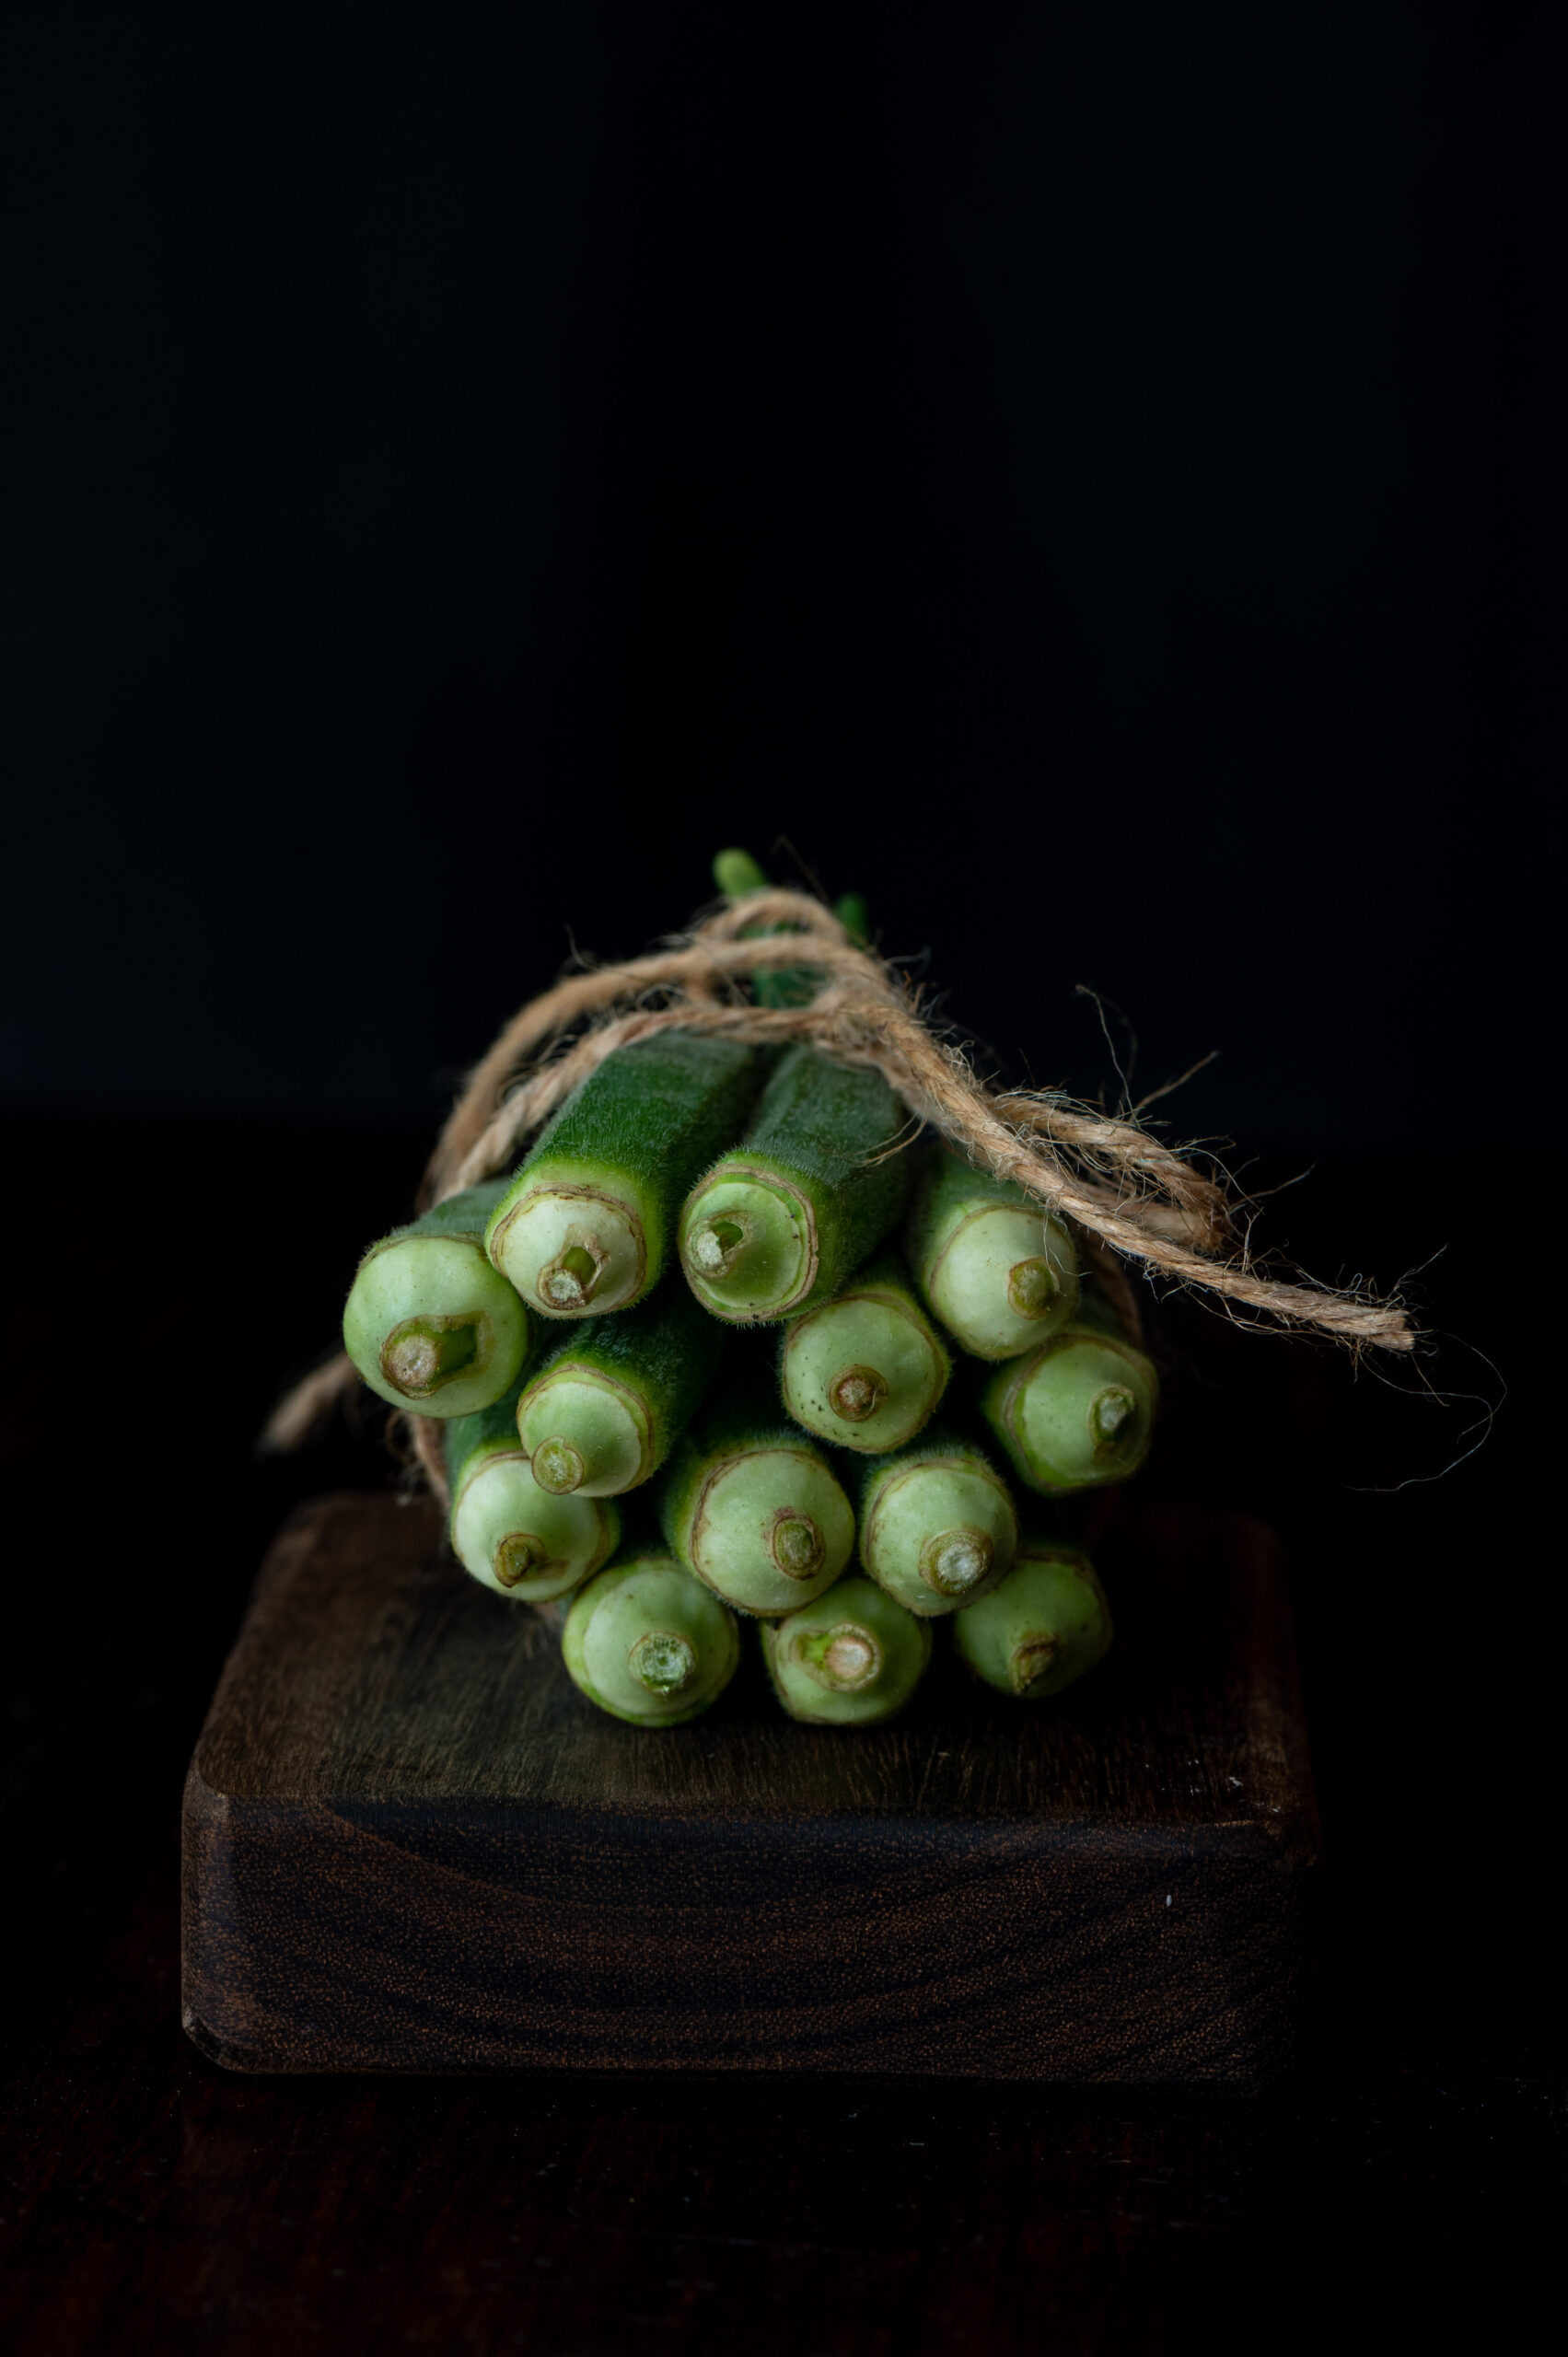
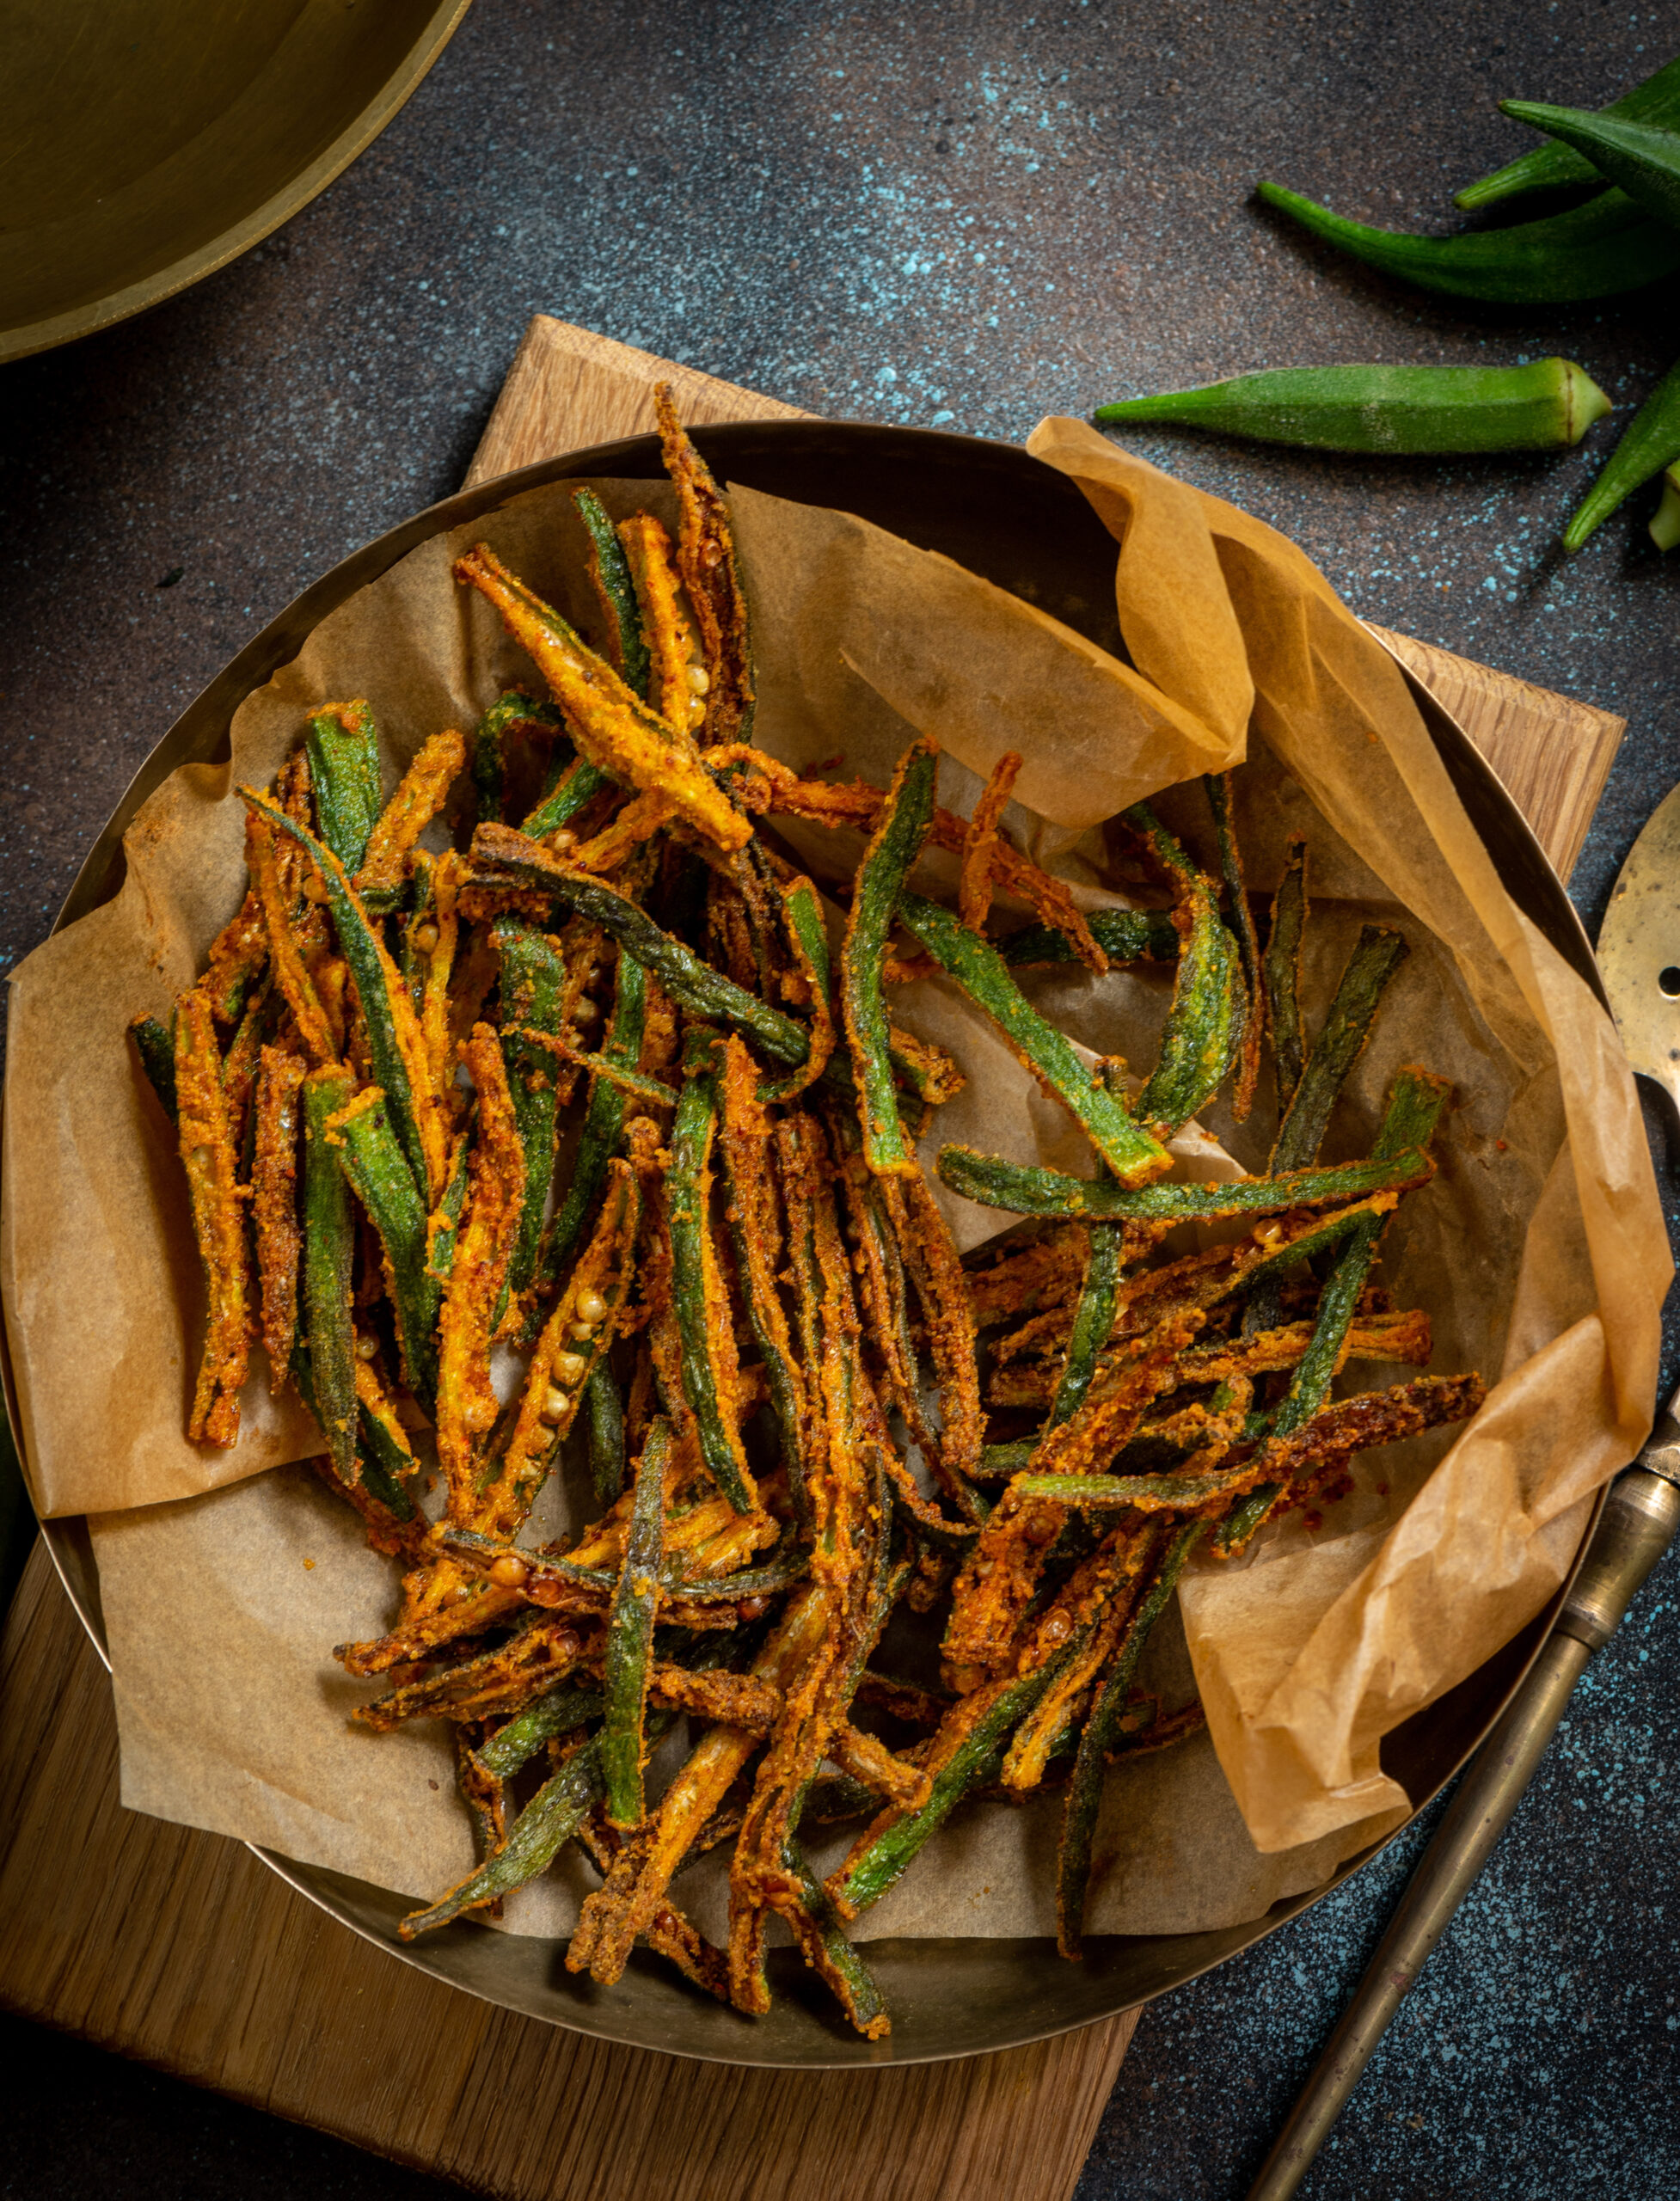
Okra, also known as lady’s finger, is a basic Indian vegetable that grows in any weather, any soil and any season. This means that it recurs as an ingredient in cuisines across the country, and there must surely be a hundred varieties or versions of cooking it. To give you some examples of its versatility: I’ve had it in a yoghurt raita and I’ve also had it in a tamarind sauce gravy, two very different concepts altogether. My most favourite way to eat okra, however, is in a dry stir fry that I make at home almost every other day as the sabzi part of our traditional Gujarati thaali. However, making a preparation attractive to the rest of my family, particularly the younger generation, has been a challenge. That was when I discovered that I could convince them to eat this vegetable by turning it into fried okra chips.

Initially, my plan was to simply introduce my kids to the wonders of a good okra dish and then have them develop enough of a liking for the vegetable that they also became interested in the regular stir-fry. I must confess this plan has backfired – we are all too addicted to this version! So it’s become more of a treat and less of a staple in my home.

Still, as I continue to find ways to increase the vegetable quotients in my kids’ diets, I’m glad to have figured out this simple yet delicious recipe. I have noticed that youngsters take some time to grow out of the feeling that brinjal or okra, vegetables that have a certain texture, are icky. Even though mine are now adults, they still have these dislikes. Preparing these vegetables they are picky about using a technique that makes the stickiness go away, such as frying, makes a difference. Do you have any such tips and tricks you’d like to share too?

Another great thing about these fried okra chips is that they require very little prep time, and as long as you have your usual spices and some fresh okra around, you can make them quite quickly. As with most vegetables, freshness is a key element when it comes to okra. When I was growing up, my mother taught me not only how to cook but also how to pick out the best vegetables when shopping for groceries. While you may not be able to do this at the market, when you’re about to cook, the secret to knowing how good your okra is this: snap the tiny piece of the tail end off. If it snaps immediately, it’s fresh. If it is tender, it’s losing its freshness.

When this happens, depending on the dish in question and the extent of the vegetable’s over-ripeness, I either use it in another preparation or else I discard it. By discard I mean that I go and feed it to the cows in the street. Most of the older vegetables amidst my groceries or in my fridge are “discarded” this way. In a sense, they are never wasted.

Fried Okra Chips

(Yield: Serves 4)


250 grams okra (sliced lengthwise)

Salt to taste

2 teaspoon Kashmiri chili powder

½ teaspoon turmeric powder

1 teaspoon cumin powder

½ teaspoon garam masala

5 tablespoons chickpea flour

1 teaspoon chaat masala

Add all the spices and the chickpea flour to the okra slices, and massage well using your hands. Allow to sit for half an hour.

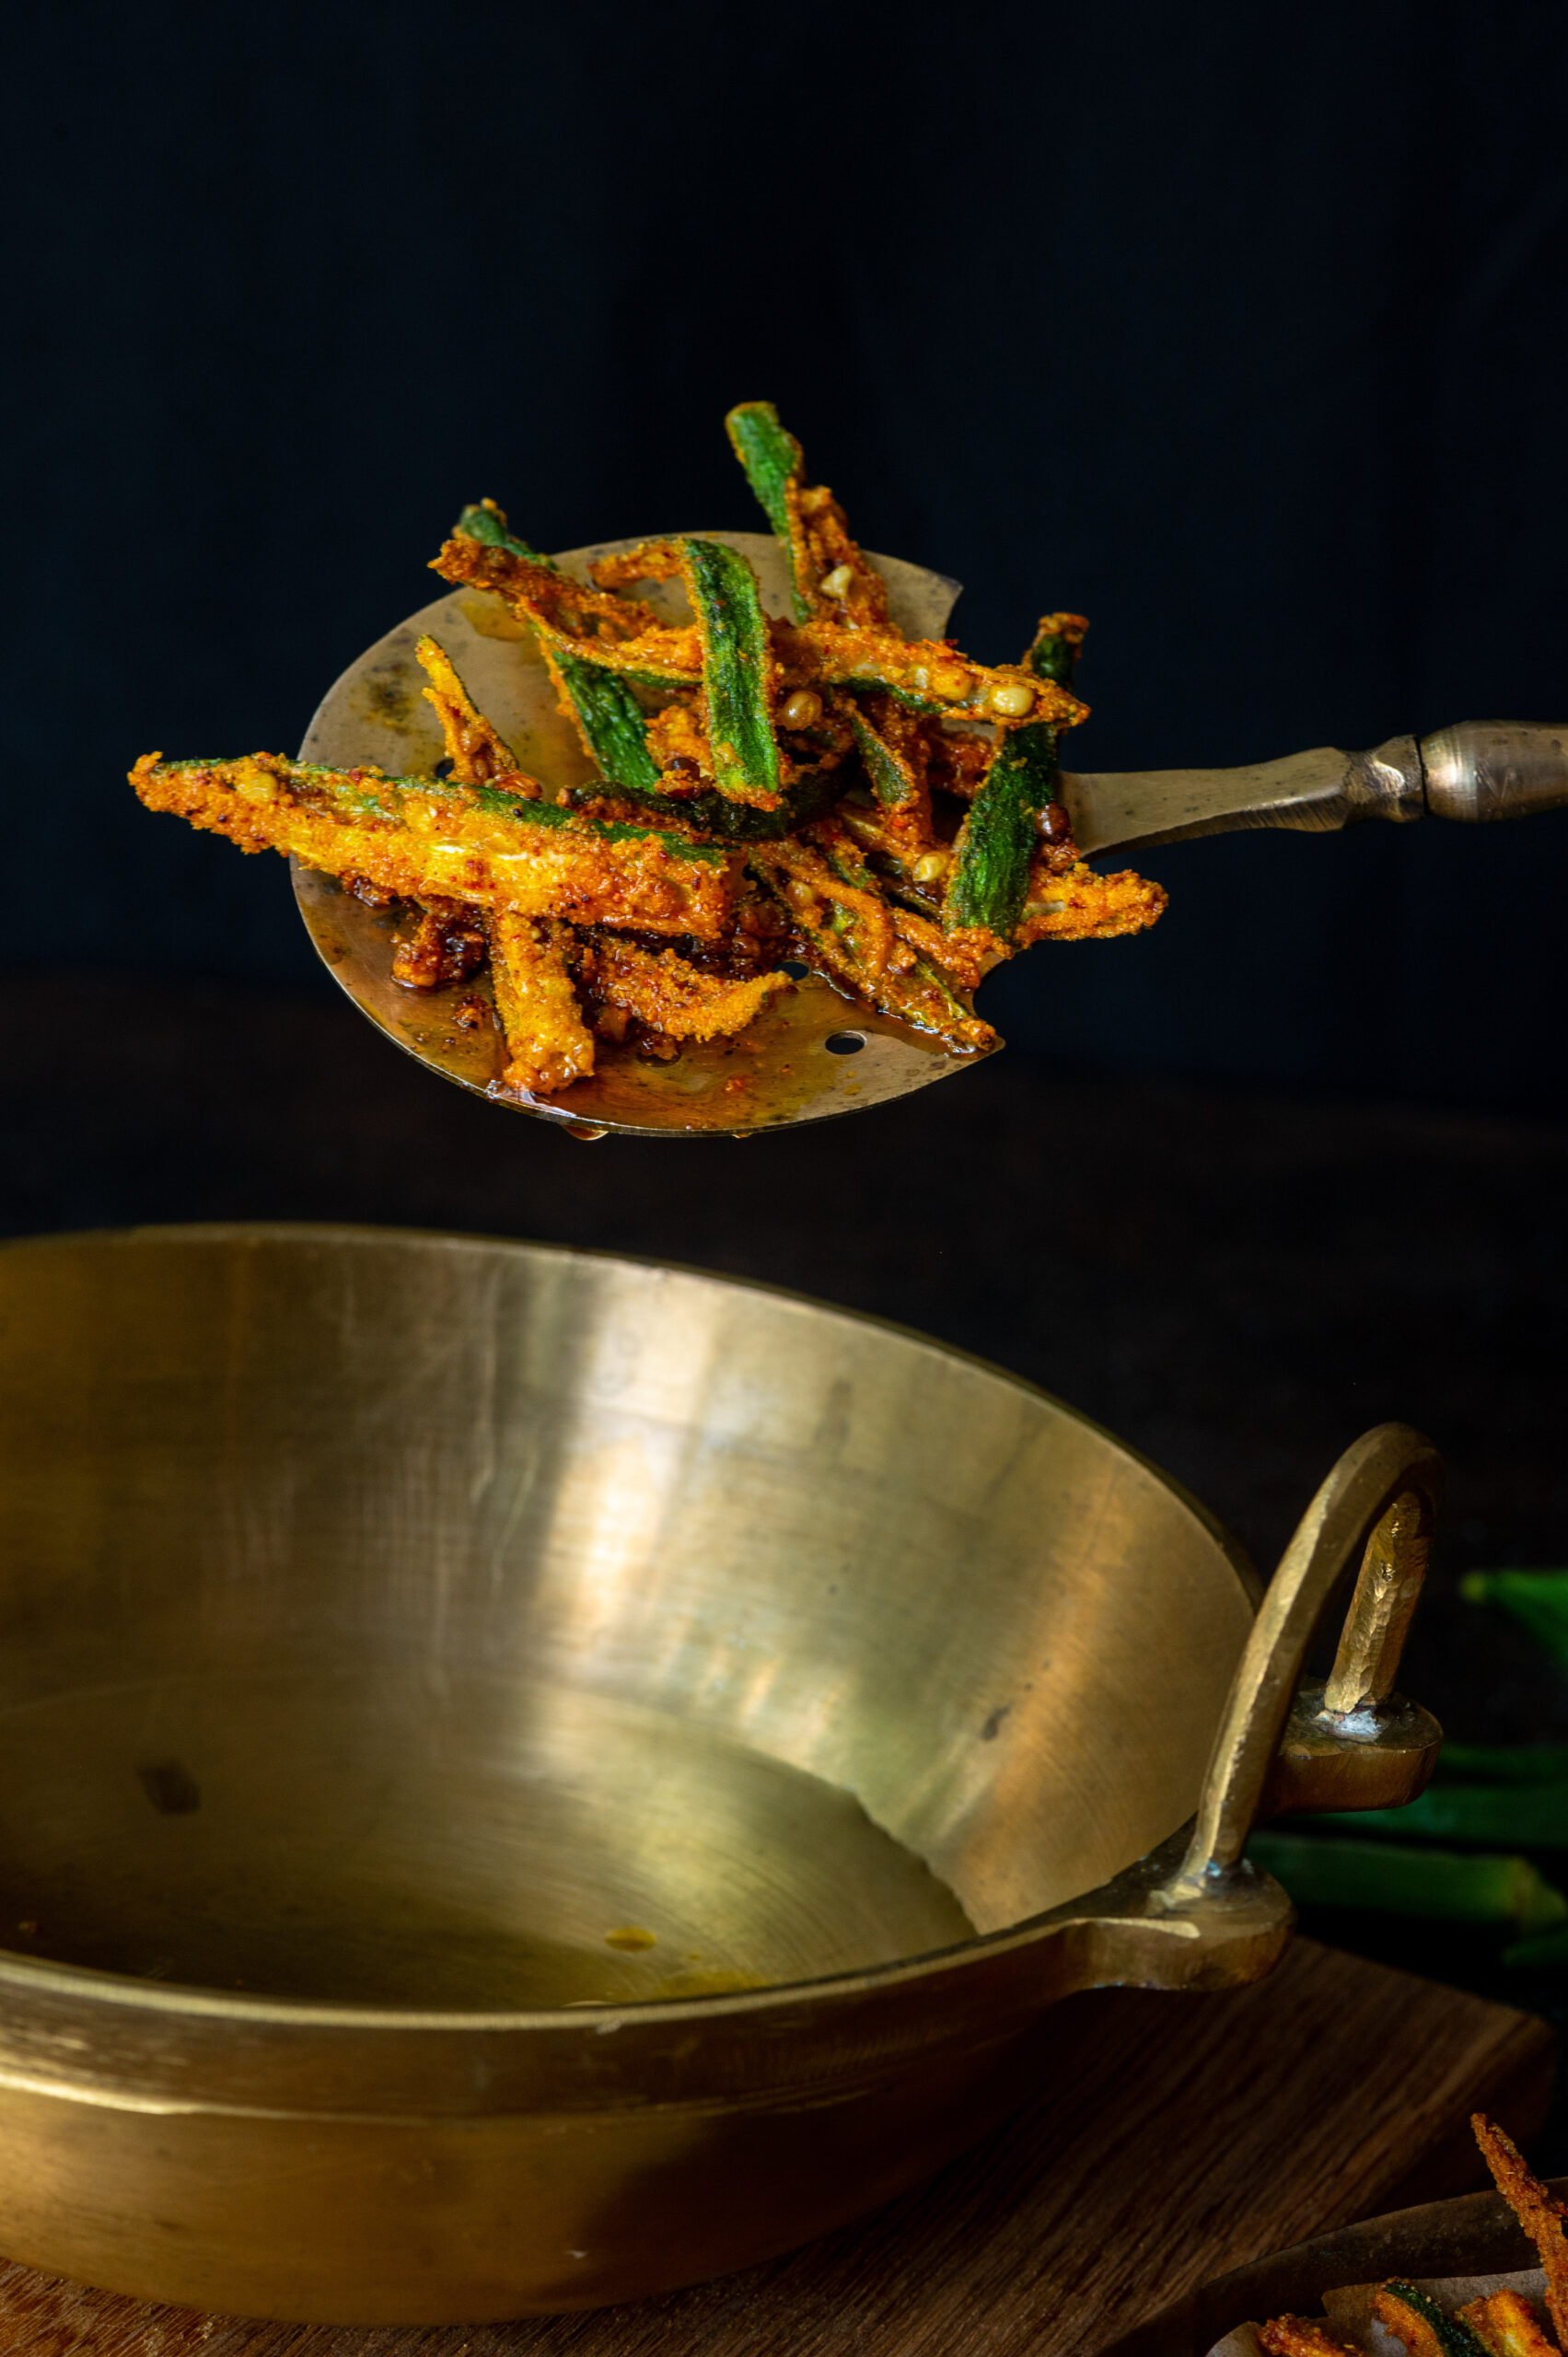
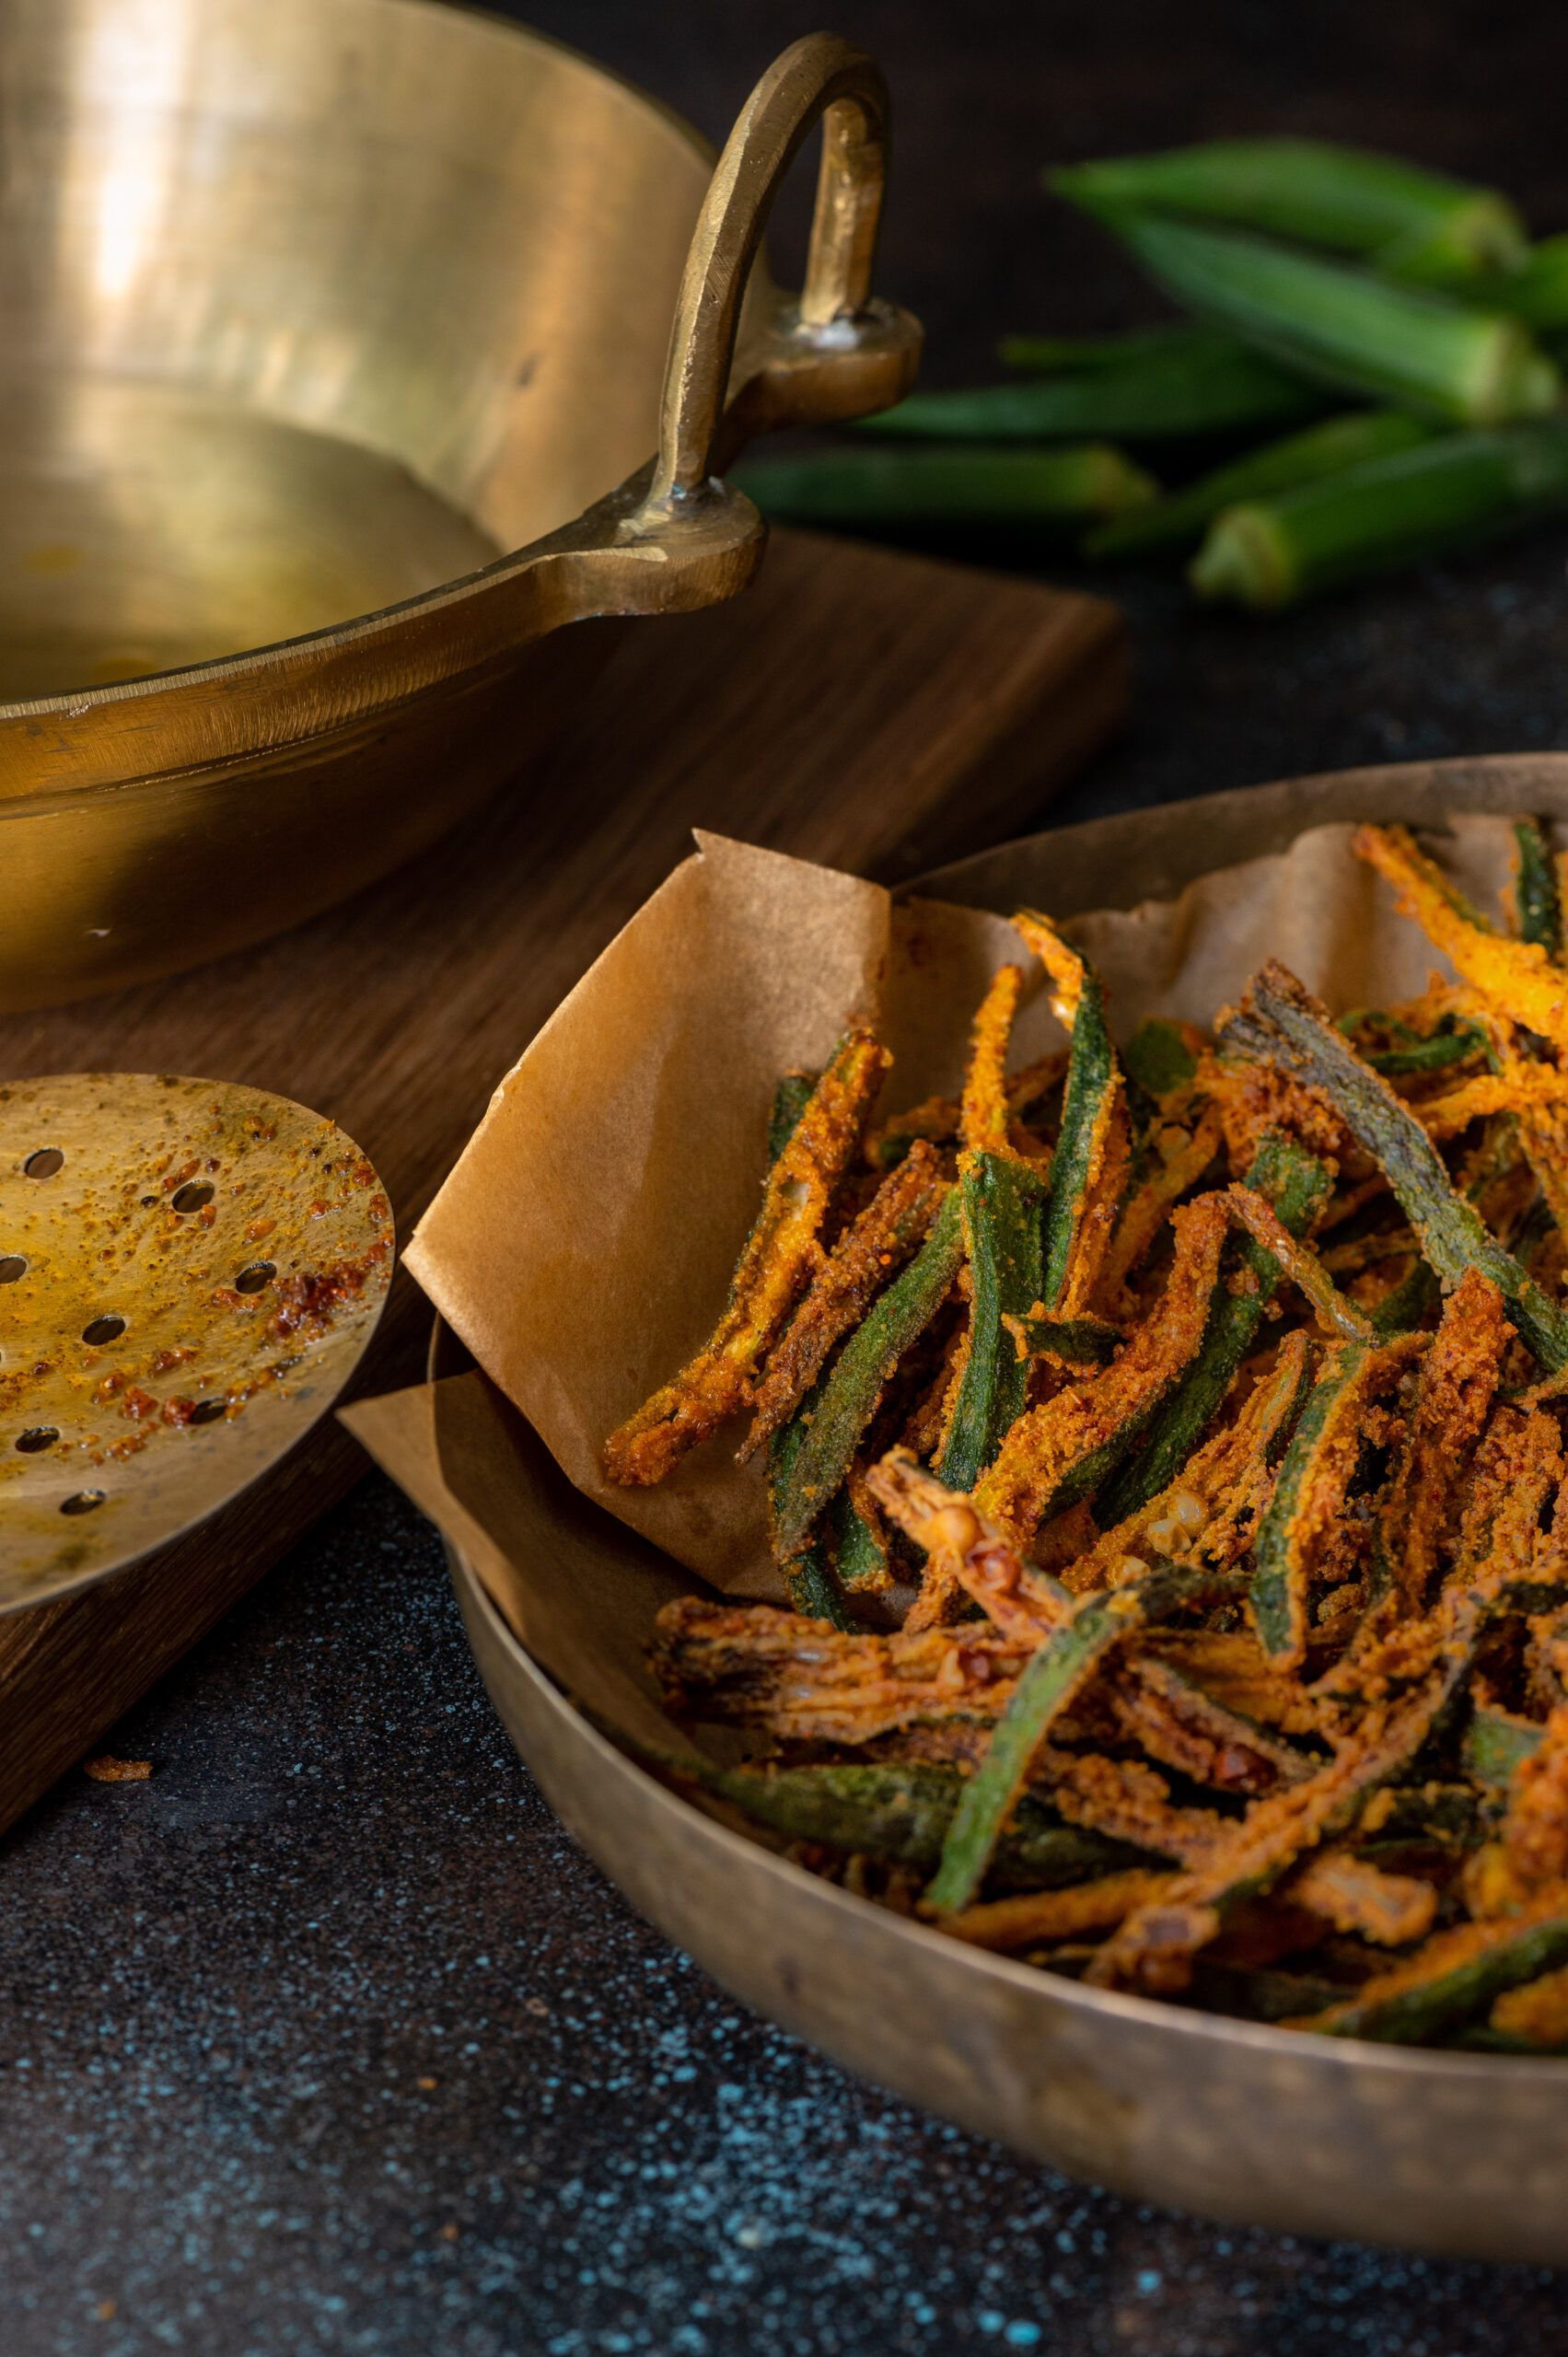
Then, heat the oil. Once the oil is heated, drop in the coated okra slices. Fry well until golden. Drain on a paper. Sprinkle with chaat masala for an additional boost of lovely flavouring. You can store the fried okra in a tin if consuming later.

These fried okra chips are a wonderful snack on their own, and also work as an accompaniment to a main course. I’d love to know what you think of them, and I’d especially love to know if you have more suggestions about how to sneak nutritious vegetables into the diets of the vegetable-averse!

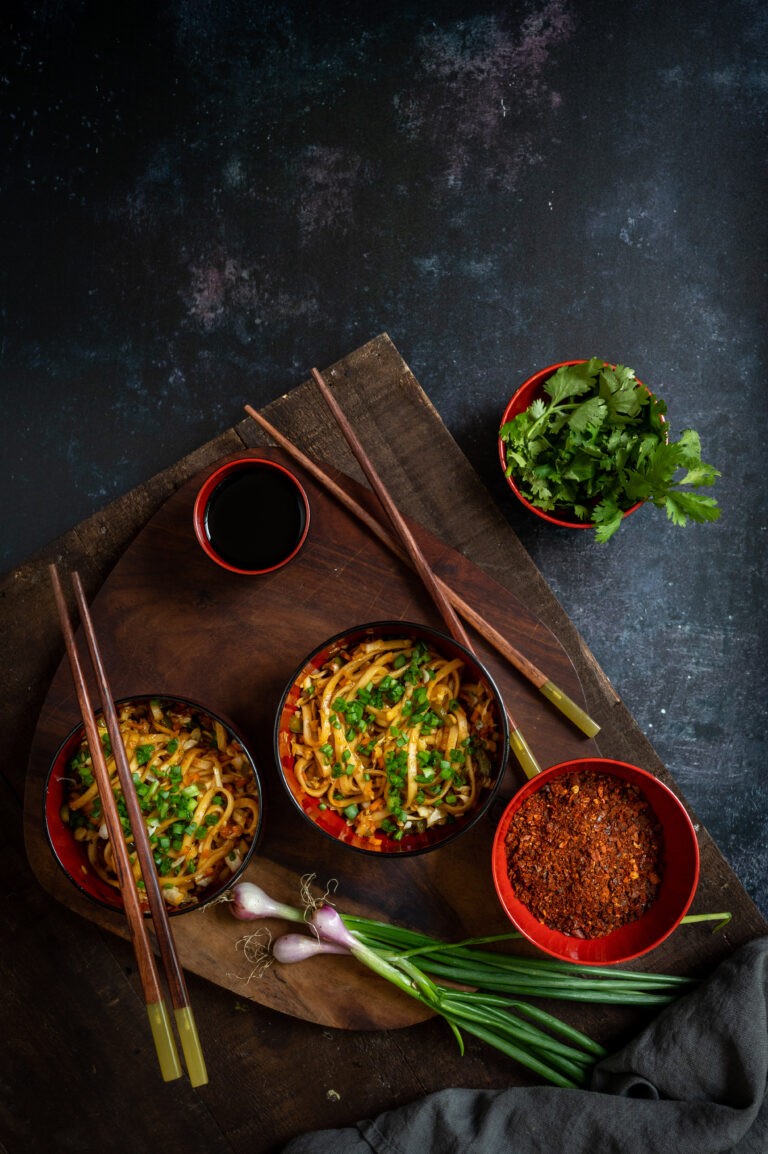
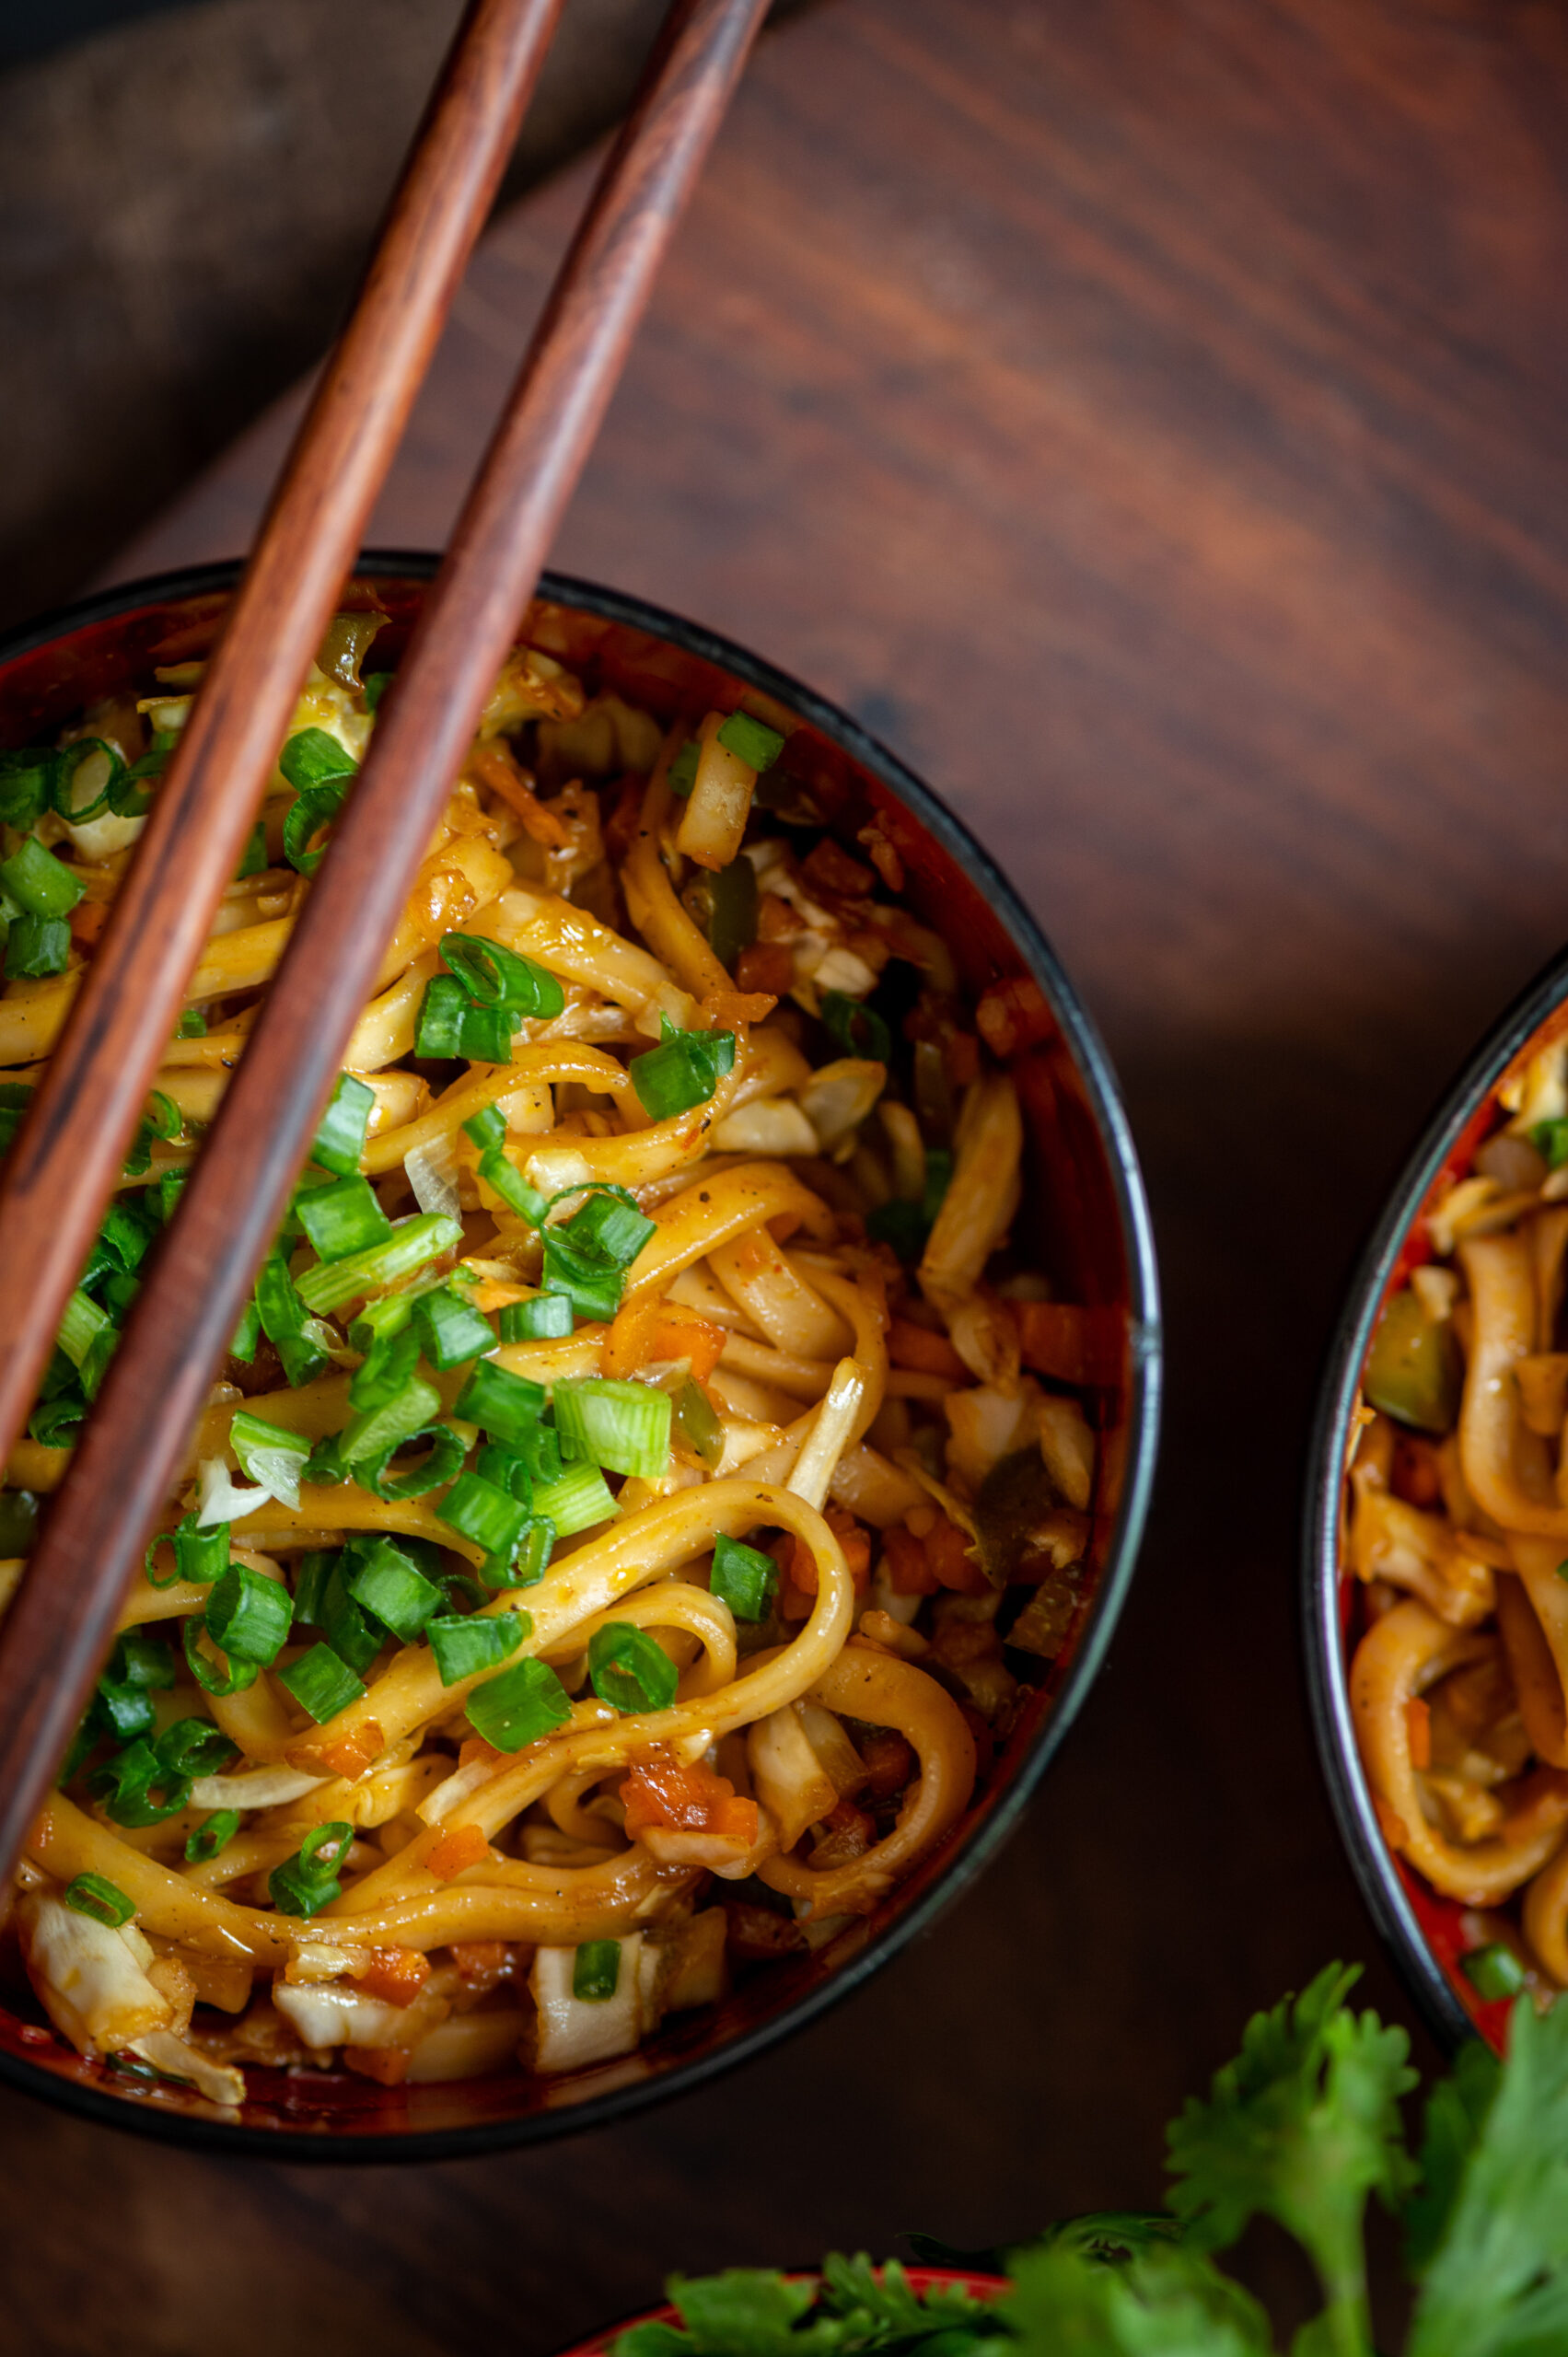
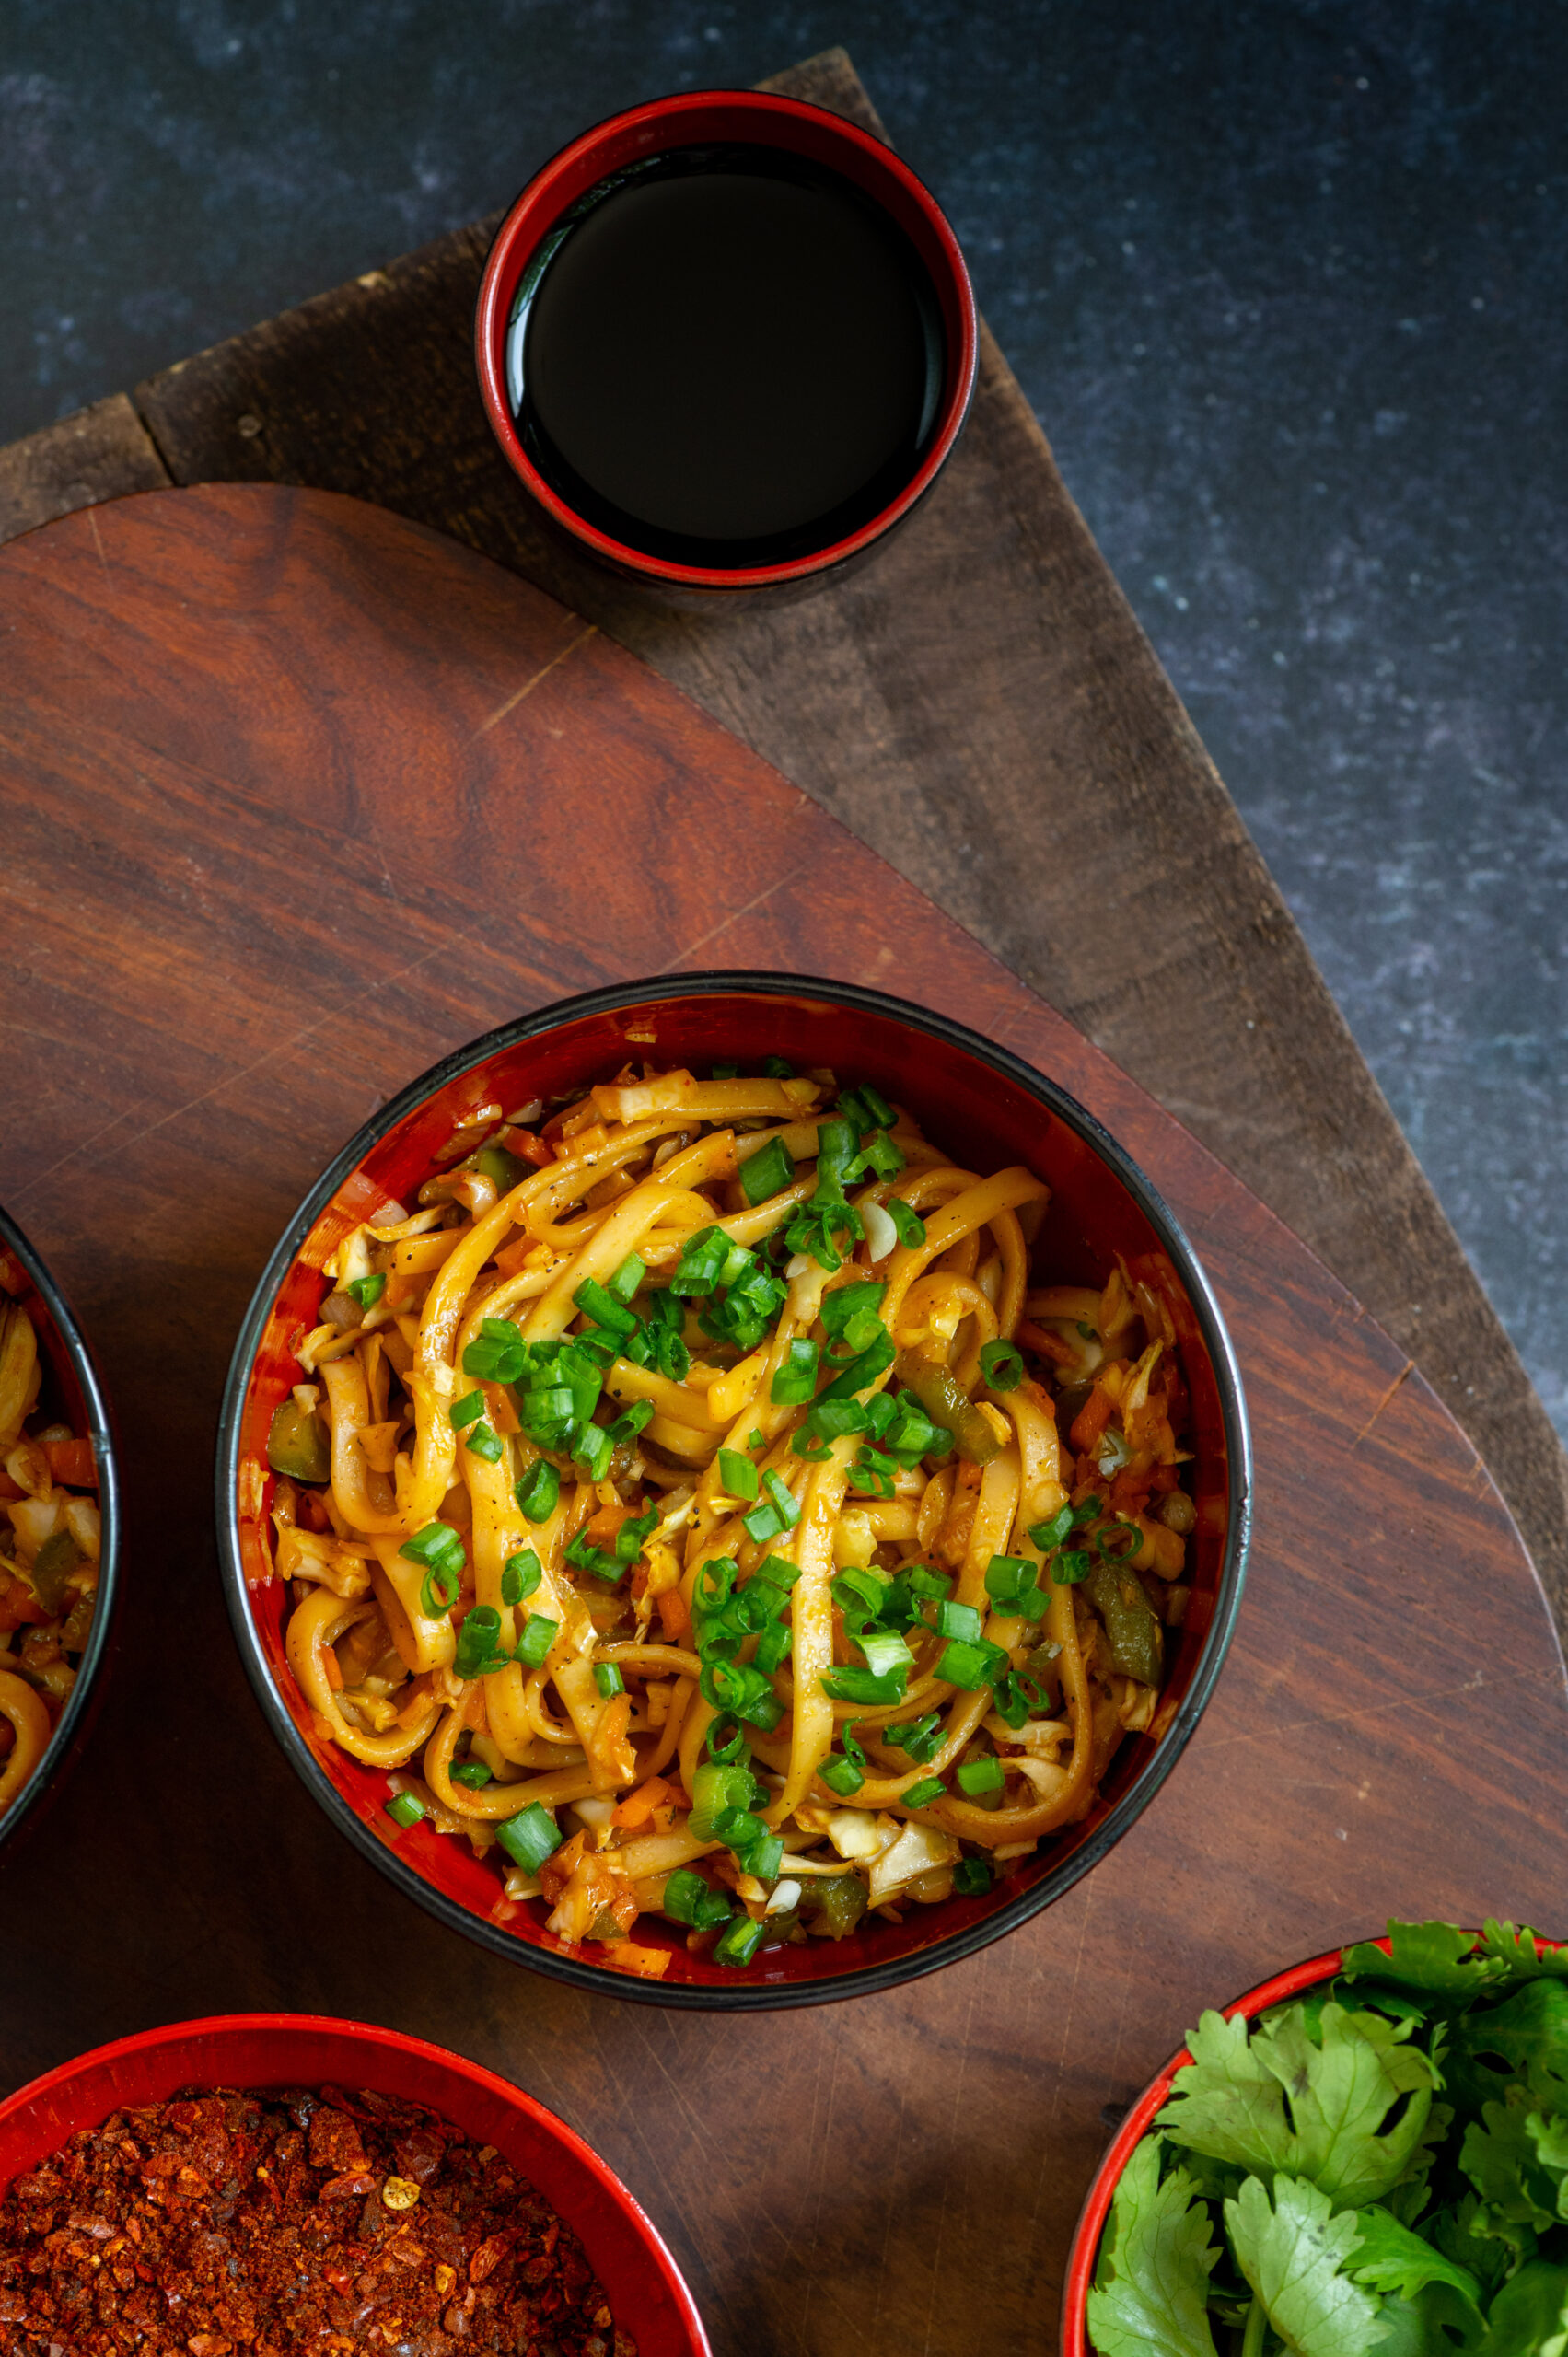
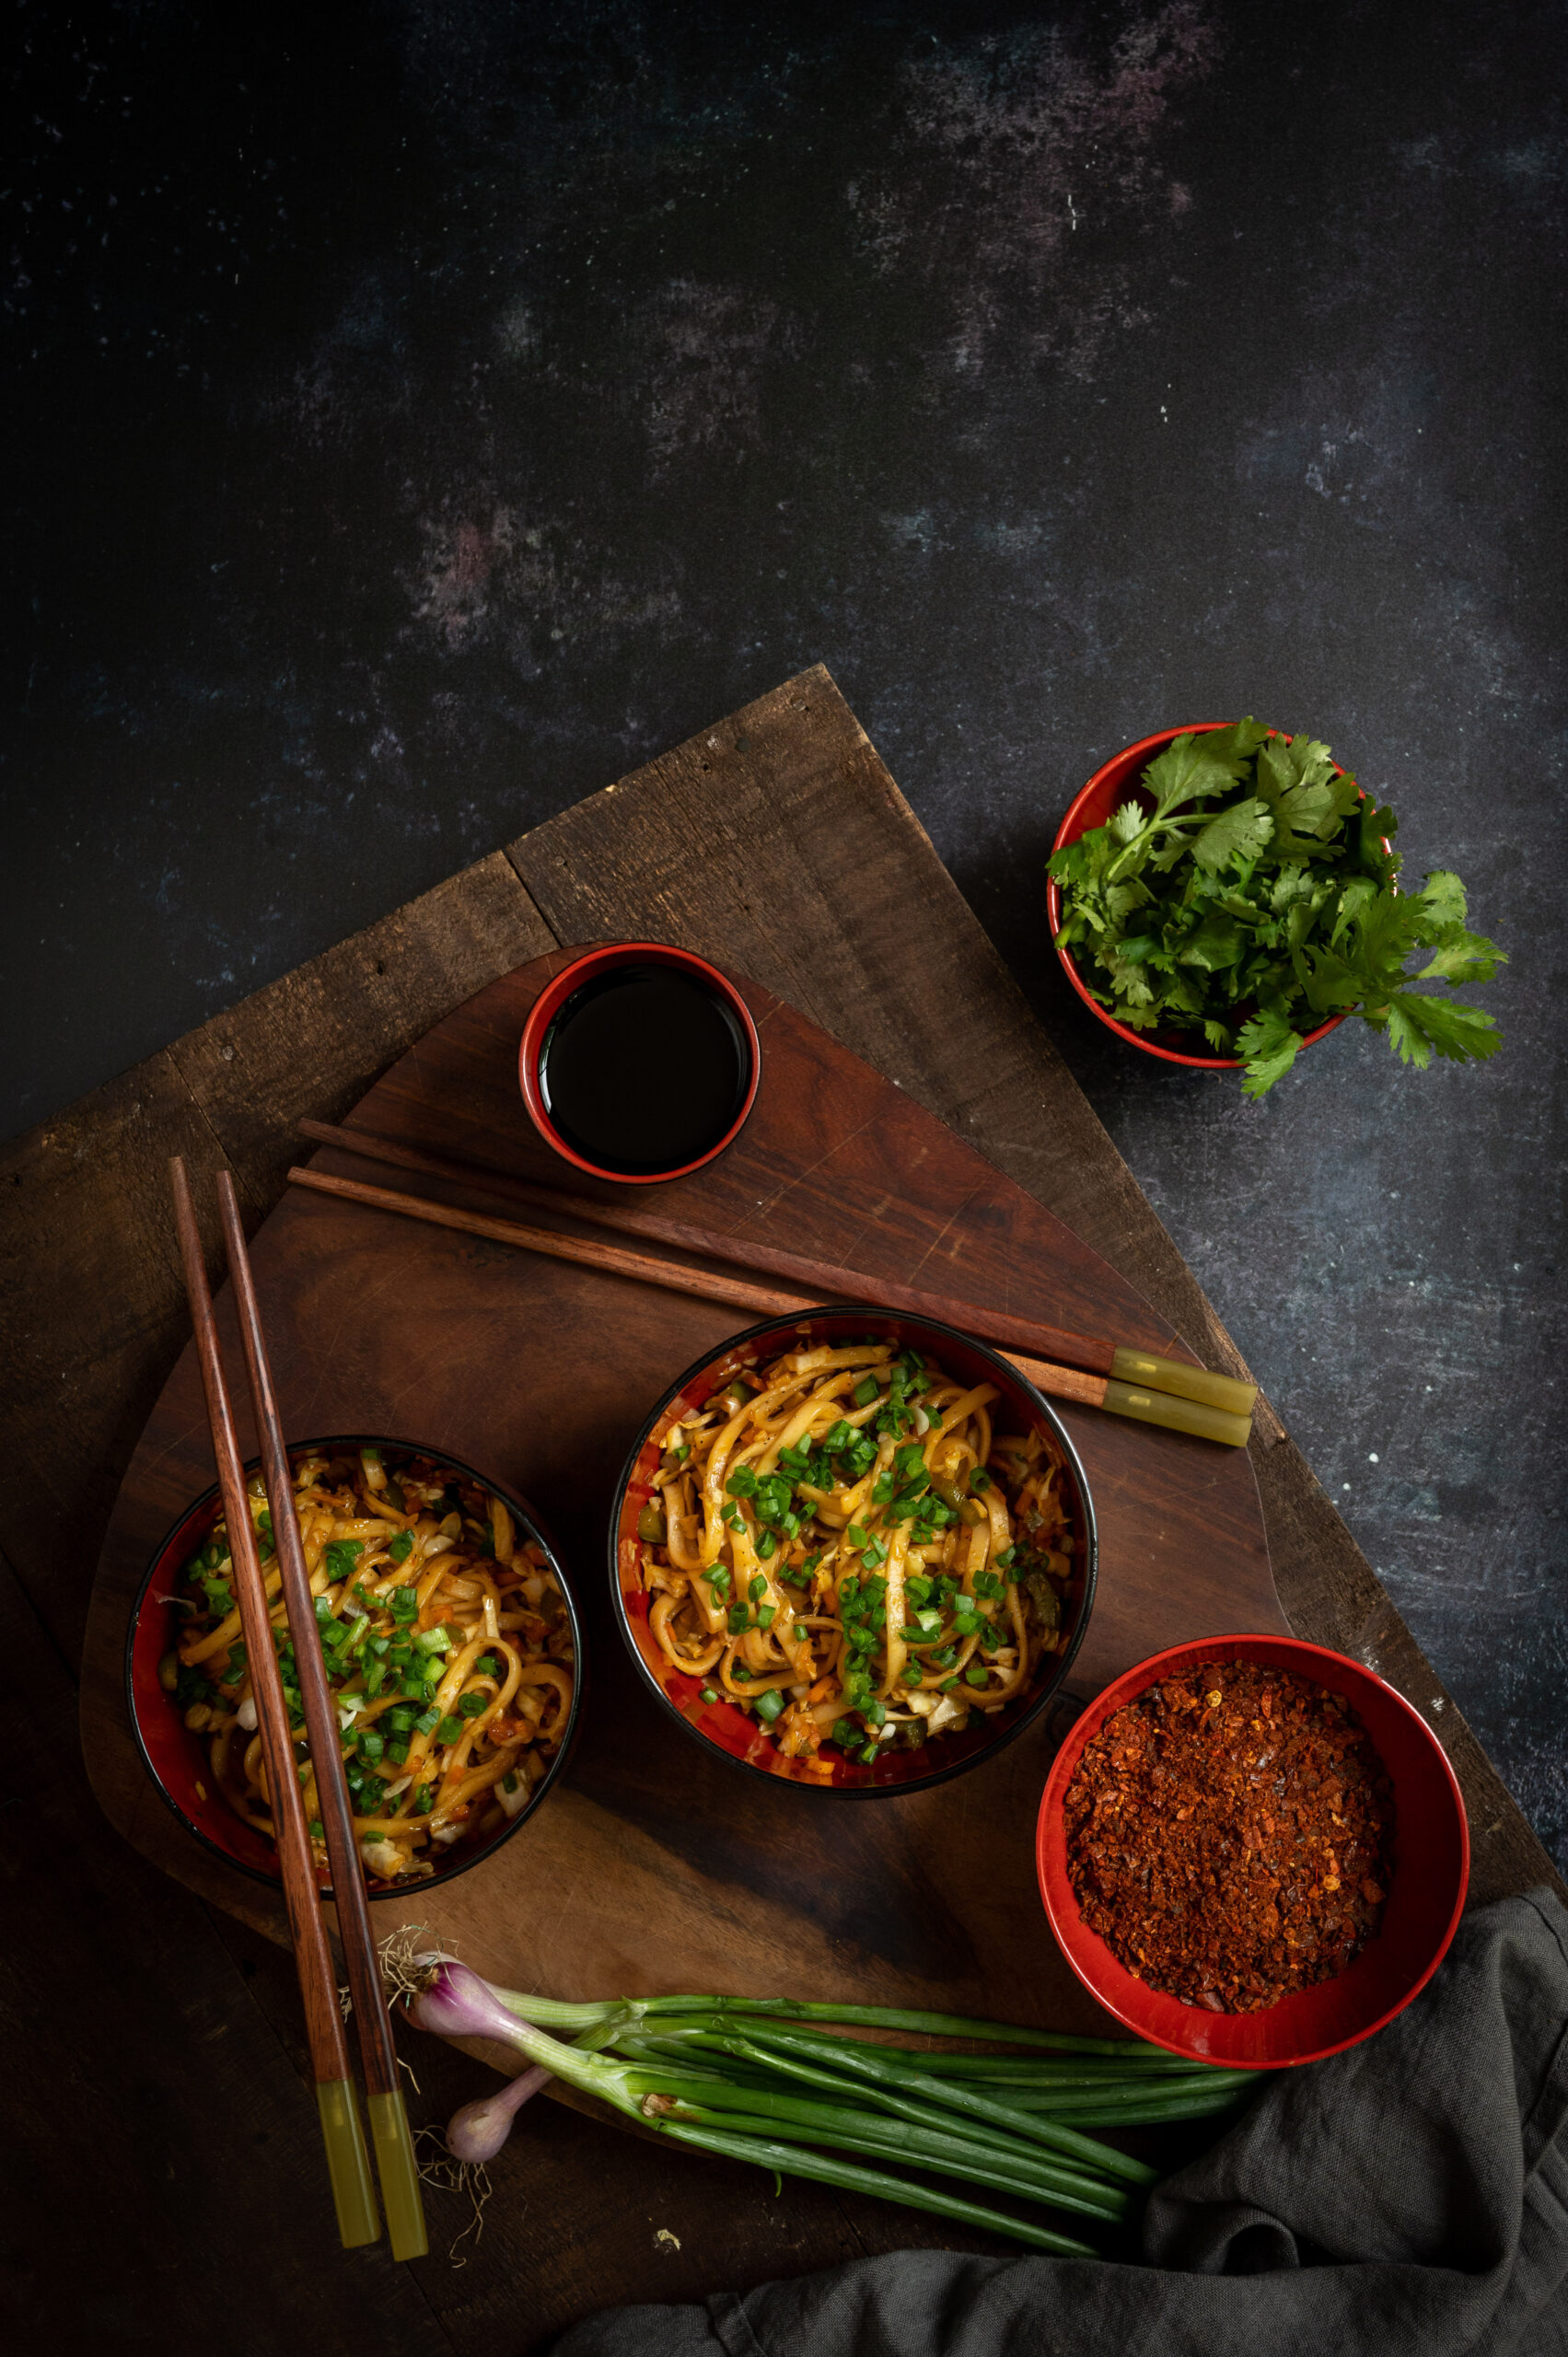
I hope you aren’t bored of hearing about how I’ve been increasing my intake of vegetables and proteins, but I know that many people are doing the same and would appreciate more recipes. This vegetable udon noodles preparation, which I sometimes add eggs to (especially for boosting that protein quotient), fulfills this need – and fulfills my cravings too. It is an Asian-inspired dish, and a meal in a bowl by itself.

This dish is a great way to consume vegetables that are in the fridge that you may not use up otherwise. It is a highly adaptable dish in so many ways. For instance, while I have used the traditional soy sauce, you may wish to swap it out for Indian masalas and spices that suit your palate.

I prefer to have early dinners, and am done with my meals by 7pm. This is so that there is sufficient time to digest before bed, as recommended by health experts, which means that I can have carbs in the evening with less guilt. This delicious dish, absolutely bursting with flavours and equally nutritious, is something I love to eat for dinner.

Certain things are non-negotiable for me when it comes to food. The quality of the oil I use is one thing. Another important choice is that I get my vegetables from good, clean sources, and buy organic as much as possible. When I go on drives outside the city, I always enjoy the lush beauty of the farms and gardens – so green, so gorgeous, so perfect. Yet, I have seen them being sprayed by chemicals too. Education about toxicity is so important for us all, whether as consumers or as farmers.

I am also conscious of consumption, and try to make use of everything that is in my kitchen. I see this is not just a cost-smart practical habit, but a mindful one. Food is so easily hit by any external factor. Whether that is war, climate change or excessive or minimal rains in a particular season, what we eat is affected first.

All this said, it is true that organic ingredients don’t come cheap, but I believe we must make good choices within what we can afford. We can also cultivate some ingredients ourselves. Whether we have ample backyards or terraces or compact kitchen gardens, we can all grow a little bit of what goes into our pots and pans. Staples like coriander and green chillies are ideal. You can also grow herbs and condiments, like lemongrass. This is something I do at home, and want to learn to do more of. That’s the thing about living mindfully and caring about sustainability – it’s not like you finish a degree and you know everything about the subject, you constantly have to adapt to changes in the world. Personally, I love to learn and to keep growing – including literally growing my own food where possible!

Udon Noodles

(Yield: Serves 2)


1½ to 2 cups chopped vegetables (capsicum, carrots, beans, spring onions, cabbage)

1 cup cooked udon noodles

1 tablespoon garlic (finely chopped or grated)

1 teaspoon ginger-garlic paste

1 pinch black pepper

Salt to taste

2 tablespoons soy sauce

1 teaspoon chilli oil

1 teaspoon chilli flakes

1 teaspoon rice vinegar

1 teaspoon mirin


In a non-stick pan, heat 1 ½ tablespoon sesame oil. Add ginger-garlic paste and sauté till it is fragrant. Add the vegetables, sauté and cook. Cover with a lid till it’s al dente.

Add the cooked noodles into the stir fried vegetables. Add pepper, salt, soy sauce, chilli oil, rice vinegar, mirin and chilli flakes. Stir until all the spices and ingredients come together.

Serve hot, and take in all the delicious flavours. If you enjoyed this dish, you may also enjoy this Asian stir fry. Do give both a try and let me know what you think!

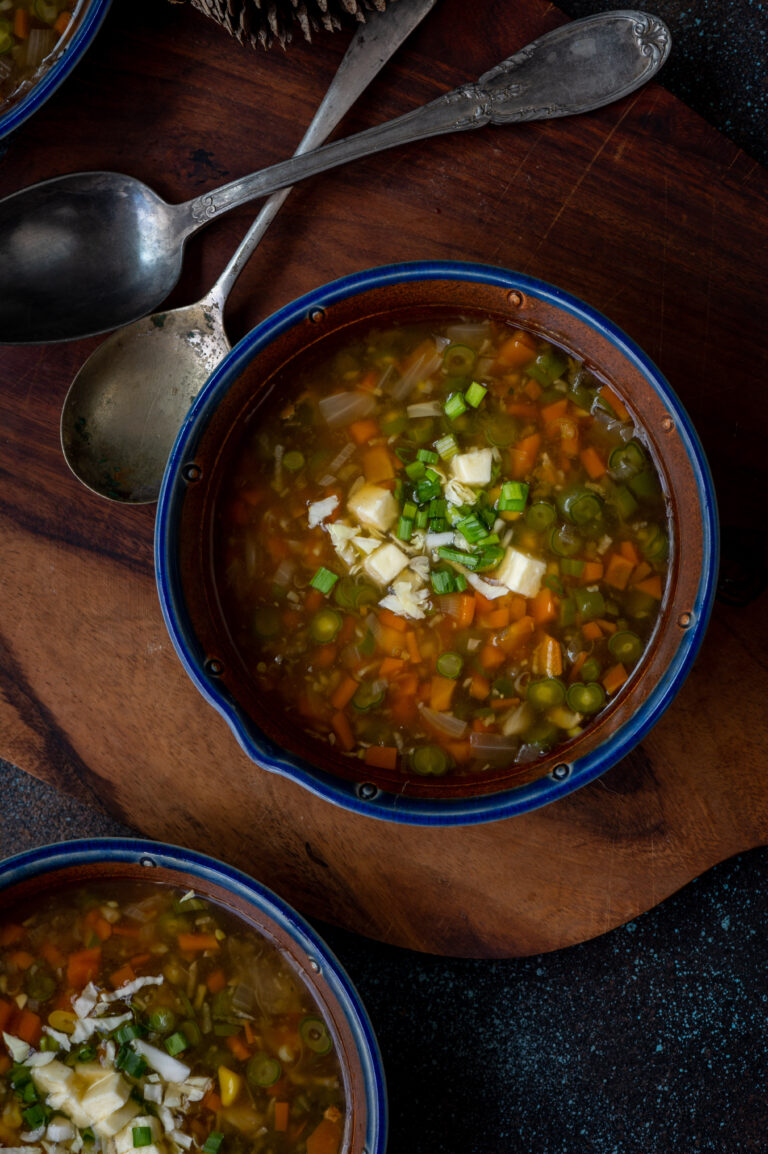
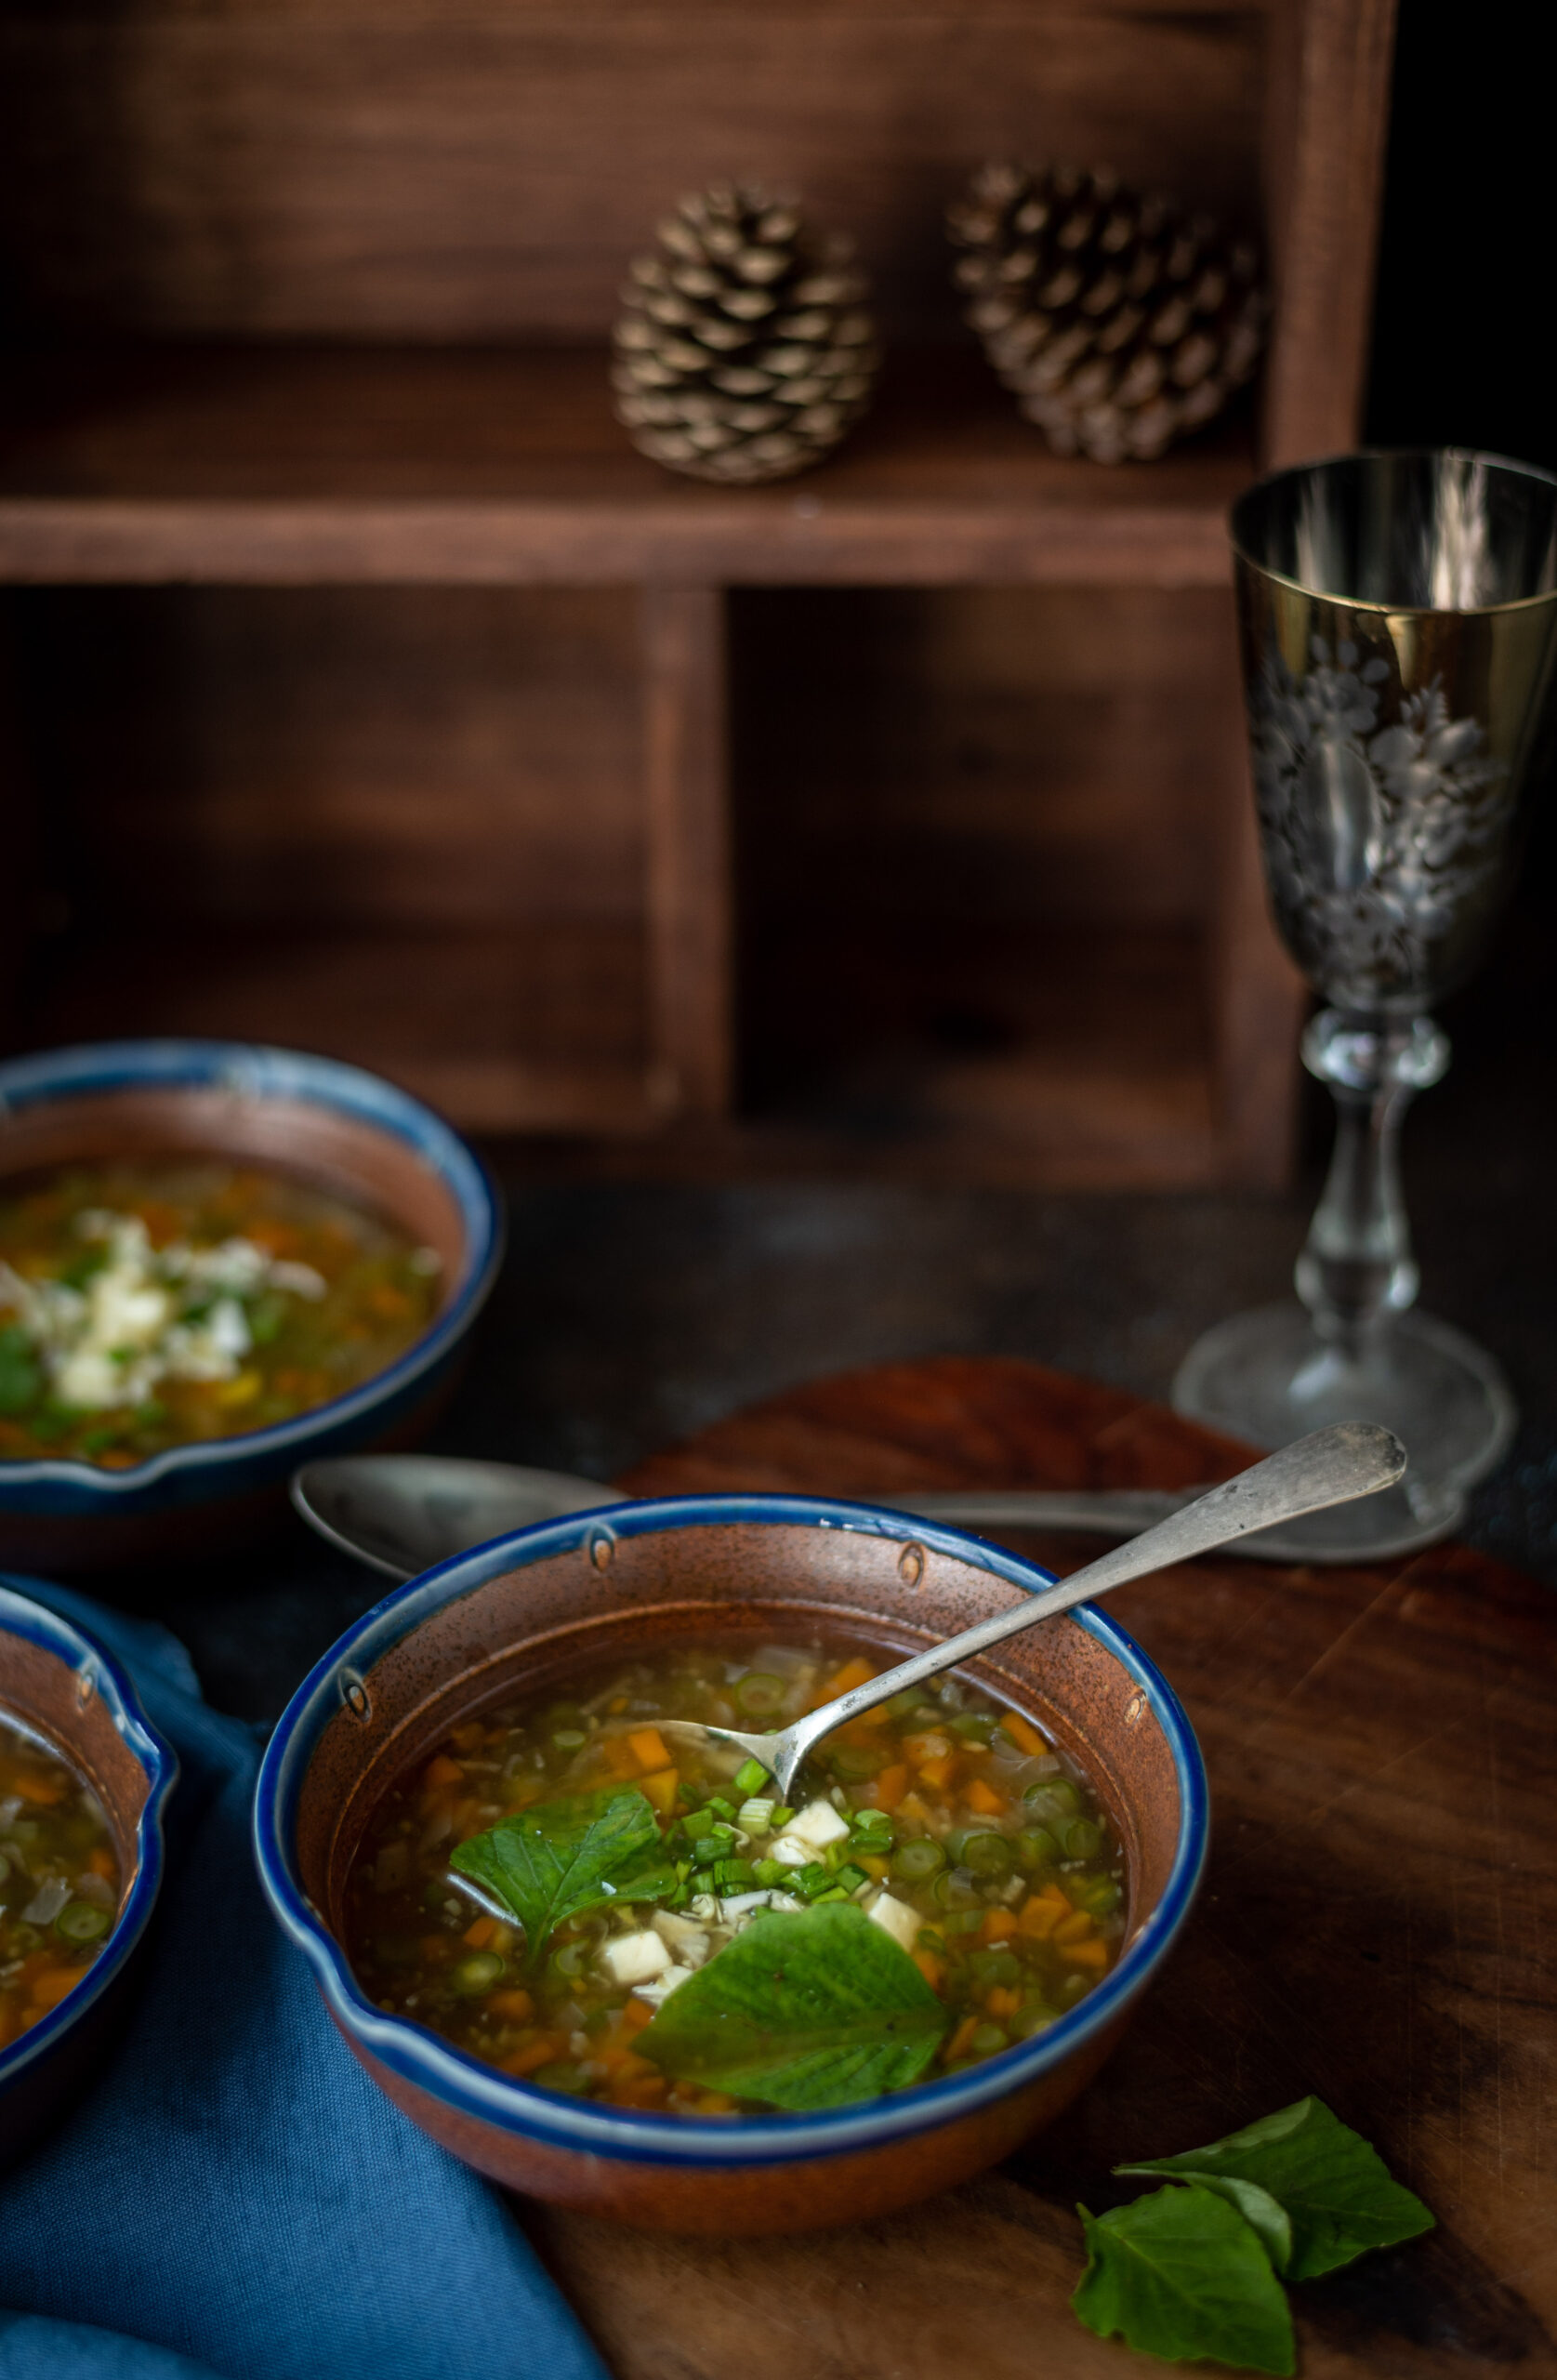
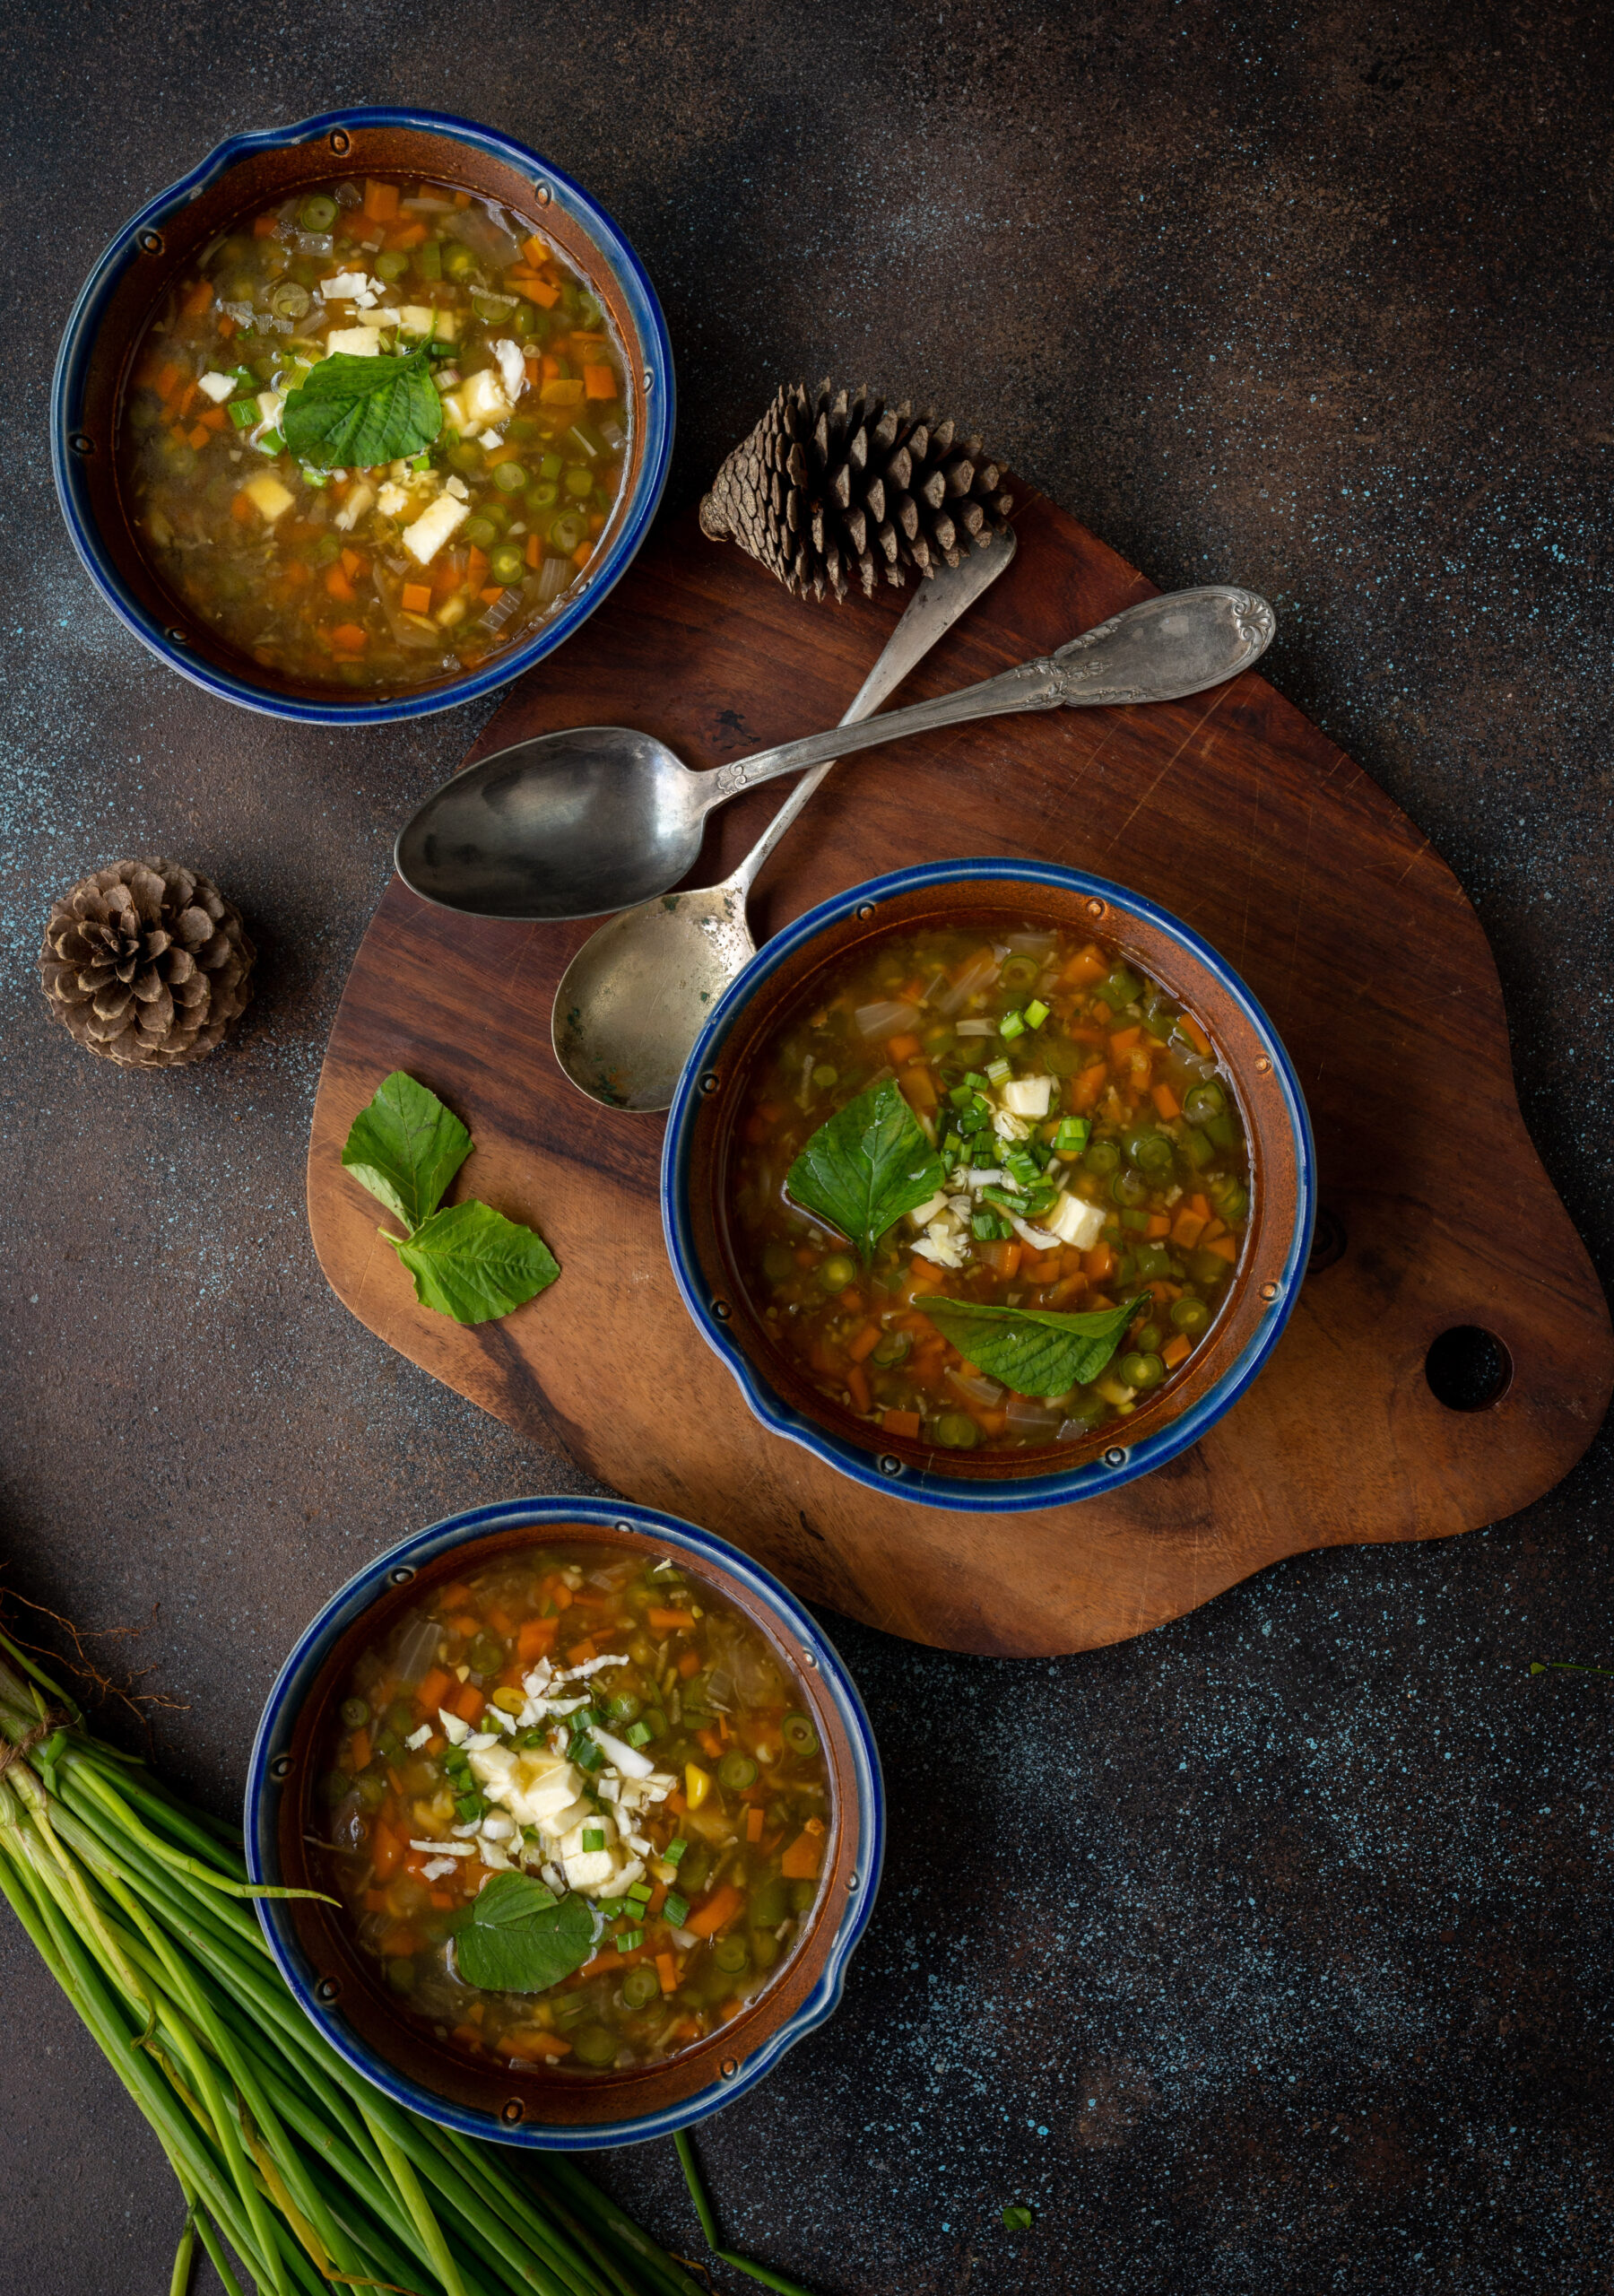
Given the heavy rain in Chennai, along with the fact that I recently recovered from a bad flu, I’ve been feeling like having more immunity-boosting foods of late. The turmeric tea that I have before bed is one among these – have you given it a try too? Another new item among my frequent meals is this simple, seasonal vegetable soup. It contains almost no processed ingredients and is a very healthy, can’t-go-wrong dish that really makes you feel well-nourished and warm.

This kind of weather also makes me feel like going into the kitchen less, so what makes this dish all the more convenient is that I can just make a large pot of it in one go, and then help myself to it whenever I feel hungry throughout the day.

The interesting part about how it’s made is that it’s really a “bits and bobs” kind of soup. You can prepare the soup stock by adding whatever you have around. For instance, I had some leftover ridge gourd, half an onion and other assorted vegetables, and all these went into it. The stock itself is a versatile item, and you can use it in dals and so on as well. As I’m a vegetarian, I’ve stuck to vegetables, but if you’re not, it’s a good idea to include some chicken while boiling the stock, and make it more protein-rich.

Making soup stock, and soup itself, with whatever is on hand came about because of necessity. All of you who are also in Chennai have faced a similar situation in recent weeks, with vegetables either unavailable or available only at skyrocketing prices. I believe that farmers have also had trouble being able to distribute the produce to the cities, in addition to flooding impacting the fields themselves. A combination of factors has led to this scarcity. The way I see it, and the way I choose to respond to it, is that it’s not so much about affordability as it is about accessibility. As a believer in Macrobiotics and someone who feels that seasonal and local ingredients are always best, I prefer to reach out for that which is most easily available at all times. That means that sturdier vegetables like potatoes, gourds, beans and carrots that still make it to our markets relatively smoothly and in good shape are what I’ve used in this dish, as well as in most of the dishes being prepared at home at the moment.

I tend to eat salads and raw vegetables at lunch, so cooked and steamed vegetables, which this soup is rich in, are my go-to for dinner. I prefer a light meal at night as it’s easier on the digestion. Also, while you’ve definitely heard quite a bit on other posts on this blog about how I’ve been cutting down on carbs, I’m in a new phase now where I let myself have some carbs at night. So sometimes I have a dosa or two, which is certainly a lighter dinner than the regular Gujarati thaali we eat at lunch. It’s all about listening to your body and adapting to the circumstances, including the weather and the vegetable supply chain!

Vegetable Soup

(Yield: Serves 3-4)

Stock

Thick peel of a potato

Cabbage leaves

Peel and parts of a ridge gourd

1 onion

Soup

1 tablespoon oil

2 cups finely cut vegetables (carrots, beans, onion, broccoli, corn)

A piece of ginger (grated)

3 cloves garlic (grated)

3-4 cups vegetable stock (above)

Salt to taste

½ cup rice starch (use corn flour if you prefer)

1 tablespoon soya sauce

1 teaspoon homemade chili sauce

A squeeze of lemon

Optional

Grated tofu

Sprouts

Leafy greens

Coriander garnishing


Prepare the stock by adding all the vegetables to about six cups of water. Allow this to boil until it reduces to ¾th the earlier quantity. Strain and cool. Set aside.

Then, begin preparing the soup.

Add the oil to a pot. Then, add the ginger and garlic and sauté for a few minutes.

Next, add all the vegetables and stir fry for a few minutes.

Then, warm and add the vegetable stock prepared earlier. Next, add the starch. Cover and allow to boil. I have opted to use rice starch from rice cooked earlier in the day, but you can use the usual corn flour, tapioca flour or any other thickening or gelling agent that you prefer.

Once it starts boiling, add the salt, soya sauce and chilli sauce. Cook for a little while and once it starts to thicken slightly, squeeze in the lemon.

The soup is ready now, but to make it go an extra mile, garnish with coriander and add some grated tofu or moong sprouts for a nice boost of protein. I added all these as well as some leafy greens I had on hand that day. Serve hot.

This vegetable soup works beautifully as a meal-in-a-bowl, or you can have it as an appetiser or complement it with a range of sides. Something like this cheesy, garlicky sourdough toast may make a lovely accompaniment. You can also check out some of the other delicious soups that I’ve shared over the years: minestrone, simple zucchini soup, broccoli and almond soup and vegan whole corn and lemongrass soup. Stay warm, and enjoy!

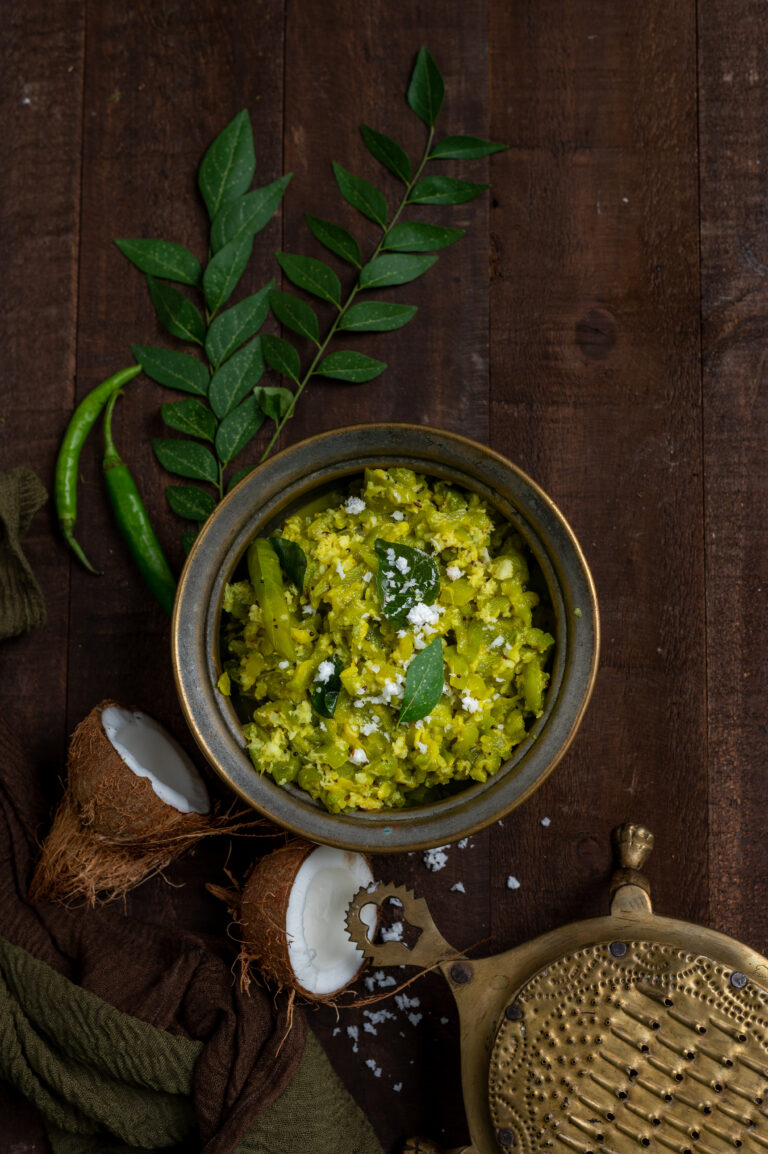
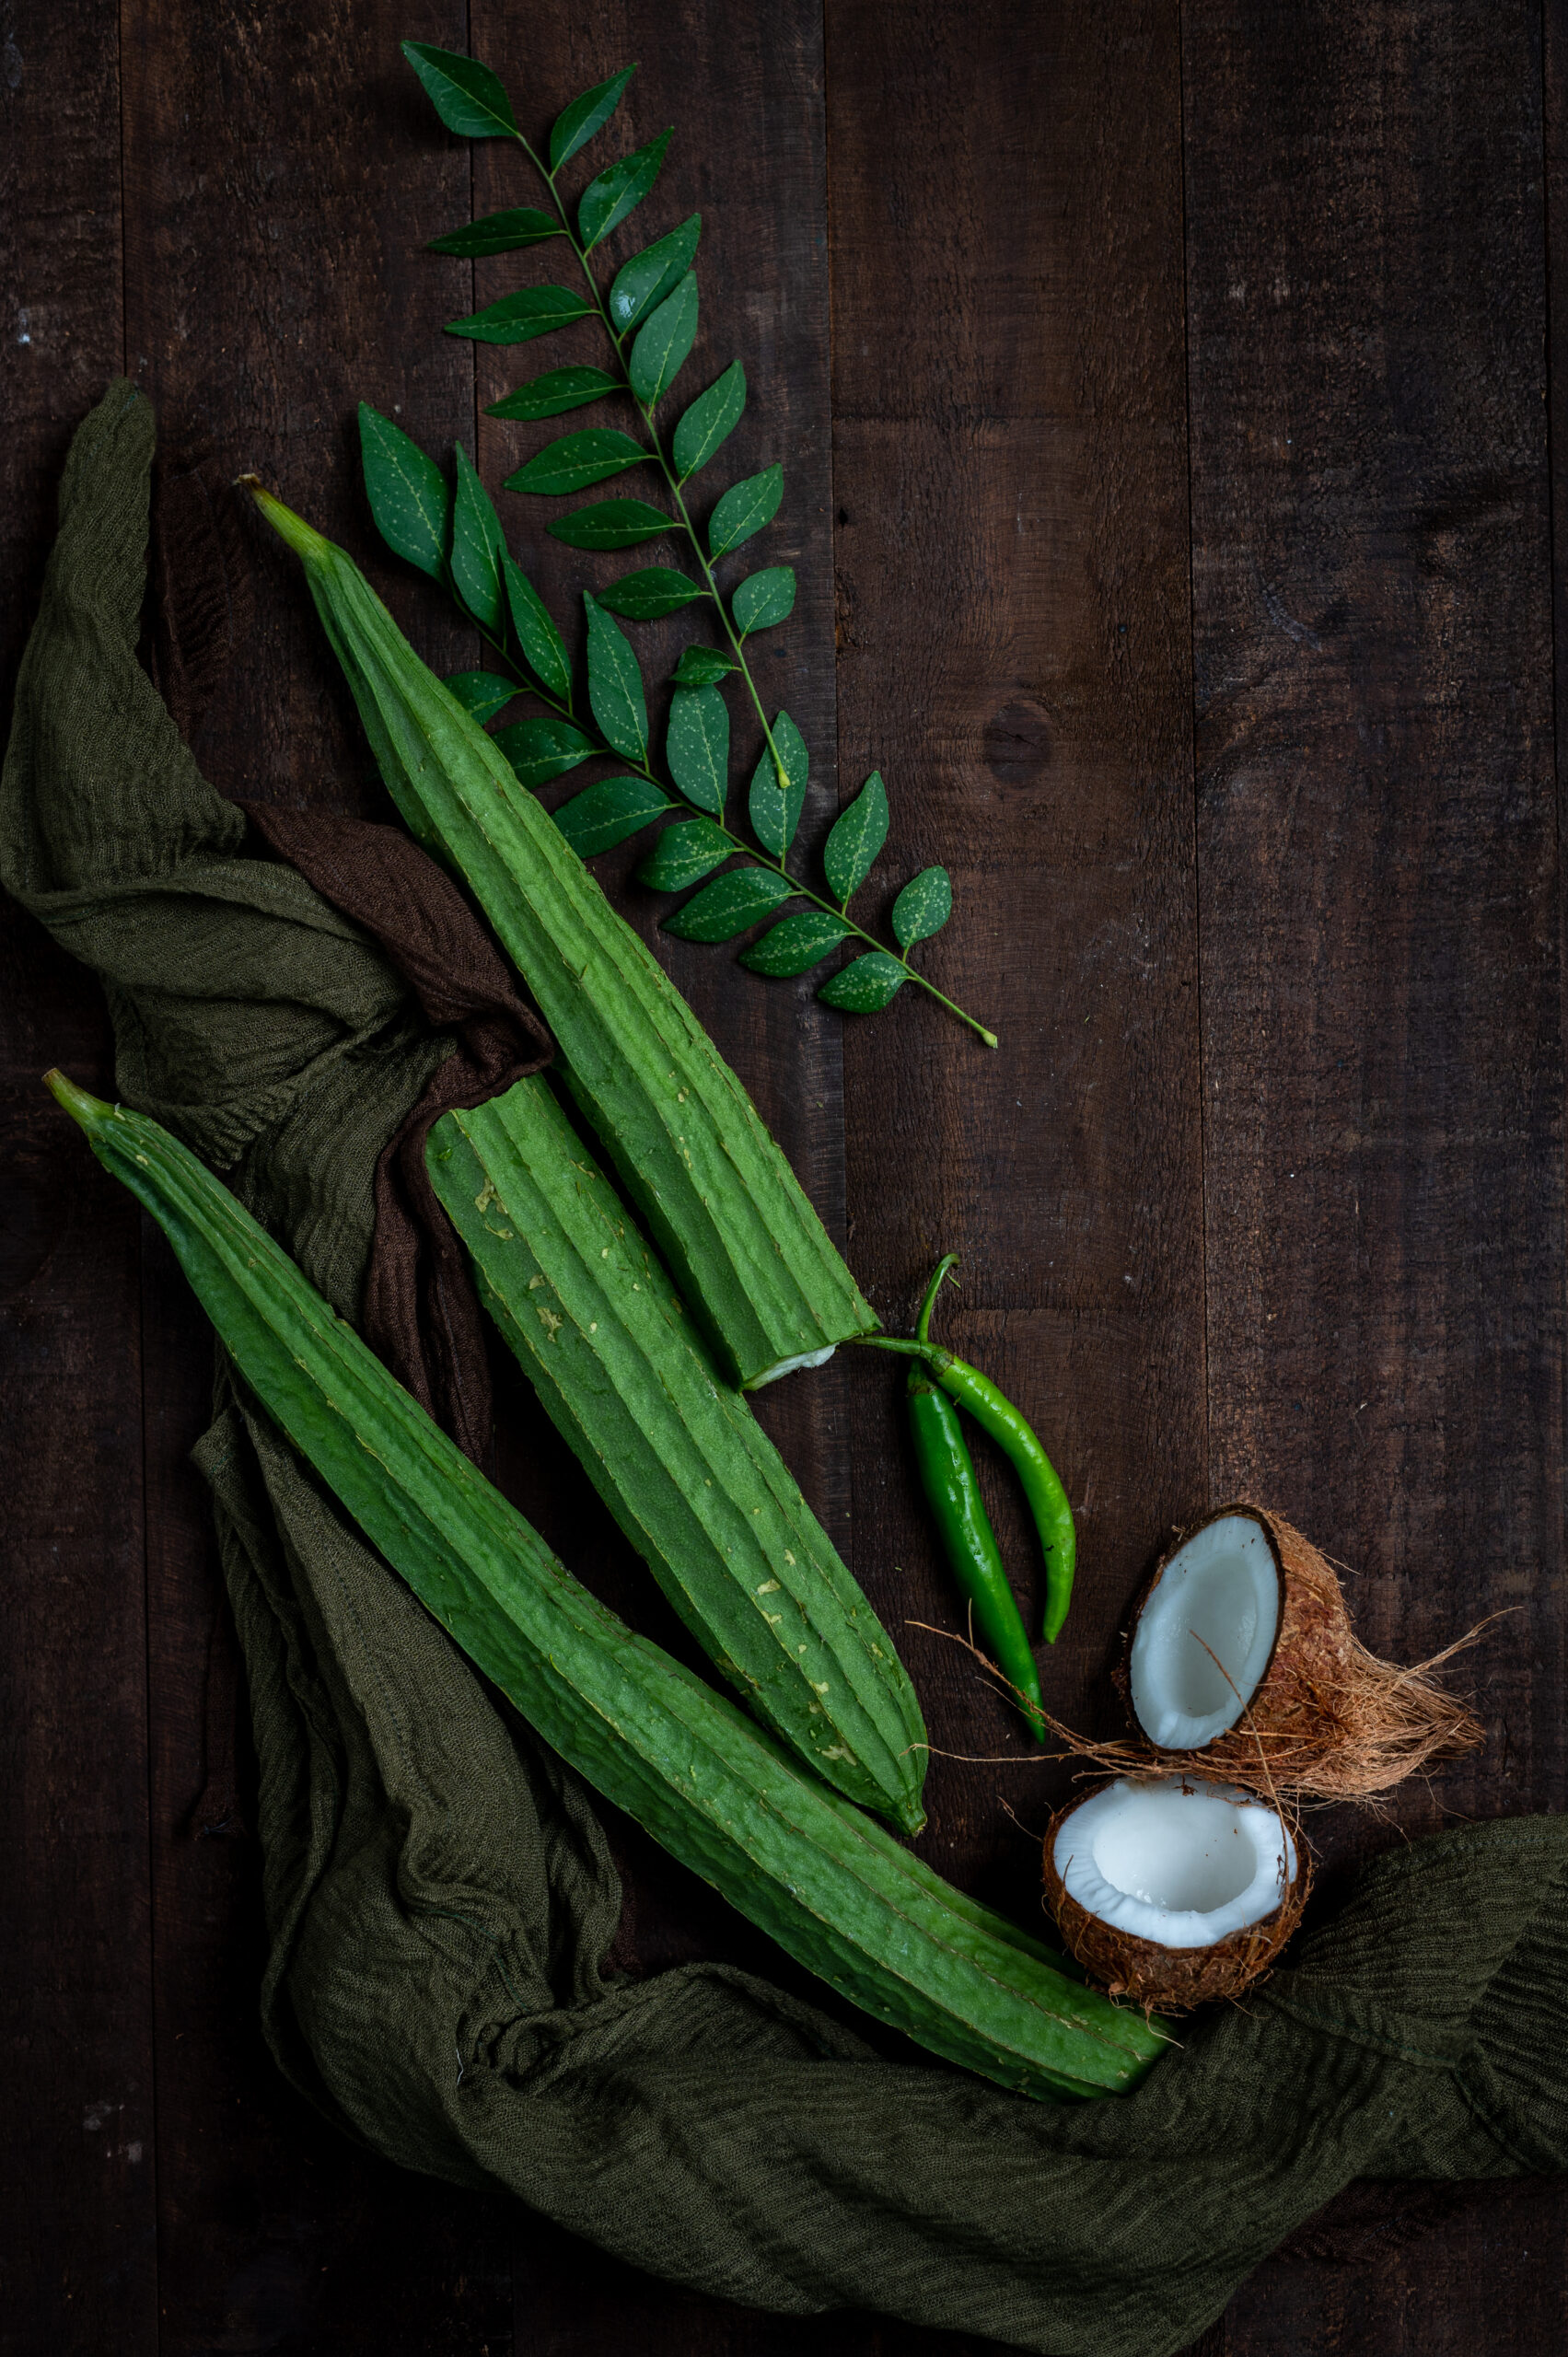
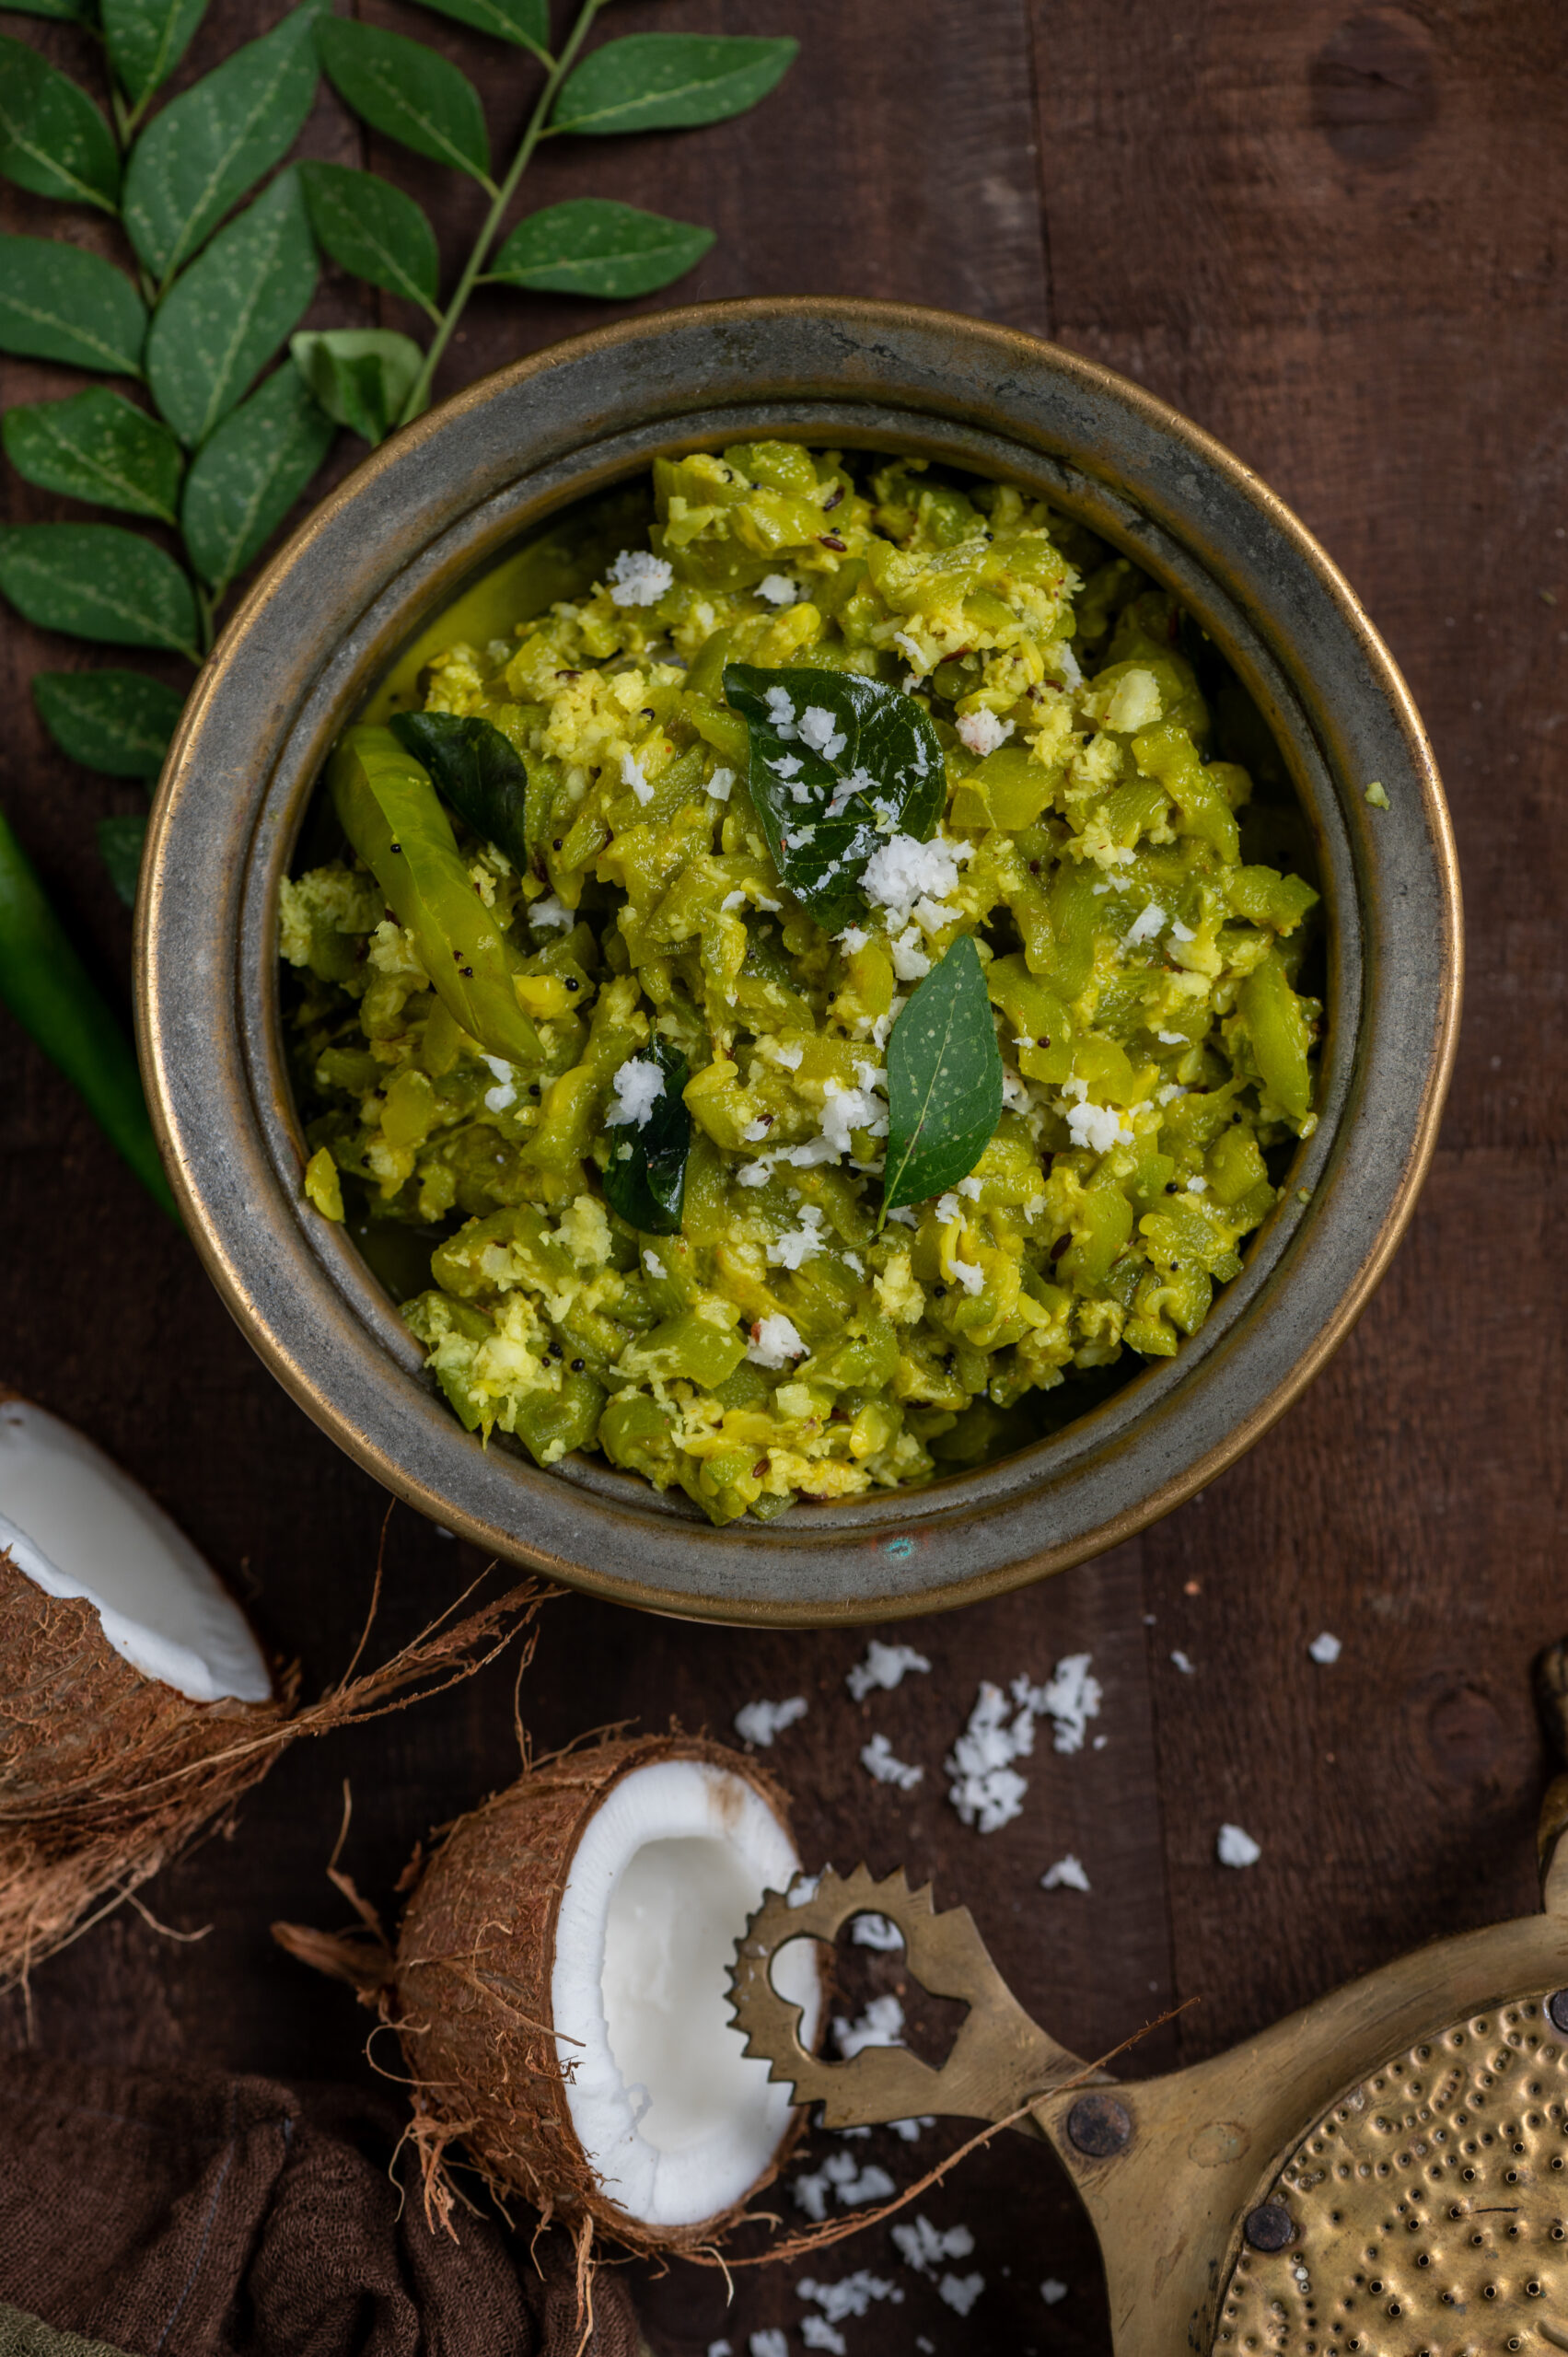
As a Gujarati who was born and brought up in Tamil Nadu, I am lucky to have the advantage of knowing and being a part of both cultures. Naturally, this extends to the cuisines as well. Although what is served for lunch nearly every day at home is a standard Gujarati thaali, which consists of rotis, a sabzi or vegetable and some dal, you can see the influence of my multicultural upbringing in the style of of some of the dishes. For instance, the sabzi of the day may be something cooked in a South Indian preparation. This ridge gourd stir-fry, or peerkanga pirratal as we know it in Tamil, is one such recipe in my eclectic repertoire.

I grow ridge gourd on my rooftop, and terrace gardening has also shown me firsthand the beautiful logic of Nature, which has designed things so that the produce that is most nourishing for those who live in the local climate is what grows best in that land too. Take the ridge gourd: high in water content, rich with fibre and minerals, and therefore just perfect for the weather of Chennai wherein our energy is easily depleted by the heat. If you live here, loading up your lunch bowl with this ingredient gives you exactly the boost you need for the rest of the day.

Of course, rounding out the standard meal would be some form of carbs, also known as the bane of my life. So here’s the trick: the Buddha bowl trompe l’oeil. Serving style and visual presentation always impact our perception of what we’re consuming. By putting just two tablespoons of white rice into a bowl and filling the rest with this ridge gourd stir-fry, I don’t have that miserable feeling of holding myself back by skimping on the main part of the meal. Instead, the vegetables themselves become the main part of the meal. This dish is very much in the category of comfort food, and I sometimes literally eat bowlfuls of it!

This South Indian ridge gourd stir-fry is very simple, very unassuming and very wholesome. Just salt and turmeric are quite enough to enhance the natural flavour of the chief ingredient. In addition to the ridge gourd on my rooftop, there are coconut trees in my backyard that yield fruit all year around. I use my own homemade coconut oil and add freshly grated coconut to this dish too, so almost everything in this dish is homegrown and pure. Even a little kitchen garden can make such a difference to our cooking. There really is something special about cultivating and consuming our own ingredients.

Doing so is also a link to a traditional way of living and a traditional way of eating, and these are subjects I think about a lot, given how we need both of these for the sustainability of our planet. M husband and I love time-honoured dishes, but our adult children feel they require much more novelty and diversity in their diets. Being in sync with Nature and seasonal rhythms is important for our vitality too, and I wonder if this is something one becomes more aware of as we age and our palates change. Growing bodies and younger bodies with dynamic lifestyles do need more carbs and sugars, certainly. As discussed in my previous post, it’s quite interesting how kids and senior citizens have very similar tastes. I have been listening more and more to what my body, somewhere between those two extremes of life, needs. In my case, vegetables are what it often craves. If you’re the same, you’ll find much for your repertoire in this blog’s archives. While re:store is all about baked indulgences, the recipes here are more often than not about bringing pleasure and nutrition into everyday meals.

South Indian Ridge Gourd Stir-Fry

(Yield: Serves 2-3)


4 cups peeled and chopped ridge gourd

A few curry leaves

¼ cup grated coconut (optional)

2 tablespoons coconut oil

¼ teaspoon mustard seeds

¼ teaspoon cumin seeds

¼ teaspoon urad dal

Salt to taste

¼ teaspoon turmeric

½ cup water

1-2 green chillies

3 tablespoons soaked mung/yellow dal


In a pressure cooker, add the mung dal and the cut gourd. Add salt, turmeric and ½ cup of water. Allow to cook until tender (this should be about 2 whistles).

In another kadai, add the coconut oil. Once it has heated, add the mustard seeds, cumin seeds and ural dal. When they start to splutter, add the curry leaves.

Immediately after, add the vegetables from the pressure cooker and stir well. Once the concoction starts boiling, turn off the flame and add the grated coconut. You can skip this ingredient if you aren’t a fan, or if it isn’t available. Mix well. Garnish with coriander leaves and serve hot. This is usually an accompaniment to rice or rotis.

This South Indian-style ridge gourd stir-fry is a recipe I picked up along the way, and prefer to the Gujarati version that my mother used to make, which required chili and coriander powders. That said, sometimes it feels a bit painful when I’m confronted with very deeply-rooted authentic Gujarati dishes and find myself at a loss about how to prepare them. Fortunately, my sister who has had much more exposure to that cuisine is within reach, as well as friends and fellow bloggers, and I usually find what I’m looking for and learn through trial and error.

In fact, this gives me an opportunity to ask you: is it true that ridge gourd peel can be used in a chutney? Have you prepared this, and if so, would you care to share the recipe?

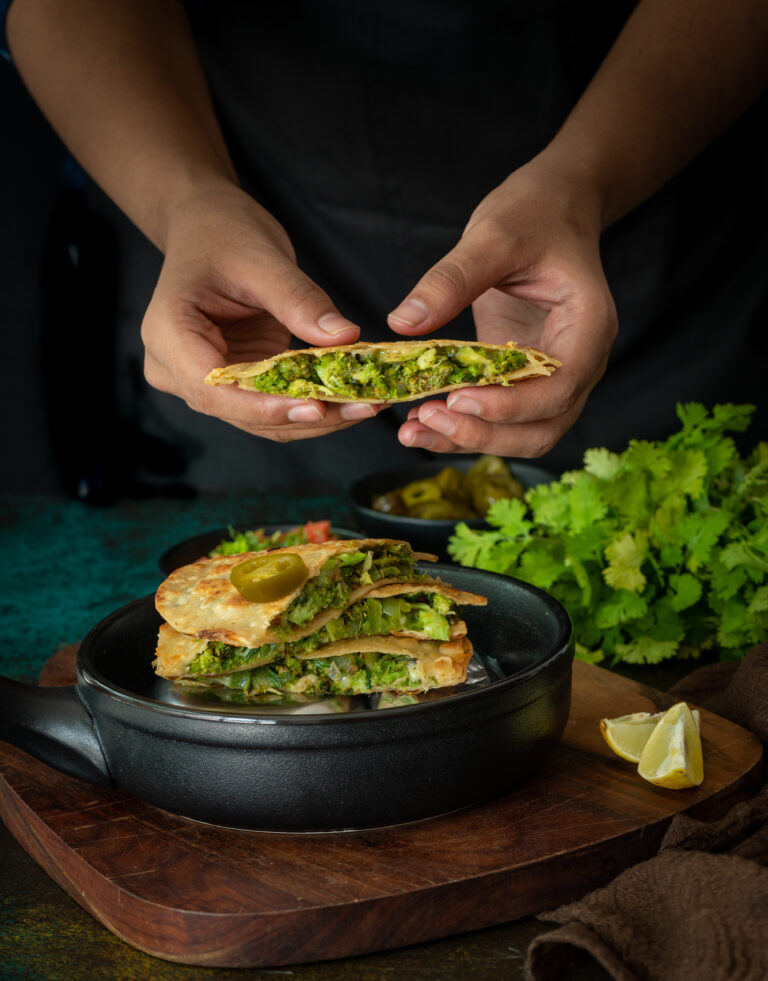
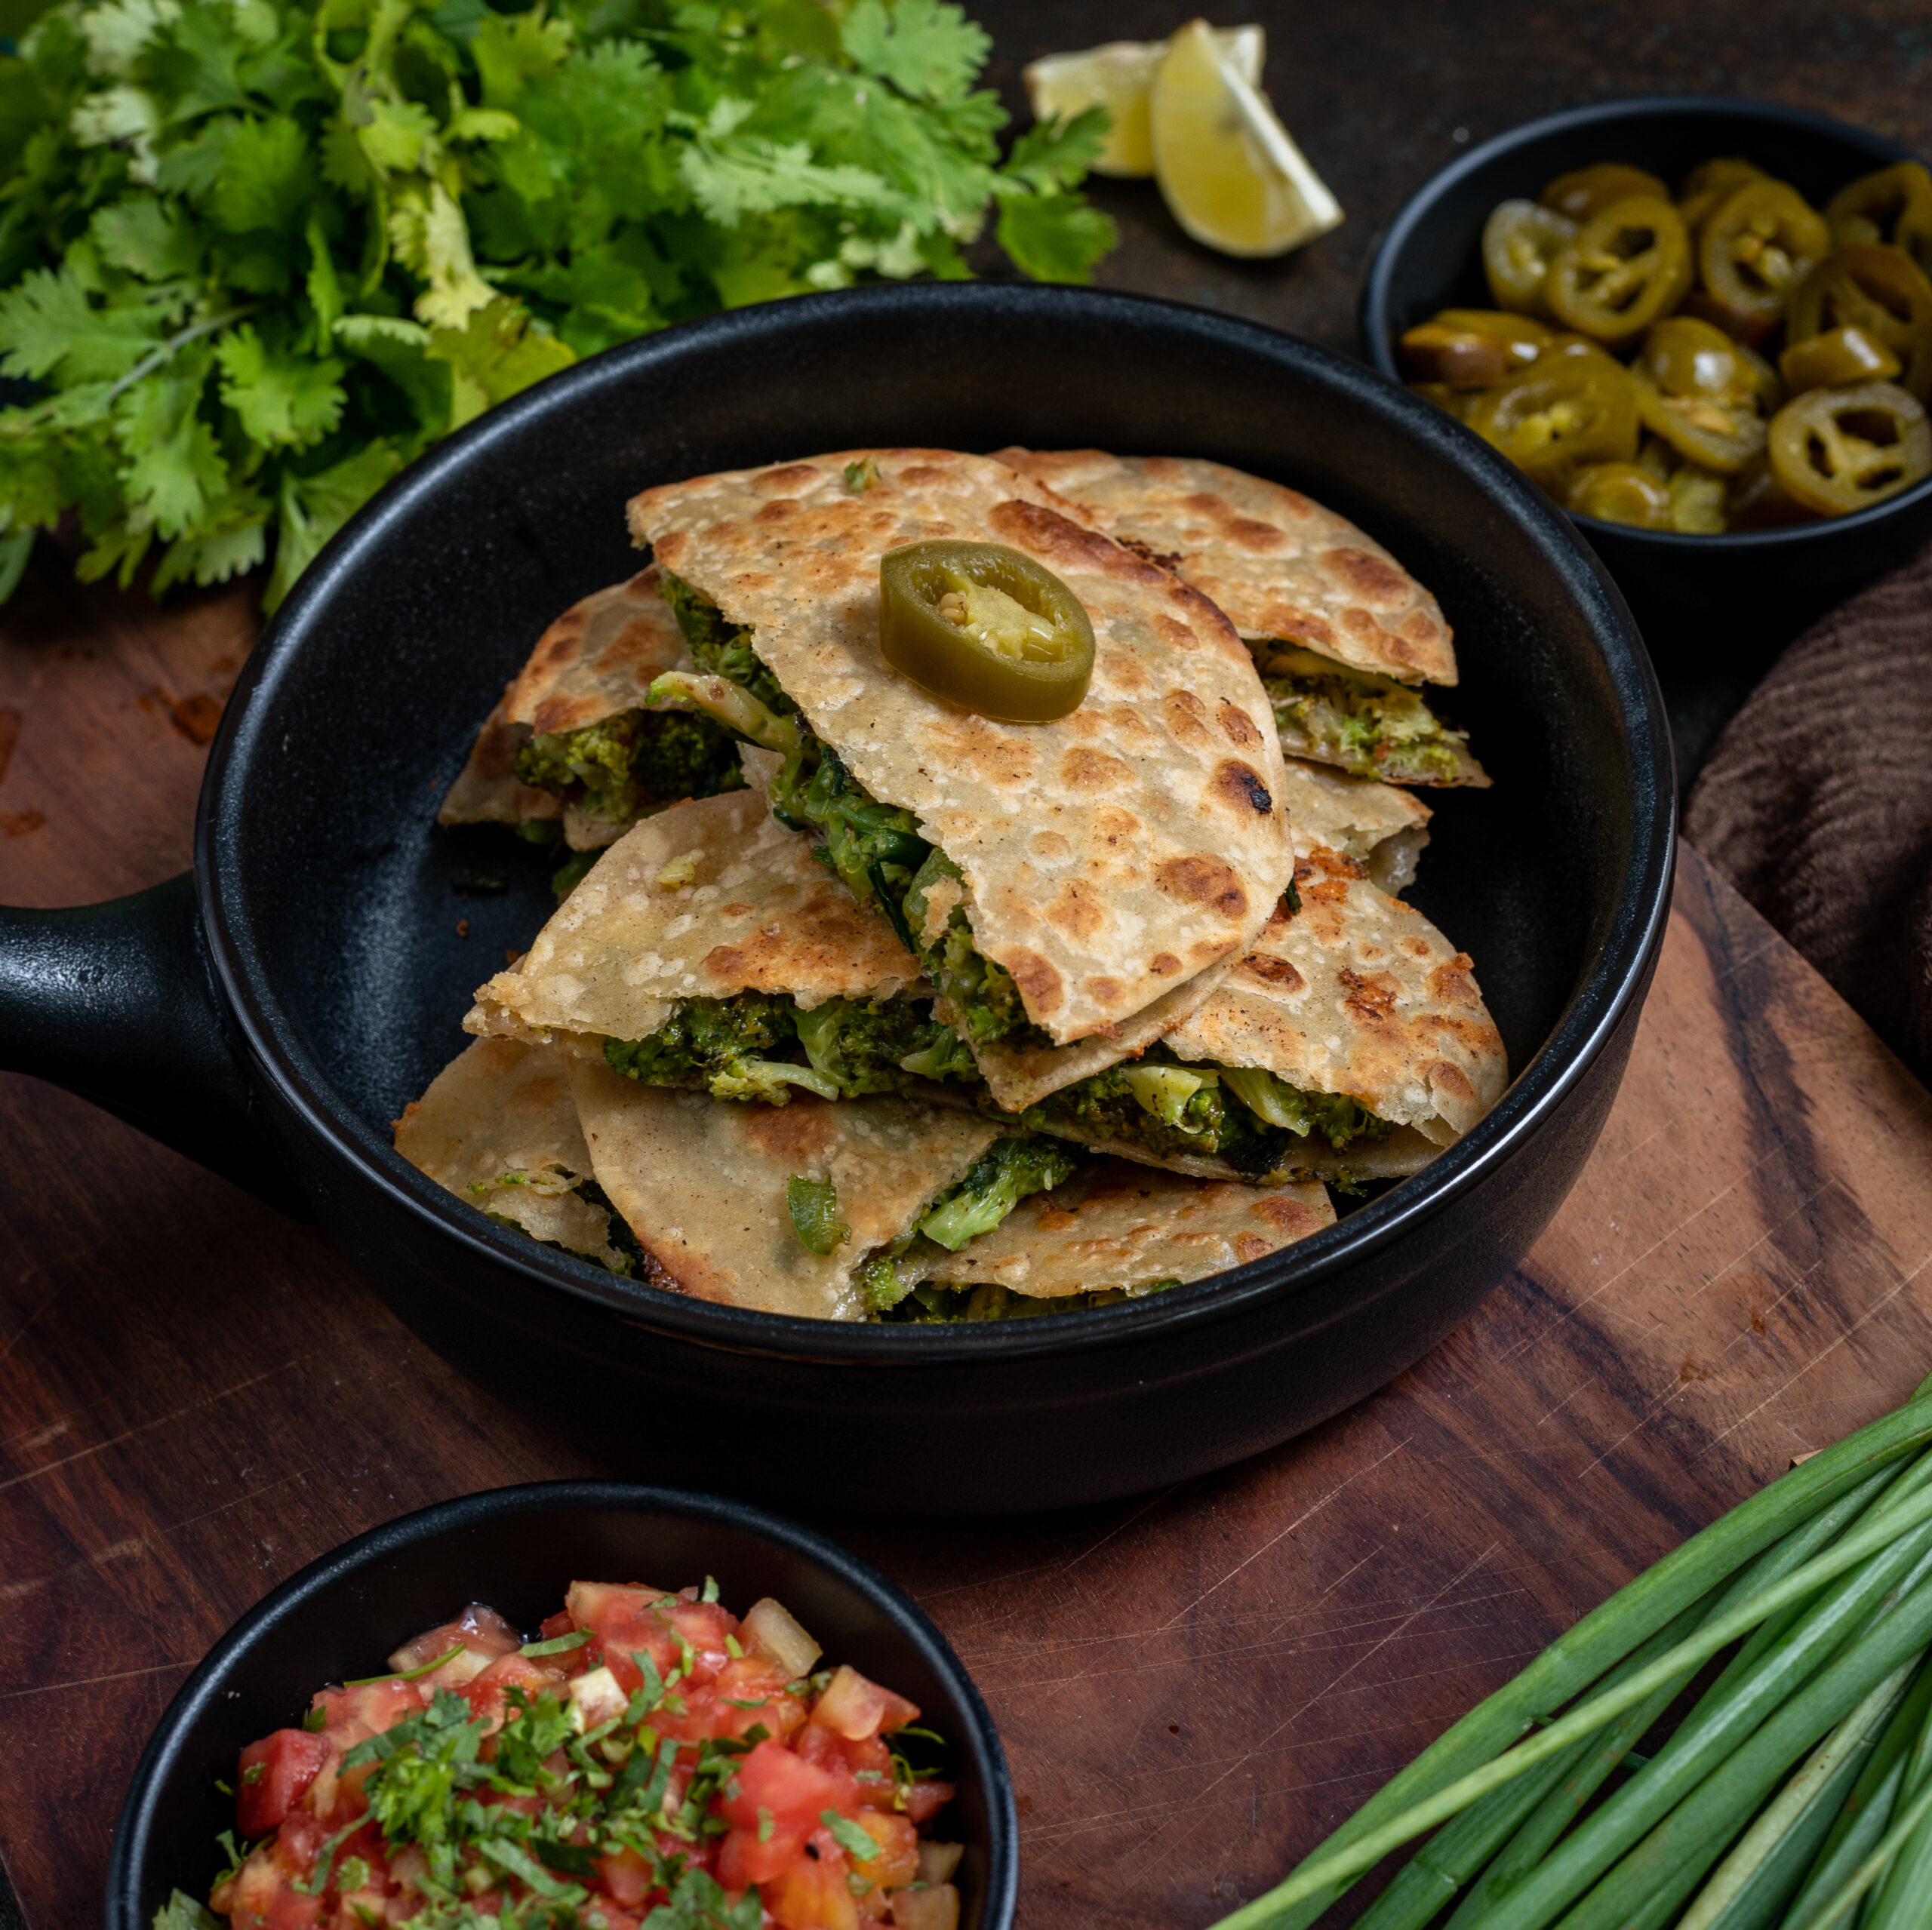
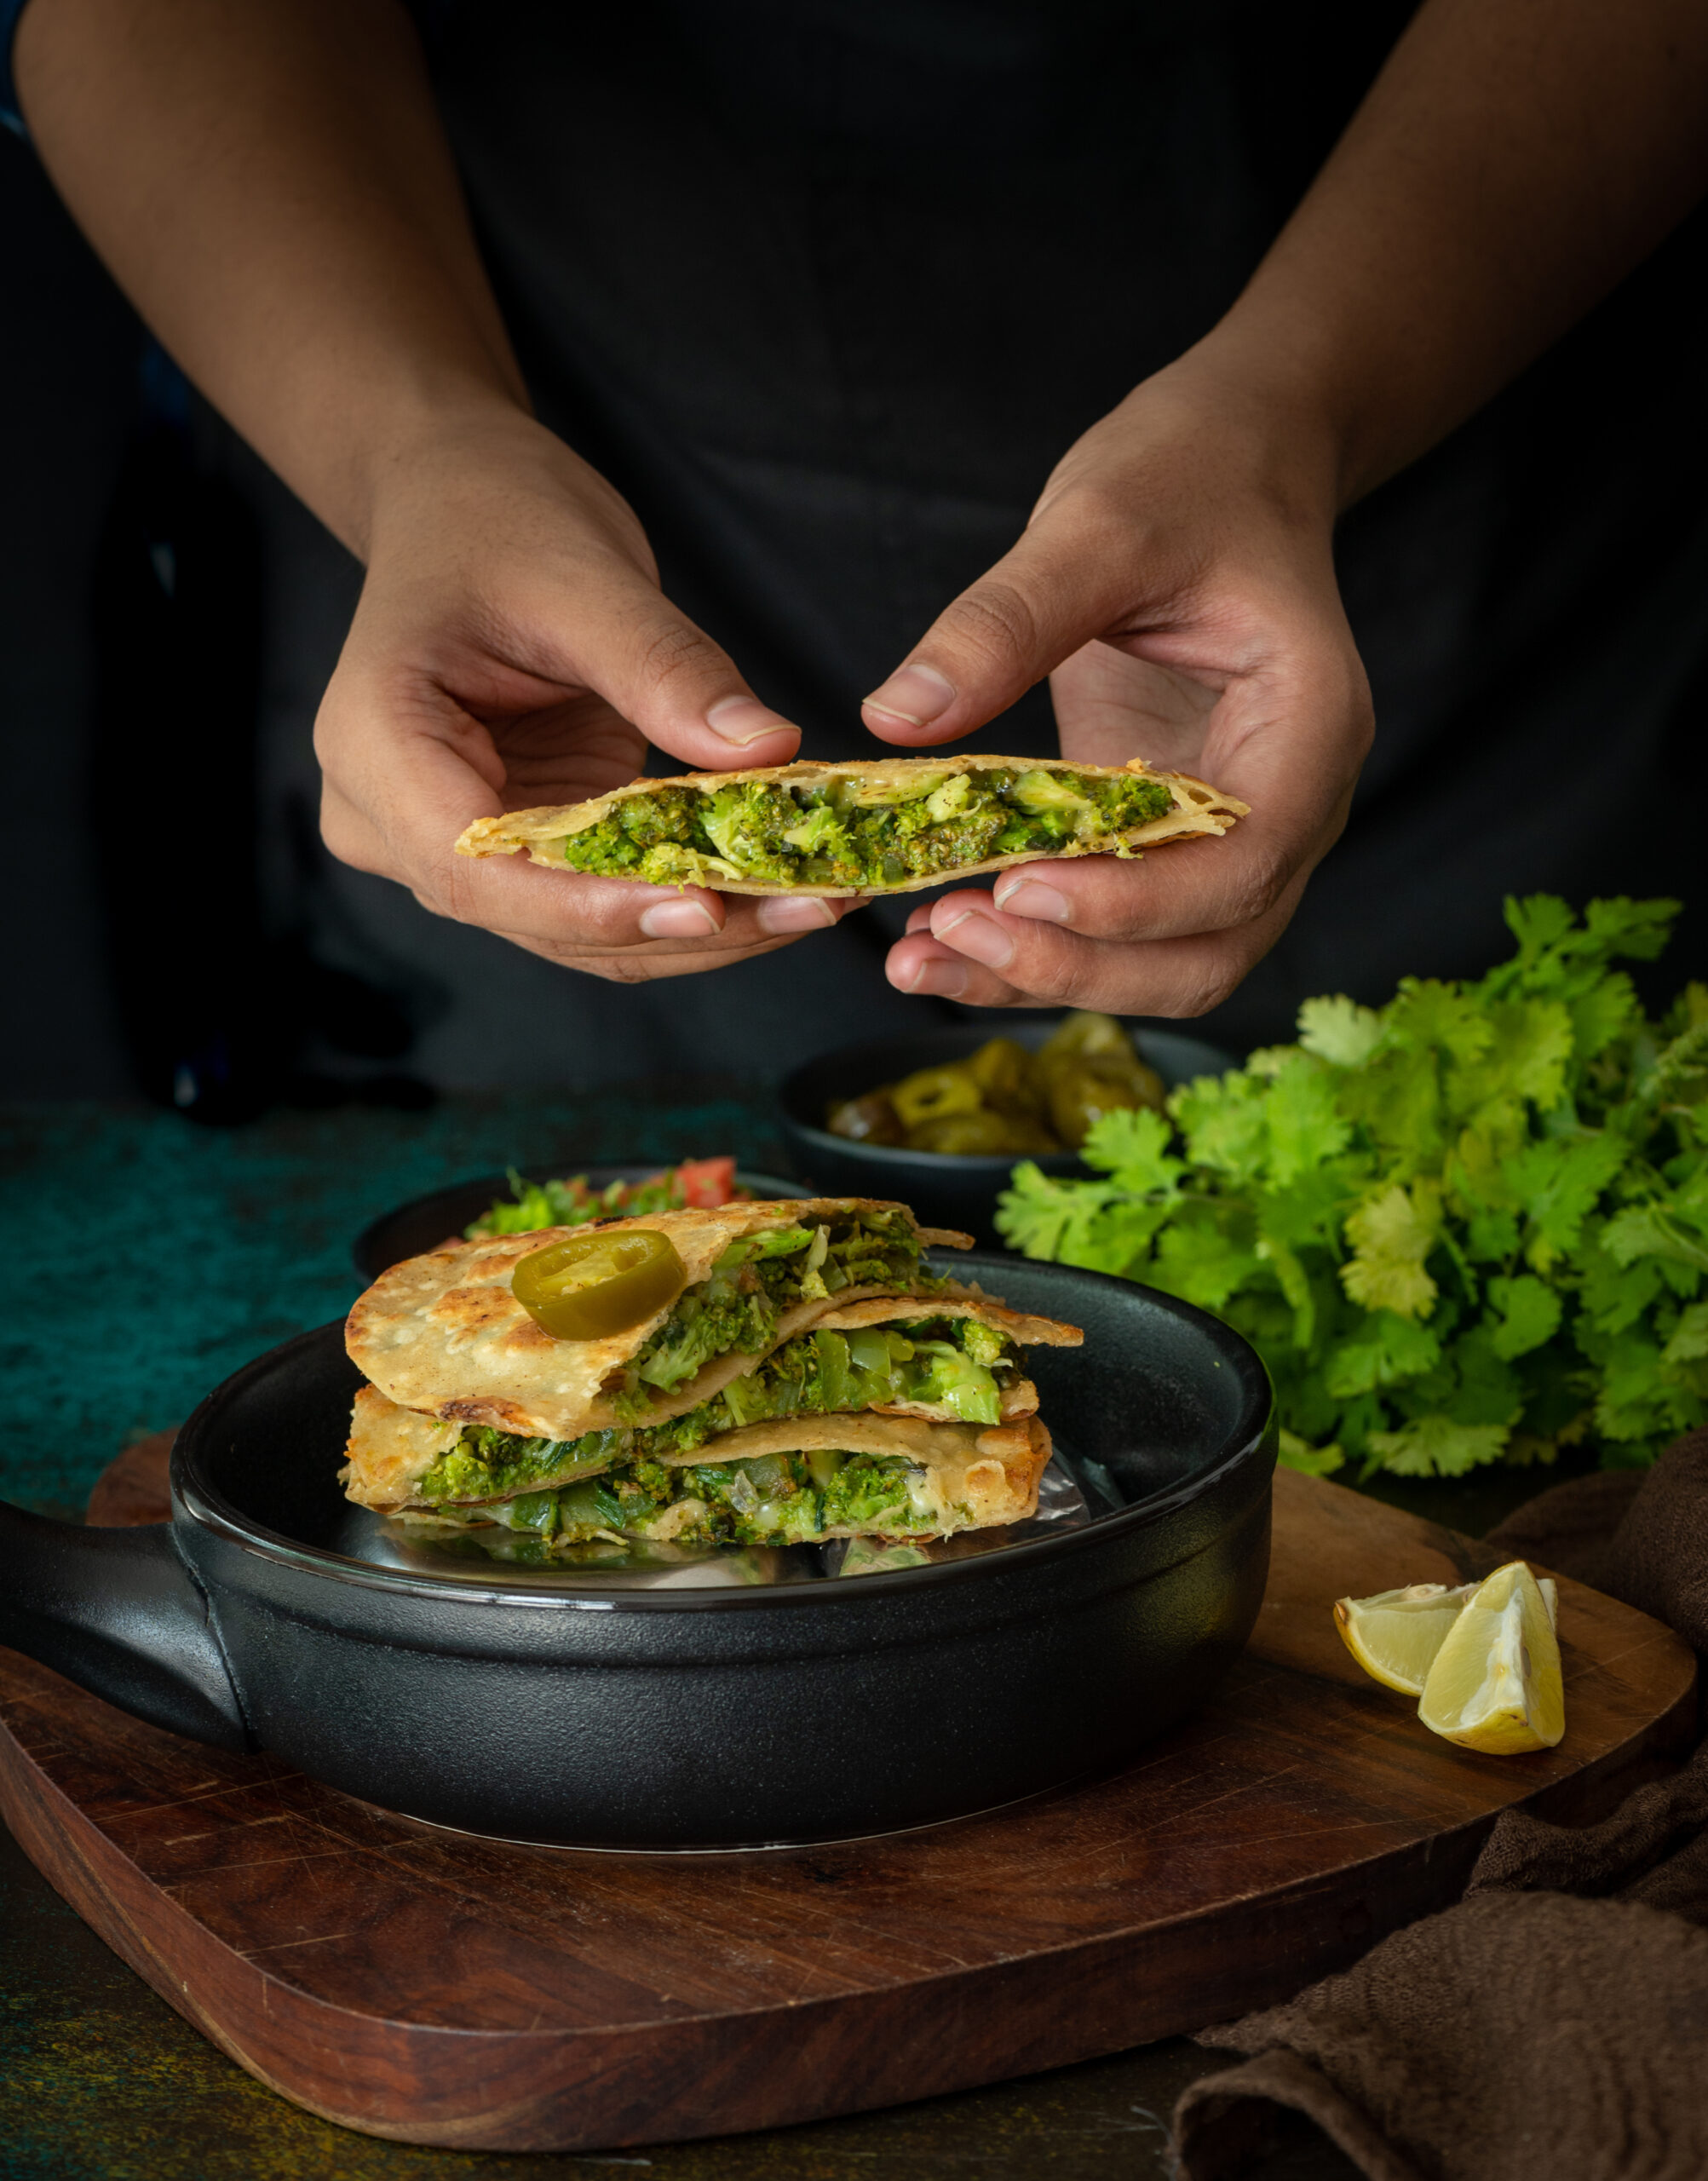
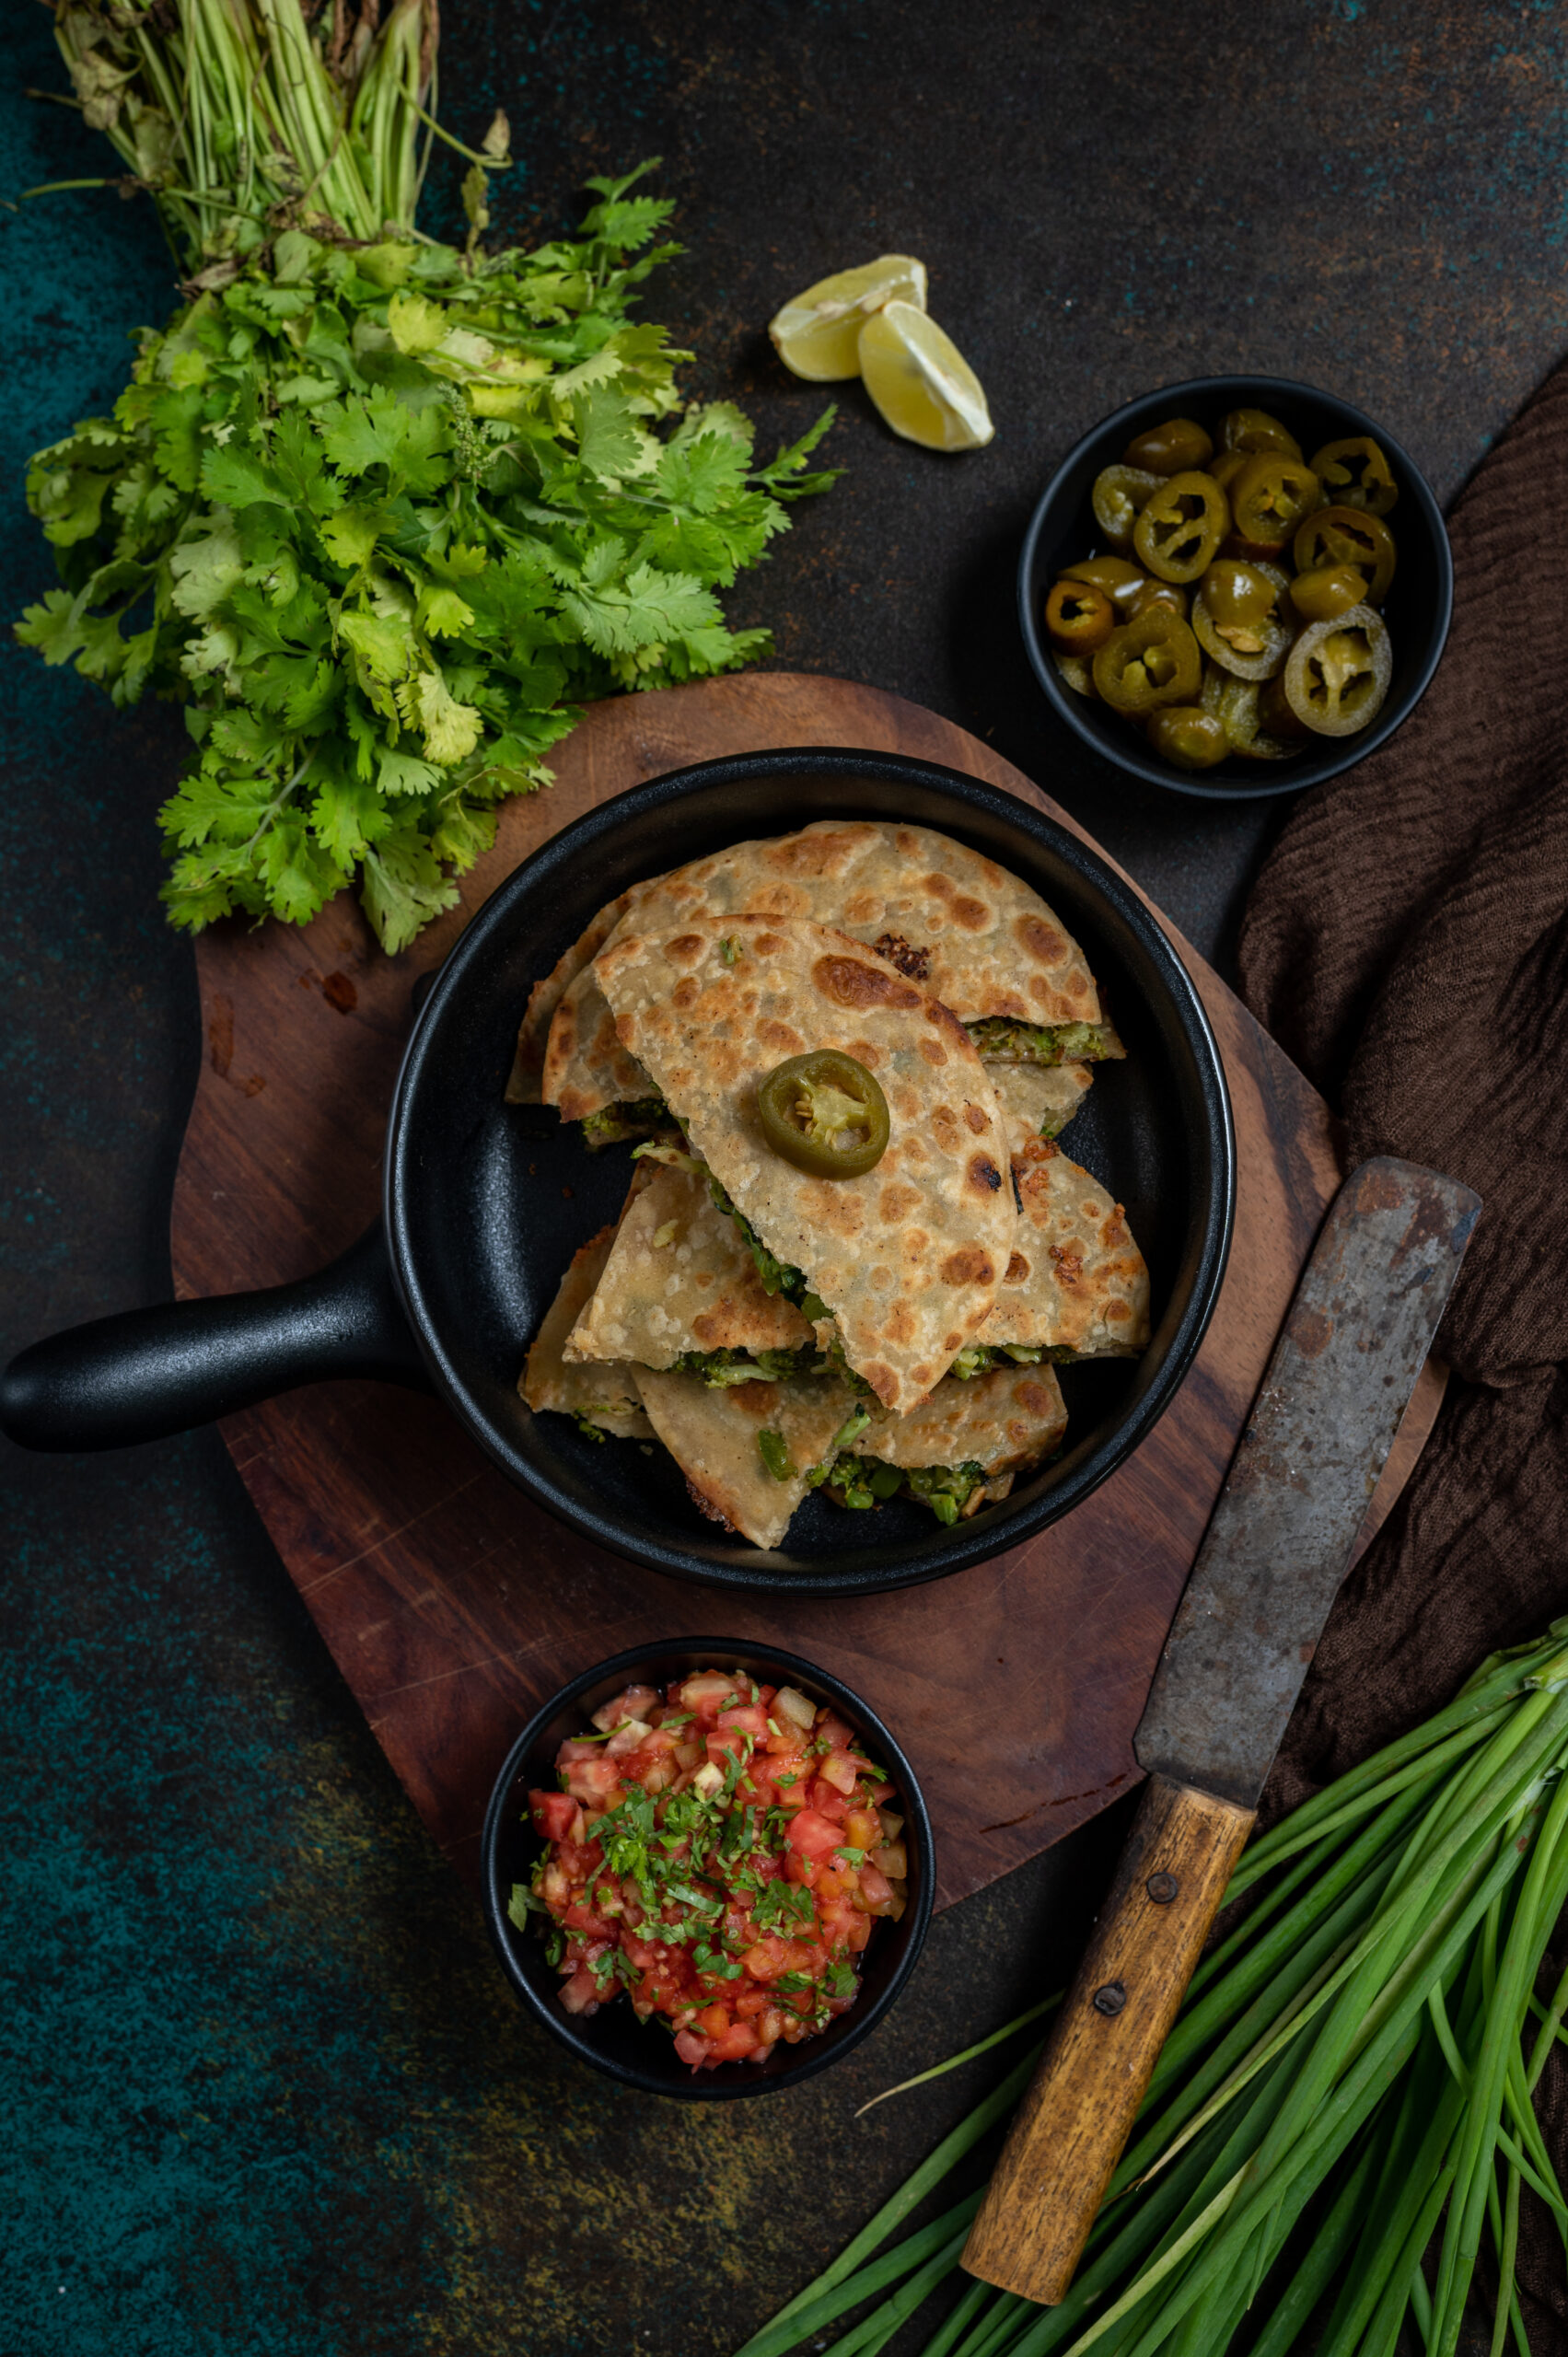
We can’t get enough of food inspired by Mexican cuisine at home, and after last week’s Mexican-style pineapple salad, I thought it would be perfect to share another delicious recipe in the same vein. This green quesadilla, truthfully speaking, is re:store style – a cross between Indian and Mexican, but leaning towards being an Indian dish with a Mexican name. For the culinary purists out there, no, this is not authentic. For the rest of us who love our fusion food and things that taste good under any moniker, I can assure you that this green quesadilla is quite amazing just the same. If you don’t believe me, ask my mother-in-law, who at 85 relishes it to the point of requesting it specifically when it’s been missing from our menu for even a week!

I can’t recall exactly how it came into being, but can make a vague guess that I must have had an excess of broccoli in my kitchen one day. I must have decided to pack it all into a quesadilla, to use up my stock while also ensuring that my family got a good load of greens that day. I do know that when I began serving it to them, my grown kids didn’t blink twice, distracted by the yummy cheese that holds the “tortilla” together (you’ll see why I use the quote marks when you read the method). I realised then that this dish is ideal for my readers with kids, especially younger ones who detest vegetables and need to be tricked into having them. In fact, calling it a quesadilla – even when you’re using ingredients that are so basic to an Indian kitchen – will also help with this, as children are always curious about trying new things and are likely to enjoy the novelty.

It has since become a staple at home, and I usually accompany it with a soup of some sort. Depending on your personal preferences, I can recommend several of my recipes for this pairing too. From the richly indulgent to the comfortingly simple, I have shared quite a range on this blog. Do check out my minestrone, zucchini soup, vegan whole corn and lemongrass soup, broccoli and almond soup or watermelon gazpacho at leisure.

Long before I encountered real quesadillas, and long before those of us who grew up in Chennai had the slightest clue what Mexican cuisine was all about, I enjoyed another dish based on the same concept at my friend Sharmila’s home. Whenever a small group of us would land up there after school, surprising her mother who would be unprepared to serve lunch for unexpected guests, she would take some rotis and whip up a simple, but extremely satisfying, treat for us. She would put some jaggery between two rotis and flip them on a pan with ghee. The jaggery would melt, bind the bread together, and would ooze out so appetisingly the moment you took a bite. Looking back, I can imagine how this clever innovation came into being. I’m sure you can too. Do you have a dish like this, one you put together in a rush one day that then became a regular?

The category of so-called quesadillas is, as proved by Sharmila’s mother, a highly diverse one. Sprinkle some idli podi on it and make it a South Indian version. Change up the veggies so they fulfill a specific dietary restriction, or to make a colourful version. Add textures or ingredients that you like. Just remember that the cheese is the main factor. Without it, the whole thing will literally fall apart!

This green quesadilla makes for a filling dinner, or even a healthy snack. I flatten and slice it like a pizza, but you can also roll it up like a kati roll. Serving it in different ways will also keep your kids (or their grandmothers!) happy and enthusiastic. Isn’t it so interesting how our tastes when we are very young often have much in common with our tastes when we are very old? With that in mind, I’m delighted to share with you my recipe for a green quesadilla that is sure to satisfy several generations of your family!

Green Quesadilla

(Yield: 3 quesadillas)


Dough

¼ cup all purpose flour

¼ cup whole wheat flour

¼ cup water (or enough to make a tight dough)

Salt to taste

1 teaspoon oil


Filling

½ cup broccoli

¼ cup green bell pepper

¼ cup spring onions

2 teaspoons olive oil

Salt to taste

1 pinch pepper

½ cup grated cheese


Butter to cook


Make a tight and smooth dough using all of the dough ingredients and set aside. When it’s ready to be worked with, make six small balls of dough. Roll them out with the help of some flour. The method in my roti post may be useful here if you want to know how to do this.

Cook all six rolled-out rotis on both sides partially. Set them aside.

In a pan, add the oil. Once it has heated, add the vegetables. On a medium to high flame, stir the vegetables and cook them al dente. Add salt and pepper and mix well.

To assemble the quesadilla, place three rotis flat. Then, scoop the vegetables on top of them, making sure that most parts of the roti are covered. Now, sprinkle the grated cheese. Cover each of these prepared rotis with a plain one, sandwiching the veggies. Press down with your hands.

Add butter or oil on both sides of each quesadilla and cook on a hot griddle. Flip carefully. The cheese will hold the vegetables together, but be gentle anyway, else they will open up.

Cut them in half and serve. You may add jalapeños to the vegetable mix, or serve some alongside. As I said earlier, a soup makes a great accompaniment if you want to round it out into a full meal. A salsa or dip of your liking will also make it more delicious as a snack. You may want to adapt my peach salsa recipe, using complementary ingredients.

There you have it – a cheesy, nourishing dish that somehow blends the comfortingly familiar with the intriguingly foreign. Do you also make your own quesadilla-ish recipe, using the simple Indian roti, and how do you do it? I would love to know!

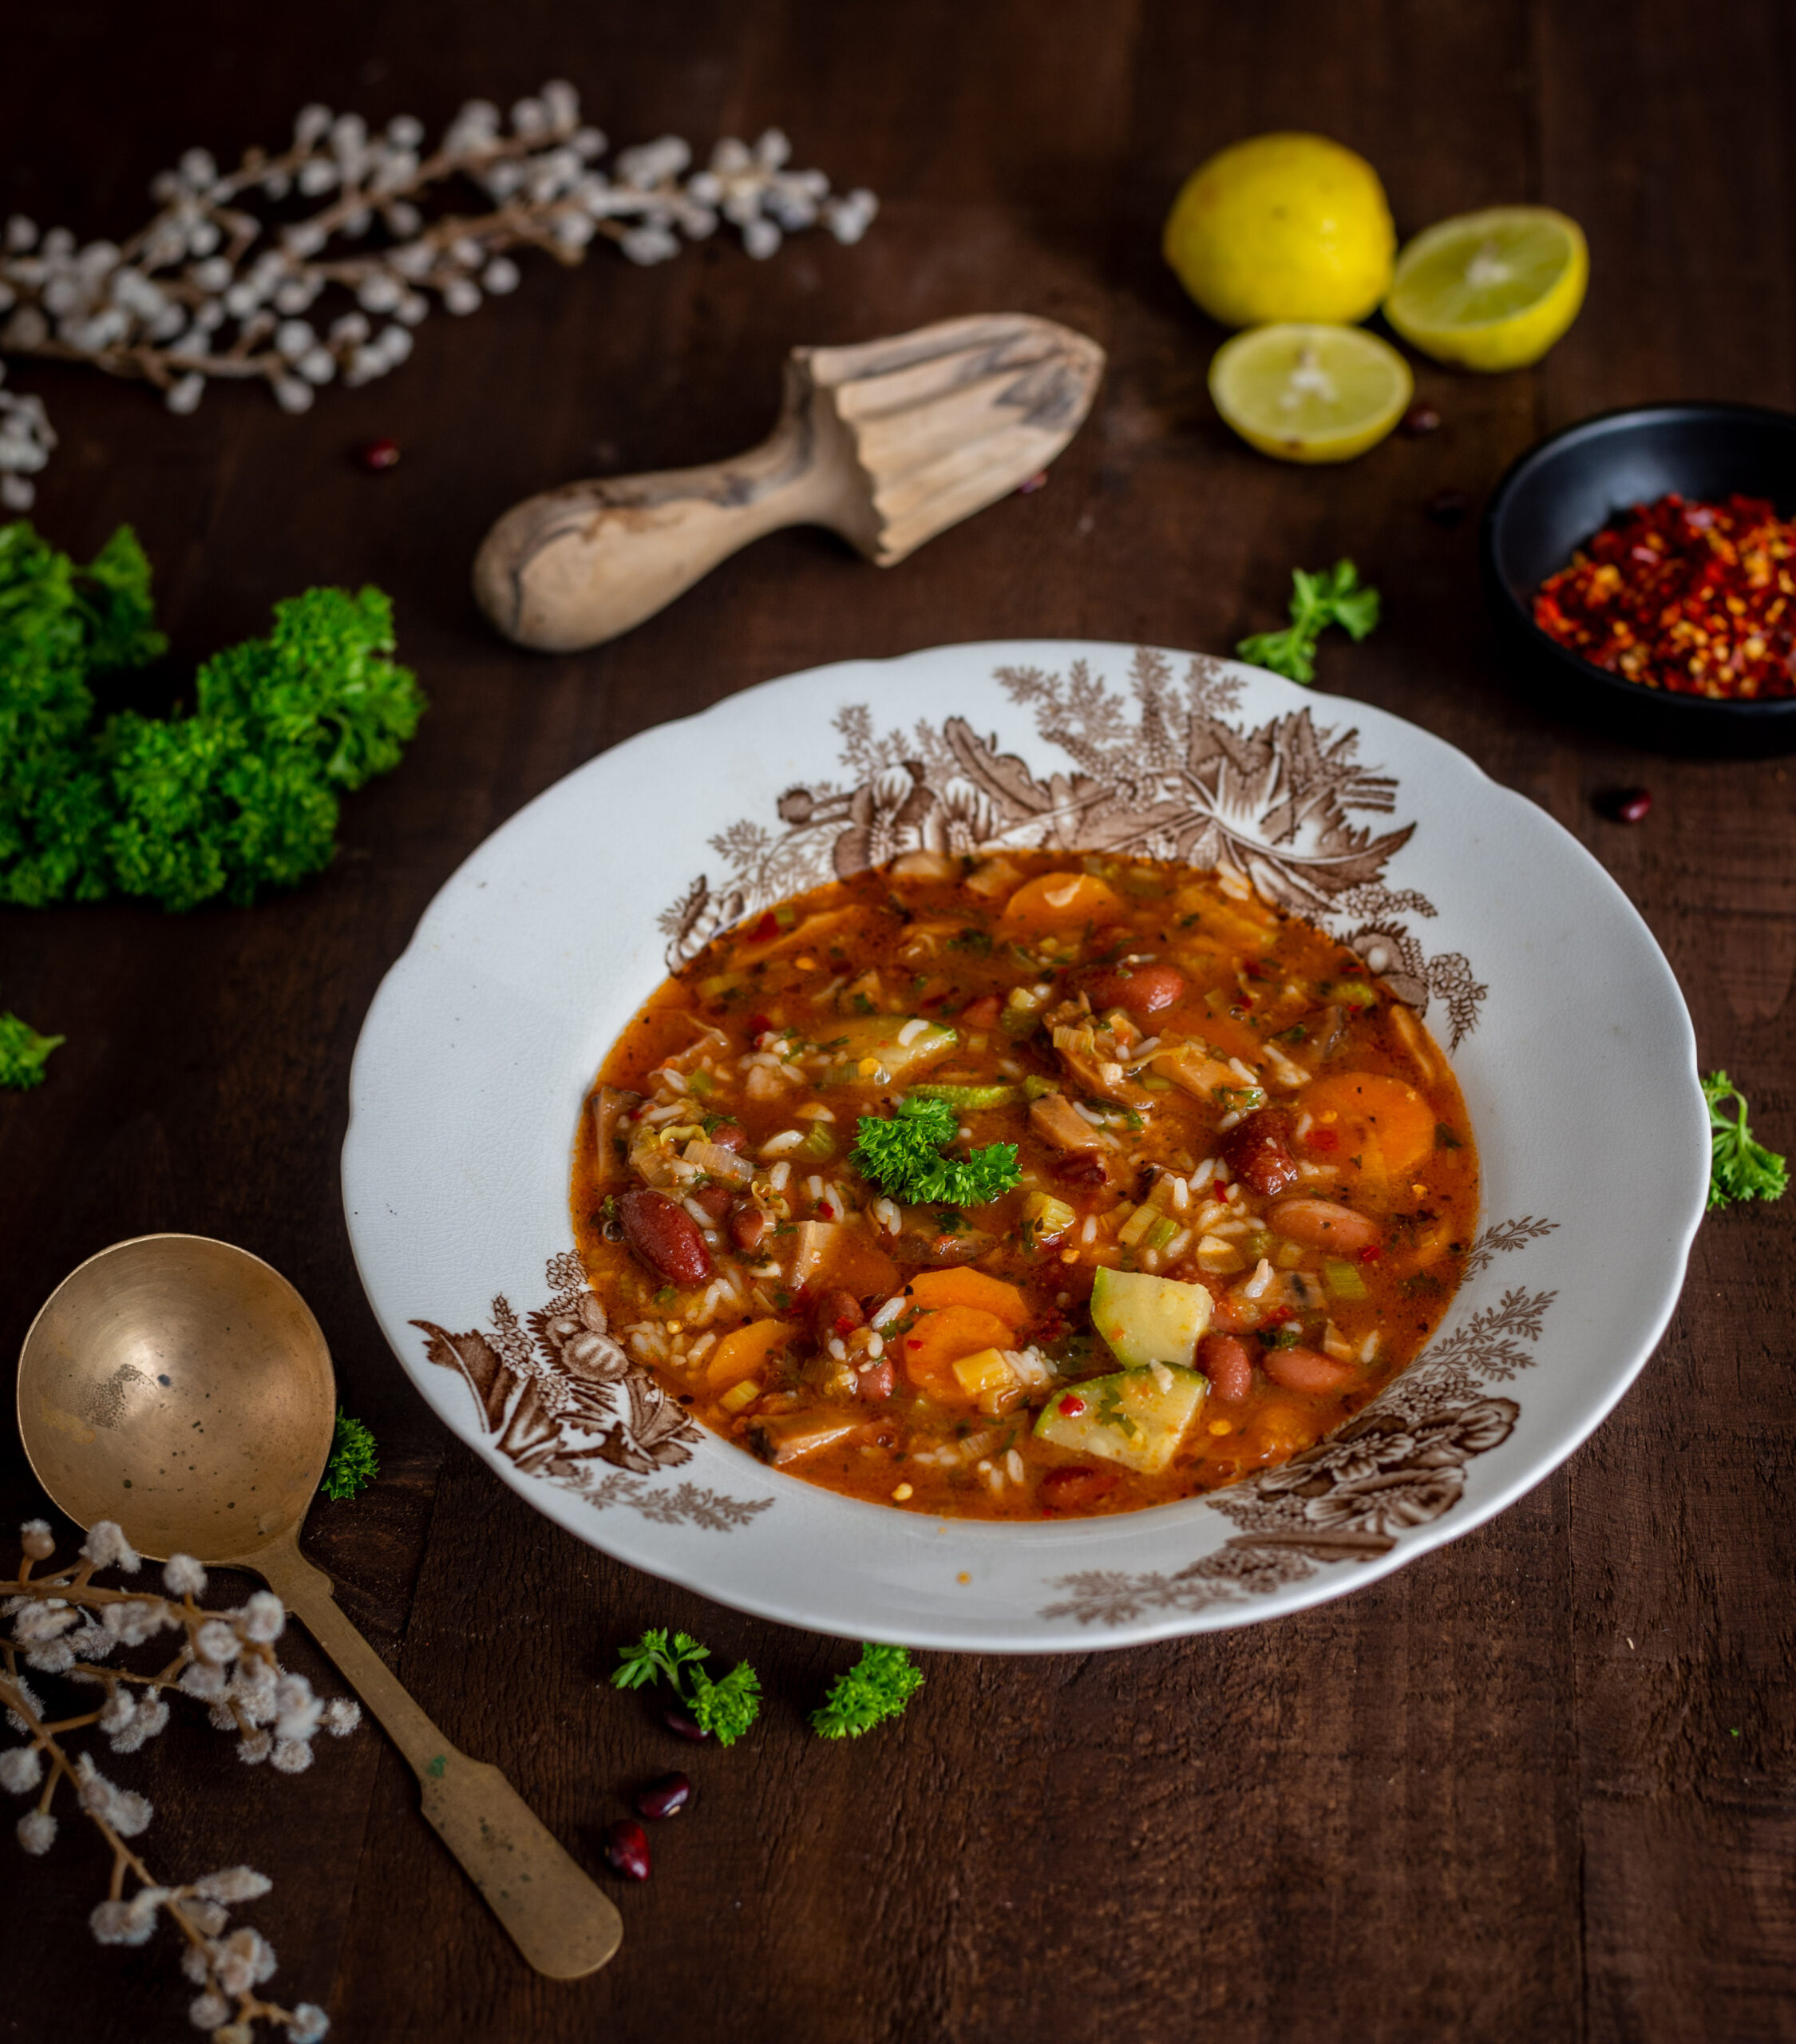
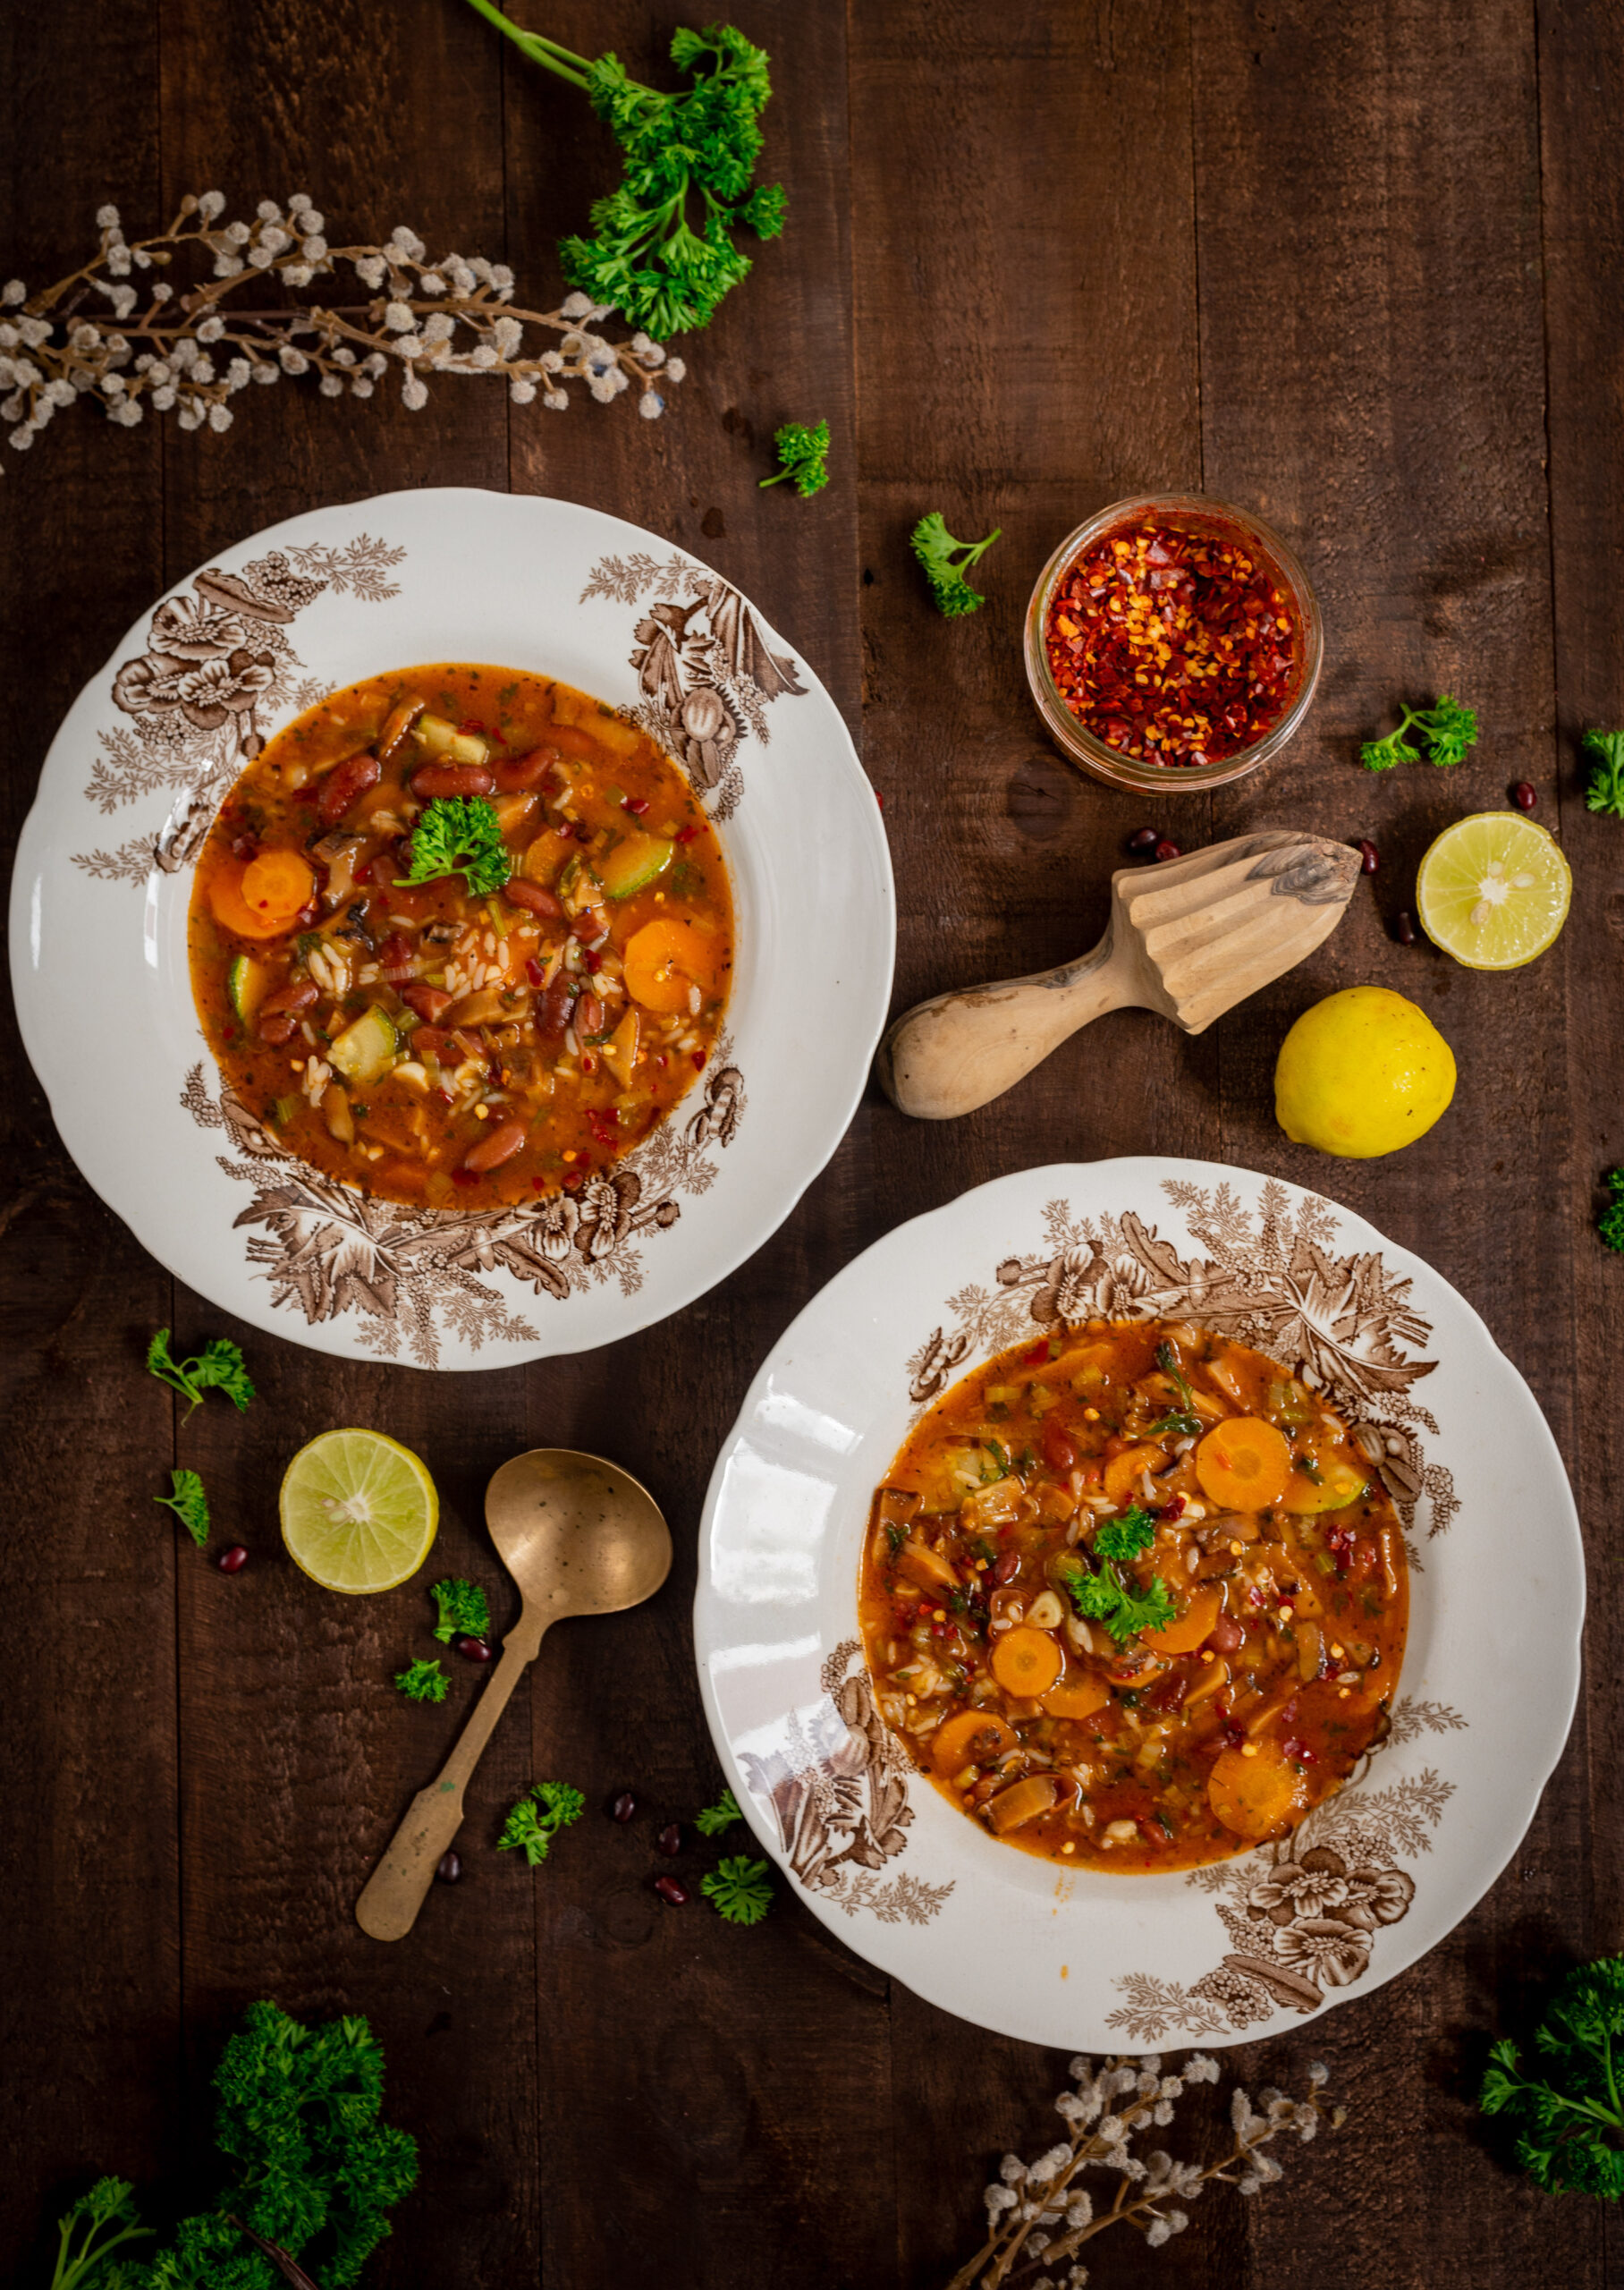
Minestrone is one of my favourite soups of all time, and the recipe was promised to you not once but twice, when I shared this sourdough toast post and this all-purpose tomato purée post some months ago. I think this is the perfect time to give you this one too, as the weather has turned cold even here in Chennai and we could all use a little more warmth.

This simple and nourishing soup is an Italian dish, but one which has changed through the centuries. It is believed that it has ancient origins, from before the Roman empire came into being, and that various trade influences led to more ingredients being incorporated to the base. Knowing that there is no one version of a strictly traditional minestrone makes me confident about sharing my version. It was a dish that I used to enjoy when I travelled abroad, but later started making at home too – a combination of wanting to be more self-sufficient, missing my travel experiences during lockdown, and a little bit of culinary FOMO. I now make it once or twice a week at home. Not only is it a very healthy dish, but it also helps to clear out excess vegetables in the fridge. This means it’s a great way to get the family to eat better. A big bowl of veggie-rich minestrone with some freshly-baked bread is a complete meal in itself. You can make it even more filling by adding quinoa, brown rice or pasta too.

Most minestrones that you may eat in Europe will contain borlotti beans (also known as cranberry beans) as their base, but these were in fact first cultivated in South America. This tells you that they must have been a later addition to the popular recipe, brought in during colonial times. This being the case, I am personally very happy to use any bean I have on hand. Here in India, we have a great variety. At home, we eat a different kind of bean daily – moong, channa and so on – as it suits our mostly vegetarian diets. For this recipe, I’ve chosen to use kidney beans as they are widely available everywhere. You can substitute them for your preferred local bean.

The secret to a great minestrone is in allowing a bit of the rind from Parmesan cheese to simmer in the soup as it cooks, which gives it a nice, nutty flavour. This plus the measured use of white wine retain the European-ness of the dish. Another ingredient that elevates it for me is my homemade tomato purée. A dollop of it makes a huge difference.

I’ve shared this recipe with various friends before, all of whom seem to love it just as much as we do at home. I hope that you will too. It’s very healthy, very tasty, and while it’s no ordinary vegetable soup, it’s just as easy to make.

Minestrone

(Yield: 2 large bowls/2 persons)


20 grams leek

25 grams celery

25 grams spring onions

100 grams zucchini, carrot, mushroom

4 cloves garlic

2 tablespoons olive oil

3 tablespoons fresh chopped parsley

2 tablespoons fresh chopped basil

2 tablespoons tomato purée

75 grams boiled kidney beans

1 cube/2 cups vegetable stock (i.e. 2 cups of boiling hot water added to one organic cube)

2-3 tablespoons white wine

1 or 2-inch Parmesan rind

Pasta/brown rice/quinoa (optional)


Sauté the garlic cloves, leek, celery, spring onions, zucchini, carrot and mushroom for a few minutes.

Add the tomato purée to this and stir well.

Next, if you are using pasta or brown rice in this soup, add that as well.

Add the kidney beans and the freshly chopped herbs. Then, pour in the vegetable stock. Freshly-made stock is always best, but cubes will work well too. After this, add the Parmesan rind to the pot and let it impart its flavour to the soup.

Add the white wine and salt to taste. Be careful with the quantities of both. Just a little more wine than you need, and the whole soup is spoiled. The tomato purée already contains salt so you will need less of it than you think.

Finally, add some chilli flakes, and garnish with chopped parsley and spring onions, and a squeeze of lemon. Remove the Parmesan rind before serving.

Serve warm. This soup works beautifully as a side, and if you have added brown rice or pasta, it can become its own meal-in-a-bowl too. I often bake a garlic pull-apart roll to go with this. My kids are tempted as soon as they see that soft, fluffy pastry, straight from the oven and tantalizing them on the table, and it draws them to sit down with a freshly-made bowl of soup too.

I hope this lovely minestrone brings you much deliciousness this December, as this year winds down and we take stock (no pun intended) of all it has contained. I wouldn’t be surprised if it becomes prepared as often in your home as it is in mine. Try it, and tell me if that’s the case! As always, I love hearing from you.

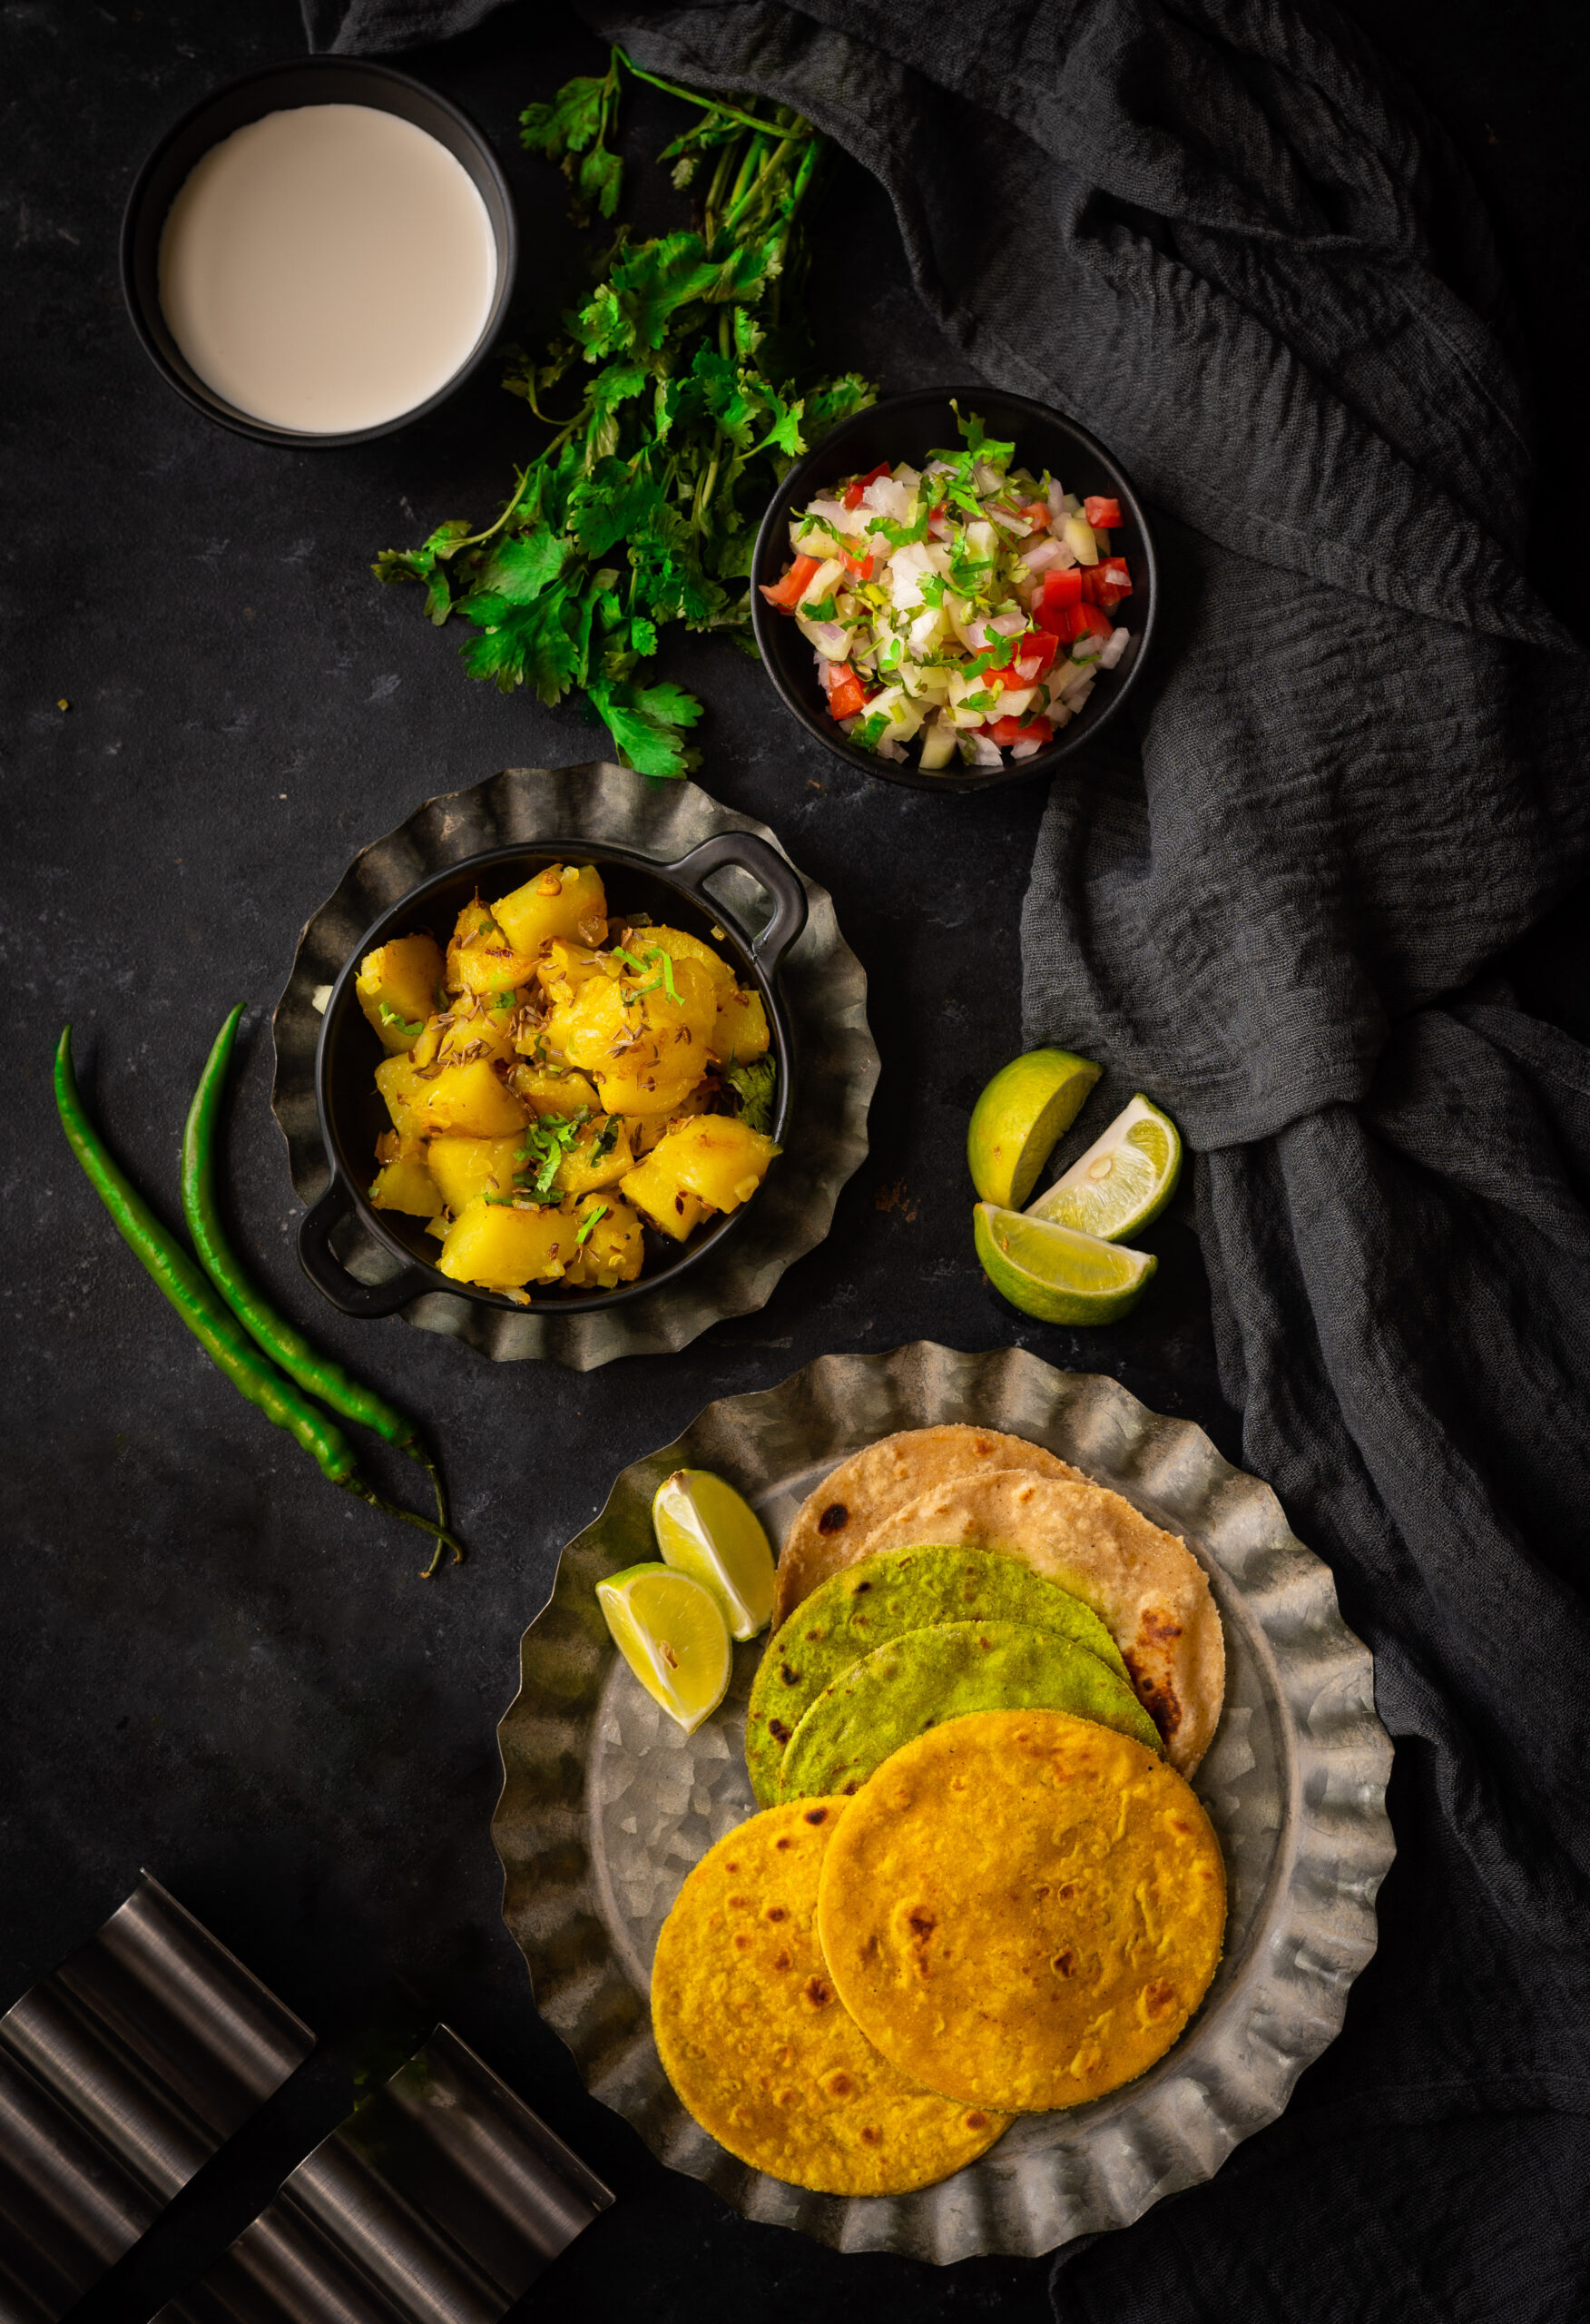
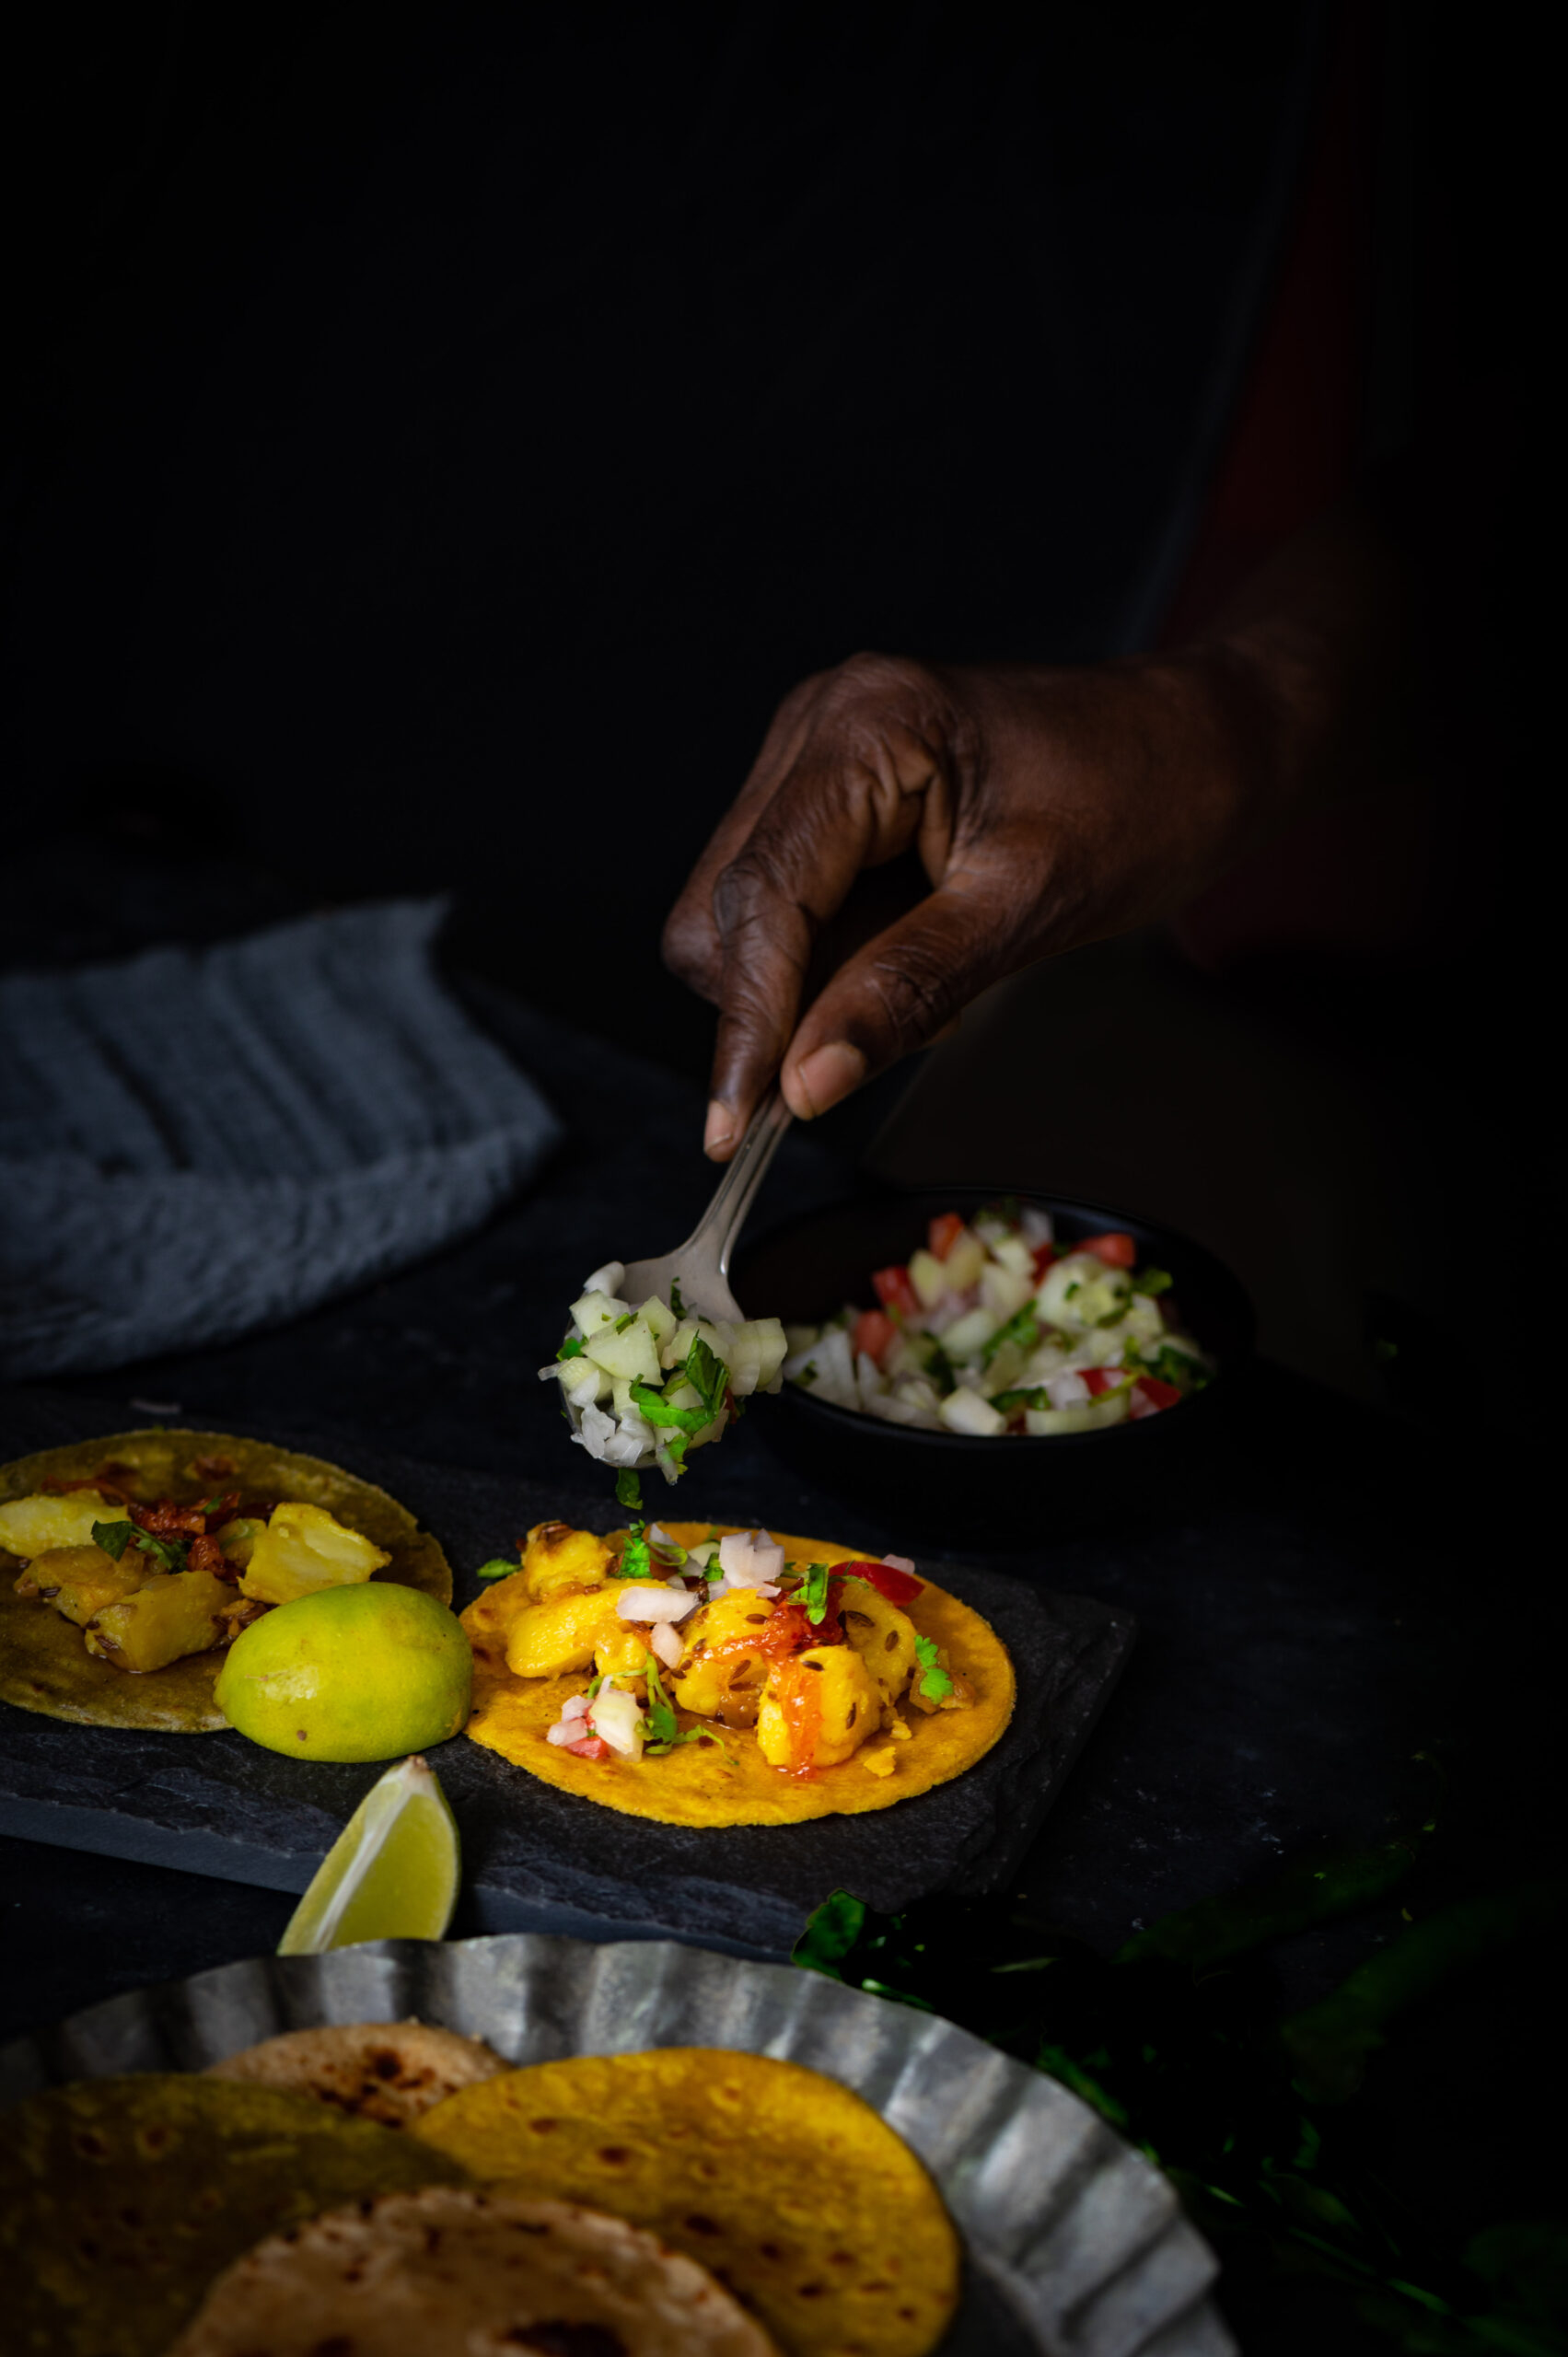
If you’ve been following this blog even for a short while, you’ll know that we are huge fans of Mexican cuisine in my home – both authentic and Indianised, or should I say re:store-ised, versions. This Mexican-inspired Buddha bowl is one example of how these flavours are enjoyed by my family. I’m very happy in my own world of fusion tastes, and am always on the lookout for how to make simple meals more enticing. I happened to come across a photo of Indian-style tacos, but without a recipe, and this inspired me to come up with my own. One day, I had some leftover roti dough, and had the brainwave of putting them to use in this way. The soft taco shells were therefore made by hand, and the entire recipe was made from scratch.

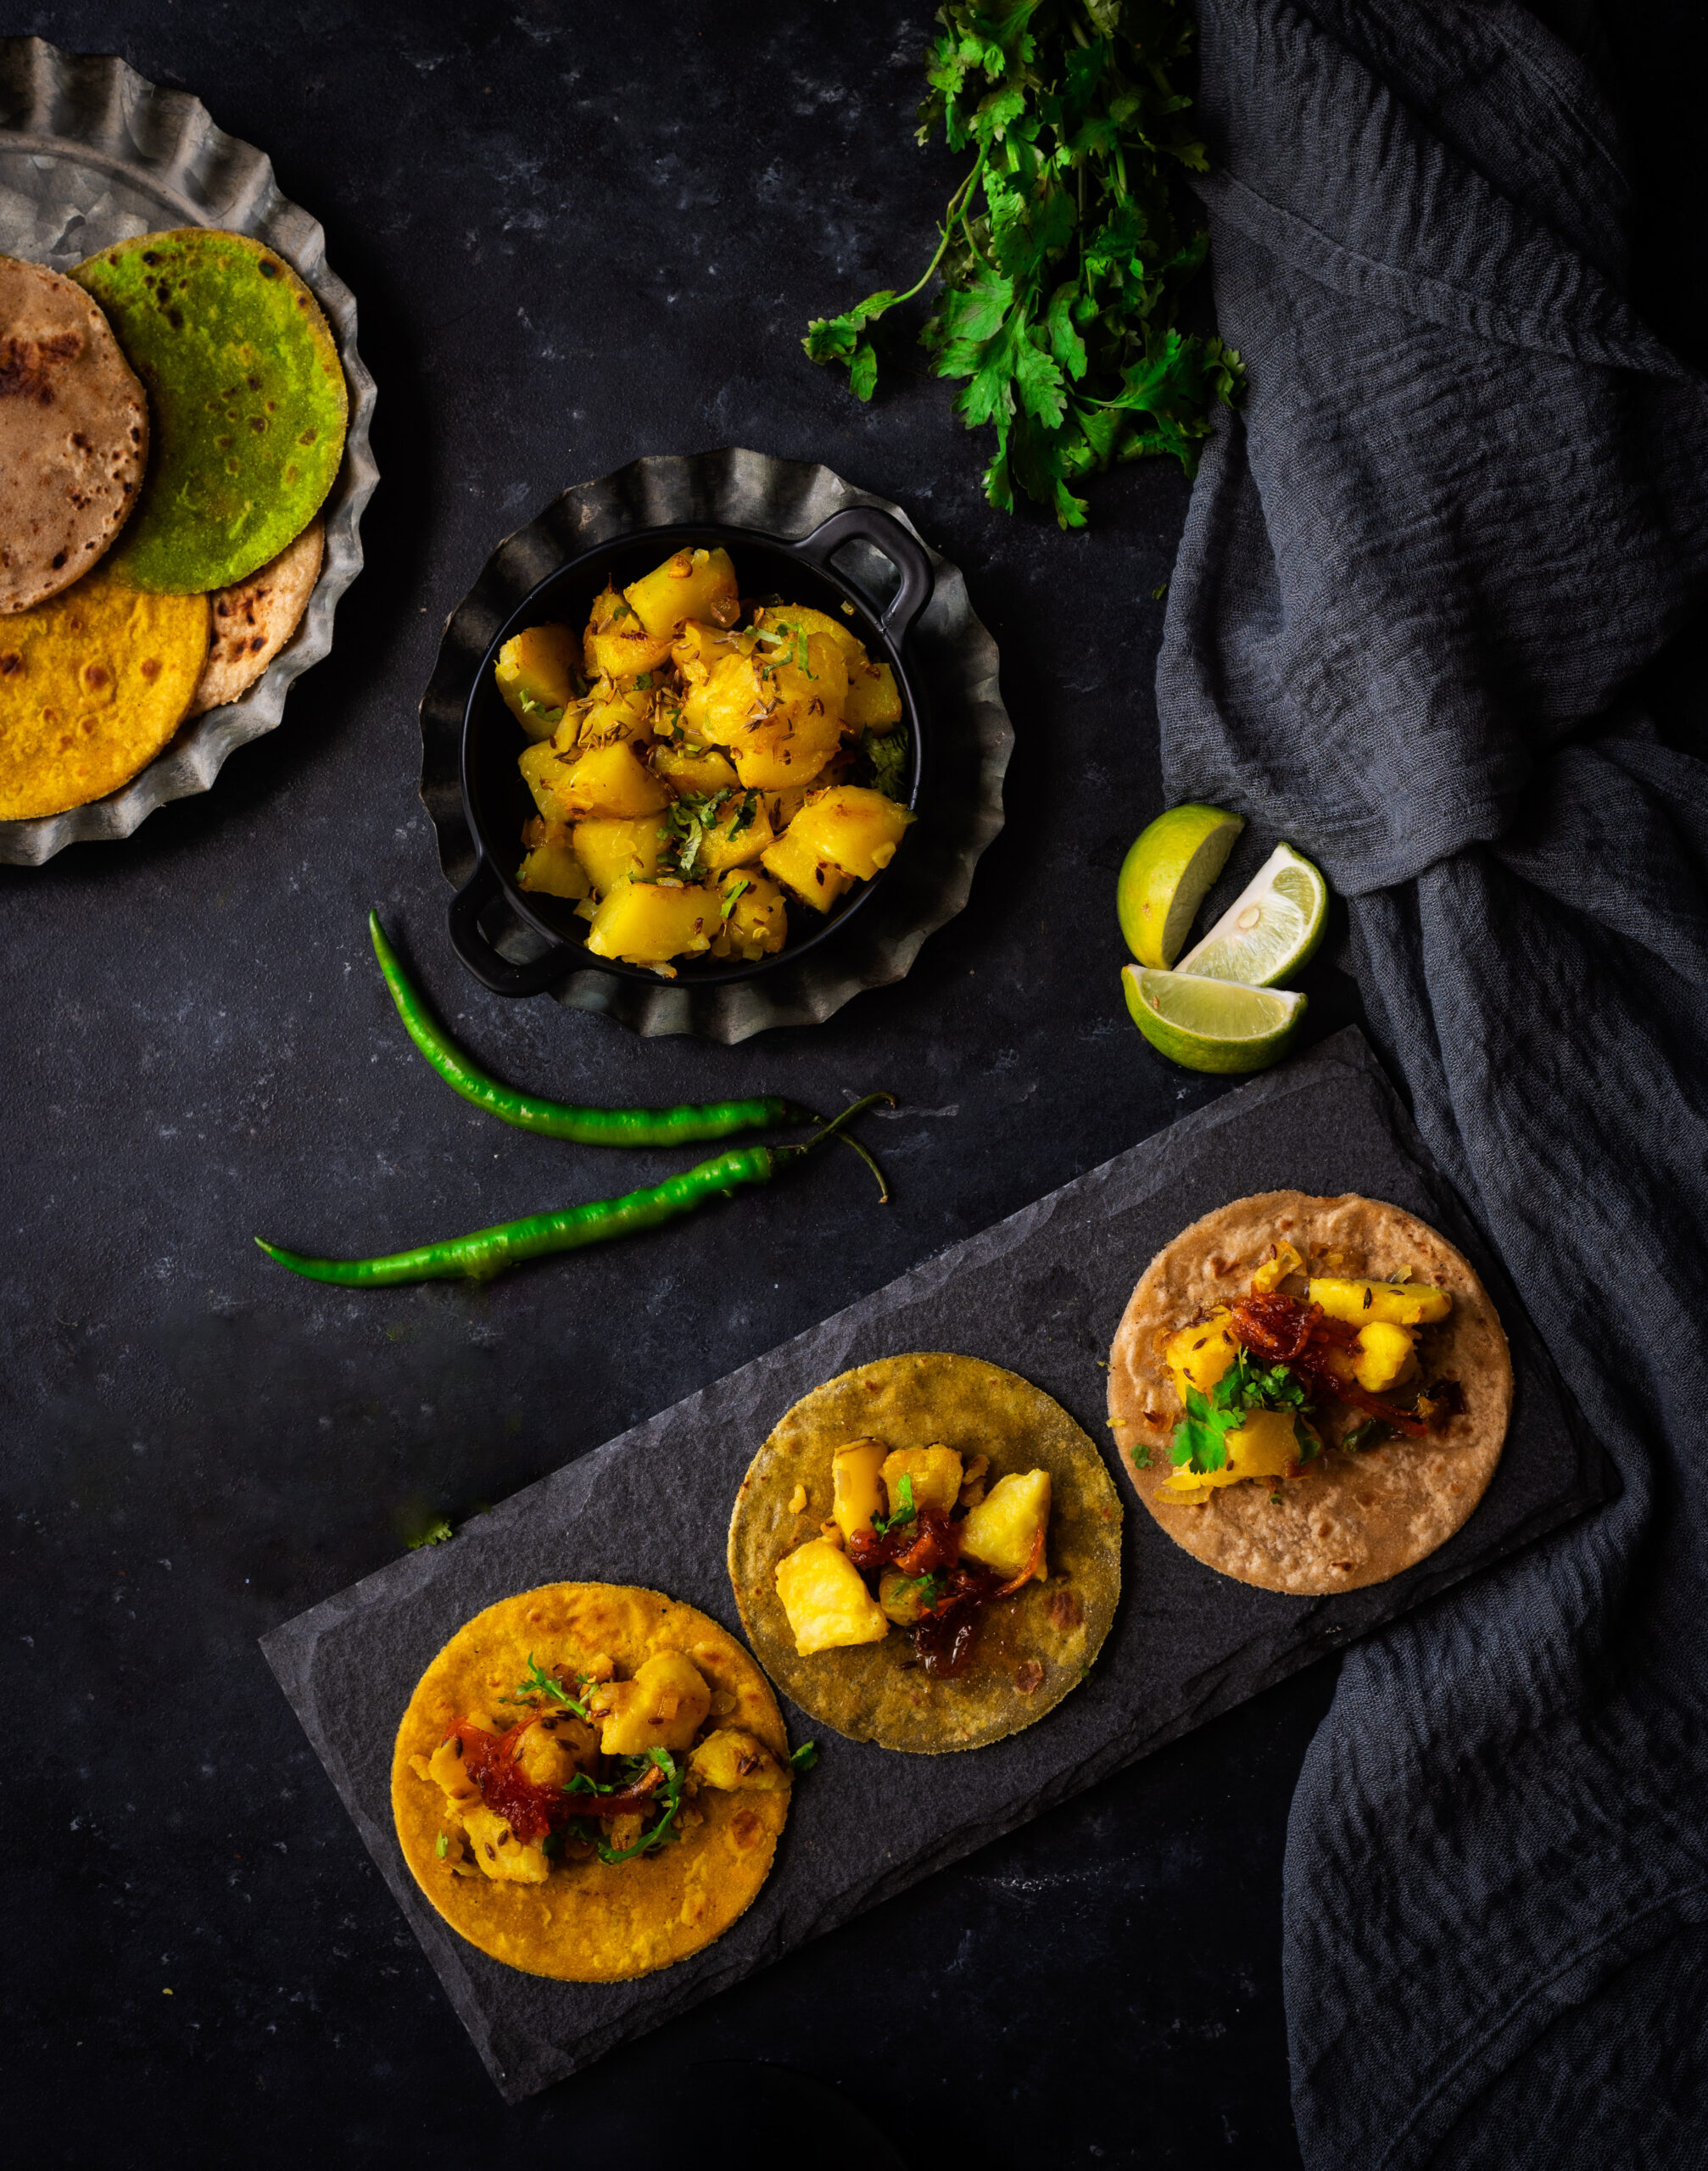
If you think about it, there are already plenty of versions of Indian tacos out there. The kati rolls that are a very popular form of street food fit the bill. They’re perfect for eating on the go, and fit easily into office and school lunch packs. While those are rolled, these tacos are open-faced. I’ve chosen to fill them with two Gujarati staples: potato sabzi, and a salad called kachumber. Where Mexican tacos use red bean paste, I’ve opted for a sweet mango pickle. The overall effect is a fun, international twist on simple Indian cooking.

This is a recipe that lends itself to variety. Replace the pickle with another that you prefer. You may want a spicy or tangy one, if you don’t have a sweet tooth. Substitute the potatoes for a different filling of your choice. Make a Jain version without potatoes or onions. Eliminate the Greek yoghurt dressing and make it vegan. Simply consider the recipe below as a base for your own versatile experiments.

I’ll let you in on a secret… We have a Mexican dinner night every week at home, with crispy tacos and other dishes that veer towards the slightly more authentic (although, as I explained in my Buddha bowl series, authenticity isn’t what I aspire to as much as sheer enjoyment is). I thought that this soft shell version would be a great way to serve a traditional Gujarati meal without anyone thinking that it’s boring. It’s so very delicious no matter if you eat it in a taco or a thali, but the appeal of food so often comes down to presentation. This is why, in addition to the plain rotis and the yellow theplas, I also tried out a roti made with spinach purée for an attractive green appearance. We all need a burst of colour now and then to get us going, and for me, cooking has always been something that fulfills this need – beautifully!

Indian Tacos

(Yield: 6-8 tacos)


Taco Shell

Theplas or rotis (recipes here)

Pickle of your choice (I like to use a sweet grated mango pickle), or a sauce of your choice


Potato filling

200 grams boiled potatoes

3 tablespoons oil

3-4 cloves of garlic

2 tablespoons finely chopped onions

½ teaspoon cumin seeds

¼ teaspoon turmeric powder

1 teaspoon cumin powder

1 finely chopped green chilli

Salt to taste


Kachumber

¾ cup finely chopped onions

1 cup finely chopped tomatoes

1 cup finely chopped cucumber

2 tablespoons finely cut coriander leaves

1 teaspoon roasted cumin powder

2 tablespoons lemon juice

1 finely chopped green chilli

Salt to taste


Greek yoghurt

1 cup yoghurt

2 cloves finely crushed garlic

6-8 finely cut mint leaves

Salt to taste


Paneer

½ cup grated paneer


Mash the boiled potatoes coarsely with your hand while they are still warm.

Heat a pan and add the oil. Once the oil is heated, add the cumin seeds. Allow them to splutter. Then, add the garlic and the potatoes. Allow the potatoes to become crisp, then add the onions. Add the remaining spices and stir well. Allow to sauté and turn golden slightly. Remove from the flame and set aside.

As for the kachumber, simply put the ingredients together in a bowl and set them aside.

Then, whisk the ingredients of the Greek yogurt together until they are blended well.

To assemble the Indian tacos, place each soft roti or thepla in a taco holder. Use the recipes here, and just add some puréed spinach to the dough if you’d like to make the green ones in my photographs.

Spread a layer of the pickle or sauce of your choice onto the Indian taco shell. Then add a tablespoon or so of potatoes. Top this with the kachumber and the Greek yoghurt dressing. Add a squeeze of lime if you like, then sprinkle the grated paneer on top. Finally, a garnish of coriander leaves will finish the dish off perfectly.

These Indian tacos are a great way to pep things up a bit and get the family to eat more, even though each of the individual components is part of a fairly typical and simple Gujarati meal! It’s all about the presentation, and the taco style makes everything all the more attractive and adds a sense of novelty to the meal. I particularly like to make them in smaller sizes because there’s an irresistibility quotient to them, just like with cupcakes, and no one can stop at just one or two!

I hope you enjoyed my previous post, in which I gave away the recipe for one of re:store’s bestsellers. As mentioned then, I was on a stop motion video kick and was determined to produce at least a couple of those cute videos, with Anushka’s help to bring everything all together, of course. The chocolate cupcakes were the first star, and I must admit they were the more difficult to shoot of the two dishes I had zeroed in on for this experiment. The second one (the recipe for which I am sharing today) was much easier to shoot, perhaps because the composition was within a single bowl and the overall motion was more stable, and I love the result.

Before we go any further, here it is: the stop motion video for this recipe, a delicious salad with passion fruit dressing.

As you can see, with the shoot for this video, I wanted the dark and moody theme that I usually use in my photography to be reflected too. I also wanted to showcase what a stop motion video looks like when the recipe is simpler, as opposed to the more complex chocolate cupcakes one. As for whether or not I was looking for a contrast between tastes, health quotient and so on – honestly, not really. In this experiment, it was my aesthetic side that took over and determined my choices more than my culinary side.

At the moment, we are enjoying a bounty of hydroponically-grown varieties of greens in Chennai. This form of small-scale agriculture seems to be all the rage in the city, and as we grow some of our own produce ourselves, and as I personally always have an eye on natural and nourishing ingredients, we couldn’t be more pleased by this trend. These organic vegetables grow without soil, and so suffer less from worms and other issues. We have so much at home at the moment that I’ve been making lots of green smoothies and salads. For this recipe, you can use any kind of lettuce that you have available.

When it comes to salad dressings, those of us who opt for healthier dressings tend to stay with the simple staples like lemon, salt or pepper, but I’ve found a way to retain the health aspect while increasing the flavour of the dressing. This is where the passion fruit comes in.

Whenever a fruit or vegetable retains its foreign name on the market, and doesn’t have a commonly used local Tamil or other Indian name, I know that it’s something that has only in the recent past been cultivated here. So it is with passion fruit, and this post by a fellow food blogger has lots of information about the supply we get here in India, which is grown in the hilly regions.

Long before I began to enjoy this taste, there used to be a passion fruit shrub at our house in Kotagiri. Not having learned yet how much I love it, I would simply give away its yield to our neighbours. The plant is long gone now, but how I wish I had eaten that bounty while I could! I feel this now all the more because passion fruit has a very short growing season here in India. Just in case you happen to try this recipe at a time when it’s scarce on the market, rest assured that you can use a store-bought syrup instead of fresh pulp too. While it may contain added sugars or other ingredients I prefer to avoid, the taste will be the same. It’s the fruit’s unique flavour that really elevates this salad. Passion fruit has a slightly sour flavour and a high citric content, and it goes very well with crunchy apples. The two fruits complement each other, with their mix of textures and tastes. They have a beautiful contrast when put together here.

Passion fruit is a hardy fruit, not very pretty in appearance, but slice it open and you’ll find just the opposite. Its soft pulp looks just lovely speckled with black seeds. My husband loves having some for breakfast whenever it’s in season, slicing it in half, sprinkling some sugar on top, and scooping the flesh out with a spoon. As for me, I enjoy the juice very much and even make it daily when I can. It’s a healthy ingredient, one that’s great to start the day with, and we make ample use of it whenever we get our hands on some. Luckily, I had enough left over during the last passion fruit spree to make it the star of this salad…


Salad With Passion Fruit Dressing

(Yield: 1 bowl)


Dressing

½ cup passion fruit pulp

2 tablespoons olive oil

1 tablespoon honey

1 tablespoon lemon juice

Salt to taste


Salad

2 cups lettuce

¼ cup finely cut spring onions

½ apple (core and sliced)

2 tablespoons chopped dates

2 tablespoons toasted pumpkin seeds


Simply put the salad ingredients together in a bowl and set them aside. Then, whisk the ingredients of the dressing until they are blended well. Pour this over the salad before you serve it. Enjoy!

Sometimes, there really is nothing else easier to prepare than a salad. I’m a huge fan of the food format itself, as you may know, and here are several you may also enjoy: mango salad, millet salad and sundal.

Salads are a great way to increase your vegetable intake, and they give you a boost especially as a mid-day meal that keeps you light on your feet but sated. Do try this one out and let me know what you think? Before I forget, here’s another look at the stop motion video that started off the idea for this post! In case you missed it, do check out my cupcakes recipe too, and the stop motion video that accompanied it. If you use the app, I’m looking forward to connecting on Instagram too.