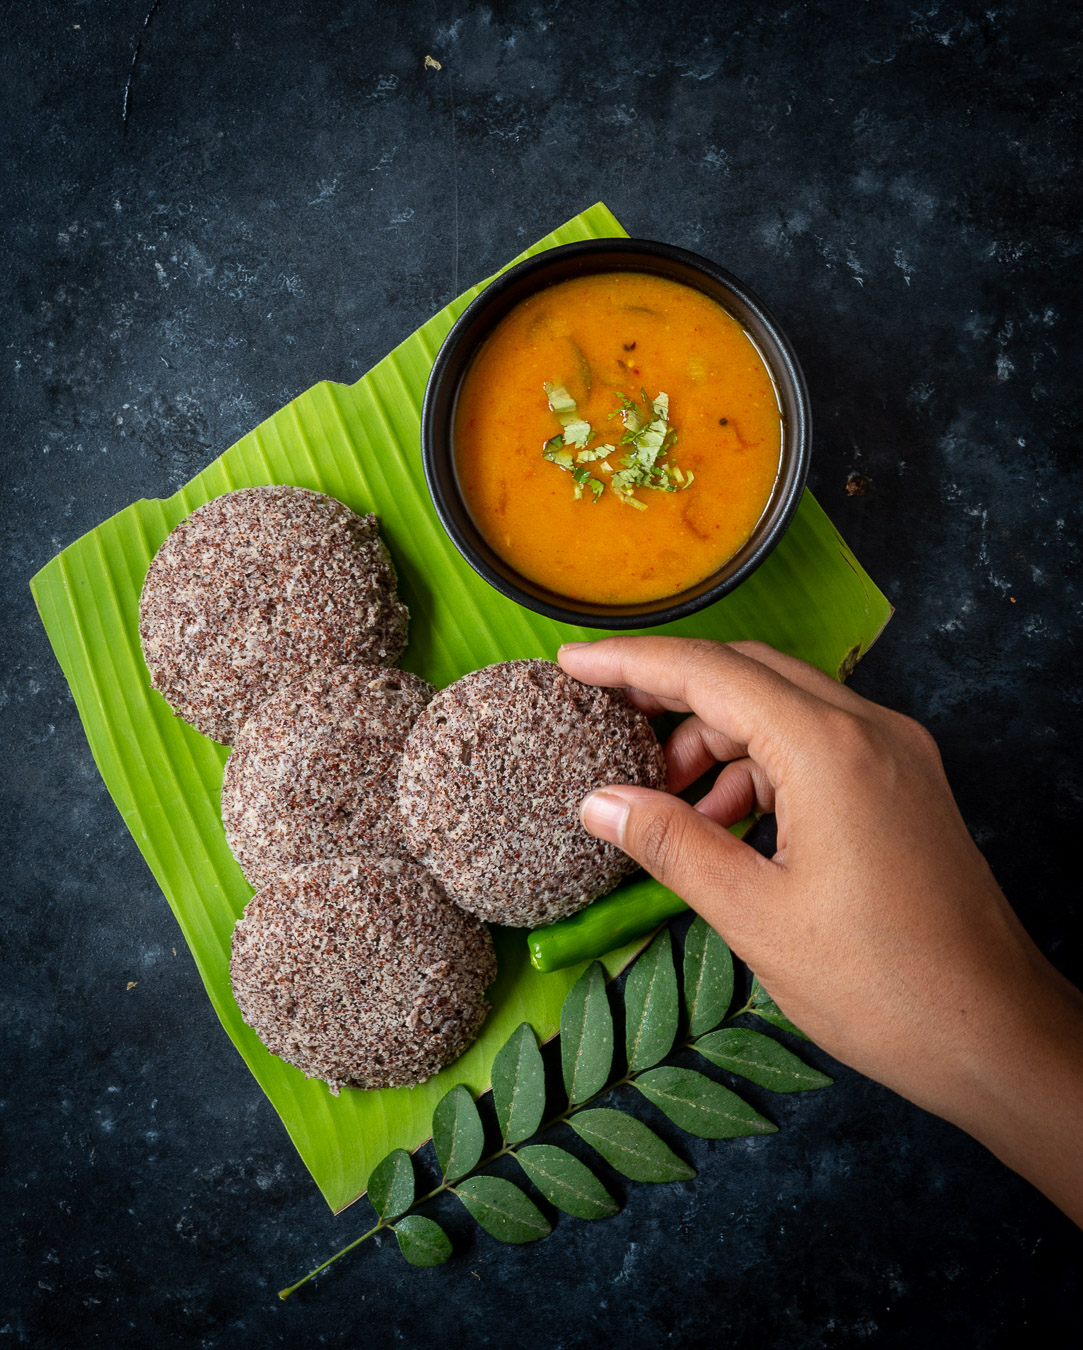
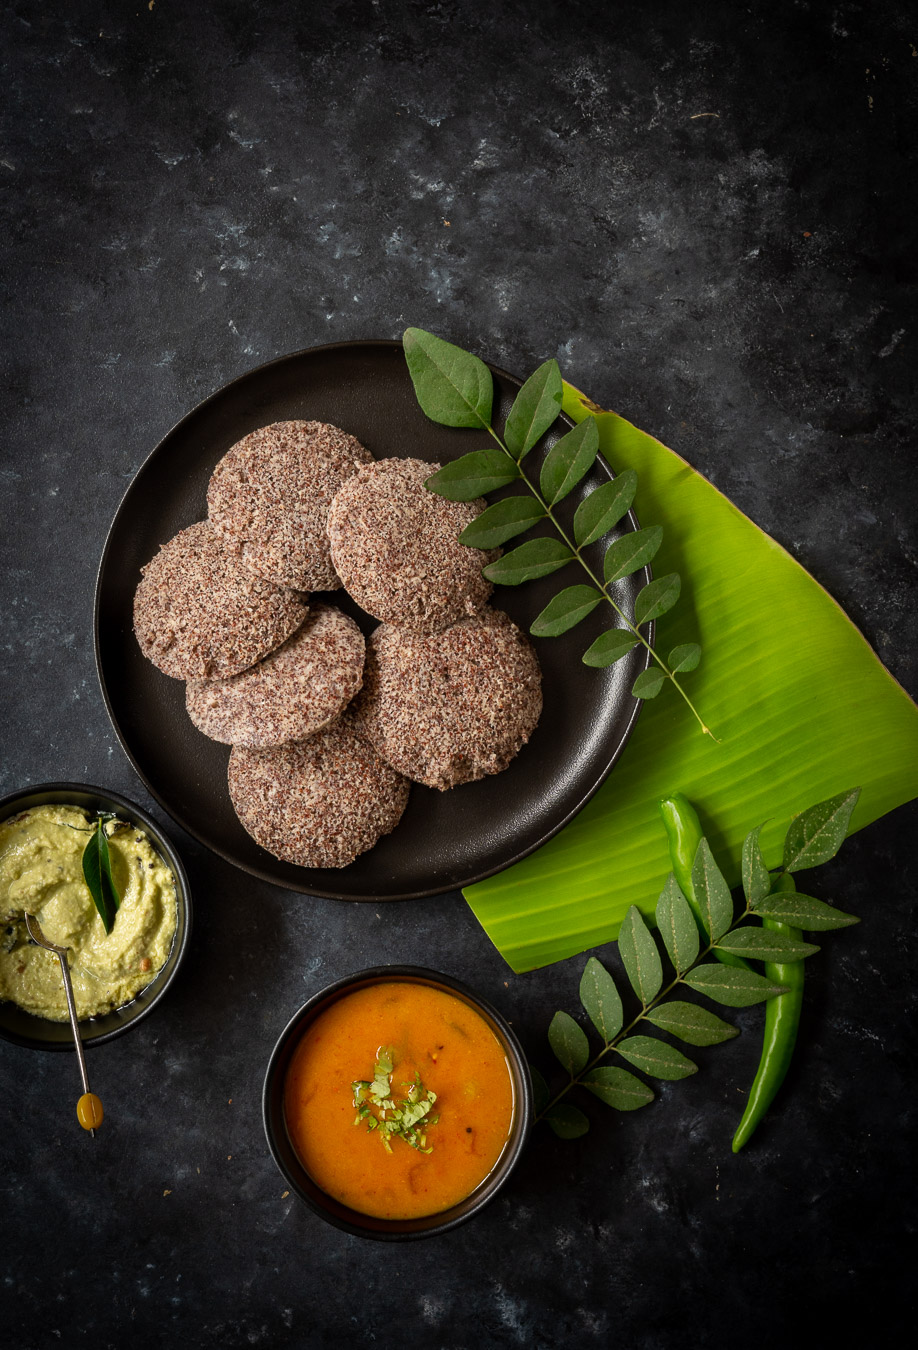
I believe that South Indian breakfasts are probably the healthiest ones prepared pan-India. I may be biased, of course, as I live here. But my belief comes from how they tend to contain some amount of protein and probiotics, and are centred on something as basic and easily digestible as rice. Rice is used in the batter for idlys and dosais, which are breakfast staples. If you travel across Tamil Nadu, especially by road, you’ll see just how prevalent these items are across all communities and economic backgrounds. Naturally, I grew up eating them too. Nowadays, I like to boost the protein quotient, as I get very hungry immediately after my morning workout and crave more of it. This is why I decided to substitute rice with ragi – finger millet – in my idlys. They are high in both protein and iron, and provide an even more nutritious start to the day.
We grow ragi on our farm, and making these idlys is a great way to put it to use. During harvests, I have quite an abundance of ragi in my kitchen, and versatile ways to consume it were introduced to me by my household staff, Vijaya. I was fortunate that she came into my family when my daughter was only a few months old. Now, my daughter is an adult, and whenever she visits, Vijaya is always so happy to see how she’s grown and how she looks after herself. It’s a joy to share these moments, as we raised her together. Over the years, we have also exchanged many recipes. Among them is this ragi idly.
I’m currently hooked to this dish, and have it at least twice a week. I alternate it with other protein-rich breakfasts such as overnight oats, quinoa porridge, moringa leaves omelette and so on. As far as eating preferences go, I tend to have a “flavour of the season”, and just as I was hooked for each of the prior recipes for a spell, the ragi idly is my current favourite breakfast. It is satisfying, filling and ticks all the boxes for a post-workout meal in a healthy and traditional way.

It’s also on-trend, as the United Nations has declared 2023 to be the International Year of Millets. I’ve been enthusiastic about millet usage for years, and have shared numerous recipes that are based on a variety of them before. I’ll be sure to share more in this category over this coming year. Please let me know if there are any millets or millet-based dishes you are curious about.
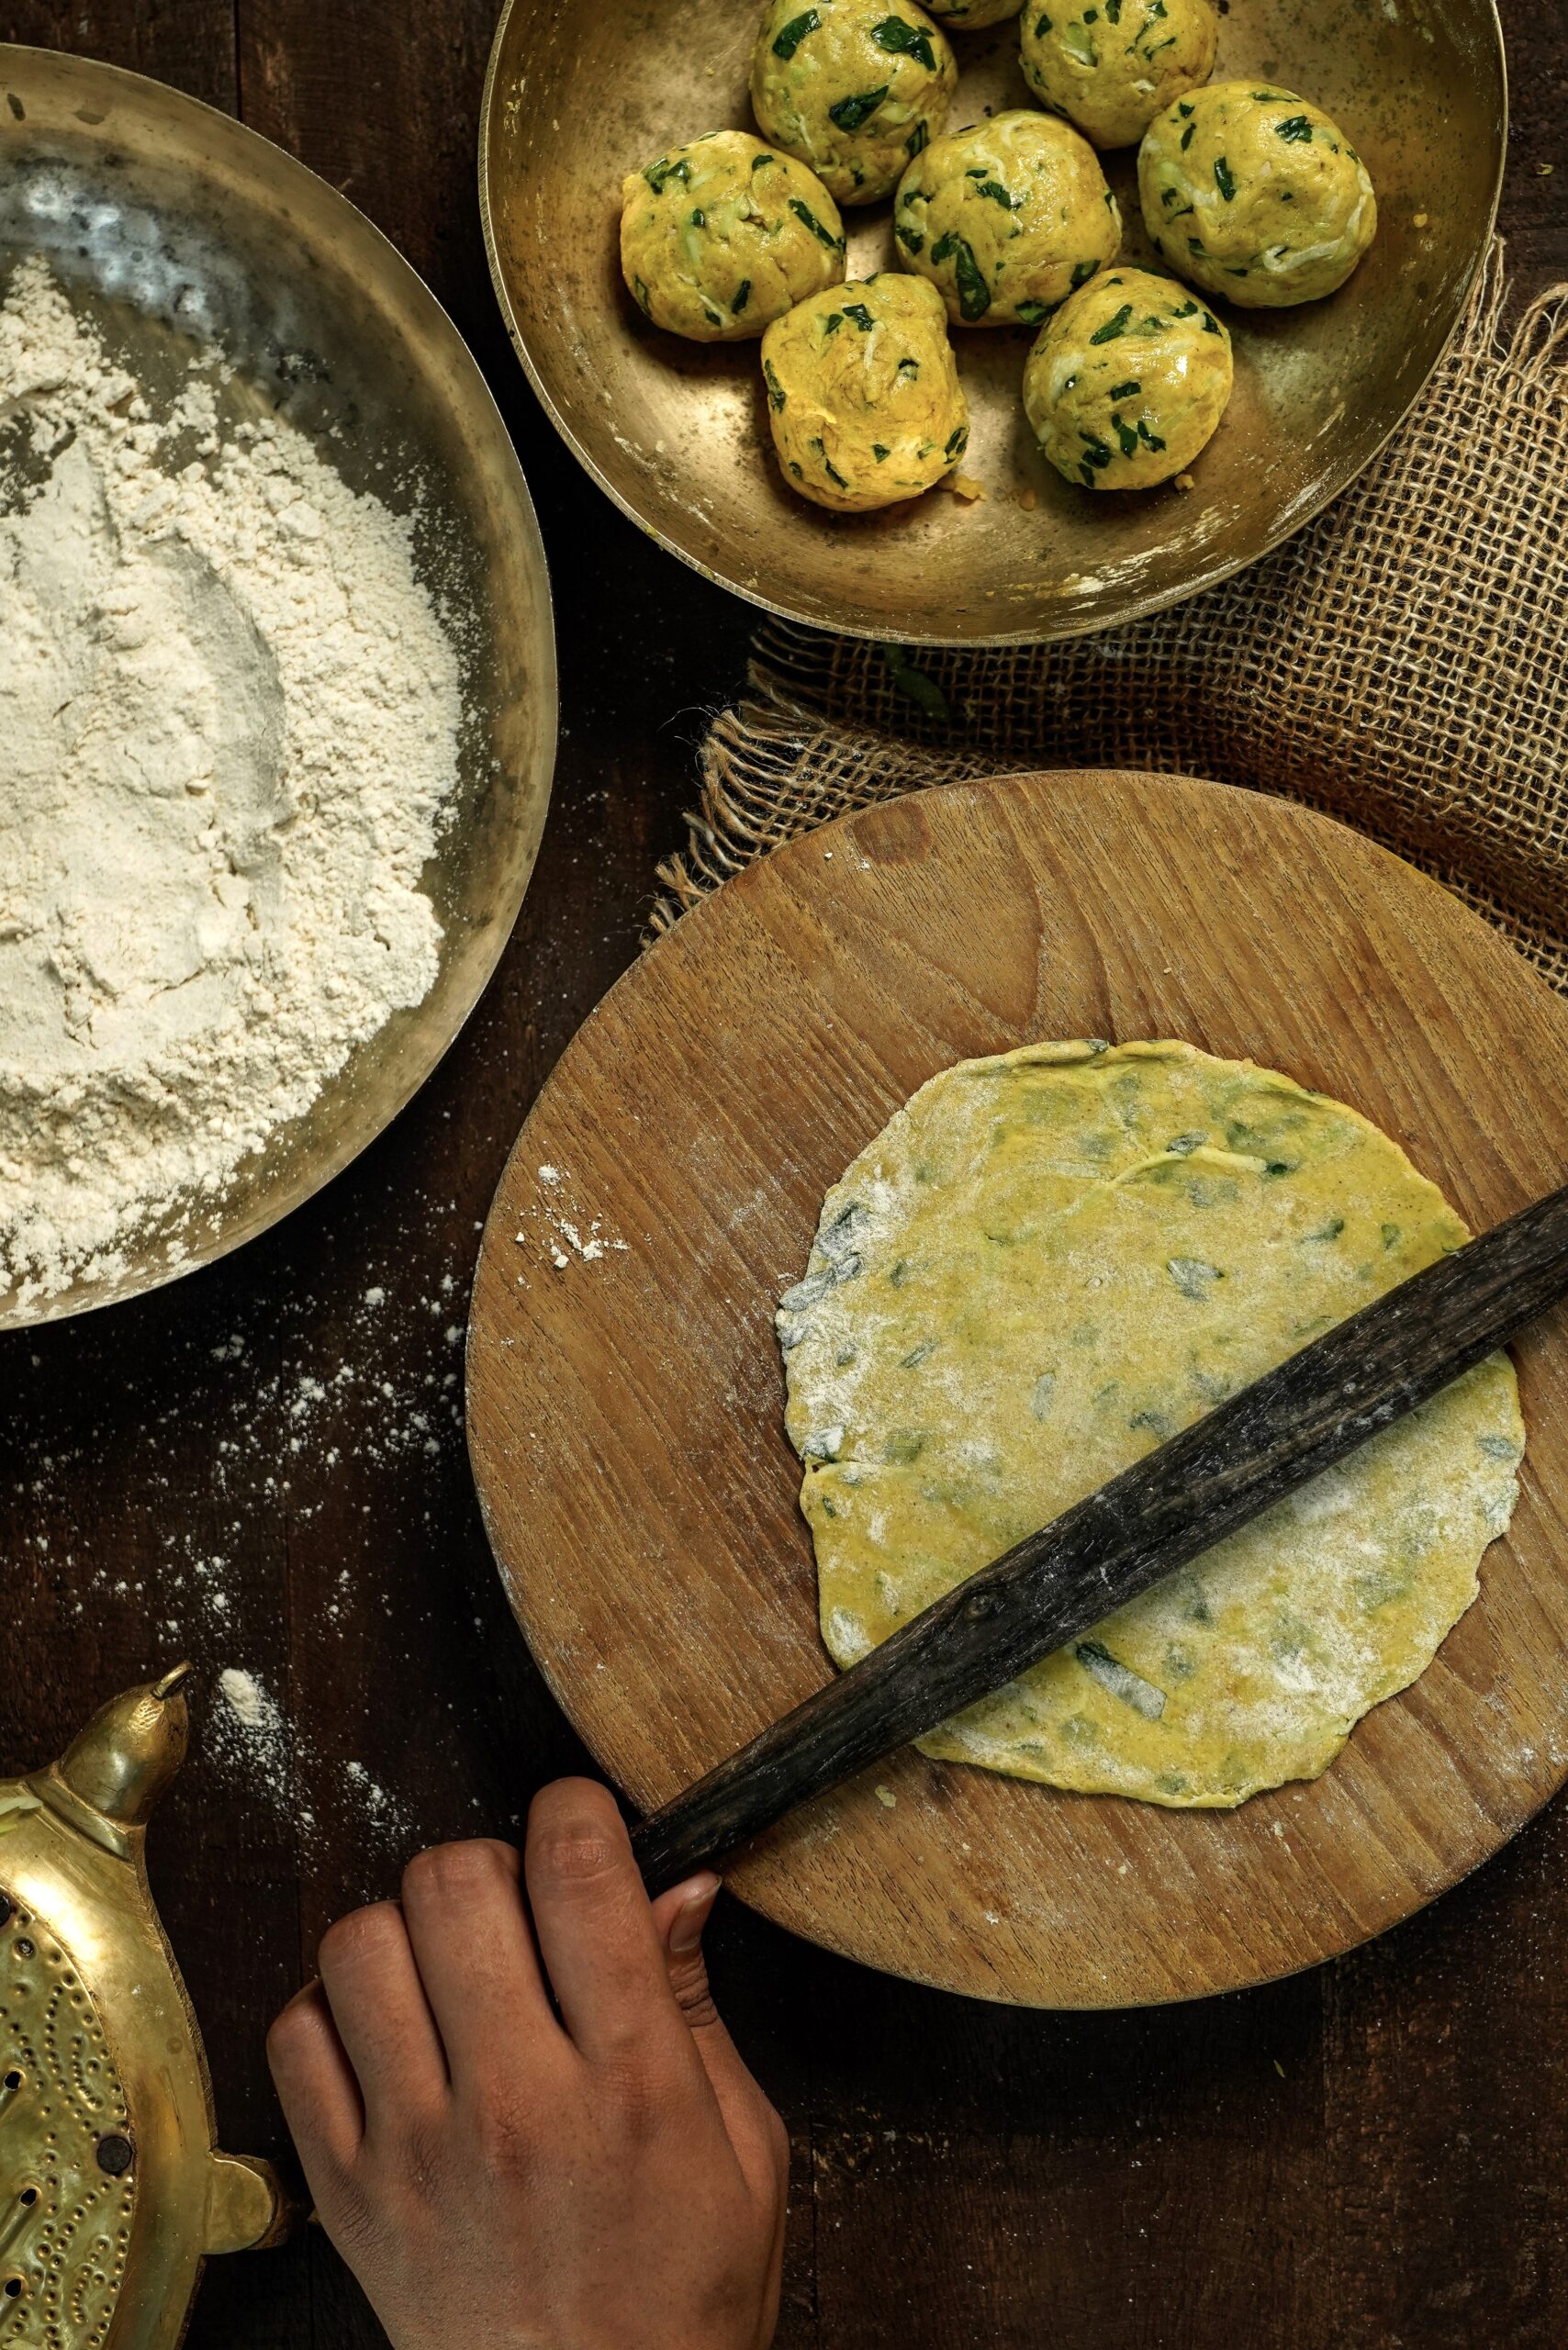
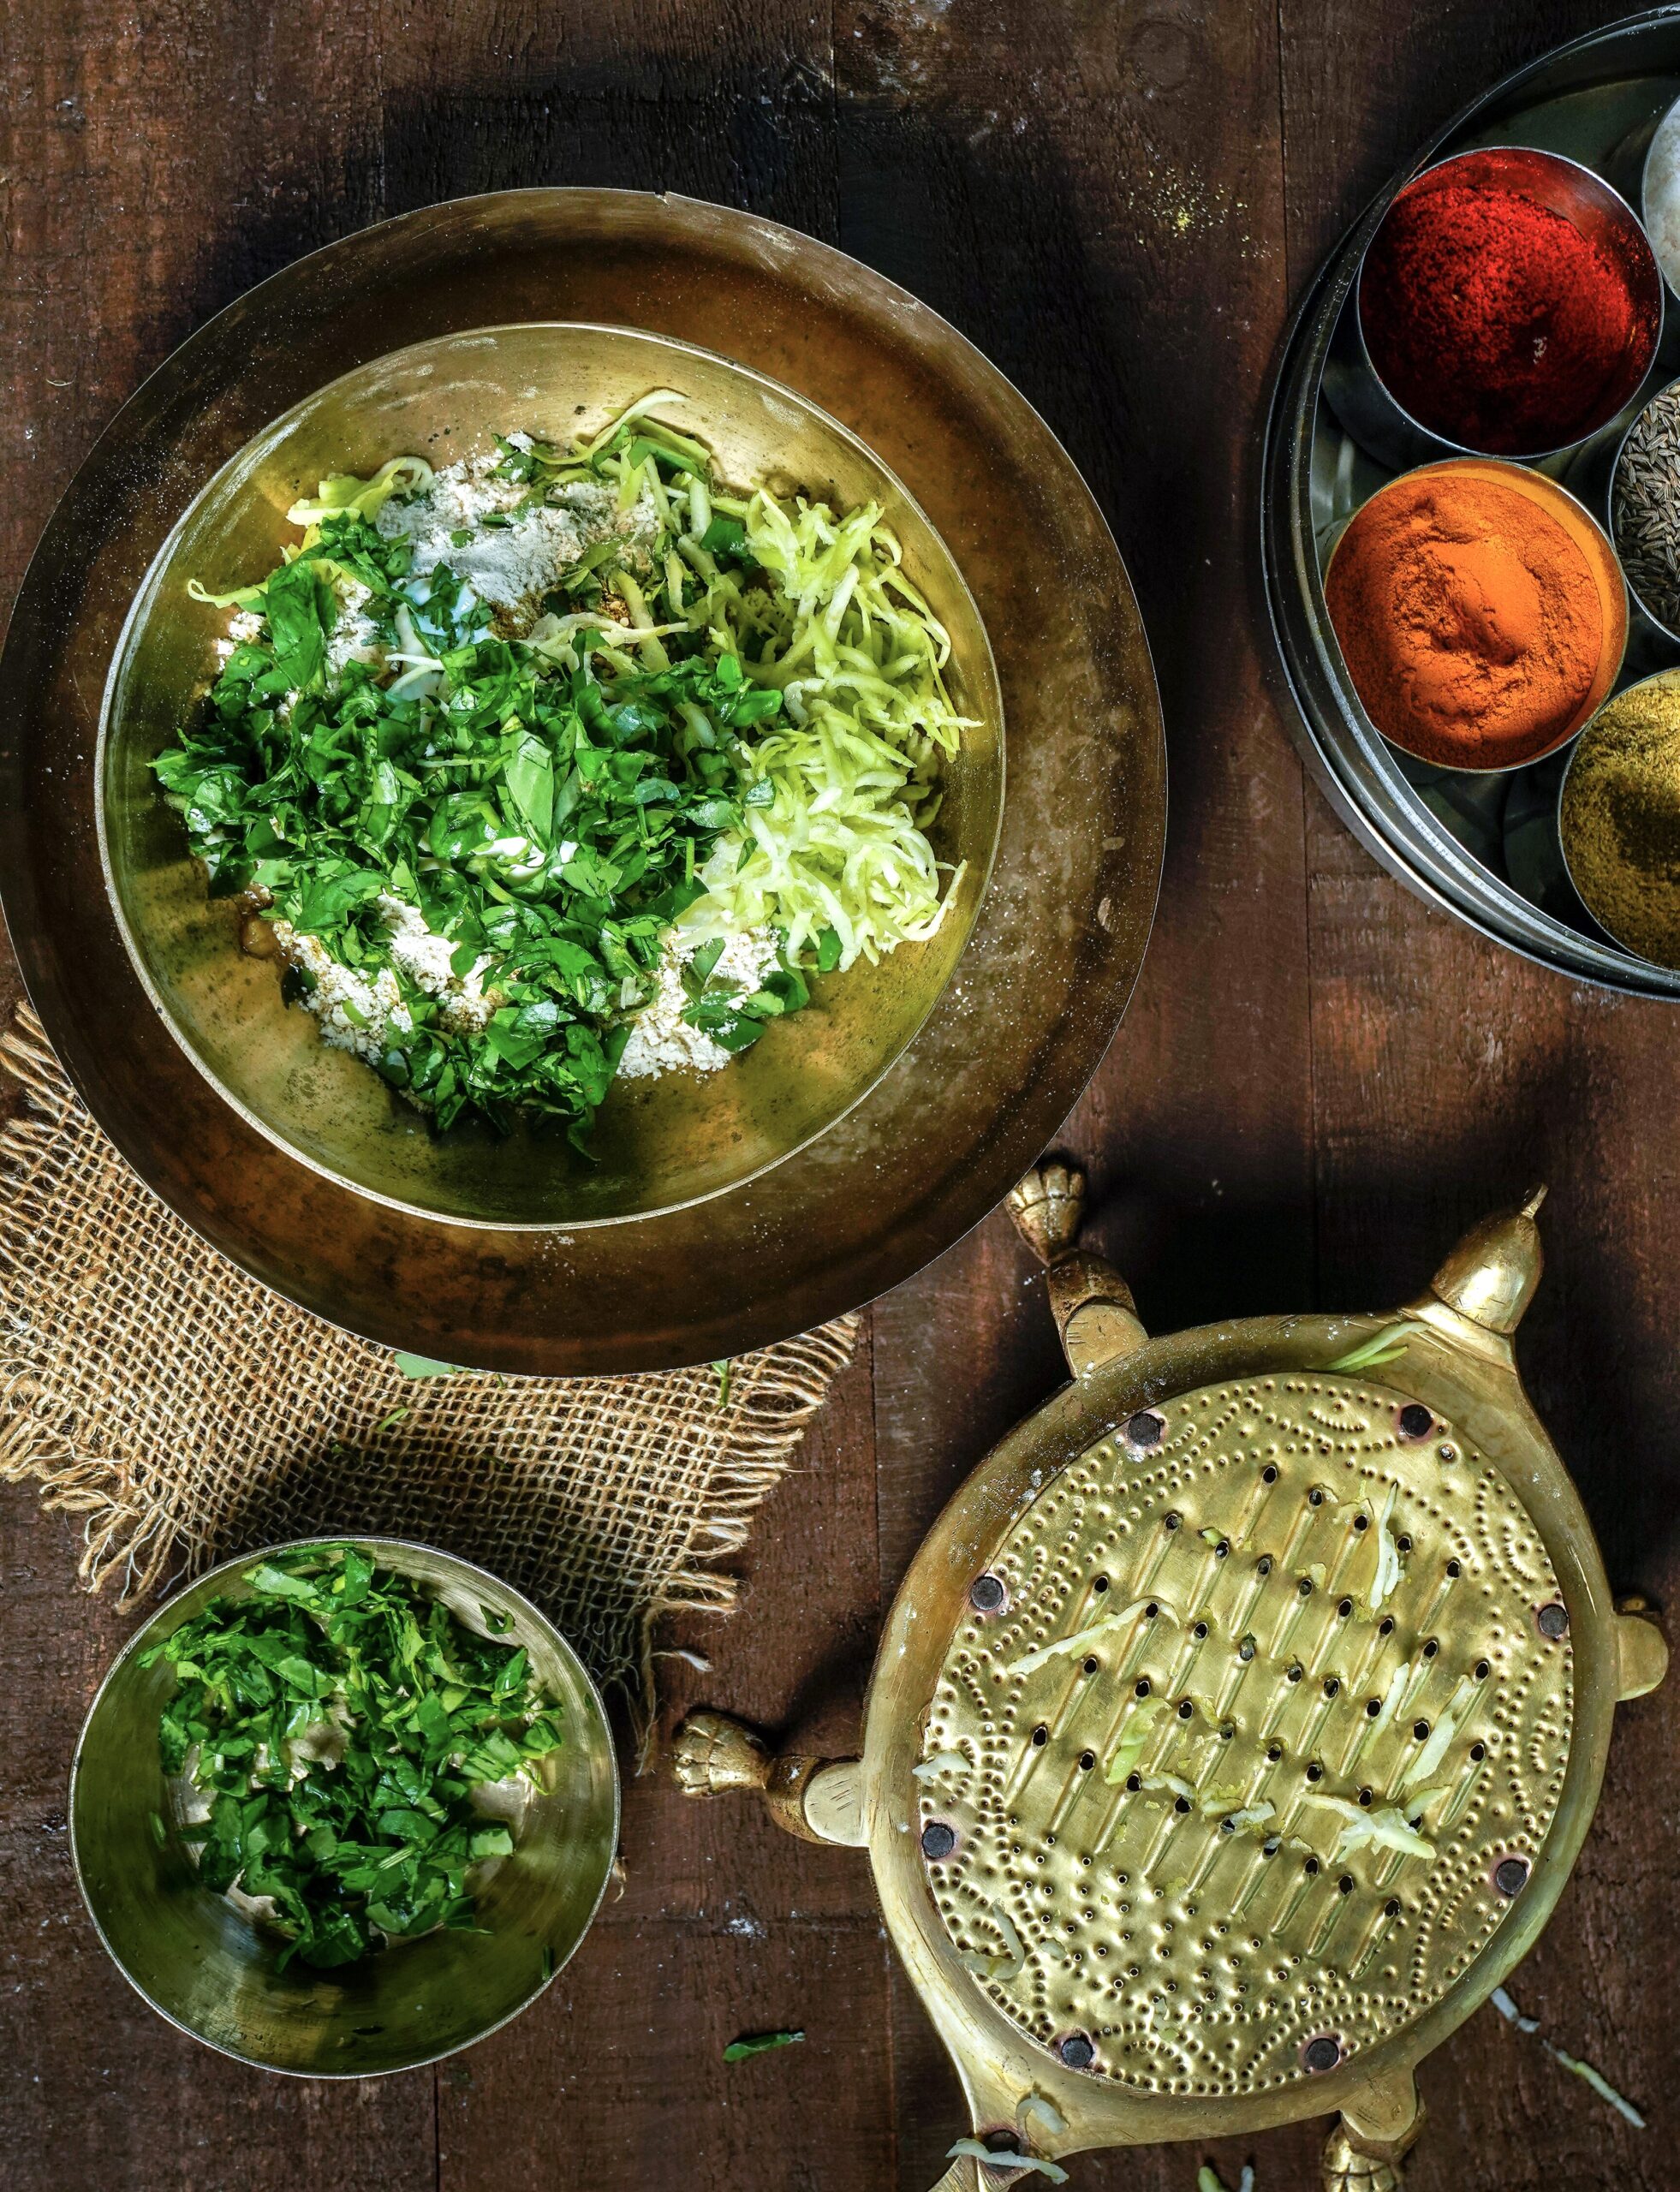
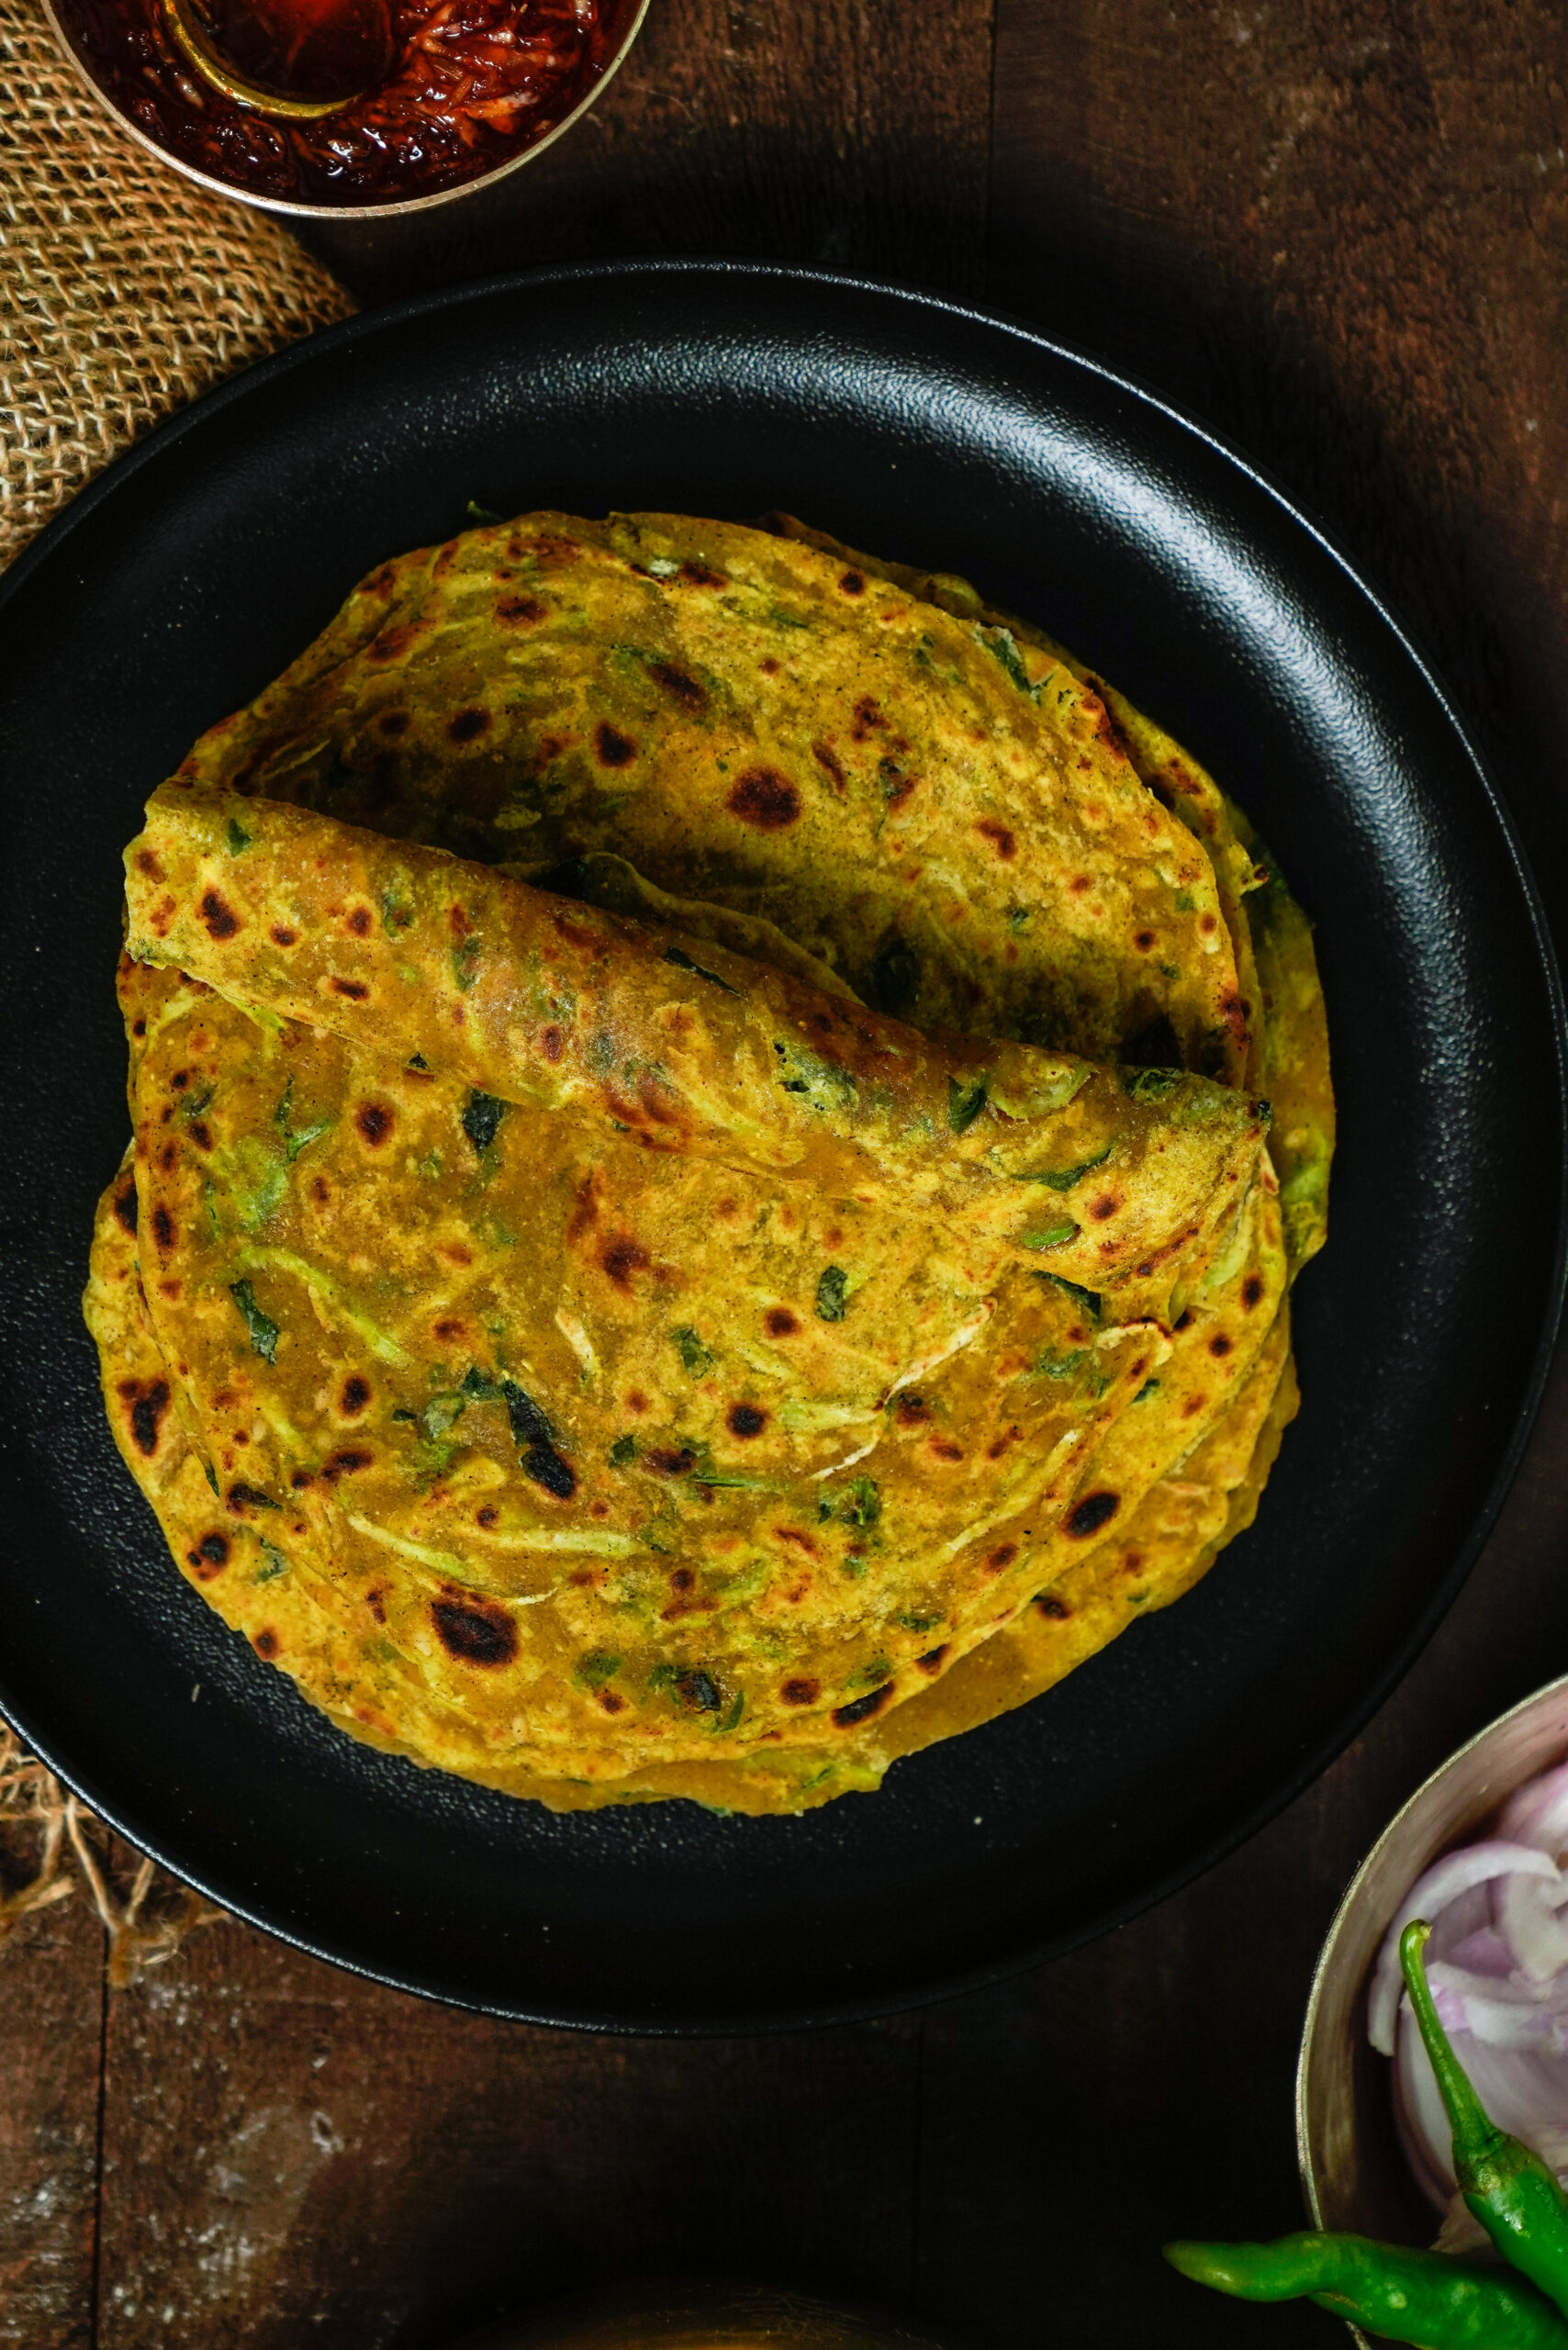
Coming back to this dish: all kinds of idlys are usually served either with a chutney, or a sambar. I will share the recipe for sambar, as well as for homemade sambar powder, in upcoming posts – so do stay tuned. The recipe below includes the traditional process of preparing and fermenting the batter.
As I said earlier, idlys are available anywhere in Tamil Nadu, but the difference when they are homemade is that they somehow feel lighter on the stomach. You can eat many idlys and not feel too full, yet you’ll have plenty of energy all the way into the afternoon. This is all the more true when it’s a millet idly, like this one.
Ragi Idly
(Yield: 20 pieces)
2 cups ragi (finger millet)
½ cup urad dal (split black gram)
¼ tsp methi (fenugreek)
½ cup water to grind dal
½ cup water to grind ragi
Soak the urad dal and the methi together. In a separate bowl, soak the ragi. Allow the grains to soak for between 4-10 hours, as required.
Then, grind the urad dal, adding the water only as needed, at approximately a ¼ cup at a time. Grind until it’s smooth between fingers. Set aside in a bowl.
Grind the ragi, along with water as required, until coarse. Add the ground ragi to the urad dal. Add salt to taste and mix with your hand. Set aside overnight and allow to ferment.
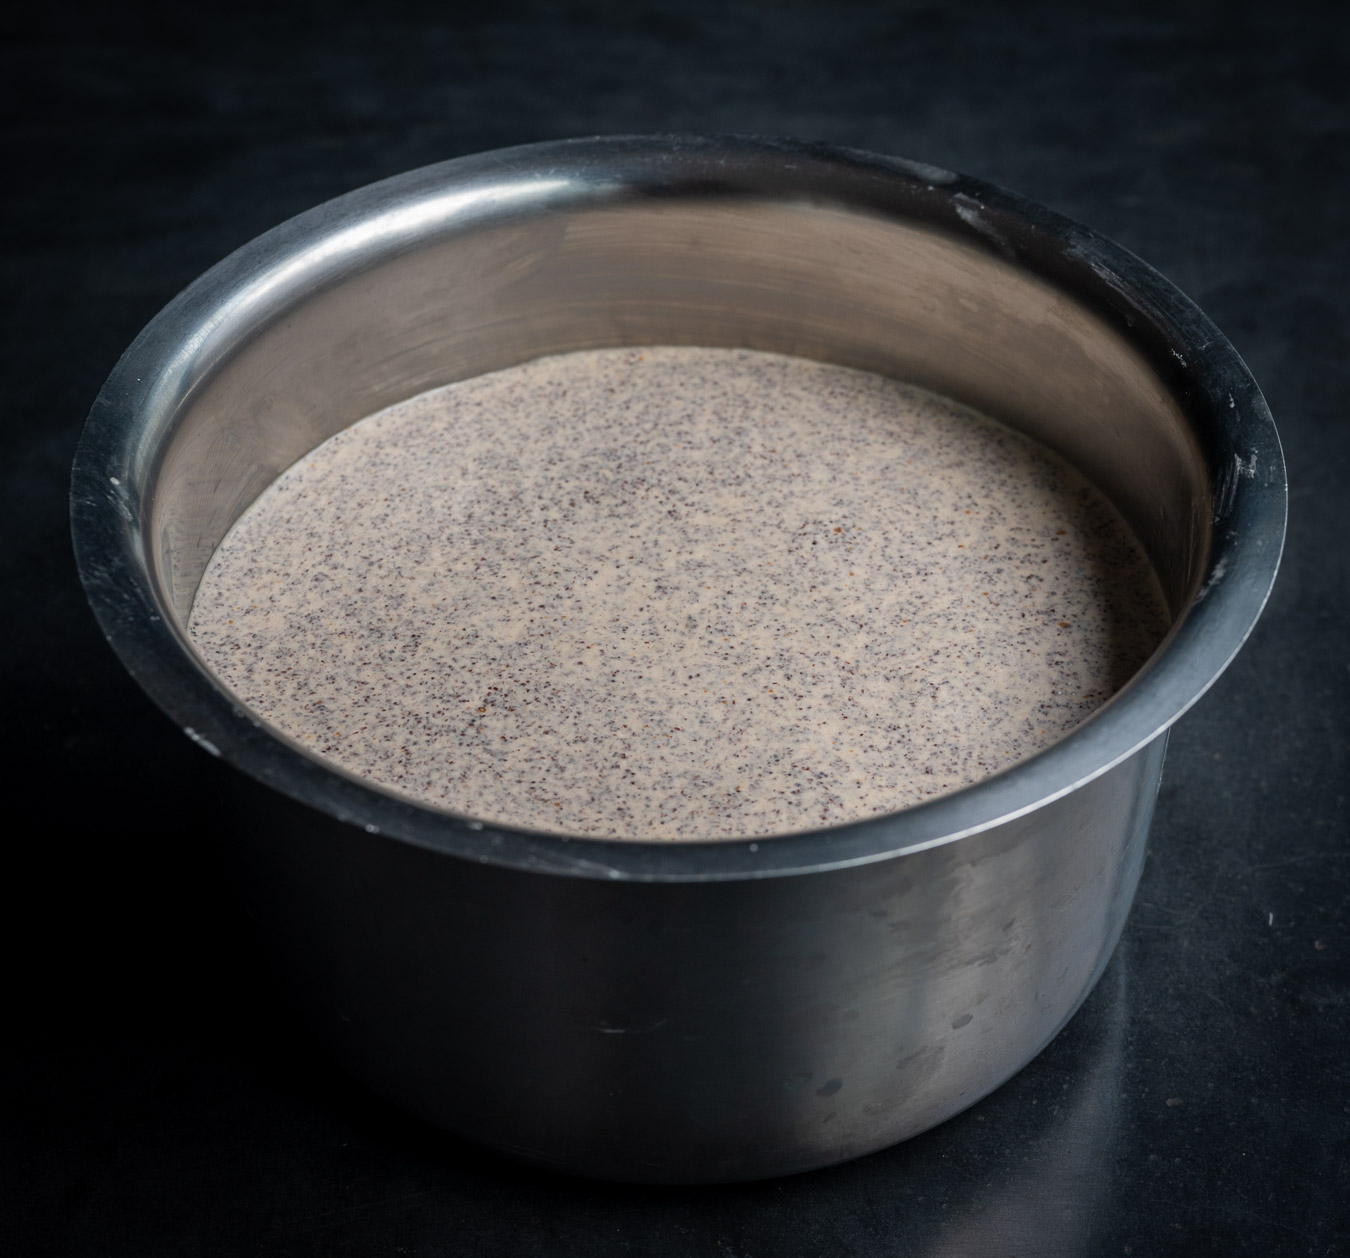
The following morning, the ragi batter would have risen for fermentation.
Prepare the idly mould by spreading a drop of ghee into each mould. This will help you remove the steamed idly with ease later. Set aside.
With a ladle, stir the batter gently and pour it into the prepared idly trays. Steam for 10-15 minutes. Remove from the cooker and allow to cool a little. Gently remove the idlys individually from the mould.
Serve topped with ghee, along with chutney and sambar, or both. There you have it: a traditional staple, superpowered by ragi!