Tag

India

Browsing

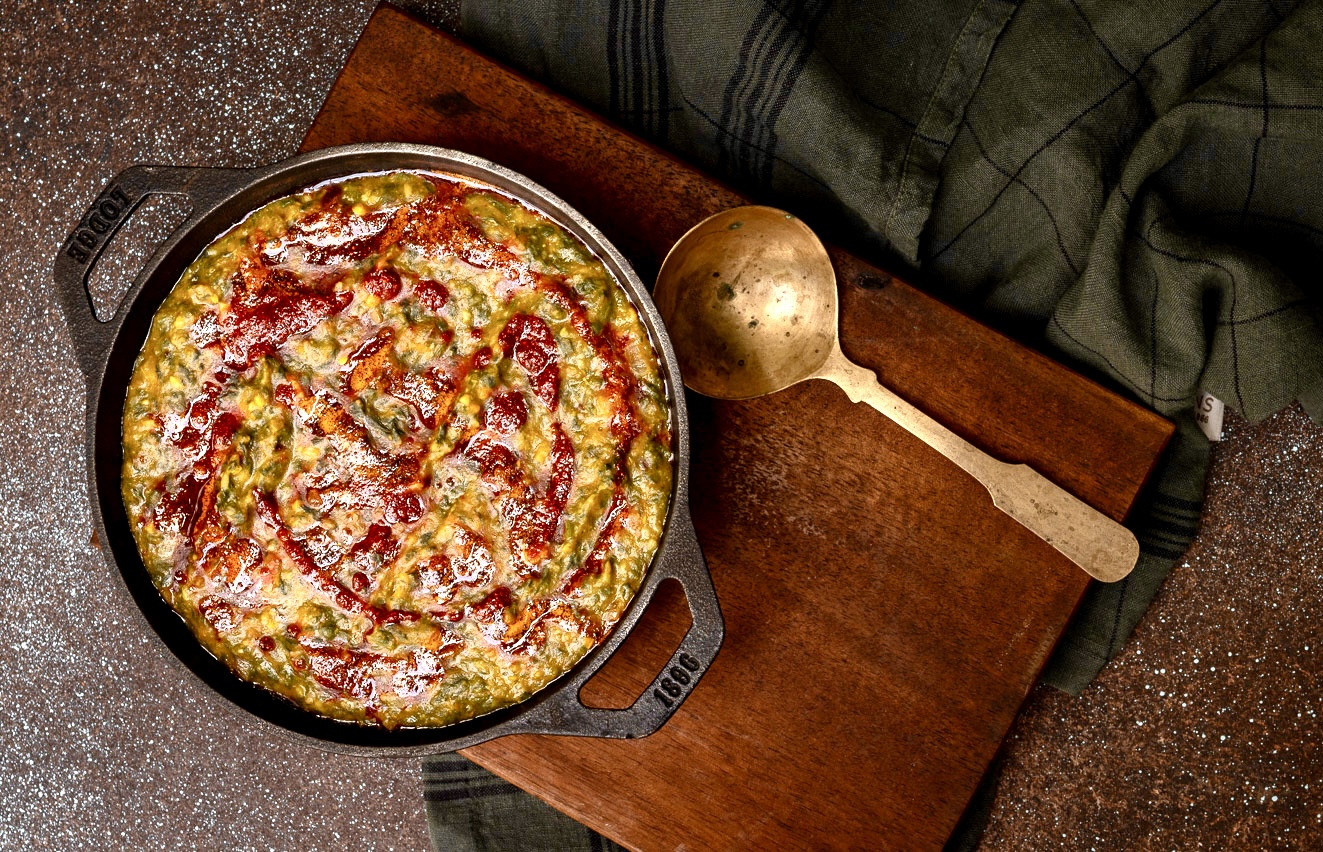
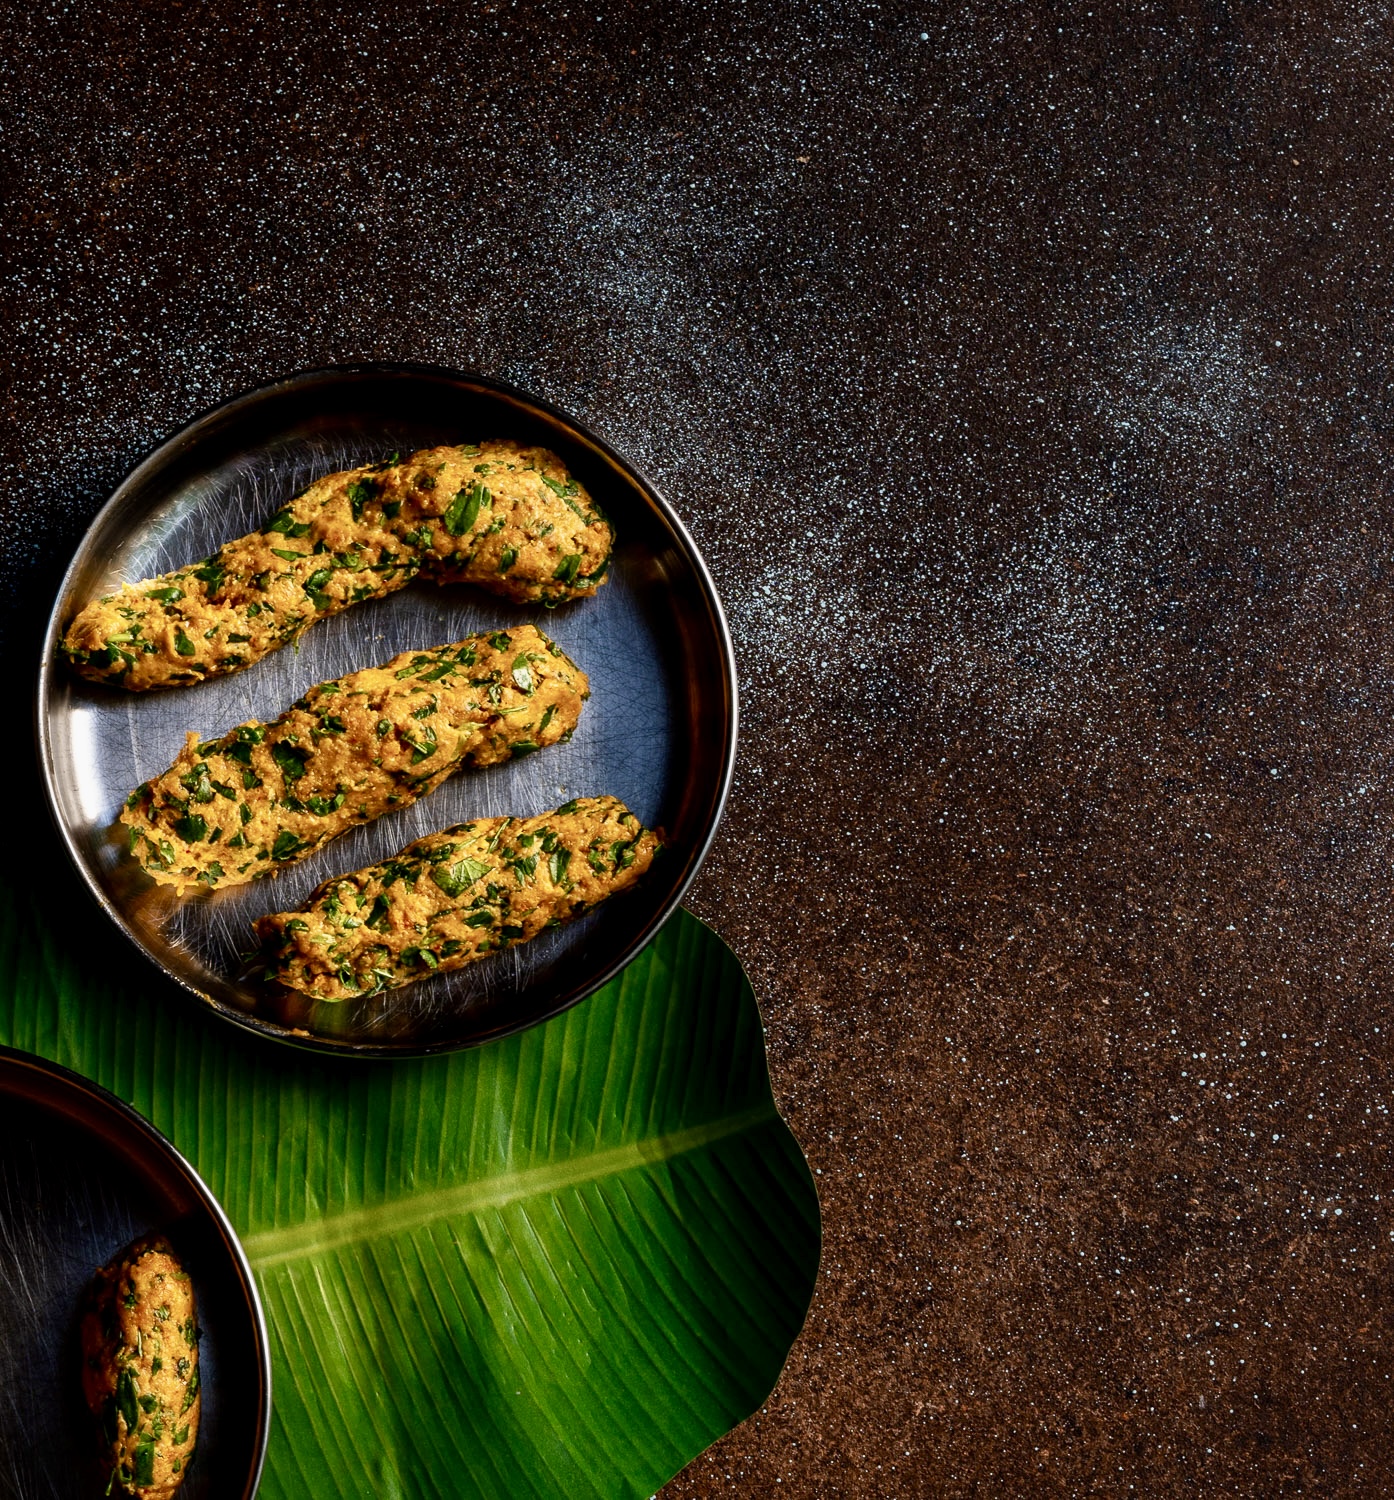
Over the years, I have shared recipes for special treats for Diwali. These include desserts from the Gujarati kitchen such as laapsi and ghugra. Joining these is kopra pak, a lovely sweet that is exquisite in both its taste and its simplicity.

When kopra pak occurred to me as this year’s Diwali recipe, I thought about how it is a dish that is often taken for granted. It utilises just a few basic ingredients, with the ubiquitous coconut as the core. “Pak” means “sugar syrup”, which preserves the sweet and makes it travel well.

As with all staples, there are many versions. Some use condensed milk rather than milk, which is a more modern take on a traditional recipe. Others use sugar syrup, not sugar, or else jaggery. Which ingredient is chosen has an impact on the softness or solidity of the dish. Those using jaggery set differently, and have their own flavour and texture. Hardened kopra paak becomes a kind of coconut candy, whereas the softer kind is naturally easier to cut and to shape. A version with jaggery is prepared for Ganesh Chathurti, and stuffed inside a rice flour modak (a dumpling that is offered to the deity during this festival). I love that one, and desperately wait for those treats at that time of year, which a friend of mine obliges me with.

Here, this kopra pak is for our Diwali celebrations – and hopefully yours as well, not only this year but for many years to still come. While sweets are always a part of our festivities, in our home, my health-conscious side and the fact that my husband is not a huge fan of desserts mean that we aren’t extravagant in our consumption of them. However, kopra pak happens to be one of the rare sweets that he really enjoys. And between watching our erratic cholesterol and BP readings, and still giving an occasion like Diwali its due, I decided that this is going to be the only sweet that I prepare at home this year. How lucky we are that it is so very delicious, and gives us just the right amount of indulgence, without immoderation.

As I prepared it, with excitement, my mind filled with memories of many festivities past. In my childhood, it felt like literally every other family we knew made kopra pak, or some version of it. Coconut is pan-Indian, and so is the concept of exchanging mithais or sweets during special occasions. Whether making a selection, or making just one type, it’s the thought that matters, and the love that is conveyed in the process.

Here, I have chosen to add a dash of rose to this traditional Gujarati sweet. It happens to be a signature flavour at re:store, and I offer this recipe to you with much gratitude for your support and recognition of my work.

This is my ninth Diwali as the creator of this blog, and if you have been with me all this while, it has truly been a journey. One of learnings, growth and change, all driven by my heart’s calling toward food and its intricate relationships with love, culture and life itself. I want to take this moment to share that I will be winding down my regular posting on this blog by the end of this year, in order to focus on a large project that has been close to my heart for a long time. That is, as you may have guessed – and if you are among my dear well-wishers, may even have enquired about – a book.
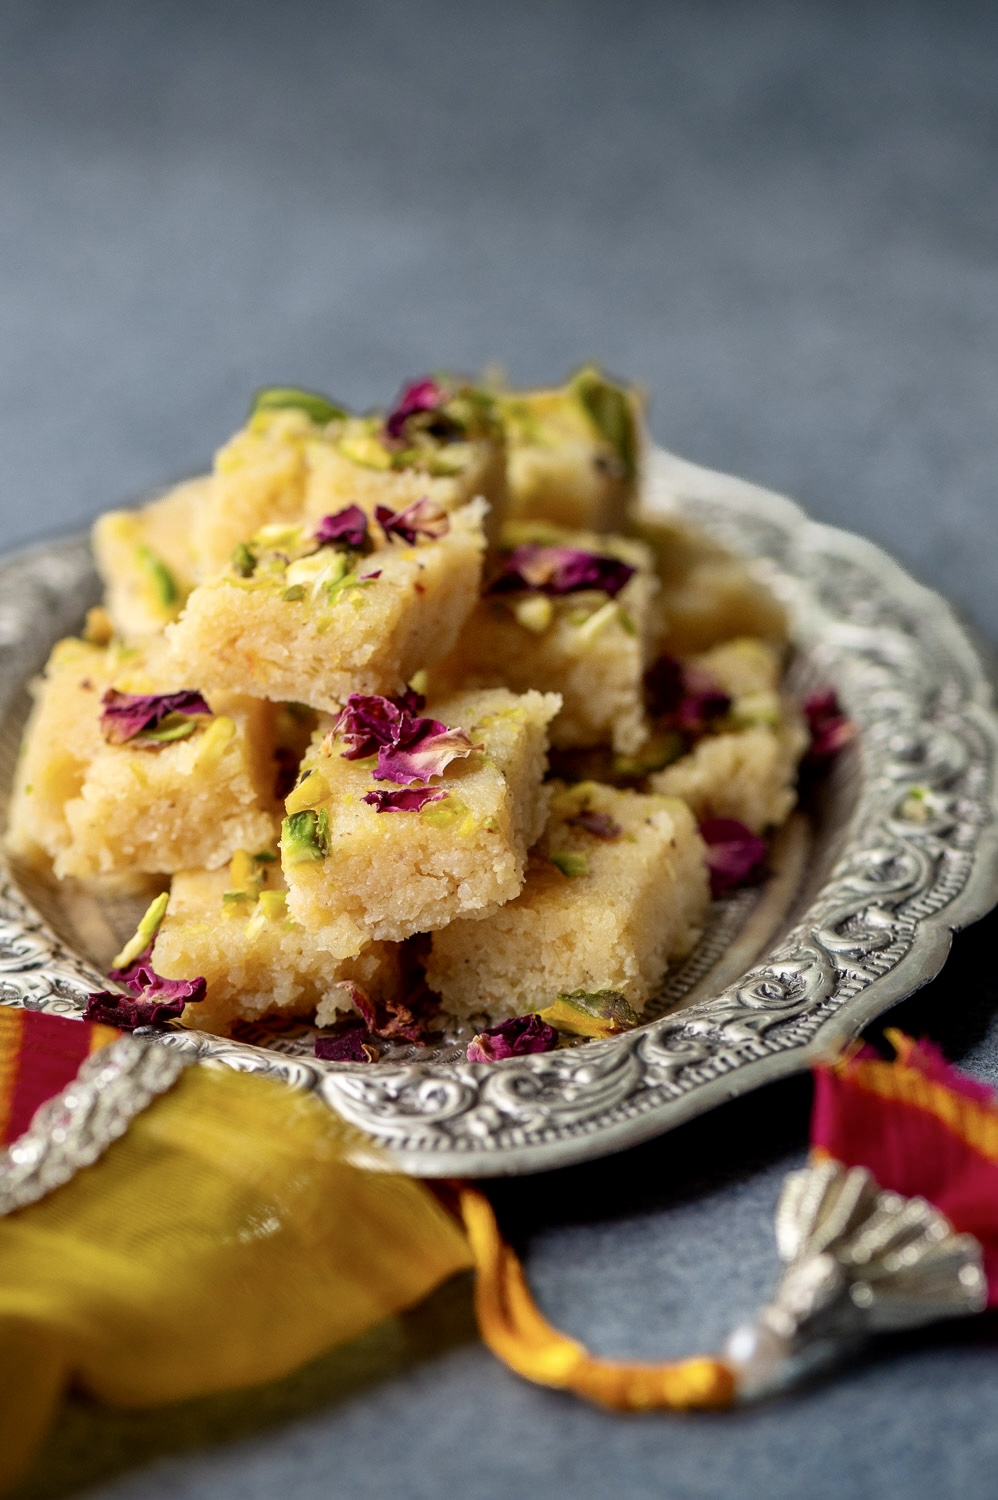
Kopra Pak With Rose
(Yield: 10-12 pieces)

1½ cups coconut (grated)
¾ cup whole milk
¾ cup sugar
A pinch of saffron in 1 tablespoon milk
¼ teaspoon cardamom powder
¼ cup pistachio (finely sliced)
½ teaspoon rose water
Ghee for greasing a plate

Heat a kadai and add the milk and coconut. Allow to cook on a low flame, stirring continuously. Make sure it does not stick at the bottom. Continue to stir until the milk has almost evaporated.

Now, add the sugar. Allow to cook. Keep stirring.

Once the mixture thickens, add the cardamom powder, saffron and rose water. Skip the rose water if you prefer not to have that flavour in your kopra pak.

Allow to cool slightly, then transfer onto the greased plate. Flatten with the help of a cup until it looks flat and smooth. Sprinkle with sliced pistachios. You may also wish to garnish with rose petals.

Refrigerate for an hour or until it sets well.

With the help of a sharp knife, cut the kopra pak into the desired shape.

As I said earlier, the gifting of sweets during Diwali is a tradition that conveys love. To me, that is what recording these precious recipes has always been about. I hope that they bring joy to you, and to all whom you share them with!

The cultures around us always have a huge influence on us especially while we are growing up, and this influence often remains through life. Certain recipes and food habits are the most common evidence of this influence, in my opinion. As a Gujarati who was born and brought up in Chennai, Tamil cuisine is obviously one I have immersed myself in, just as much as my native one. Additionally, with a Sindhi member of the family and numerous Sindhi friends, Sindhi cuisine is another one I have an abiding love for. This recipe – a vegetable curry known as sai bhaji – is from the same.

Sindhis are a community who are mostly originally from the Sindh region of Pakistan. The majority of Indian Sindhis are believed to have migrated from there during Partition, a highly significant event in subcontinental history. Subsequently, they also moved to many other countries, and are known – in addition to delicious food – for being very enterprising. It is often said that a Sindhi-owned company can be found no matter where you travel in the world, such is the community known for its business acumen.

My exposure to Sindhi food began in childhood, as I mentioned, through a friend who now lives in Mumbai. Whenever I visit her, she asks me what I would like to eat, and I will invariably request sai bhaji. It is a dish that I recall fondly not just from ordinary meals at her house, but even from birthday parties and such. Back then, these parties were always in homes, and featured homemade food. The only special or exotic thing would be a cake, while even the other treats would all be items prepared by the family. In India, proper food is served at every such gathering, as feeding guests well is a valuable tenet of our culture. A sai bhaji – a healthy item! – would certainly not be out of place.

“Sai” means “green” and “bhaji” means vegetables. The dish is spinach-based, and also contains a variety of leftover ingredients. A little leftover brinjal, a little leftover carrot… All these will be pressure cooked along with dal in order to prepare this nourishing dish.

When I said earlier that feeding guests a hearty meal is a part of Indian culture, across all communities, I was thinking specifically of how this is a collective choice in spite of a history of droughts, famines and lack of economic power. Perhaps because of this history, we are very cautious about not wasting food and use leftovers very sensibly. Some years ago, I did a series called “Second Helpings” of traditional recipes that innovate using leftovers. We turn around every little bit that sits in the fridge, and have done so since well before the invention of fridges, in fact!

To me, how we treat food and how we treat knowledge are the real wealth of India. We hold both in such regard, because the fact is that many generations have had to do with less of both or either than they deserved. To us, throwing food into a bin is as much of a sin as stepping on a book or a newspaper. The respect we have for such objects, the respect we have for guests: we know what is precious, whether or not that preciousness is measurable on material terms.

Sai Bhaji
(Yield: Serves 4)

1 medium-sized onion
1 medium-sized tomato
1 tablespoon ginger (grated)
1 teaspoon garlic (grated)
1 green chilli
1 bunch spinach (palak)
3 tablespoons yellow moong dal
1 medium-sized potato
1 medium-sized carrot
Any vegetables of your choice
2 tablespoons oil
Salt to taste
½ teaspoon turmeric powder
1 teaspoon chili powder
1½ teaspoons coriander powder
½ teaspoon cumin powder
2 tablespoons water

In a pressure cooker, place the dal followed by the vegetables and finally the spinach. Add 2 tablespoons of water and allow to cook or whistle until tender.

Meanwhile, chop the onion and tomato.

Heat a kadai, add the oil. Then, add the onion, garlic and ginger. Finally, add green chilli and sauté everything until golden.

Next, add the chopped tomato. Sauté and add all the spices. Stir well.

Open the pressure cooker and mash all the vegetables until they come together.

Finally, add the vegetables to the onion-tomato mixture and mix well.

Add a dash of water if you prefer it to be less thick.

Your sai bhaji is ready. I enjoy eating it alongside hot rice, with kadhi and curd on the side. I hope you’ll enjoy this lovely recipe from Sindhi cuisine. I am sure you will find, as I do, that it pairs beautifully with other dishes from across the Indian subcontinent.

Millets have made numerous appearances on this blog. They were, traditionally speaking, widely consumed across India and have in recent years made a comeback among the health-conscious. When it comes to jowar (which you may know as sorghum), the fibre, protein and essential minerals it provides – along with the fact that it is relatively light to digest – make it an excellent choice. This jowar khichdi is a great dish to put a little energy boost into your day, and is ideal for either lunch or dinner.

In the last post, I shared the recipe for jowar roti. I had said then that the winter variant of jowar roti is bajra roti, which uses the heavier pearl millet. It is important to note that millets are not universally interchangeable. A jowar dish made for breakfast, such as for example a jowar upma, cannot become a bajra dish through mere substitution. Bajra tends to be heavier on the stomach and takes more effort to chew. One does not want to tax the system so early in the day. If at all I want to have bajra in the mornings, I will have it in roti form.

That said, you can certainly use some other millets in lieu of jowar in this khichdi form. The method will remain the same, but the cooking and soaking time (if required), will vary. A millet with smaller grains, such as little millet or foxtail millet, will cook faster and without pressure cooking. Jowar, on the other hand, benefits from a few hours of soaking. Keep these factors in mind whenever you select a millet, for any kind of dish.

When my children were younger, millets weren’t part of our regular meals. We weren’t familiar with them, and there was hesitation around the unfamiliar taste and texture. I myself only started experimenting with them a little over a decade ago. At this point, the entire family also began to enjoy them. Since then, I’ve been a strong advocate for incorporating millets into daily meals. Each kind satisfies certain nutritional requirements, and has its own taste. As with any grain, flavour pairings also make a difference. For instance: jowar is known for a subtle, slightly sweet taste, while little millet has a hint of nuttiness. My recommendation is to keep experimenting in the kitchen, always. Even when working with very traditional recipes, the learning never has to stop.

Jowar Khichdi
(Yield: Serves 2)

1 cup coarsely ground jowar
Water as required for soaking
2 cups water (for cooking)
Salt to taste
1 tablespoon ghee
½ teaspoon cumin seeds

Soak the jowar for 6-10 hours. Rinse well.

In a pressure cooker, add the soaked and rinsed jowar along with water and salt.

Cover and cook for 4 whistles. Allow to cool, then open the lid.

Heat a small tempering bowl. Add ghee and then cumin seeds. Once the seeds splutter, pour the tempering over the khichdi. Serve immediately.

Hot khichdi is a comfort food that has had other iterations on this blog, and I’m glad to share this one with you too. I hope this jowar khichdi becomes one of your preferred variants too.

Time and again, I have spoken on this blog about how eating seasonal produce is the best thing for our bodies. We are a part of Nature, and it is intrinsic in us. We cannot look at it from the outside, or even objectively, because we belong to it. We cannot go against its flow, which is what we often try to do today. However, I believe that even as the world changes and decentres Nature, in our own lives we can actively choose – at the very least – to listen to our bodies. When we do, we will quickly realise that our hunger cravings have a rhythm with climatic cycles. Here in India, while the peak of summer is behind us, the winter is still far enough away that lighter grains are what we need. Hence, jowar (known in English as sorghum) is something I am making meals from these days. This jowar roti is an excellent use of the same, incorporating the ingredient into a daily staple.

I am fortunate to have access to very good quality, homemade jowar flour through my sister. She has a small mill in her kitchen, which she uses to prepare her own flours and powders. I have observed many other households in Mumbai doing the same. When I visited her recently, she was making jowar flour. What intrigued me was that she added a handful of soyabeans to it. I found this an interesting, and very healthy, combination. I don’t have a mill of my own back in Chennai yet, but as I teased my sister, I don’t need to, as I can just keep asking her for homemade flours. She gave me a kilo of jowar flour on that visit, and it’s being used liberally – and I’ll soon need more, as I’ve already warned her!

If jowar is used in warmer months, it is bajra (known in English as pearl millet) that is preferred in winters. Jowar is not only lighter on the digestion, but in flour form also easier to fold into roti dough. It really is so simple to make, requiring no pre-prep. All you do is add warm water, which brings out a glutinous consistency, then make the dough and roll it out immediately in order to fry it up. Bajra flour, on the other hand, tends to break apart as you roll it out due to a complete lack of gluten.

Both jowar and bajra rotis are eaten in my home. Depending on the season, one or the other will be served at lunch – except during the height of summer, when rice replaces roti altogether. Other than during that time, these two are staples, even though a wide variety of other flatbreads are brought into our meals too. I have been rolling out rotis since I was a young girl, and am able to handle different flours, but it does take practice. The trick is in the hand, and in being patient.

Jowar roti, despite being made of a lighter flour, is very filling. Just one piece, with a cup of dal or two cups of vegetables, is a perfect lunch. You don’t need anything else for hours after.

This may be why my mother would have some jowar roti during days on which she performed certain kinds of fasts, for instance. I am not entirely sure because the truth is that I paid very little attention to some of the items that my parents ate when I was a kid, and jowar roti was one of them. My siblings and I would screw up our noses when we saw it, so our mother always prepared regular whole wheat rotis for us instead of these healthier ones. I regret not having eaten jowar roti back then, but I am grateful that I learned how to make it.

Exposure plays such an important role in what we reach out to – or return to – in terms of food as we grow older. What we saw being prepared or consumed as children, whether we appreciated it or not, stays with us and informs our choices later on. Sometimes, I think about whether my kids – now grown and with homes of their own – will ask for these recipes when they have children of their own, whom they will of course want to provide the best of everything to. That is one of the core reasons behind this blog: it is my legacy to my loved ones, just as much as it is my offering to anyone in the world who seeks the comfort of a well-made meal.

Jowar Roti
(Yield: 3 pieces)

1 cup jowar flour

1/2 cup water

A pinch of salt

In a bowl, add the flour. To this, add water and salt. Mix all the ingredients with your fingertips and massage well, binding them all together. Make 3 balls of the dough and set aside.

Using your palms, roll out the balls. Sprinkle some flour onto the rolling board, and add some flour on top of each ball as well. Gently roll out the balls into flat discs. 

Heat a roti pan and add 1 disc at a time. If the roti is thick, then keep your flame on low or medium and cook the roti on both sides.

Now, with the help of tongs, place the roti on the stove or directly on the flame and allow to cook until spots appear. Set aside.

Repeat with the remaining balls.

Serve with hot ghee and/or along with subzi or pickle.

Stay tuned for another jowar-based recipe that I’ll share here soon. You may also wish to explore other millet dishes that I’ve shared over the years.

My son who lives abroad often tells me how much he craves home food, or Indian food in general. As I do for all my children, there are certain special dishes that are prepared without fail during their visits, depending on their individual preferences. This son’s favourite is biryani, which means that I make it very often – and very happily, I might add. So much so that I began to roast and store the masala, or the spice powder, myself too. This biryani masala powder is versatile, and can be used with a wide range of biryani styles.

Biryani is a pan-Indian rice dish invented by the kitchens of the Mughal empire. In its original form, it is basically highly flavourful rice cooked with meat. Across the country, versions and variations of this basic concept – with and without meat, and utilizing different rice grains, particularly short and stout ones like samba or long ones like basmati – have pride of place. I continue to encounter biryanis that are new to me, such as a fish biryani that I had at a friend’s place not long ago, which I had never been aware of as a dish prior to that meal.

My son prefers chicken biryani, and given that our household is primarily vegetarian, I can attest to how this masala can be used in more than one biryani rendition – to equal success. I have shared a vegetable biryani recipe in the past, which happens to be my own favourite. You can certainly use the biryani masala recipe below for either or both, as well as with other core ingredients.

I realise that these days biryani, once a royal enjoyment, has become a much more accessible and affordable dish. In fact, it is now a widely available form of street food. All around Chennai, I notice tiny little counters and kiosks, if not full-fledged shops, serving biryani. I must confess that I am wary of these. While the food is tasty, I love heaping vegetables to my biryanis and making them as wholesome as possible. This is true even when I am preparing meat versions for my son. Biryani itself is quite a rich, heavy dish, and balancing out the nutrition content is important to me. This is why I choose to make it at home whenever possible, despite the temptation of store-bought meals.

Similarly, making my own spices is something I really enjoy doing. There is nothing like the aroma that rises when they are freshly ground. Those used in biryani masala are either intrinsic, or have at least become traditional, to this part of the world. There is a sense of doing as generations have done for centuries past: putting together a beautiful medley of flavours to add depth and taste to a dish.

There is, for me, also a sense of following in my mother’s footsteps. She told me about how Gujaratis customarily had some kind of basement or pantry for the safe storing of dry provisions, including spices, so that these could be utilized through the year. We didn’t have a basement per se, but she retained this sensibility. Grains and spices were always stored, with the latter prepared during the summer months when roasting them under the blazing sun would be most efficient. Our blender was always busy during that season. It is a practice I have made my own, and despite the conveniences of today, I hope to share the beauty of this practice with as many people as possible too.

Biryani Masala Powder
(Yield: Approximately 1 cup)

2 2-inch cinnamon sticks
10-12 cloves
10-12 green cardamom
3 black cardamom
3 star anise
1 teaspoon black peppercorns
1 tablespoon fennel seeds
8 bay leaves
15 Kashmiri red chilies
1 tablespoon cumin seeds
¼ cup coriander seeds
½ nutmeg
2 mace

Dry roast the cloves, pepper, green cardamom and black cardamom on a slow flame. Once they release an aroma, remove onto a plate.

Next, dry roast the coriander seeds, fennel seeds, cumin seeds, nutmeg and mace. Once they release an aroma, remove onto a plate.

Finally, roast the bay leaves, cinnamon, red chillis, and star anise. Keep stirring on a low flame.

Allow all the ingredients to cool, then transfer to a blender. Powder and store in airtight jar at room temperature.

I like to always fill just a small jar, so that whatever spice or spice mix powder is contained within is consumed while the aromas are still quite fresh. I would recommend using up each batch within a month.

I hope this biryani masala powder becomes a part of many feasts in your life. You may also wish to explore other spice powders and blends I have shared earlier, including sambar podi, garam masala, curry leaf podi  and coconut podi.

Garam masala is one of India’s quintessential spice blends, a staple of the Punjabi kitchen and popular in the north of the subcontinent. Traditional Gujarati and Tamil cuisines don’t use it, which means it is not a masala that features regularly in my own cooking. That said, I do enjoy the flavour profile immensely in certain dishes. Until recently, I would purchase readymade garam masala, but an increasing number of spice adulteration scares in India when it comes to commercial brands have convinced me that it is safer to prepare it at home myself. I found the process easy and the outcome fulfilling, and in some ways, this means that garam masala features a little more often in the recipes I choose too.

There is a vast amount of nuance when it comes to Indian spicing techniques and spice blends. There are differences between whole forms and powdered versions, and seasonality and availability also have an impact on what became considered traditional. Certain combinations are region-specific. Additionally, while many assume that red chillies are the base spice, this is historically inaccurate. The chilli family came to the subcontinent with the Portuguese. The core spice in this part of the world prior to this was pepper.

Garam masala has had only a scattering of appearances on this blog, used sparingly for dishes like roast potatoes and radish paratha. I have also used it in place of chana masala when making chole, rather than buying readymade chana masala. It traditionally features in black dal, moong dal and even certain meat preparations. I find that the flavour is very potent, so it is best to use a very small quantity, especially when the blend is homemade, as it will be purer. Adjust the quantity as required, based on your preferences and on what the dish calls for.

Nowadays, I roast the spices, but I clearly remember when my mother used to dry them in the sun in the summer heat. We were fond of chana and black dal and rarely went to restaurants, so garam masala was definitely a presence in her kitchen cabinet too. As I have said many times over many posts, my cooking skills came from her. She was as fond of exploring different cuisines and increasing her own repertoire as I am.

You may recall from prior posts that the more elaborate method of sun-drying is also something I do now and then or for specific spices, but this is of course climate-dependent. I presume that exposure to the elements may add more to the flavour, but overall I certainly lean towards homemade rather than storebought and that fact alone elevates any powder I prepare – roasted or sun-dried. I always make my powders in bulk, not only so that they may be used for a longer period, but also so that I can give them to my kids, who will utilise the same in their own kitchens. This gorgeous garam masala is now in all the places they live, and perhaps will be welcome in your home too.

Garam Masala
(Yield: Approximately 1 cup)

½ teaspoon nutmeg
2 strands mace
4 cloves
¼ cup coriander seeds
2 tablespoons cumin seeds
½ tablespoon black pepper corn
1 tablespoon fennel seeds
¼ teaspoon ajwain (carom) seeds
1 teaspoon methi (fenugreek) seeds
4-5 whole cardamom
6 cinnamon sticks
2 star anise

Begin by roasting all the big ingredients on a low flame. These would be cinnamon, star anise, nutmeg and mace. Add the smaller grains second: cardamom, methi, fennel, cumin, ajwain, coriander, pepper, cloves.

Once the ingredients release their fragrance, turn off the stove and remove the pan from the flame.

Allow to cool and blend in a spice grinder.

Store in an airtight glass jar. Use in curries of your choice for a well-rounded and deep flavour.

Over the years, I have shared numerous spice powder recipes, from to curry leaf podi to coconut podi and more. More will soon follow, so do stay connected!

Mango is, as cliché as it sounds, truly the king of fruits – in India at least, if not the world.

It’s amazing how many recipes each person, not just each community or state, but each individual, can come up with using mango. Whether raw, ripe, or dried, this core ingredient can be used in countless ways. I recently mentioned aam ki launji, a Marwari condiment that is neither a pickle nor a chutney but is almost both, and I am happy to share a recipe for this today.

I’ve mentioned in the past how we have a tradition of exchanging mangoes during the season. Between friends, they travel lovingly – from my farm to yours, or my backyard to yours. During these trades, I have been inspired by learning about varieties of the fruit that were unknown to me. For instance, a friend of ours has around 20 mango trees in his garden in Kerala. When we visited him recently, he brought out some fruits called “mallika”. He grows them organically, without the use of any chemical sprays.

The mallika is such a lovely mango. It is so flavourful, and simply beautiful to look at. Its peel is a deep orange colour, and its shape is long and striking. It’s such a big mango — one that demands to be shared.

He gave me one to take home – a raw fruit that ripened slowly, which I was able to enjoy alongside the memories of the trip itself. I really treasured eating that mango, and now that season draws to a close, I am certain that it was one of this year’s mango highlights for me. I hope you too have had a particular mango, or many mangoes, that you especially cherished this year.

Returning now to aam ki launji after that dreamy interlude with organic Kerala mallikas, this dish is dear to me because it was taught to me by a beloved aunt of mine. Her name was Pushpa Agarwal, and she also happened to be a neighbour a long time ago when my children were little. In many ways, she played the role of a mother-in-law to me, guiding me and supporting me. Every time that I had any issues with my kids, she would come running to help me, or I would go running to her. She taught me a lot about child care, but she also taught me certain recipes. For instance, she made the best pani puri ever – it even beat streetside chaat stalls!

Aam ki launji, of course, was one of my inheritances from her. Since our palate at home is largely Gujarati and Tamil, this Marwari dish makes an appearance only because of Pushpa Aunty. You will see from the method below that the spices are different from the kinds of recipes that typically appear on this blog, as it’s from a cuisine range that I haven’t worked with here before. That said, some form of this dish is made pan-India. I’ve come across similar condiments in Kerala and Tamil Nadu too, though it goes by other names of course. At its core, it’s a blend of mango and jaggery, but the spices used vary from place to place.

My husband loves foods that are both sweet and tangy, so this aam ki launji is naturally one of his favourites. This means we usually have a batch in the fridge. It keeps well for about two weeks, although it gets finished off much sooner at my house. It goes really well with theplas and other flatbreads.

As I said, I am sharing this at the close of the mango season, when sweet, ripe mangoes can be replaced with something like a pickle, a daily condiment – one that is made with raw mango. Something I notice is that my body also craves foods in a seasonal way. My hankering for mangoes is dissipating as the weather changes. The need to have a nice, fresh, juicy mango to rival the heat is gone. I have noticed this happen in other years too, and I believe that our bodies adapt and that it’s not just a case of repetitively consuming to the point of boredom. Personally, I don’t even attempt freezing mangoes for the winter because I know I won’t want them then.

So, at the tail end of May, a last taste: aam ki launji.

Aam Ki Launji
(Yield: 2 cups)

500 grams raw mango
2 tablespoons sesame oil
1 teaspoon mustard seeds
1 teaspoon cumin seeds
½ teaspoon nigella seeds
¼ teaspoon methi seeds (fenugreek)
¼ teaspoon asafoetida
150 grams jaggery
Salt to taste
¼ teaspoon turmeric powder
1 heaped teaspoon Kashmiri chilli powder
½ cup water

Wash, peel and cut the mangoes. Set aside.

Heat a kadai and add the oil. Now add the mustard seeds, cumin seeds, nigella seeds and methi. Once the seeds splutter, add the asafoetida.

Now, add the mangoes and sprinkle some water. Cover and allow to cook until mangoes are slightly tender. Open the lid and add salt and turmeric. Mix and then add the jaggery. Add water and chilli powder.

Stir and cover with lid until the water thickens. Your aam ki launji is now ready.

Enjoy it with flatbreads, rice or in any way you’d like to. As I said, it’s a special kind of condiment: not quite a pickle, not quite a chutney, not quite a gravy. It tastes just great, and accompanies many main courses beautifully. I do hope you’ll use your last chance to make the most of mangoes this season by preparing some aam ki launji to bring joy for a couple of weeks of the monsoon!

Aloo poori used to be a regular dish served in daily meals throughout India. That’s how I remember it. Increasingly, I notice that it has become more of an item enjoyed at celebrations. This is probably because people have become more health conscious, or at least that is what I believe based on what I observe. Poori is a kind of fried flatbread, usually puffed up and on the oily side. “Aloo” means “potato” in Hindi, indicating the curry it is eaten with. Together, they are delicious, and I understand both why people used to want to eat aloo poori frequently earlier, and why it plays a role in feasts today. Here, I share a masala aloo poori recipe.

As I said, aloo poori is really a pan-Indian dish. I am particularly familiar with two versions: Gujarati style and Tamil style. In Gujarati, the dish is known as “batata poori” (“batata” means “potato”), while here in Chennai I have encountered it in many restaurants under the name “poori potato”. There may be a Tamil name for it, of course. I have also enjoyed some more versions around the country. Every time I’ve been to Kolkata, I’ve ordered what they call “luchi aloo”, which happens to be a dish I really love. Marwaris often eat pooris with aam ki loonji, a mango condiment that’s neither a chutney nor a pickle, yet somehow both at once. It’s another interesting combination, and I’ll be sharing that recipe soon.

Regular poori, rather than spiced poori, is eaten everywhere, but I want to share a typically Gujarati version, which is masala poori. Traditionally, the poori and potato combination is eaten alongside a third party: a kheer. A kheer is a kind of milky dessert you may have encountered on this blog before. The savouriness of the masala poori contrasts well with the sweetness of the kheer. Potatoes always make people happy, of course. All together, masala poori with batata and kheer are just unbeatable.

I have shared many flatbreads from the Gujarat region earlier, most notably in this post [hyperlink] featuring a number of variants. They are usually made petite and two-bite sized. Pooris are also made small, but unlike some other flatbreads, like theplas [hyperlink], they are not travel-friendly. They are meant to be eaten fresh.

In fact, they aren’t even flatbreads, technically, since the whole proof of a well-made poori is that it fluffs up in the oil, rises and turns into a hollow ball. A flat poori is one that hasn’t been prepared well. A puffy poori is achieved when the dough has been made to the right consistency, neither tight nor soft. It needs to be pliable and well-massaged.

I learned the nuances of making a good poori from my mother. She showed me how they should puff up perfectly and always be served hot. Here, I’ve chosen to keep the potatoes very simple, since the pooris themselves are spiced and the kheer brings in its own rich range of flavours to complete the meal.

I also associate potatoes with my brother, and have many childhood memories of him preparing batata nu shaak or batata poori for us.

He genuinely enjoyed being in the kitchen. Although he was very macho, and was an athlete too – a rowing champion, in fact – he showed us early on that there’s no shame in a man cooking or doing household work. He loved to make the potatoes while our mother handled the pooris, and my sister and I would sit happily at the table, waiting to be served.

When I think about this now, it occurs to me how cooking together – even watching loved ones cooking, everyone being in the kitchen together – was a kind of bonding activity for us. We often talk about the importance of eating meals together as a family – but why not extend that to preparing them together, too? Such little things are the stuff of quality time in the moment, and such precious memories down the line…

Masala Poori With Aloo
(Serves: 3-4)

Masala Poori

1 ½ cups whole wheat flour
1 heaped tablespoon chickpea flour
13 teaspoon turmeric powder
1 teaspoon dhaniya (coriander) powder
Salt to taste
¼ teaspoon kasoori methi (fenugreek leaves) powder
1 pinch asafoetida
1 tablespoon curd
1 tablespoon oil
1 teaspoon ginger-green chili paste
13 cup water

Take the flours in a bowl. To these, add all the spices, along with the curd and the oil. Mix well using your fingertips and slowly add water as required to make a medium-soft dough.

Massage the dough well so it becomes smooth. You can use the help of a little oil on your palms to achieve a good dough.

Cover and set aside.

Heat the oil for frying. Make small rounds and start by rolling each one out.

Once the oil is hot enough, drop a rolled-out dough piece into the hot oil gently. Soon, it will fluff. Flip it over so it is cooked well on both sides. Repeat for all the dough circles.

Your masala pooris are now ready to be served hot.

Potato

350 grams potato
Salt to taste
2 tablespoons oil
1 teaspoon mustard seeds
½ teaspoon cumin seeds
¼ teaspoon turmeric powder
1 teaspoon cumin or coriander powder
½ teaspoon ginger paste
½ teaspoon green chilli paste

Wash, peel and cut the potatoes into small pieces.

Heat a kadai and add oil. Once the oil is hot, add the mustard seeds and cumin seeds. After they begin to splutter, add the potatoes. Stir and add salt and turmeric. Mix again, then cover with a lid. Allow to cook on a low flame, stirring occasionally until the potatoes are tender and cooked.

Now add the remaining spices and mix well. Cover and allow to cook once again for a few minutes until all the flavours come together well.

Garnish with coriander leaves and serve hot with pooris.

Don’t forget that you may want to enhance your meal even more with some kheer. I have shared several kheer recipes on this blog. Feel free to prepare one of your choice and serve it along with this masala poori with aloo!

I shared one version of muthiya in my recipe for turiya muthiya shaak recently. In that dish, the muthiyas were small, deep-fried dumplings which contained fenugreek leaves, and which were soaked in the vegetable gravy. I mentioned in that post that larger deep-fried muthiyas are often enjoyed with snacks. There are even more kinds of muthiya out there too. There is one with grated bottle gourd, another version with fenugreek leaves, and even ones that utilise leftover khichdi or leftover rice – these are bound with flour, greens and spices, rolled and steamed and had as a wholesome, single-dish meal. I am sure more of these muthiyas will be explored on this blog in the time to come. Today, I want to share a steamed variant.

While steamed muthiya can certainly work well as a snack, I would recommend that these be had for high tea or even as a meal, as they are heavier than the smaller, deep-fried kind. Steamed muthiyas happen to be the hot favourite at home right now. I find myself preparing them at least once a week, usually for dinner. While many of us in India have the privilege of employing cooks in our home kitchens, in mine, there are certain recipes that only I will prepare even though I have help. Although my cooks over the years have been skilled and pick up my techniques, I get more satisfaction from making some meals from scratch. This is the case with many traditional Gujarati recipes. Somehow, not only do I enjoy the process, but the process itself evokes childhood memories and nostalgia, and a sense of connection to my late mother. I like to make such dishes as close to authentically as I was taught. Any kind of muthiya belongs to that treasured category.

Looking back, it’s obvious to me that our mother had really spoiled us all when we were growing up. Food was served to us fresh off the griddle, and always prepared with such attentiveness and care. Regardless of whether we enjoyed a dish or demanded another, she just didn’t cut corners when it comes to cooking. Steamed muthiya was something that my siblings and I didn’t like at all, and I remember that we often asked for pasta instead (funnily enough, we were not fond of pizza, but we did love a baked casserole with white sauce that our mom sometimes made). To us, what was exotic was most appealing. While my culinary curiosity and search for novelty remains, I have since learned to appreciate the traditional and the simple too.

While we kids didn’t like steamed muthiya, it was one of our father’s favourite dishes. As soon as the dumplings came out of the steamer, he would cut one up and dip it in methi masala, a traditional Gujarati condiment which contains chilli powder ground with fenugreek leaves. I have clear memories of how much he relished the freshly steamed muthiya. Another, possibly more popular method, is to take it off the steamer, slice it and sauté it in oil with mustard and sesame seeds. These steamed, sliced, sautéed muthiya are then eaten with green chutney. The healthier version, of course, is to have them as my dad did back in those days.

As we age, our tastes not only change, but so does the way that we perceive food. When I look back, it’s true that even our snack options were relatively healthy when I was growing up, because most items were homemade. Now that junk food is vastly available, I am glad to not be attracted to it, perhaps because of habits inculcated in childhood. I also consciously reach out for more nourishing options, not just in terms of snacks but even for our daily meals, our beverages and so on. I am happy to circle back to my mother’s ways.

This particular steamed muthiya recipe is hers. Other versions, equally authentic and traditional, will be different. This is true for any dish, as I’ve said before. It will be prepared differently in every family, community or region. For example, I have come across steamed muthiyas which contain chickpea flour. It’s not something my mother added, so I skip it just like she did, but you can incorporate some if you wish.

Steamed muthiya really is very simple to make. Prepare the dough, which is enriched with various spices (and in this case, fenugreek, which grows abundantly in Tamil Nadu in the summer, and is a staple of Gujarati cooking). Roll out the pieces, steam them, and eat them as soon as they’ve cooled enough. Or else, sauté them for added flavour. You’ll see what I mean below.

I have provided both the steamed and sautéed versions in the method. What I have observed is that when I have friends over for lunch, they seem to enjoy the steamed versions more (not just this kind, but those which use veggies or khichdi too). While the muthiyas are very filling, the fact that they are steamed makes them feel lighter. I notice that my guests reach out for more helpings. I am sure that the knowledge that they are healthier than fried goodies is reassuring. Despite being better dietarily-speaking, they are delicious.

I wonder which version you’ll enjoy more. Why not try both?

Steamed Muthiya
(Serves 2-3)

1⅓cup whole wheat flour
⅓ cup rava
1 full cup methi/fenugreek leaves (finely chopped)
2 tablespoons oil
Salt to taste
¼ teaspoon turmeric powder
¼ teaspoon asafoetida
1 teaspoon dhaniya/coriander powder
2 teaspoons sugar
1 teaspoon ginger (grated)
1 green chili (finely chopped)
Juice of ½ lime
2-4 tablespoons water

Sautéed style
2 tablespoons oil
½ teaspoon mustard seeds
½ teaspoon sesame seeds

Chop the methi leaves finely. Rinse in water thoroughly.

Add the methi leaves to a bowl. Add oil, salt, turmeric, asafoetida, dhaniya, ginger, green chili, sugar and lime juice and massage well.

Now, add the flour and rava. If required, use 2 tablespoons of water to help mix into a soft pliable dough or batter.

Make long strips of the dough and place in the steamer. Steam for 20 minutes.

Once done, remove the muthiyas and allow to cool. Then, slice them into discs. You can serve them now, accompanied by condiments of your choice, or you can prepare the sautéed version if you prefer.

To sauté, heat a pan and add 2 tablespoons of oil. Add mustard and sesame seeds. Once the seeds splutter, add the sliced muthiya. Stir often and allow to turn golden on both sides. Serve hot with a chutney of your choice.

I have shared numerous traditional Gujarati dishes on this blog over the years, and you’ll find a wide selection from appetizers to desserts in my archives. I hope you’ll enjoy exploring them!

Indian sweets aside, my experiences of desserts while growing up consist largely of two particular treats: one was ice cream, and the other was fruit salad. While my mother did also bake cakes, and as mentioned in various posts, crafted a wide array of Gujarati and pan-Indian delights, there was something about either ice cream or fruit salad that was just unbeatable in my eyes. With the heat now in full swing, and having become too sugar-conscious to eat ice creams the way I did as a kid, I decided to put together a lovely Indian-style summer fruit salad to make the most of the season!

I do want to take a moment to recall the ice creams of my childhood fondly, though. Back then, our family would visit a long-gone parlour called Joy Ice Creams, which sold ice creams both on sticks and in cups. This would be a rare indulgence, and we would really look forward to those outings. However, I must confess I also enjoyed eating ice creams every day – every school day, that is. There was an ice cream seller at my school, and my friends and I would literally buy his products on a daily basis. Well, I use the word “buy” a little loosely. The truth is that we would beg him to let us have some ice cream even if we didn’t have cash on us, and would wind up accumulating bills at the end of each month, not all of which got cleared. Many years later, some of our classmates happened to meet the gentleman and reimbursed him for his kindness to us back then!

My favourite at that time was pistachio ice cream, and somehow this flavour has never tasted quite as good when I have had it anywhere else since. Some things just can’t be replicated, I guess. I am grateful that many of my late mother’s recipes can indeed not just be prepared now because she shared them with me – but also that those dishes can be enjoyed just as much, if not more, that I did back then because the recipes are accurate. She ensured I would be able to recreate the taste of her cooking as precisely as possible. This fruit salad happens to be one of them, and I am so glad that I still have it in my life.

My mother prepared fruit salad once a week during the summer, using basic fruits like apples, bananas and chikoos. Sometimes she would add tinned peaches as a treat. She would avoid tangy ones in case they soured the milk in the dish.  Now, of course, our access to fruit varieties is so much greater, and we can make our fruit salads in much more exotic ways, perhaps prioritising seasonality or a certain colour. You can see from my photographs what I have chosen, but you should select your fruits according to your preferences and the availability of the same.

Essentially, there were four ingredients in mom’s fruit salad: sugar, milk, fruit and custard powder. Custard powder was very easily available back then, and it continues to be today. I believe it was introduced to India by the British and was basically a flavourful type of corn flour that could be used as a thickening agent in desserts including puddings and of course this fruit salad. While Continental in concept, this is quite Indian in terms of popularity, as far as I know. She also occasionally made a custard and jelly combination.

Once a week, we would have lighter dinners so we could eat more of this treat. Mom knew we loved it, so she always made a large quantity so that there would be leftovers. It often tasted even better the next day. My siblings and I would be given measured cups so we wouldn’t fight over portions. Even so, there was such a sense of joy in what we all shared, limited or not. There was great satisfaction in just having one cup each. This effortlessly lovely dish was a part of so many of our evenings. It was made as a small, regular treat, but it was also served to guests, when one of us got good marks in school and so on. In this way, it was a big part of our childhoods.

I used to prepare it for my children when they were younger too, and they enjoyed it then. Now, their exposure to food is so vast that I am not sure a humble fruit salad has as special a place in their hearts as it does in mine. Nowadays, there seems to be an abundance of everything. When you can tap a few buttons on your phone and have amazing gourmet ice cream arrive at your doorstep, the idea of wearing your best dresses and going out to a parlour for a special occasion becomes a relic of the past. So too with many basic, homemade dishes. Still, some days call for very simple delights. On those days, nothing beats this Indian-style summer fruit salad.

Indian-Style Summer Fruit Salad
(Serves 4)

2 tablespoons custard powder
½ litre milk
3-4 teaspoons sugar
2-3 cups cut fruit of your choice
2 dates

Peel and cut all the fruits and the dates. Keep in a bowl. Cover and refrigerate.

Remove ¼ of the milk and keep it aside. Boil the rest.

Meanwhile, add custard powder to the cup of room temperature milk that was kept aside. Mix well until there are no lumps and gently add the mixture to the boiling milk. Keep stirring constantly on a low to medium flame, making sure it doesn’t stick to the bottom. Be careful here as the milk may get burnt. It will release a distinct smell if it does, and we don’t want this.

As the milk is thickening, add the sugar and stir.

Turn off the flame and after giving it a last stir, cover the mixture well. Allow to cool to room temperature. Then refrigerate until cold.

Once cold, add the cut fruits and dates to the prepared custard milk and mix. Refrigerate again and serve cold. Garnish with nuts of your choice, if you’d like to.

The season really does call for more fruit consumption, and offers some great harvests too, so I encourage you to explore more fruity recipes in my blog archives!