Tag

desserts

Browsing

When I began to imagine this post, it was with the idea that there was not much of a memory storyline behind the recipe I am sharing today. All that had come to mind when a friend gifted me a basket of plums, and I wondered what I could make with them, was that I would pluck the tiny, country variety from trees in Ooty during our summertime holidays when I was growing up… And then, before I knew it, an abundance of recollections came flooding back – of reaching with my own hands for something to eat, raw and delicious and freshly-plucked. Before I get carried away with those reminiscences, let me just say that the recent occasion of Thanksgiving, which is important to my American friends and family, as well as the upcoming Christmas season also gave me inspiration. The plum relish that is traditionally enjoyed during those festivities has been Indianised in my home as plum chutney, and that’s the recipe that this trip down memory lane will culminate in.

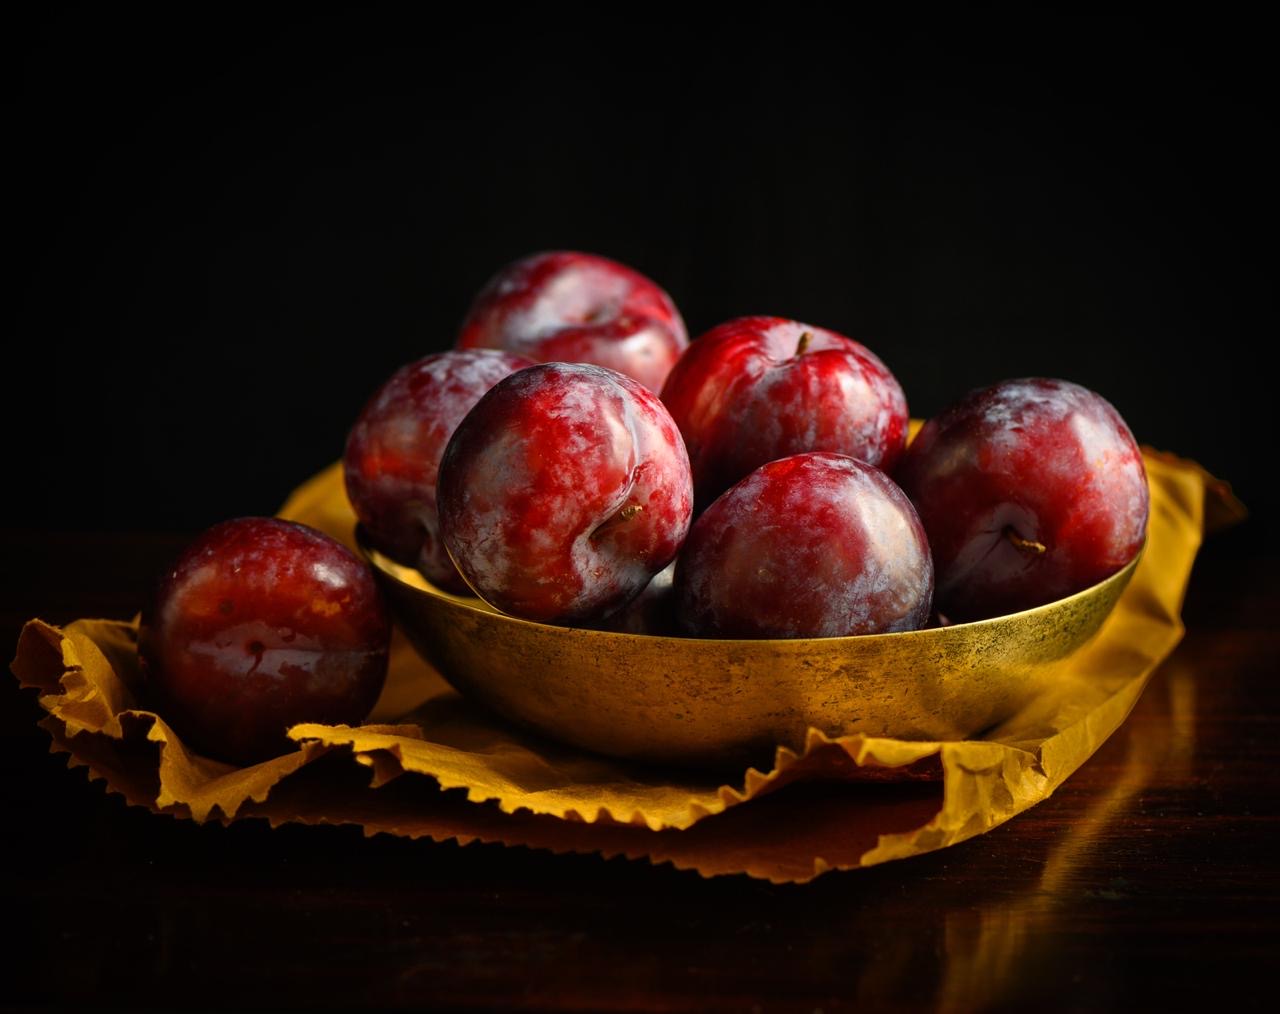
The gift basket I received contained what I call “the millennial plum”, a delicious hybrid cultivar which is large and has a deep maroon colour. It usually tastes sweet. The country plums of my childhood, by contrast, were sour and tangy. They came in an orangeish shade and were relatively tiny. Still, as little children, my siblings, cousins, friends and I absolutely delighted in them. There was just a certain immense joy in picking fruits right off a branch and eating them unwashed. There was a rawness to the experience that brought us closer to Nature. Even the sourest fruit was enjoyed in this way.

Fruit-picking was always a thrilling activity for us, both with and without permission. When we had the chance to go abroad for holidays with our aunt, she would give us baskets of our own and take us to strawberry farms, where we would spend the day indulging this hobby of ours to the fullest. We would cherish and guard those baskets full of fresh, ripe fruit. Every last berry was special, plucked with our own hands, and tasted all the more delicious for this reason.

Back home, far from the hills of Tamil Nadu or the strawberry farms of Europe, we still pursued our fruit-gathering in earnest. We would run loose in our neighbourhood and steal mangoes from the trees, as I think I’ve mentioned a number of times on this blog before. It was certainly one of our favourite past-times, even if scoldings were a natural consequence!

The fruit-bearing local naatu cherry tree and the nellika or gooseberry tree were two that I grew up under, and to this day the sight of either of these can make me feel a bit emotional. The gooseberry tree in our garden was laden with kambilipoochis (hairy caterpillars), which would invariably leave a hair or two on me when I reached up to grab those fruits, and I would have to go crying to my mother to get her to remove those caterpillar hairs! Those naatu (country) cherries weren’t the beautiful, glossy-looking ones that top my cakes today, but a small, orange-coloured variety with a tiny, grain-like seed inside. There was also a black-coloured berry, sour and with a high Vitamin C content, with a name that slips my mind. These local, edible fruits were so plentiful in Chennai in those days, available to anyone who knew how to climb a tree.

I’ve spoken before of how much I long to revive different varieties of plants and flowers in our little farmland. I really believe that some of our green wealth is disappearing, and it hurts to find proof of it, as I did when I went looking for wood-apple recently. I dream of planting the trees of some of the fruits I plucked and ate in childhood. I’ve started the process by asking everyone I know for cuttings. Would you have some – of any kind of fruit, flower or plant that seems to be scarce in and around Chennai these days, but which you remember from before? I only specify Chennai because the cutting needs to be suitable to our climate.

The more time I spent reminiscing, the more I remembered: not only did we love eating freshly plucked (and sometimes stolen) fruit, but we even foraged for plants and flowers! The three leaf clover that grows like a weed was one of these. We’d just pop one into our mouths and enjoy its sour, earthy taste. There were also certain flowers, like the gorgeous orange trumpet flower, which we would suck the nectar out of after removing the stem. Did you do any of these activities growing up, when it seemed like we played in the outdoors so much more than the children of today do?

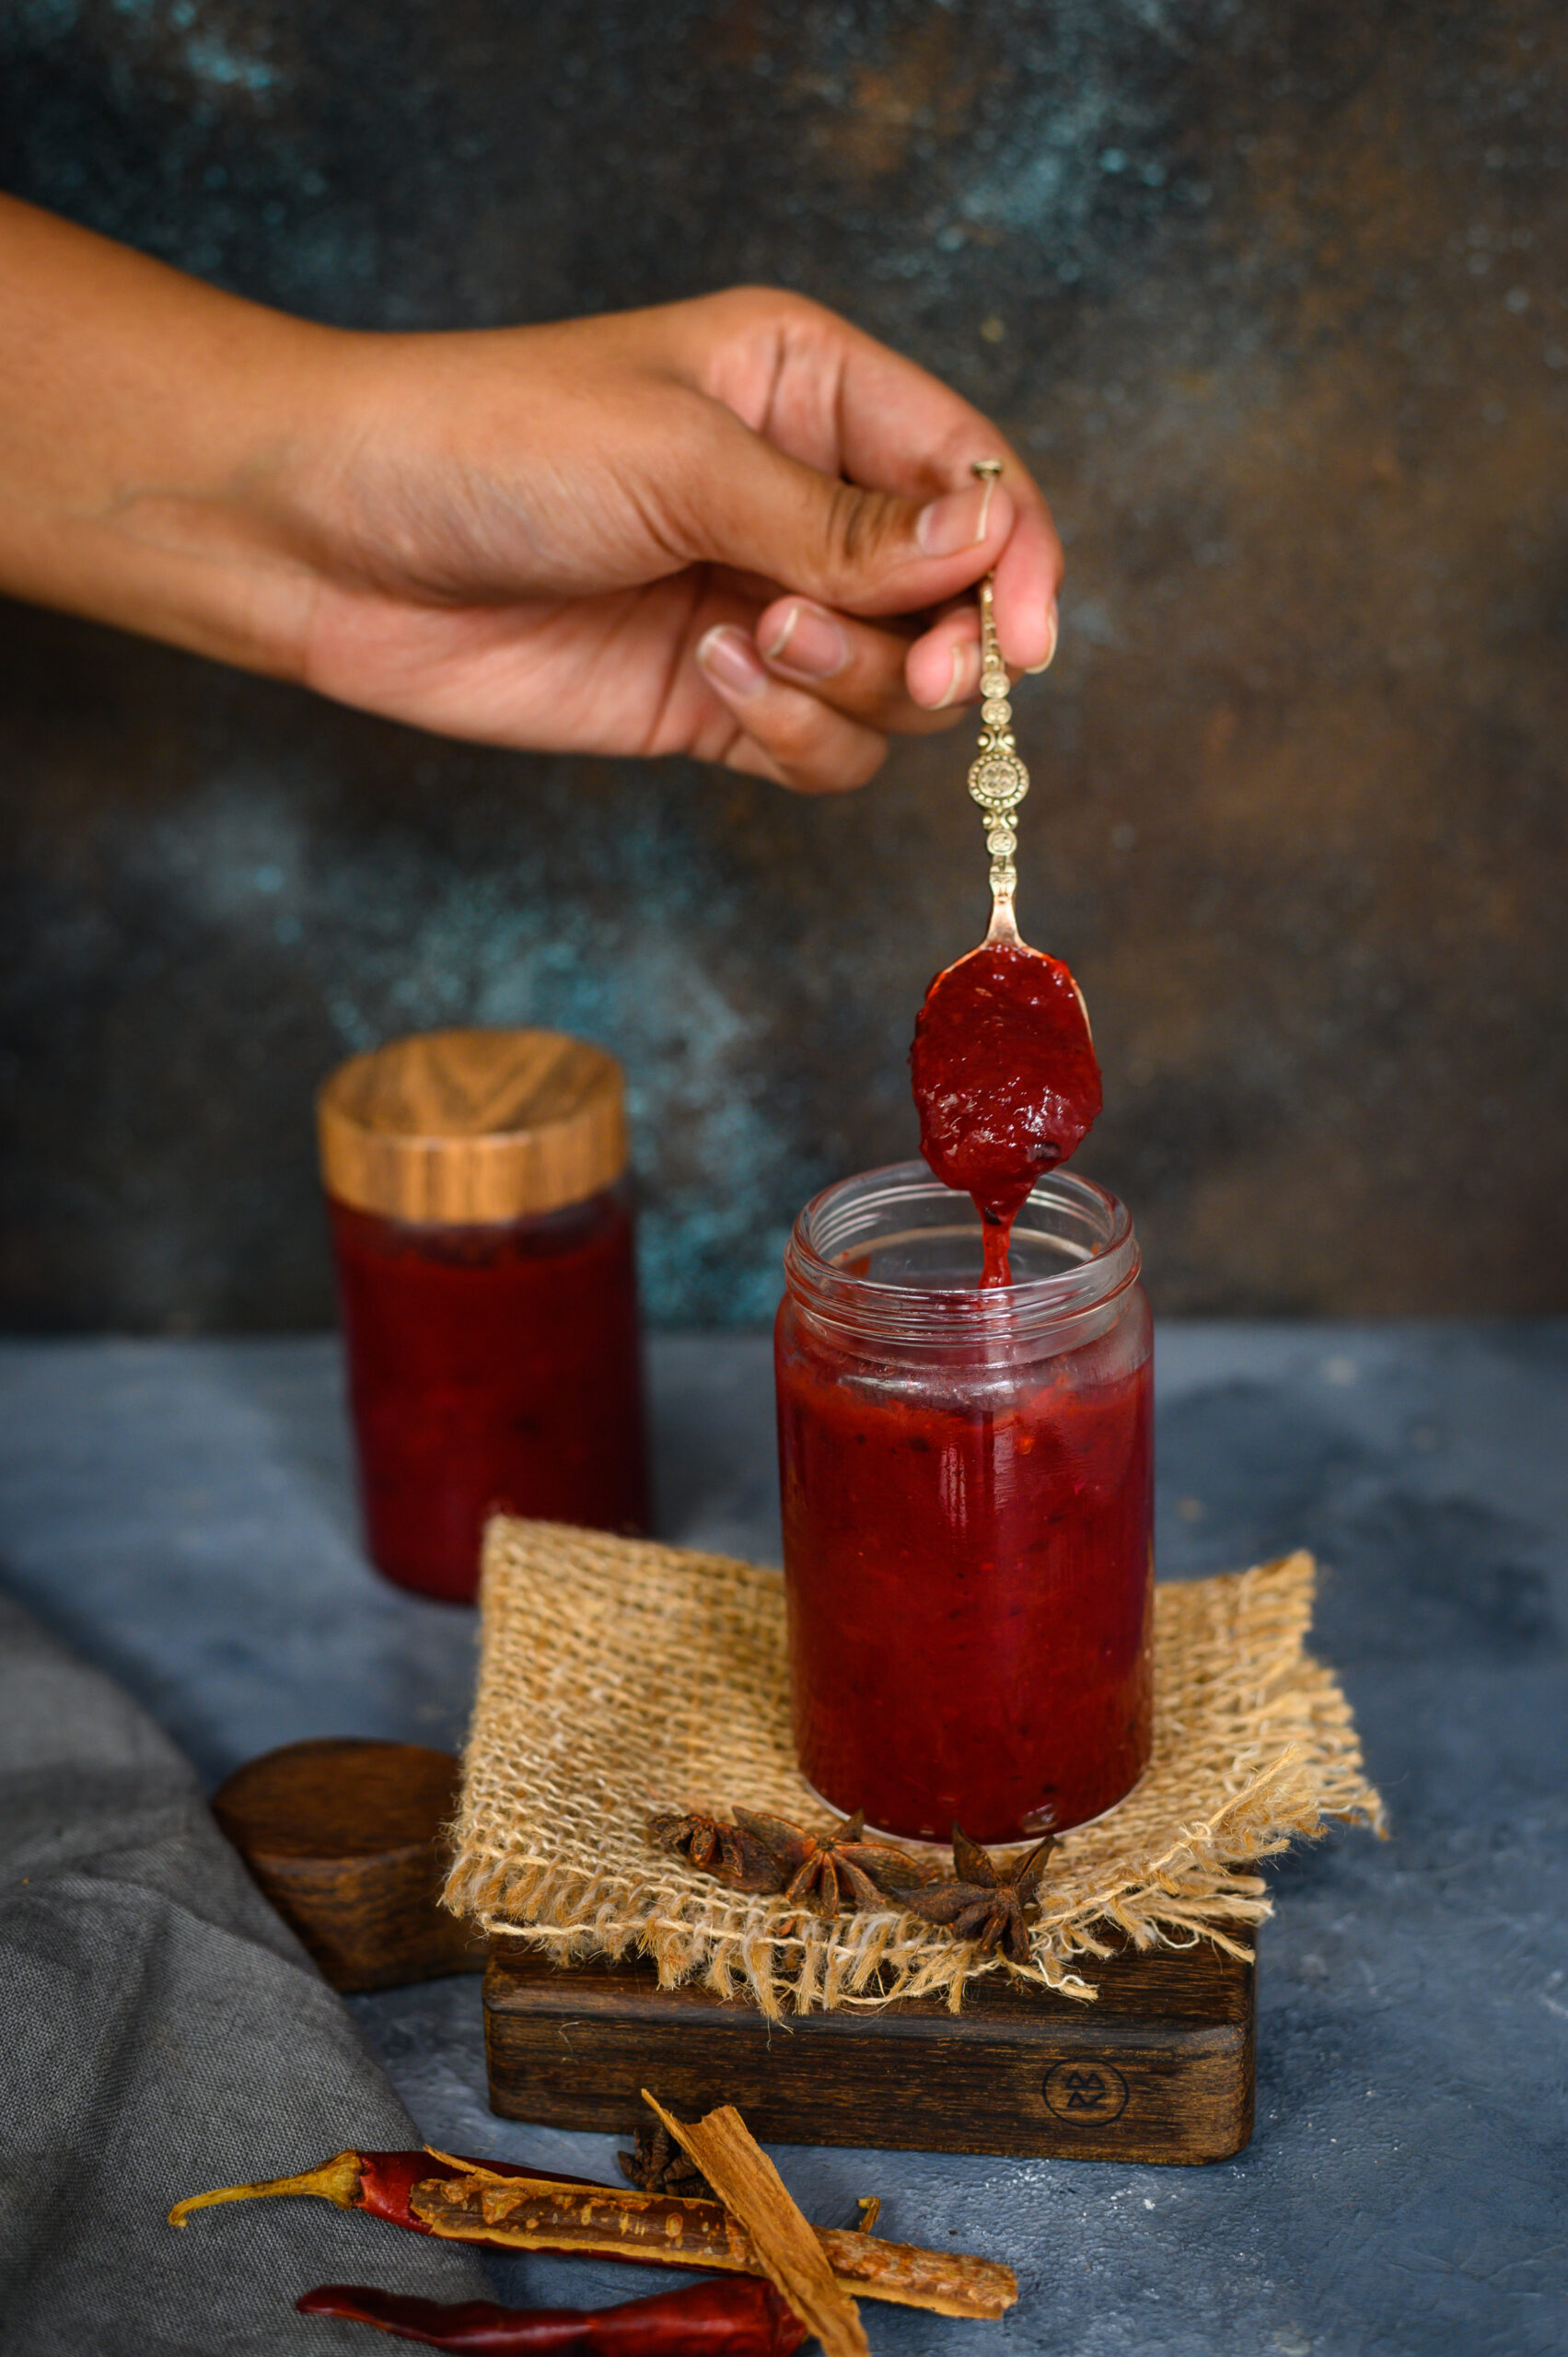
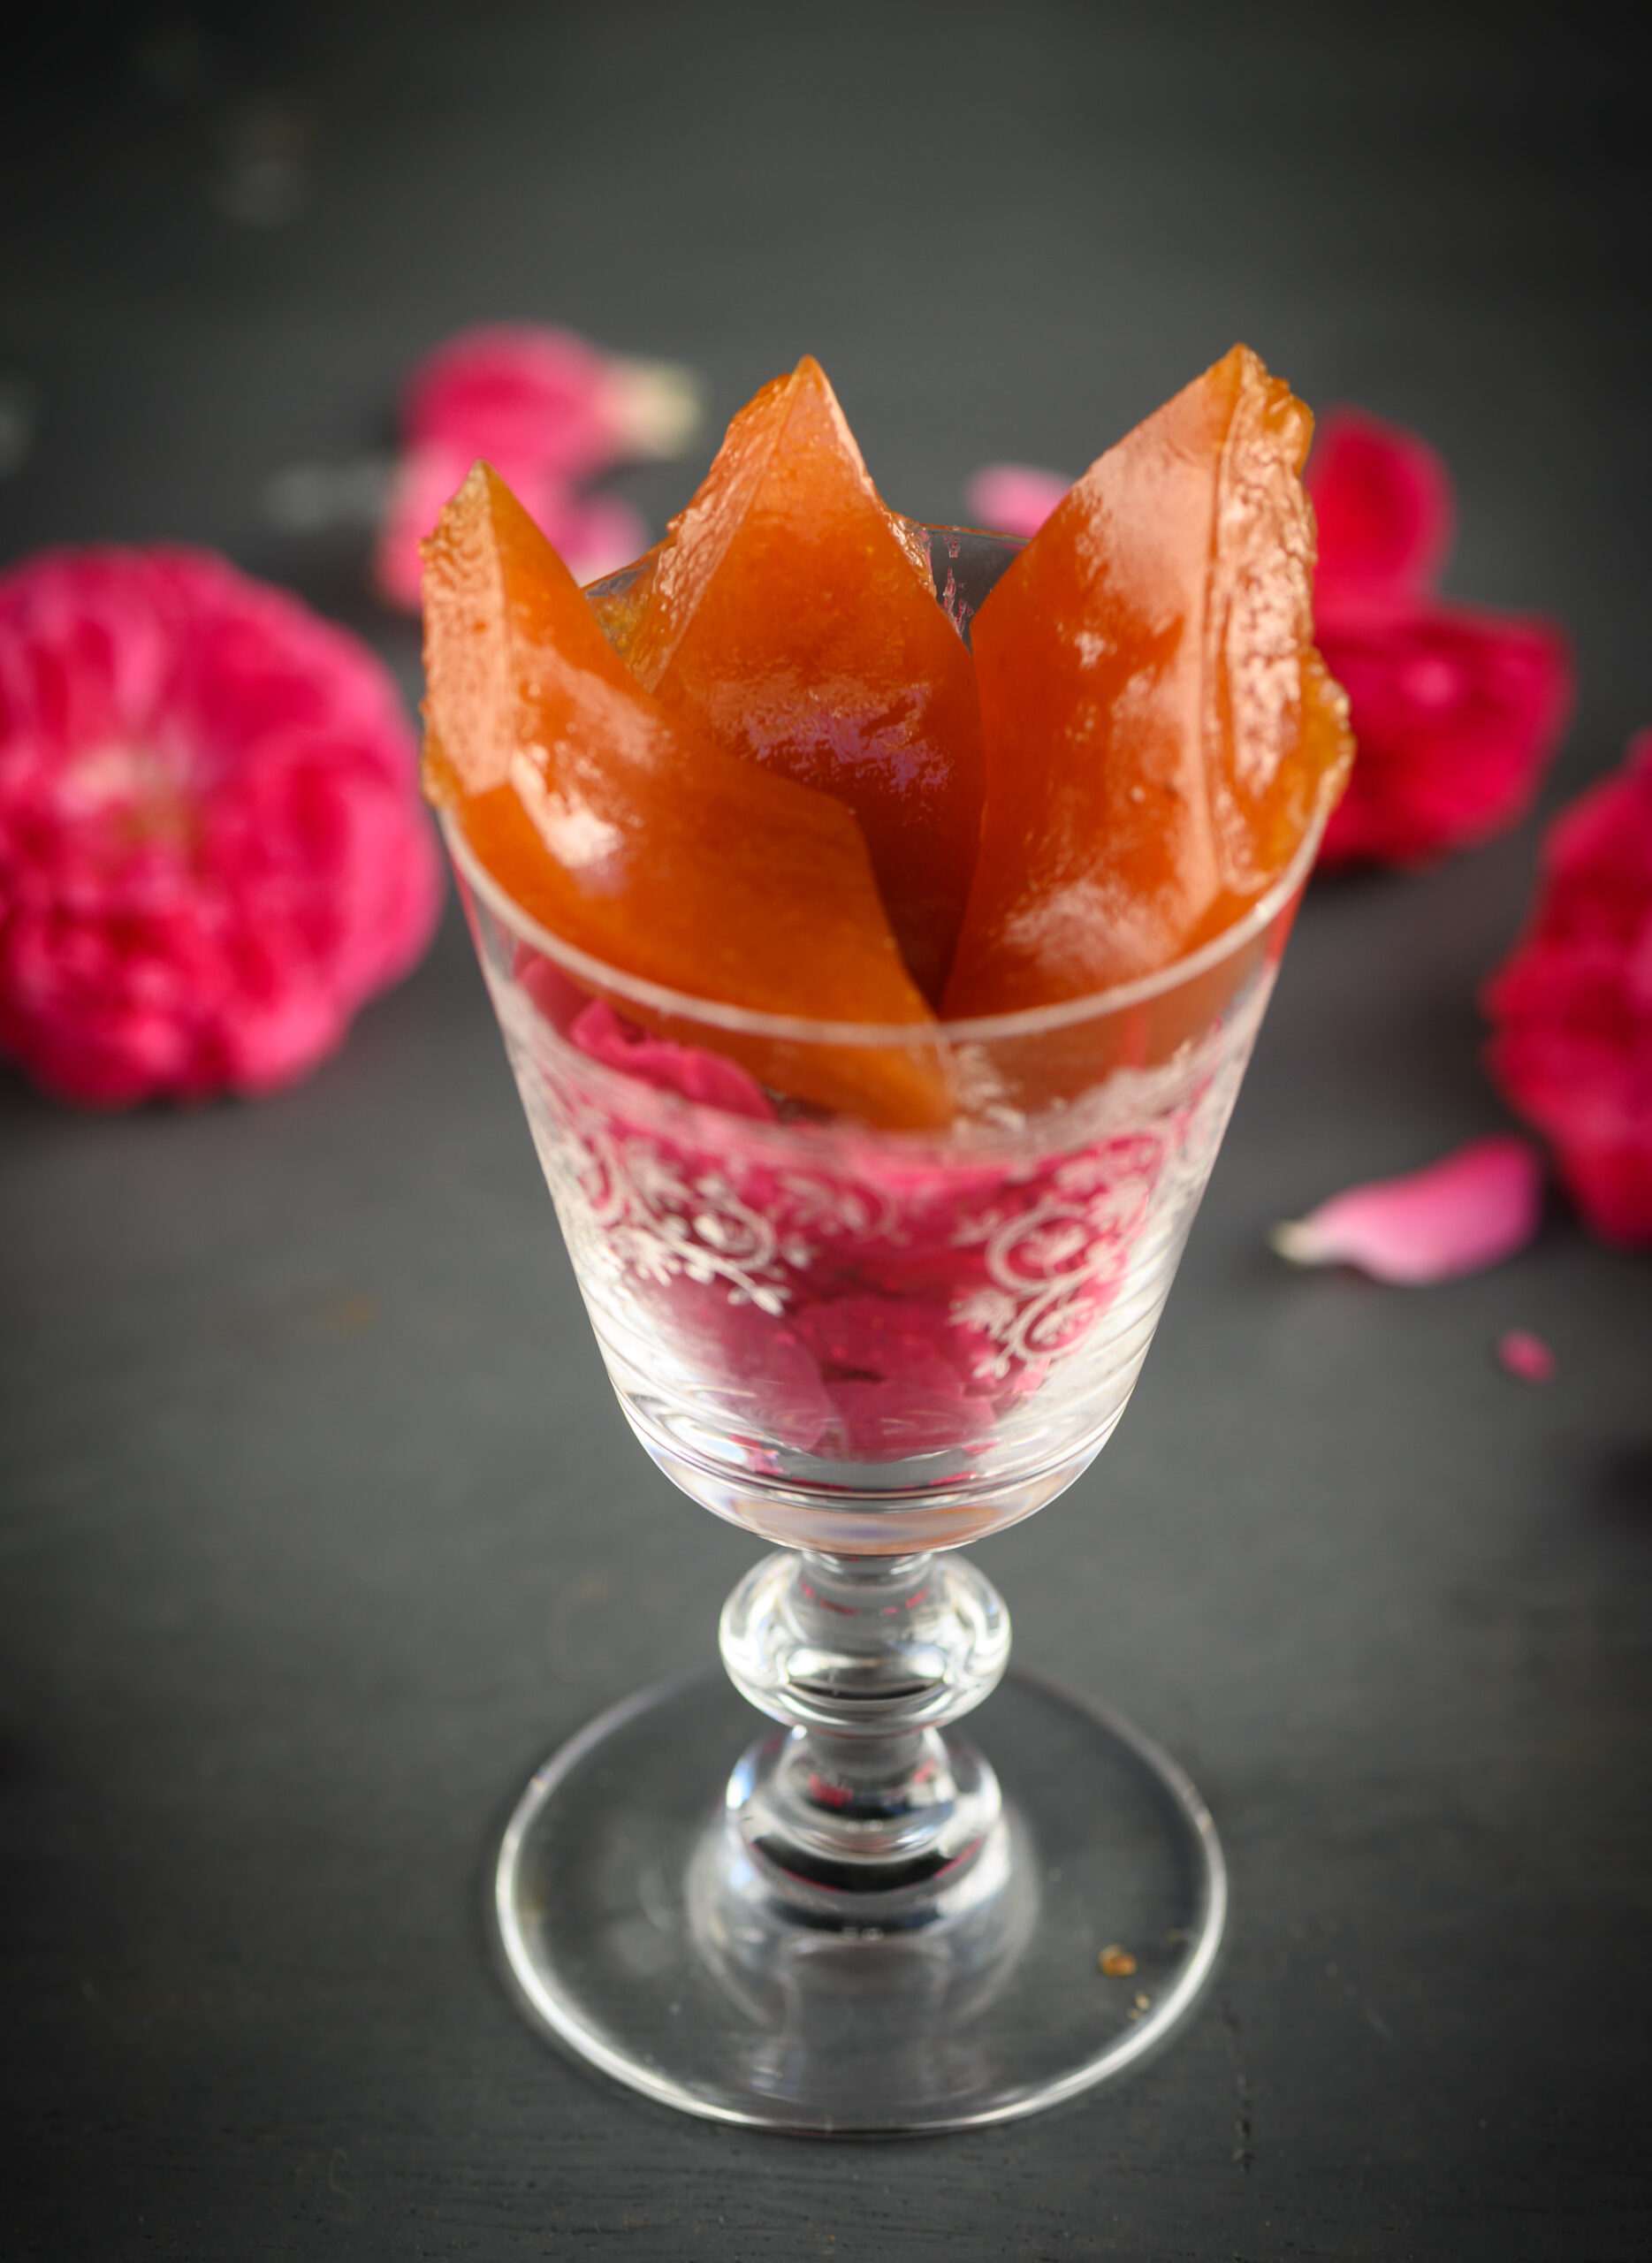
Let me bring this little trip down memory lane, lined with fruit-bearing trees, full circle by coming back to the gift of plums. In India, you can make a chutney with pretty much anything, and I was curious to try out this fruity one. My husband is a big fan of chutneys, and will even have some on the side with a pasta, so I know for a fact that this plum chutney is very versatile. You can also roll it up in a chapatti for a tiffin box, or spread it on toast. It has a sweet, spicy flavour that lends itself as an accompaniment to many dishes.


Plum Chutney

(Yield: 350 grams)

500 grams plums

150 grams sugar

1 small onion

⅛ teaspoon ginger powder

1 star anise

Salt to taste

2 teaspoons dry chili flakes

2 tablespoons apple cider vinegar

Lemon zest


Plums are a succulent fruit with a vast number of health benefits, from improving cardiovascular health to reducing the risk of osteoporosis to promoting skin health. They are packed with Vitamin C and Vitamin A, as well as antioxidants and minerals. They have been grown since ancient times, and the hybrid types we get today thrive in various places in India – which means we are fortunate that the market is abundantly flooded with them too.

This plum chutney is very simple to prepare, but requires one step of overnight prep. Chop the plums and discard the seeds. Add sugar to the fruit pieces, and cover with a lid. Allow to soak and refrigerate overnight, as this will reduce the cooking time.

The following day, add all the remaining ingredients to the sugar-soaked fruit. Boil on a medium flame. I lightly blended the mixture with a hand blender to break down and bring the flavours together.

Allow to simmer until the chutney thickens. Then, allow to cool.

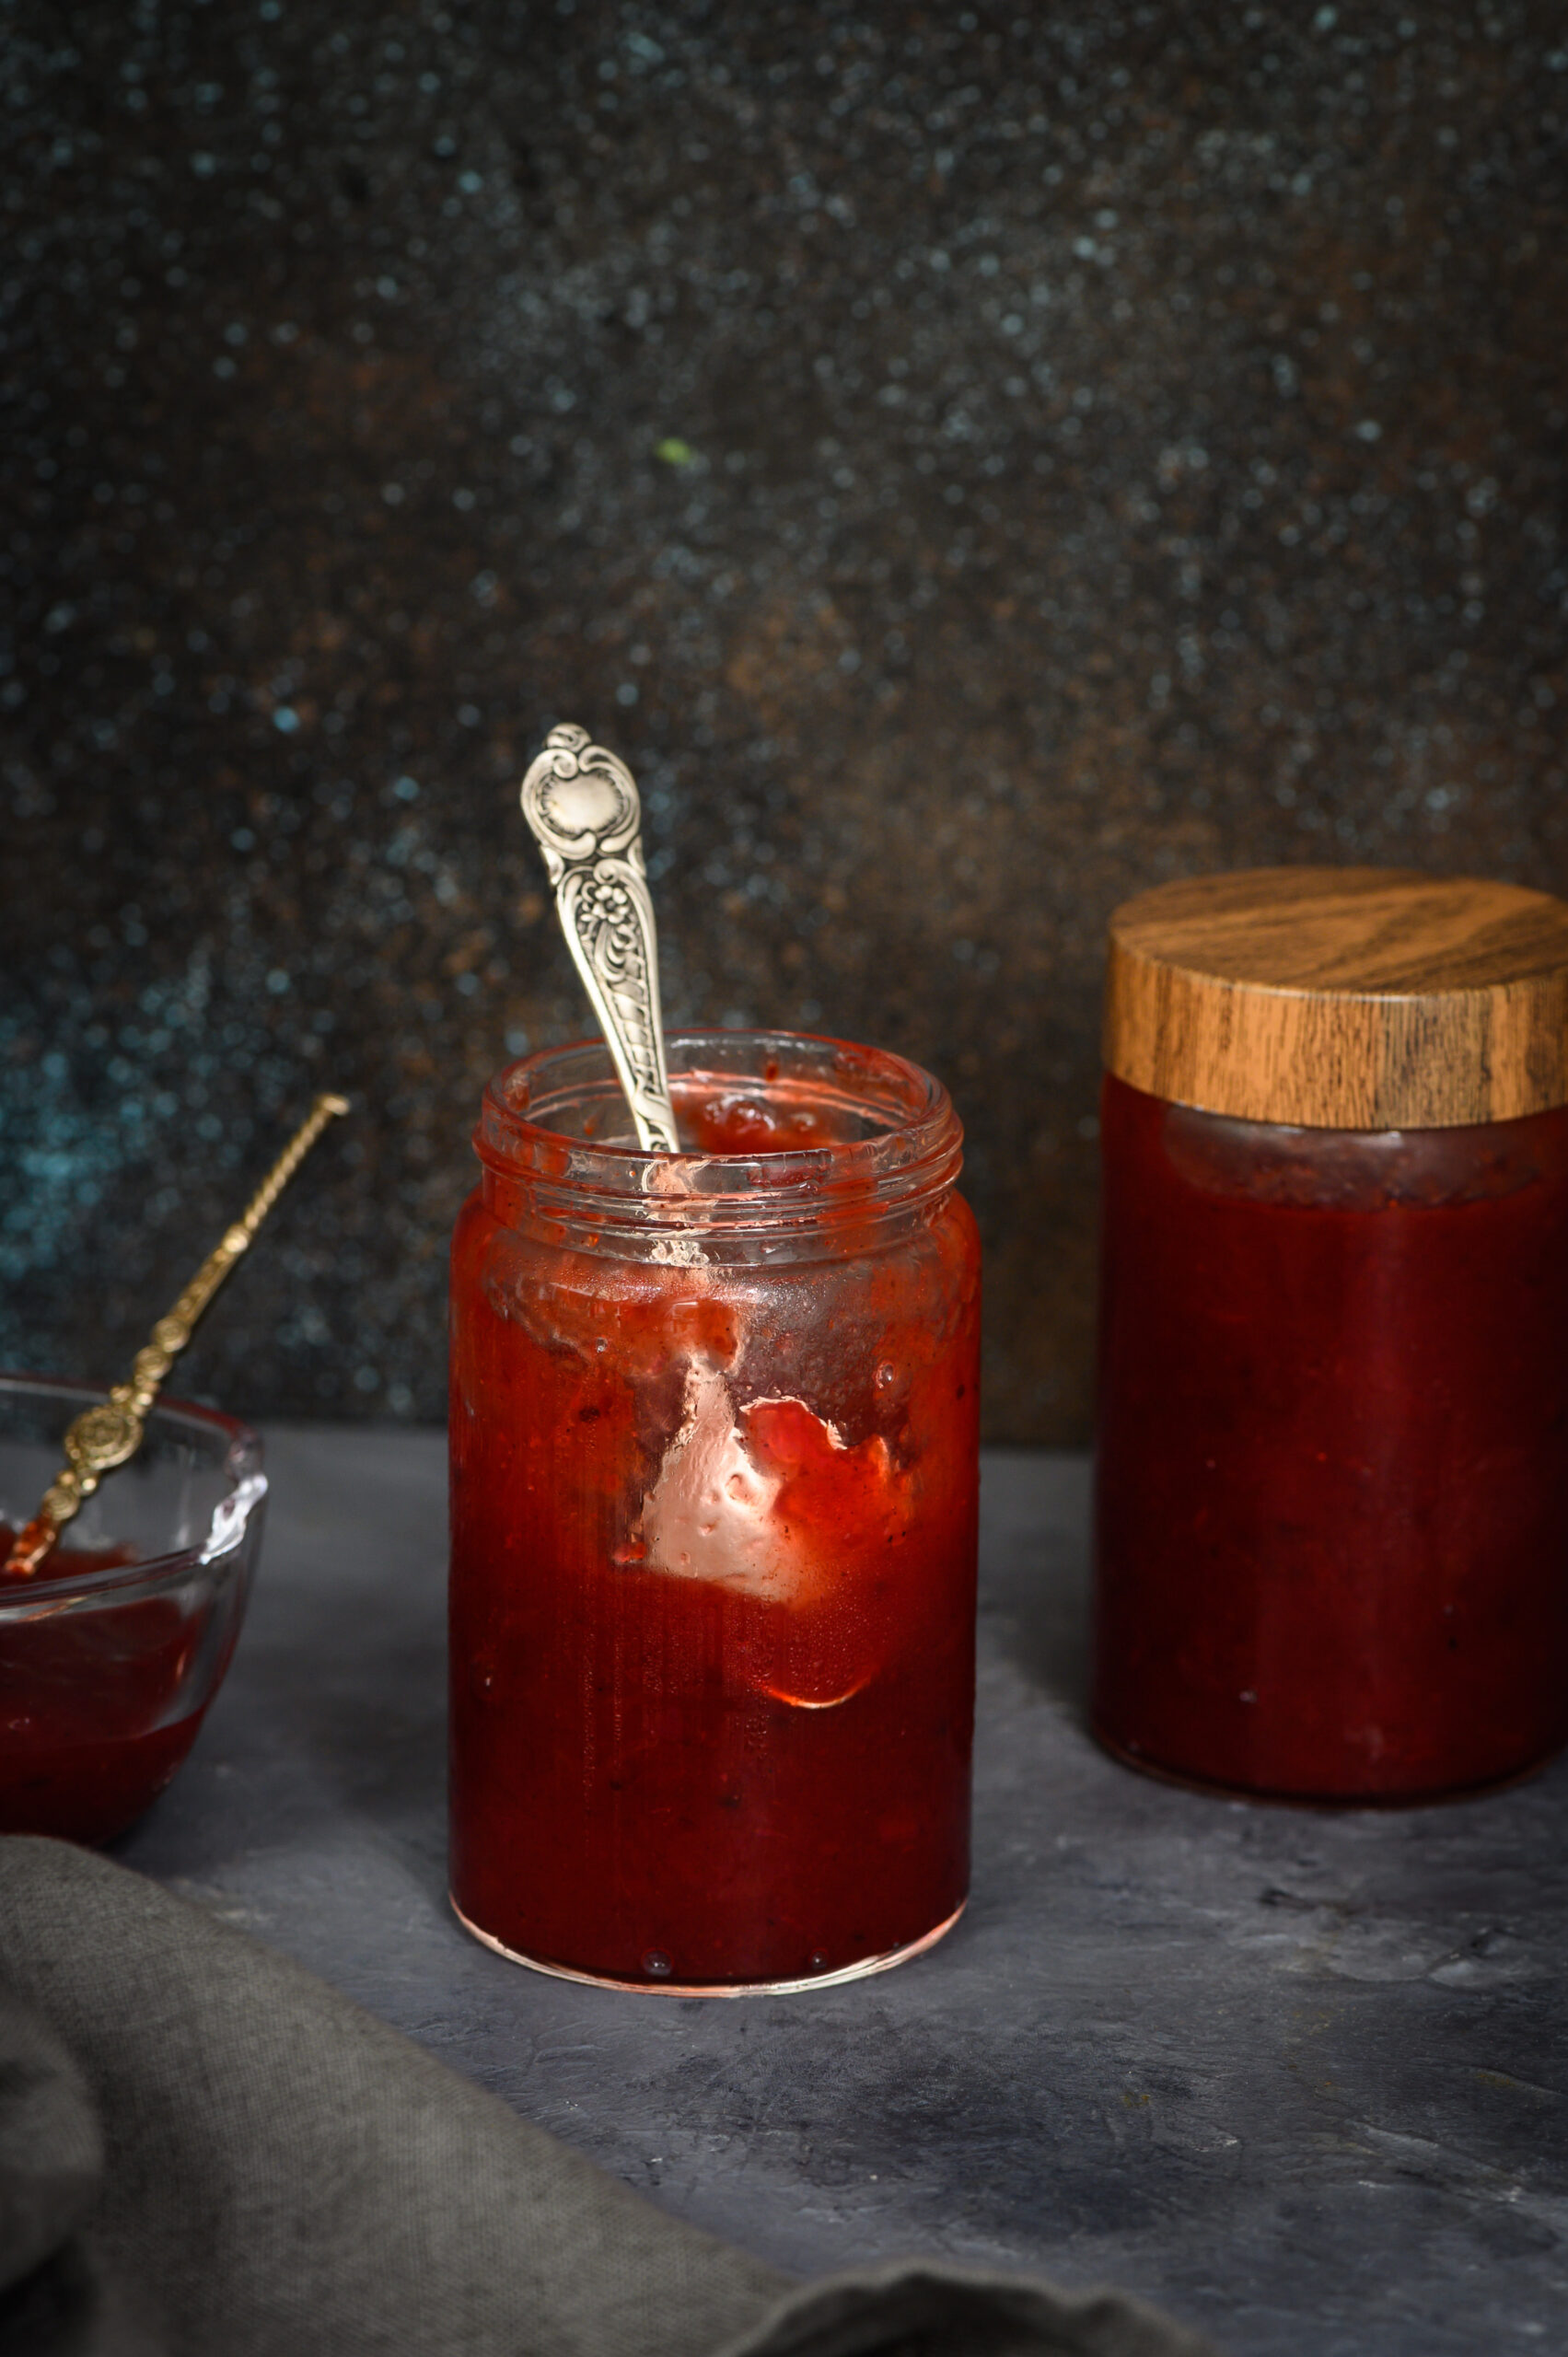
With a clean spoon, transfer the plum chutney into a clean jar and refrigerate. As long as dry spoons are used and the container is refrigerated, a batch can be kept for up to a couple of weeks.

You may serve it with cheese as they do in the West, or with chapatti as I do at home, but either way, I hope a jar of it finds a place at your table this Christmas – and I hope you’ll simply relish it!

This Diwali, in so many homes across India (and in Indian homes across the world), sweets are going to be the star of the celebrations. Among several I am preparing is the sweet boondi, which I only learned how to make recently. Much to my surprise, it was an almost effortless process. Originating from Rajasthani cuisine and also popular in Bengal, boondi is essentially fried balls of chickpea batter, submerged in sugar syrup. It is certainly an indulgence, but that’s what festive seasons are for, aren’t they?

My sister has become my culinary teacher of late, and I was staying with her for a few weeks while having my sciatica treated. You may have noticed that I had been lying low on Instagram for awhile, and that was the reason why. I believe that illnesses have a mind-body connect, and my body forced me to destress through this one. The best advice that anyone gave me was that I needed to enjoy my downtime. I spent my recuperation reading, catching up with films, taking it easy, doing mild exercises which were a far cry from my frantic and intensive gym regimen, and just breathing. We have to remind ourselves to slow down and savour the moment. For those of you watching your diet over the holidays, you know exactly how it feels to let yourself enjoy just one sweet. That’s the kind of slowing down and savouring that I am talking about.

Staying with my sister gave me a chance to watch her working in her kitchen daily, and to pick up so many techniques and recipes from her. Among them was this sweet boondi. Like many people, I had consumed it innumerable times without ever attempting to make it myself.

Boondi is made in different sizes. The tiny one is called “motichoor”, for “moti”, meaning pearl. This recipe can be considered medium-sized. I recall enjoying the large, laddoo version of this sweet as a child (“motichoor laddoo”, in which many small balls are rolled together to make one big one). Another way to make this sweet is to flatten out the batter on a dish and cut it into squares, which are then fried and dipped in sugar syrup just like all the variants.

These days, with the proliferation of sweet stores, I find that many people reach out to purchase a whole range of treats without any idea of how easy they are to make. The soft sandesh that I recently shared on this blog was a perfect example of this. Some of my friends told me after reading the post that they had no idea that an item they had always considered fancy and difficult to make was in fact extremely straightforward and required so few ingredients. We often have the impression that just because something is available for purchase in stores and at restaurants, it cannot be prepared at home. This sweet boondi is similar. Let me assure you that as long as you master the consistency of the batter and the syrup syrup, you’ll be able to whip it up in your own kitchen in no time. The process is quick and easy, not as long-drawn and elaborate as you may have imagined.

Unlike perishable milk sweets, this dish will keep for a few more days – but I guarantee you that you won’t have proof of that. It’s far too irresistible. Place it on the table and just watch it disappear!


Sweet Boondi

(Yield: approximately 3 cups)

1 cup chickpea flour

¾ cup water

1 cup sugar + ½ cup water

¼ teaspoon saffron + 1 teaspoon water

½ cup sliced almonds


The trick is to get the consistency of the batter just right, so that it drips into the oil properly as it fries. After this, the next trick is to have perfectly-made sugar syrup is key. I was so tempted to flavour mine with rosewater, given that rose is an ingredient I reach for so frequently that it’s one of re:store’s signature twists. But I refrained, choosing to go for a traditional spice instead. The saffron in this sweet adds a subtle fragrance and flavour to it.

In a bowl, mix the chickpea flour with water. It needs to be almost like an idly batter or pancake batter consistency. Only if you have the consistency right will the boondi drop into beautiful dots.

In another bowl, add the sugar and ½ cup water. In a medium flame, stir the sugar and water slightly for about 10 minutes until it becomes thicker, but not too thick. Allow to cool slightly and add the soaked saffron so the sugar expands in an orange colour.

Heat ghee in a frying pan on a medium flame. Once the ghee is hot, drop the batter through a sieve so that it falls in tiny droplets into the hot ghee. See the video below for the method.

Fry the droplets for a few minutes, making sure it doesn’t turn colour. Now, strain the drops from the hot ghee and add them into the warm sugar syrup. Fry all of the batter this way. As you drop the boondi into the syrup, it will soak up the syrup.

Garnish with sliced almonds or pistachio, or to give it a festive look, decorate with silver leaf/varak. Your sweet boondi is now ready to serve.

If you prefer this boondi in laddoo form, then the sugar syrup needs to be thicker so that you can pick up the boondi and roll it into balls between your palms.

When it comes to snacks, my most favourite combinations are both sweet and savoury. I love having this sweet boondi with the crunchy, spicy poha roast mix. Over Diwali, I feel like I consume endless bowls of the two together, with their medley of textures and tastes.

You may have noticed that the majority of recipes I share are for dishes I have some emotional connect with, especially from my childhood. This sweet boondi is one with which I have no such nostalgic attachment, but for me festivals and food are not just about the past. Each dish, each festivity, is a chance for new experiences. We create new memories this way, which may eventually become sentimental in their own way. As we celebrate this Diwali, I wish for you that the year to come contains all the sweetness of this dish. I hope it will be a part of the precious bonds that you are building over your dining table, too.

Festivals are a big part of Indian culture and making a sweet (or many!) at home during special occasions is almost mandatory.  Growing up, my mother would make an array of them, along with savouries, and we would wait to devour those goodies. I prefer to keep some of those traditions alive so that future generations may understand and value our heritage. Even today, I make sweets and savouries at home, although less than my mum used to. However, with the festive season having begun, and orders pouring in, I’ve been making so many lately that I really felt  I needed to make a dish that was just for me. Although most of the members of my family are not fans of this one, and it being a quickly perishable item means that it isn’t ideal for my clients at re:store, this soft sandesh is something I simply had to make for myself the other day. I’m a huge fan of this delicate milk sweet, and I relished having it to myself.

Typically from Bengal, sandesh is prepared in myriad ways and each version seems tastier than the other. While there is a popular version where the mixture is heated and stirred until dry, I prefer this one. During my trial for the perfect recipe, I made a small batch of the dry version. I dry roasted the chenna in a non-stick pan until it was about to become grainy and then shaped it. While it did taste fine, I prefer the softer version, and that is what I am sharing below.

Chenna is essentially a milk solid, with the whey removed. Also known as paneer or Indian cottage cheese, it is high in protein and calcium and is popular in so many Indian dishes, from sweets to curries.

As I have mentioned in my blog before, milk is considered an important food for the gods and almost all communities use milk to prepare sweets as offerings. Milk is considered sacred in India, perhaps because of its relationship with the cow. Veganism is beginning to catch on here, but milk remains a key ingredient in our sweets. As you know, I have been going more and more vegan myself, and I feel that it’s high time that almond milk or coconut milk become more popular here. Below is a traditional recipe, however.

This delicious sandesh is very quick and easy to make if you have chenna/paneer handy, which most Indian homes do. I recall how on one of my Kolkata visits, I happened to get to see an entire chenna market. Huge piles of it were sold there. Just like there are exclusive flower markets and so on, an exclusive chenna market made sense because of the popularity of the ingredient. I had noticed how the famed Bengali sweet culture was dairy-based, and clearly there are reliable sources where stores can purchase their key ingredient daily.

This chenna vendor posed for me that day, and I watched him work for a while. I was intrigued by how the chenna is wrapped in leaves and newspapers instead of plastic packaging, a wonderful way to use biodegradable materials.

A Spanish friend of mine whom I met on the day of the photoshoot had a serving of my sandesh and remarked that it tastes a bit like cheesecake! I would think it’s somewhat lighter than cheesecake, both in terms of richness and how it sits in the stomach.

Not long ago, I mentioned panch-phoron and wanting to explore more of Bengali cuisine on my blog, and this soft sandesh is an auspicious start to more such culinary journeys…

Soft Sandesh

(Yield: 15-20 pieces)


1 ½ cups chenna (paneer)

¾ cup powdered sugar (coconut blossom/sugar)

½ teaspoon rose water


I made this soft sandesh from scratch, and the chenna or paneer is easy to make it at home. In many Indian homes, we prefer homemade paneer so as to ensure quality. The following is my method to prepare it.

Boil 1 litre of milk over a medium flame in a pan, stirring occasionally. Once it reaches close to boiling stage, add 1-2 tablespoons of lemon juice. This will help the milk to curdle and the whey to separate. Do not stir too much at this point. Only ensure that it does not stick to the bottom. The milk solids will appear evidently separate.

Now, pour the mixture into a large-sized cheese cloth. Gather the ends of the cheese cloth and tie them into a big knot. Place a container below the bundle to collect the whey. I usually tie it to the kitchen sink (something you may remember from my lavender shrikand recipe). Allow it to drain for about 1 hour.

Next, place the bundle onto a plate and add some weight on top of it to ensure that it drains completely. Once drained, open the bundle. Rinse the chenna under running water, to ensure that the lemon which was added earlier is removed. Allow it to drain again (add more weight on top of it to help the process). Your chenna is now ready to use. Due to the weather in Chennai, where it’s mostly warm, I usually put it away in the refrigerator for about half an hour before preparing the sandesh.

Since the whey is high in protein, I use it to make roti dough or add it as a gravy to any vegetable being cooked that day. Very little goes to waste in most Indian kitchens!

The next stage is very simple. Place the chenna on a plate and add the sugar. With your palm, blend the sugar and chenna well together. It should be soft and pliable at this point. I’ve found that using less sugar, as I have, or using a substitute like jaggery or any other form of natural sweetener, makes it all the more delectable.

Finally, add the rose water and blend once again. Make small balls with your palm and decorate with rose petals. Store in a container. Sandesh needs to be refrigerated and consumed within 3-4 days.

You may add any flavour of your choice. Sometimes, I add saffron to the chenna and decorate it with a slice of almond. You may sprinkle cocoa powder on top after rolling it with a small piece of chocolate at the centre. You can decorate it as beautifully as you wish to, or keep it plain. There are many choices, as the light flavour of this sweet can be adapted in versatile ways. I’d love to know how you get creative with this recipe. Please tell me more in the comments!

Every day, I wake up thinking: “What shall I bake today?” My work schedule begins with this question. By the time I walk into my kitchen, I am already excited about conducting a new trial of some kind. Whether on a whim, because of excitement over an item freshly in season or gifted to me by a friend, or thanks to setting a challenge for myself, I’m looking forward to an experiment. Often, I’ll already be thinking of how the finished dish can be styled for a shoot, even before I make it. These culinary experiments are a great source of pleasure and learning for me. In this way, the re:store repertoire constantly grows.

When the day is not cluttered with a hundred things to do, I can bake especially peacefully. I pull out cookbooks and pore over them. Sometimes it’s the beauty of the photographs that pulls me in. Sometimes it’s a single ingredient, either something exotic or a familiar one that I want to use in a special way. Most mornings, it’s something new. Something different. Even the beauty of a book on architecture or on art can excite me, reminding me of my travels and my memories. Or it could be words from a poem. Or even the colours worn by a group of people I may have seen on the street on the previous day. Something will make me reach for certain ingredients or search for certain recipes. It doesn’t always work, but even then, I enjoy the challenge of going, “Damn, what went wrong?” and finding a way around the snag during the next trial.

As I was raised in a household which observed the tradition of never eating food before it was offered to God (which meant that there was no dipping a spoon or a finger into the pot as we cooked), I learned early on how to tell on sight if a dish is ready. I can gauge if it will taste good, or otherwise. So I usually have a strong sense of how an experiment will turn out even as I’m in the midst of it. Of course, there are occasional dull moments when I feel like I’m dragging my feet, and I think something is doomed to fail, and that’s exactly when it doesn’t work at all. I’ve come to understand that space and mood are vital components for these culinary experiments. And when I get it right, I want to share the results immediately – with everyone! My friends and family get the first slices, scoops and sips. And then, there is this blog…

In addition to books, photos and memories, a well-stocked kitchen is often the beginning of inspiration for me. Many Indians love almonds, also known as badam, both for their taste and for their nutrition benefits (which include skincare, lowered cholesterol, weight management, improved eyesight and much more). In my case, there’s always almond meal or almond flour in my house, and it’s an ingredient I reach for liberally. As I’ve said so often, a belief in the goodness of homemade food is at the heart of everything at re:store. Most of the flours and powders I use in my kitchen – from turmeric to chillies to chickpeas and more – are sent to be ground in small batches at a trusted mill. The same goes for almond flour and all the others that I use in my baking.

One recent morning, my brainwave was to conduct a trial for a sugar-free version of the almond cookies that are a staple in my home. As we get older, we have to be more watchful of our food intake both in terms of quantity as well as where problematic ingredients are concerned. Sugar is a big culprit when it comes to health issues, and often the first thing that experts recommend eliminating or cutting down. Ever conscientious of eating well, I find myself increasingly attracted to desserts which use other natural sweeteners. These include maple syrup, coconut sugar, barley malt, honey and jaggery. That famous Gujarati sweet tooth can’t resist temptation. These days, I try to make sure that when my cravings hit, the treats within reach are sugar-free.


You know how much I love my tea-times and simply must have a crunchy bite to go with my hot drink. This is true not just for me, but equally so for my Max. The moment he sees the cup in my hand, he comes bounding up, salivating for his own biscuit.

This is what we’ve been enjoying over the past few days. An almond cookie is a classic – and this sugar-free, eggless version is one that will capture a lot of hearts. And I can assure you that it comes with Max’s stamp of approval!


Sugar-Free Almond Cookies

(Yield: 15-20 cookies)


1½ cups oats flour

¾ cup whole wheat flour

¾ cup maida

1 cup almond flour

1 teaspoon baking powder

½ teaspoon salt

½ cup oil

½ cup honey

½ teaspoon vanilla extract

¼ teaspoon rose extract

¼ teaspoon rose water

Preheat the oven to 150°C. Prepare a baking tray and keep it ready.

In a mixing bowl, add all the dry ingredients and whisk well. Then, slowly add all the wet ingredients into the dry ingredients. Mix them all together with your hands gently until they become one whole mass of dough.

Now, make small flat discs and place them in rows on the baking tray. Bake in the oven for 10-12 minutes or until they turn golden on the edges. Remove and allow to cool on tray for about 5 minutes. Remove them onto a cooling rack.

They are ready to serve, and if you wish to, you can decorate them with any toppings or icing of your choice.

On one of my recent Instagram posts, you would have seen another one of my successful latest experiments: pista-rose cookies, which combined two of the more popular flavours on the re:store menu. The next time I make it, I’m going to try and adapt this recipe to do so, replacing almond meal or almond flour with pistachio meal or pistachio flour.

With the kinds of cravings for sweetness that I have, finding and incorporating sugar-free desserts into my meals is a necessary, healthier choice. These sugar-free almond cookies are also eggless, as you may have noticed, which makes them the perfect choice for vegetarians. Vegans may opt to substitute honey with a sweetener of their choice. As I said earlier, this recipe came about through a process of experimentation. What next? As I write this, I’m already wondering: what about an almond kachori? Innovative uses of readily available ingredients are practically a daily adventure for me now.

Since I’m not giving up the crunchiness that I need with my cup of tea anytime soon, I’m delighted to have these sugar-free almond cookies around. After all, they are not only free of sugar, but in being so, also free of guilt!

The beauty that we see all around us, we take for granted. This is why I love flower exhibitions, which put that beauty at the centre and let us appreciate it fully. Flowers represent inner peace to me. Amongst other things, the Chelsea Flower Show, was on my wishlist. And I recently had that dream fulfilled. It was like the experience of so many flower market visits, multiplied.

One of my favourite things to do in London is to wake up early and go to the flower market, which I enjoy just as much as I do a flea market or an antique market. It was a dear friend who first took me to the Columbia Street Market, which soon became one of my favourite London experiences. It begins with a coffee at any of the quaint shops alongside the flower sellers, sipping leisurely while watching them set up their stalls. They bring their fresh flowers in and I watch them at work while I have my coffee, which is always so lovely and which sets off the mood. I could sit there all day, between the taste of the coffee and the sight of the blossoms.

Amidst the abundance of peonies and a variety of English greens, I was taken aback to see a jasmine plant in a pot. It was simply laden with flowers which reminded me of the oosi malli back home. I was surprised to see it blossoming when the climate was not conducive for it, and it gave me fresh inspiration to continue working in my own gardens. I was reminded of my own home and the manoranjithas I’m trying to revive. The dedication of those London florists, and the sheer variety of flowers they cultivate, are lessons to inspire us to look at the diversity and beauty that exists around us.


Sitting in one such market not long ago, taking impromptu images on my iPhone camera, my eyes were wandering around looking for those flowers which were dried, so I could carry them back with me. This was when this exquisite batch of lavender caught my attention. Since I brought this beautiful lavender back with me, my entire home is carrying its fragrance and I’d do anything to keep it lasting. If there was a way I could capture its fragrance, I’d easily share it with you. But since I can’t, this vegan lavender cake with coconut icing is the next best thing.

As you may know, lavender is one of the flowers/ingredients that most inspires me, and you may have enjoyed several of my previous recipes featuring it. Some of my experiments have yielded such delights as this lavender shrikand and this vegan lavender panna cotta.

This cake is made for the vegan palette. Veganism is becoming increasingly popular, and rightly so. Among other reasons, the treatment of animals to procure ingredients for non-vegan meals is a big factor as to why people choose it. I am increasingly becoming aware of veganism and trying to include it in my food journey, and you can see several of my recipes here.

Vegan Lavender Cake

Cake:

190 grams flour

30 grams desiccated coconut

200 grams sugar

1 teaspoon baking soda

¼ teaspoon salt

1 cup coconut milk

2 teaspoons vanilla extract

80ml sunflower oil

1 tablespoon apple cider vinegar

½ teaspoon lavender


Icing:

400 grams icing sugar

40 grams vegan butter or margarine

2 teaspoons coconut milk

1 teaspoon vanilla extract


Decoration:

¼ cup desiccated coconut

I’ve talked so often about the pleasure of baking that whenever I share a recipe like this – something from the re:store menu – it makes me happy to know that you can have that same experience of the joy of preparation, not just the satisfaction of the final product!


Preheat the oven to 160°C. Grease and dust two 7’ cake tins and line them.

Sift the flour.

Add all the dry ingredients – flour, desiccated coconut, lavender, baking soda and salt – into a bowl and whisk. Now add the sugar. Keep aside.

Now, put all the wet ingredients – coconut milk, oil, vanilla extract and vinegar – in a separate bowl, blend, then add these to the dry mixture.

Whisk the wet and dry ingredients together gently. Once you have a batter, divide it equally between the 2 cake tins.

Bake both tins for approximately 30 minutes or until a tooth pick comes out clean.

Allow to cool for 10 minutes before removing the cakes onto a cooling rack. Once they have cooled completely, they are ready to be decorated with icing. So it’s best to make this as they cool.

This vegan lavender cake is garnished with a coconut milk icing. In a mixer, add the butter, vanilla extract and sugar. Beat on a low speed. Slowly, increase the speed and add the coconut milk carefully. Add only as much as required, and make sure that the mixture is spreadable. Adjust the coconut milk or sugar quantities as required to ensure this.

Place one of the cakes on a base and apply half the icing on top of it. Sprinkle 1 tablespoon of the desiccated coconut, then place the second cake on top of this to form a layer.

Ice the top generously and sprinkle the remaining desiccated coconut. Decorate as desired. A good presentation makes for a tasty cake too. As I always say, the eye tastes before the mouth does, and using attractive serving ware and garnishings can really enhance the experience.

As is most often the case, I decided on this recipe based on the ingredients I had on-hand and how they inspire me. Lavender and coconut were the flavours I chiefly wanted to bring out, and vanilla is of course a baker’s best friend. Together, for me they evoke the way it feels to sit at a café and watch a flower market being set up. When you try out this recipe, please let me know what these scents and tastes evoke for you!

I’ve spoken often of how, just a few years ago, my daughter baked a chocolate cake for the family which was a turning point in my life. It was the best cake I had ever eaten, and I remember watching her as she made it. She was in good spirits, and hummed and sang while she was gathering the ingredients and lining them up in front of her. Then, she happily pulled out a recipe and began with such lightness and joy. Watching her, I thought to myself: “I’ve tried baking for so many years. I must try again with the same spirit my daughter has.” The first bite of the cake that came out of the oven was the last push of encouragement I needed. I set my mind to it: I would learn to bake with joy. I spent the next month baking the exact same cake every single day, tweaking the method and learning with each effort, until I too fell into a happy, humming rhythm. And the rest, as they say, was history…

My daughter is a big part of the recipe I am sharing today, but it’s not just because of that life-changing chocolate cake (which you can order right here if you are in Chennai). Rather, it’s because of one of the many dishes she introduced me to when she was studying for her Bachelor’s in Boston. Whenever I would visit her, she would always take me to interesting new places to try out delicious cuisines and treats that never failed to inspire me. It was in one such café that I tasted madeleines for the first time. They were pistachio ones, and you know I love pistachio (of course, a pistachio cake also sits prettily on the re:store product list).

Madeleines are a kind of basic sponge cake which are made in a shell-like shape (you can find trays for this in most baking stores). They are widely regarded as being of French origin, and an English version with jam, desiccated coconut and cherries is also popular. But to me, it’s the Spanish madeleine that captured my heart. You see, some time before being introduced to the sweet treat in Boston, we had gone to Spain, where I first heard of the little sponge cake. It was the loveliness of the trip itself which gave its local version a sentimental value for me, even though it wasn’t until later that I got a chance to eat it.

It was an experience of a lifetime to be in Santiago de Compostela, in Spain’s Galician region, on the holy day of Palm Sunday. We had been delayed and had missed our connecting flight, so we were surprised to find we had made it in time for the services. And even better, we had somehow wound up in the front row. Here, we had a wonderful view of a special ritual that only takes place on special occasions. Enormous incense holders known as botafumeiro are swung across the expanse of the church and back, filling the environment with scent, smoke and a feeling of divine grace.  The effect of the smoke in that beautiful cathedral, amidst the chants and prayers, was surreal.

Heading back to the exquisite Hostal dos Reis Católicos, which dates back to 1486 and is thought to be the most beautiful hotel in Europe, I gathered these new memories together. Somewhere on this trip was where I learned how the humble madeleine is related to the grandeur of a Spanish cathedral, and that’s how I think of it, no matter where I eat it. You see, Santiago de Compostela is the culminating point of the Camino de Santiago pilgrimage route. In the Spanish origin story of the recipe I am sharing today, a medieval chef named Madeleine used to make these little shell-shaped delights to feed the pilgrims there. The treats took on her name.

Short or long, pilgrimages are all metaphors for our own life as we pursue our dreams and life’s mission. To me, my own pilgrimage is a journey of delighting people through food which appeals to every sense. From the tastebuds to the memory centres, and everything in between. These sweet madeleines are a perfect example – and yes, they are made with joy!

Madeleines

(Yield: 12 madeleines)

90 grams flour

¾ teaspoon baking powder

100 grams unsalted butter

65 grams sugar

2 eggs

1 teaspoon vanilla extract

½ teaspoon lavender seeds

2 teaspoons maple syrup

2 teaspoons milk

Powdered sugar for dusting

The basic madeleine recipe is simple and elegant and I have done little to change it but sweeten it further using maple syrup. I also added a little re:store flourish in the form of one of my favourite ingredients – lavender, the subtle hint of which always lightens up my mood.

Prepare a madeleine pan by buttering and dusting it.

Whisk all the dry ingredients together. Carefully melt the butter in a pan, on a medium flame, until it turns brown.

Place the sugar in a bowl and mix it. Add the eggs one at a time and beat well.

Now, add the vanilla extract, the lavender seeds and the maple syrup. Whisk well until the mixture is perfectly blended.

Now, add the remaining dry ingredients. Once all the ingredients are well incorporated, add the butter in slowly, using just a small quantity at a time. Then, stir in the milk.

Now that you have made the batter, divide it into the moulds of the madeleine tray and allow it to cool in the refrigerator for 15 minutes. In the meantime, preheat the oven at 160 °C.

Remove the tray from the refrigerator and place it directly into the oven. Depending on what kind of oven you use, bake for 10-15 minutes.

Once the baking is done, remove the tray from the oven. Upturn it and watch as the beautiful madeleines fall out. Dust them with powdered sugar and store in a dry container. That is, if you don’t serve them immediately. Chances are, you won’t be able to resist.

These delicious madeleines are a perfect tea-time snack, so brew yourself a pot of your favourite as you enjoy the scent of baking still lingering in your kitchen.

I love ruminating over tea, as I sit with Max and enjoy a little me-time. It was on one such day that I dreamt up this post as well. And I especially like having a little sweet treat to go with my beverage. How about you? Please be sure to let me know what tasting these madeleines inspires in you!


In my Gujarati household, we have always had a deep and old association with Parsees. The Dark Prince’s best friend, Sohrab, is a Parsee, and so was his grandfather’s best friend, Bachu Foi, in Ahmedabad. When we got married and his grandfather also became mine, so too did Bachu Foi. “Foi” means “paternal aunt”, and Bachu Foi was the gentlest, kindest soul I’ve ever known. When I met her, she was well into her 70s and happily single, and always seemed to be around when we visited our grandparents. In those years, I would arrive with my gaggle of toddlers who kept my hands full. Bachu Foi always knew when I was coming, and would move in with me for the duration of my visit. And she would make the best-I’ve-ever-had guava jelly. Well, I’d never had guava jelly before hers, but it set my taste for life.

Pink, sweet, luscious, diamond-shaped guava jelly. I treasured it not only because it was sweet, but because it was made by my very sweet Bachu Foi. The truth is that at the time, I was too involved with my little children to spare the time to patiently learn the recipe from her, but how I wish I had. As my culinary skills grew, over time I experimented and finally arrived at my own version. I would say it comes pretty close to what Bachu Foi used to make. After all, we both use the same basic ingredient: love.

I was not only busy with my kids, but also highly involved with trying to stay in the good books of my strict, disciplinarian grandfather. And Bachu Foi was ever on the lookout, ready to bail me out and take my side. These memories came flooding back to me on a recent trip to Ahmedabad for a book I am working on (ssshhh…). There, I met a relative of hers, an old gent who exclaimed, “Ah yes, I knew your grandpa – Bachu Foi was his girlfriend!”

I was quick to argue with him, “No, she was never his girlfriend!” Then I realised how futile it was to explain that they just shared such a beautiful friendship. I thought about how my grandmother, who was just as wonderful a person, was always around too. She was divinity personified, calm and chilled out, and not in the least threatened by Bachu Foi!

In my previous post, in which I shared a mood-uplifting Gujarati curry using the favourite fruit of my childhood, I’d mentioned that one other way in which I like to enjoy guavas is in jelly form, with a platter of crackers and a glass of wine. The combination of salty and sweet makes for a lovely treat. This was something I picked up in Cuba, during the only other time that I’ve experienced guava jelly close to Bachu Foi’s sublime creation. I was surprised to see guavas there then, not knowing their history, and brought back a big chunk of guava jelly. I later realized that they were the perfect substitute there for fig jam, which is usually served with wine, and it’s the same here. Our familiar, affordable guavas are perfect for the job.

The previous post is full of information about the goodness of guavas (they are loaded with Vitamin C), but let me be honest – this one is very, very indulgent! It is dedicated, with much love, to the memory of my Bachu Foi.

Guava Jelly

(Yield: approximately 15 pieces)

½ kilo guavas
6 cups water
¼ cup butter
1 teaspoon lemon juice
1 teaspoon rosewater
Sugar to measure


As I experimented with guava jelly recipes, I hit on what would make this one unique. One of re:store’s signature ingredients: rosewater. It adds a divine aroma to an already divine dessert. You may also know this dish by another name – sweet guava cheese.

Wash the guavas and place them in boiling water, and allow the water to bubble until the guavas turn soft. Then, remove them carefully and keep the water aside. Allow the guavas to cool slightly, then remove the skin. Next, remove the seeds from the fruit and keep them aside.

Add the seeds to 2 cups of the same water that was used to boil the guavas and allow them to cook for some more time. Cool.

Blend the flesh of the guavas and strain, along with the water containing the seeds. Collect the pulp in a pot and boil. Within a few minutes, add a quantity of sugar equivalent to the pulp. When I was making this recipe, I found that I added 3 cups. You may adjust the sugar quantity depending on the sweetness of the guavas and your own preferences.

Allow the mixture to boil, stirring constantly. This took me approximately 20-25 minutes. You will notice the pulp becoming thicker. Now, add the butter and lemon juice. Cook some more until the pulp starts to leave the edges of the pot. If you scrape to see, you should notice a dry pot.

Drop a glob of the pulp in cold water to check if it forms into a hard lump. Allow to cook some more.

Finally, add the rosewater. Stir well, and pour the thick pulp onto a greased plate. Remember that the quantity of the pulp will reduce as it cools, which you must allow it to do at room temperature for 3 hours.

Then, cut into shapes and remove gently. I use the diamond shape, just like Bachu Foi – that gem of a person – did.

You’ll find the guava jelly to be chewy, sticky and sweet. I’ve used approximate quantities in the recipe above, so do experiment and see what suits you. As I mentioned, I don’t really know how to make Bachu Foi’s exact recipe, and so I also want to share the method as to how I arrived at mine. I did it by reading at least 20 different recipes from various sources, adjusting according to my culinary sense and taste. So here’s a big Thank You to all the other food bloggers out there, especially on Instagram, who generously share their recipes too! Here’s adding mine to the collection, with love for Bachu Foi…


Sankranti, the harvest festival, is here and as we celebrate by giving thanks for the crops we eat daily, it’s til-ka-chikki that strikes me as a perfect dish for the occasion. The chief ingredient of this crunchy sweet is sesame, which is believed to have been cultivated in India for over 5500 years. As a form of produce that can grow with relatively little supervision, and in less than ideal conditions, there is no doubt to me that many of our ancestors would have considered it a perfect if not vital part of their Sankranti. Sankranti is known by various names throughout the country – it is also observed as Pongal, Bihu, Maghi and by other names depending on region. No matter where, it falls in mid-January and is a time when the sun is worshipped for its life-giving properties.

“Til” is the Gujarati word for sesame, as well as in other languages including Hindi and Punjabi. The English word “sesame” is from the Arabic “semsem”, indicating oil or liquid fat. This is because it is an oilseed produce. It’s an excellent digestive aid as it’s full of fiber, and also has high copper, manganese and calcium content, in addition to other vitamins and minerals.

Chikkis are a whole category of snacks, usually sweet thanks to the sticky jaggery that holds them together. We also make them with groundnuts, puffed rice (mora mora) and other variations, depending on the season. You can make them either in bars or in balls, and they also make a great ice cream topping when crushed. Til-ka-chikki is basically a sesame brittle, and today I’ll share the method to make them into bars.

I used to have a huge mental block about til-ka-chikki as I simply hadn’t known how to make it. My sister got married when she was just out of college, and she hadn’t learned how to cook yet. She went to her mother-in-law’s house, where she learned how to make the most beautiful traditional Gujarati dishes. I was still in high school at the time, and am still envious to this day about the culinary skills she picked up back then. Meanwhile, in my mother’s house, I was still studying but also began to slowly pick up recipes and techniques in the kitchen. I was probably inspired by my sister’s newfound talents, and our mother started me off on the basics, like rotli. Over time, I began to regard not only my mother and my own mother-in-law as my culinary teachers, but my older sister as well. My sister’s repertoire is vast. Even to this day, each time I visit her, I insist that she teaches me an entirely new dish  every time.

I overcame my mental block when I finally learned how to make this til-ka-chikki a couple of years ago, with her guidance. And I’ll admit that I am still learning. I don’t quite have the confidence to make it on my own yet, but every experiment has ended in happy mouths and sticky fingers. It would be great if you could learn it together alongside me. We could master it together, just as my sister has.

As with most traditional Gujarati sweets and snacks, this too requires only three ingredients. In this case, they are jaggery, sesame and ghee. If you’d like a vegan version, replace the ghee with a flavourless oil of your choice. Til-ka-chikki is also offered as a prasad, so while it is a simple dish it can also be a part of prayers for festive and special occasions. For Sankranti, of course, it’s a beautiful way to honour the sun that gave us this ancient and nutritious crop.


Til-Ka-Chikki (Sesame Brittle)

(Yield: 10-15 pieces)


Ingredients

½ cup sesame seeds

½ cup jaggery

1 tablespoon ghee

Grease an overturned steel plate and a rolling pin and keep these ready. Next, in a wok or kadai, roast the sesame seeds on a low flame. Occasionally increase to a medium flame for short spans. The sesame will take about 7 minutes to roast. Keep stirring until the colour changes.

Once roasted, transfer to a plate and allow to cool. Once cooled, taste a few seeds to check if they have a crunch to it. This means they are ready.

In the same wok or kadai, add the ghee. Then, add the jaggery and stir constantly on a low flame. As with the roasting of the sesame seeds, you may occasionally increase the flame to a medium for short spans, then immediately reduce it to a low again. Take care that the jaggery does not burn. Do see this video for reference: re:store sesame brittle video – 1

Mine took approximately 9 minutes to turn into a reddish colour. Once this happens, turn off the flame. Add the sesame seeds and stir well.

Drop the mixture onto the greased, overturned plate and immediately start to spread it out as thin as possible. You may need to use your fingers (dipped in water), while the rolling pin is coated with ghee. With this combination, try and spread it out in such a way that you mark lines for the pieces later.

Allow the spread mixture, striped with lines to form bars, to cool. Once it has completely cooled, place the plate on the stove and warm from below. The entire piece will come out as a whole. Break it along the marked lines. Store in an airtight container.


Here’s another process video: re:store sesame brittle video – 2

I want to say that this til-ka-chikki is easy to make, but I’ve already told you honestly that it’s not. But I love a challenge in the kitchen, and try again and again to better then perfect my dishes. Even with my photoshoots, it’s the same. When the end result comes out well, it’s all the more delicious when I know the effort that’s gone into it! Tell me how it goes when you try your hand at this dish. Wishing you and your loved ones a happy Sankranti!


A panna cotta is a classic Italian dessert that is among my favourites – mostly because it is not too sweet. Some say it is quite like baked yoghurt, which I also enjoy. A traditional panna cotta is just dairy, sugar and gelatin, which are then topped with a fruity sauce. But you can also infuse the mixture itself with a flavour of your choice. Perhaps you remember my lavender shrikand from some time ago. That recipe came about thanks to a gift of lavender from my friend Siddharth’s farm in Australia. If you click on the link in the previous line, you’ll find lots of information about the cultivar of culinary lavender known as Miss Donnington. Siddharth sent me a batch from the most recent harvest, and its wonderful scent gives me much calm and joy at the moment. As I held those beautifully dried buds in my hands, I was inspired once more. I was already in the mood for some panna cotta. A lavender infusion would kick it up a notch. And to make it vegan? Perfection.

I’m on a vegan wave at the moment, as you saw from my vegan masala milk post earlier this month. Making a vegan panna cotta is quite simple, just requiring you to replace regular milk with almond or coconut milk. I used coconut cream here for a more luscious texture. If you already have a panna cotta recipe and are trying to wean yourself off dairy, just try it with a milk or cream substitute, using the measurements below. This recipe calls for half the guilt: even thought coconut cream has a high fat content, you can enjoy it without cheating on your dietary preferences. Of course, if you’d rather not try the vegan version, or have milk in your fridge you want to use up, just replace the coconut cream with regular milk or cream.

In my masala milk recipe, I suggested honey as a sweetener, which strict vegans don’t touch. In this one, my preferred sweetener is maple syrup. You can substitute this with another of your choice too. But what I like about maple syrup is that like all the other key flavours here, it is subtle. Coconut, lavender, fig and maple syrup – combined, they are subtly sweet as well. This makes for a perfect dessert after a heavy meal, when anything too rich might be too much.

To top this panna cotta, I used a fig sauce as I found the flavours to be complementary, but you can experiment with everything from blueberries to lilac sauce, depending on your tastes and availability. I’ve refrained from using other additives, keeping the ingredients simple. I want to add here that panna cotta, despite having the ring of a fancy dessert, is actually quite easy to make. It’s perfect for youngsters who are entertaining guests more formally for the first time. And the decorative potential also gives you creative scope.

Plating is essential for a dish like this, otherwise it runs the risk of looking too plain. When it comes to something like panna cotta, you have to find a way to lift the dish so that the person who is going to eat it finds it fascinating even before they place that first spoonful into their mouth. So the visual presentation is crucial. How do you want to impress someone? Do you want to add flower petals, or cut figs and cinnamon sticks, or find another way to bring colour into the display?

Developing my style as a photographer helped me innovate with plating as well. I love setting up my photoshoots, and I feel like I have found a distinct look now – I like dark and moody pictures in 100% natural light, and very little editing. For this shoot, to play up the dish, I decided to bring a bit more brightness in. Yes, brightness – what better quality for a New Year dish (and a New Year wish) to have?


Lavender Panna Cotta

(Yield: 3-4 small cups)


Ingredients

Panna cotta

2 cups coconut cream

¼ cup maple syrup

½ teaspoon lavender buds

1¾ teaspoons kanten (agar agar)

Fig sauce

4 figs (cut to small pieces)

¼ cup maple syrup

1 long cinnamon stick


In a pan, add all the ingredients for the panna cotta. Allow to heat on a medium flame, stirring constantly. Once the mixture begins to boil, you will notice the edges bubbling. Give it a few more minutes (remember to keep stirring), and then turn off the flame. The contents will start to thicken at this point. Close with a lid, allowing the lavender to steep well for about 10-15 minutes. The quality of lavender that my friend sent me was so good, and so fragrant, that I barely had to steep it for the recommended time for the flavours to become well-infused, but this will vary.

Then, strain the liquid into cups of your choice and allow them to set in the refrigerator. Panna cotta is always served chilled.

For the fig sauce, simply add all the ingredients to a pan and allow to boil until the liquid thickens. Keep aside.

When you are ready to serve this dessert, add a spoonful of the fig sauce onto each cup of panna cotta. Decorate as desired. As I said earlier, plating is quite important for panna cotta of any kind as the dish by itself looks quite bland. You can do this easily, and keep it all edible too, with nuts, fruits and so on.

Lavender is used in alternative healing such as aromatherapy as it is believed to be a calming influence. As I prepared this dessert in my kitchen, inhaling that evocative fragrance, this is what I pondered. I know that the past year has had a lot of volatility for many of us. As we move into this new year, this lavender panna cotta is a heartfelt metaphor for what I hope for us all. Let us wish that 2019 is just as subtle, calming, peaceful – and simply delicious.

When I was growing up, it was believed in every Indian home that milk provided everything that a child’s developing body needed. Proteins, minerals, the works. This was true to an extent, of course, as milk contains an impressive range of nutrients that the human body needs. There were no fancy gyms back then, but I have fond memories of my siblings and friends and I going to the club and rowing. You needed to have strength to row, and being a vegetarian family, my mum made dairy a big priority so that our fitness and wellness needs were met. We consumed milk fresh and on its own, but also with Bournvita or Complan at different times to keep us going through the day or before going to bed. Coffee and tea were seldom given to children, and in Gujarati households were practically taboo to the point that I did not drink tea until after I was married. But milk was had aplenty. And when winters came around, my mother would prepare a special masala milk loaded with nutty goodness. With almonds, pistachios and good old milk, we had what would be called the perfect protein shake today.

Although I’m now a proponent of this protein-rich pudding that I devour each morning after my workout, I felt sentimental about this simple, nutty masala milk from my childhood days. I then remembered that my mother used to be particularly keen on us having this instead of regular milk during winters, so that we were more fortified. Although Chennai doesn’t experience winter like you may know it, it does rain a lot and kids certainly fall ill during this time. But for us, the Indian “ishtyle” masala milk was just a treat. In some ways, this beverage was our version of a hot chocolate, which is why I share the recipe with you as a Christmas drink.

Second to milk, most Indians still believe that dried fruits and nuts are the best source of protein. Obviously, our ancestors already knew the nutrient values that others are only discovering now. Nowadays, thanks to a growing health consciousness, instead of the customary mithai exchange during festive occasions, we have taken to exchanging pretty parcels of fruits and nuts with well-wishers. As you may know, I use both generously in my muesli, one of re:store’s bestsellers. My mother used nuts to make this masala, but I’ve taken it a step further…

I also feel that the milk we had when we were younger was much less adulterated. Cows were treated better, and most of all, we had the sense that we could trust what we were buying. But milk has nothing to do with the recipe I am sharing with you today, despite its status as a crucial part of my childhood version of this beverage. As you know, I often experiment with vegan ingredients as many of re:store’s clientele enjoy them. So here’s my own twist to my mother’s trusted recipe. Not only is this masala milk vegan, but I also share how to make vegan milk rather than rely on a store-bought product. This way, you can ensure that what you and your family consume is of the best quality.

Vegan Masala Milk

(Yield: 2-3 cups)

Ingredients

Nutty Milk Masala

1 cup whole almonds

1 cup shelled unsalted pistachios

2 pinches saffron

10 pods cardamom

Vegan Milk

¾ cup cashew nuts

1 cup hot water

1 teaspoon milk masala (or more)

2 teaspoons honey (or sweetener of your choice – dates, maple syrup or sugar)

Begin by preparing the nut-based masala, and set it aside. All these ingredients should remain dry until they are added to the milk. You can prepare a larger quantity so you can store and use it later. My mother would make a batch at a time and just blend it into (regular) milk when it was serving time.

Peel the cardamom and add to the remaining ingredients: saffron, pistachios and almonds. Blend. You can make this powder as coarse or as fine as you prefer. If you would like a crunchy taste to your masala milk – which also tastes amazing – you can hand-pound the ingredients instead of using a blender. Store in a clean glass jar and use as required.

Then, make the vegan milk itself. As those of you familiar with vegan diets know, soy, seeds, or almonds or other nuts are the usual source. In this case, I have used cashew nuts. Soak the cashew nuts in water for about 3 hours. Then, remove the water that was used for soaking. Add the hot water, and blend the nuts until they are thick and creamy. If you prefer the consistency to be thinner, add more hot water. Voila – vegan milk! If you’ve ever wondered what it is, you now know how easy it is to make.

Once the vegan milk has been well blended, add the masala prepared earlier and stir. Serve in small cups. I find this vegan milk masala to be very filling and heavy, so I prefer small portions. Sweeten as per your liking.

What I love about this recipe is that it has a bit of novelty to it, as well as a bit of nostalgia. Just perfect for Christmas time, especially if you’re watching your diet this year – don’t you think?