Tag

sweet

Browsing

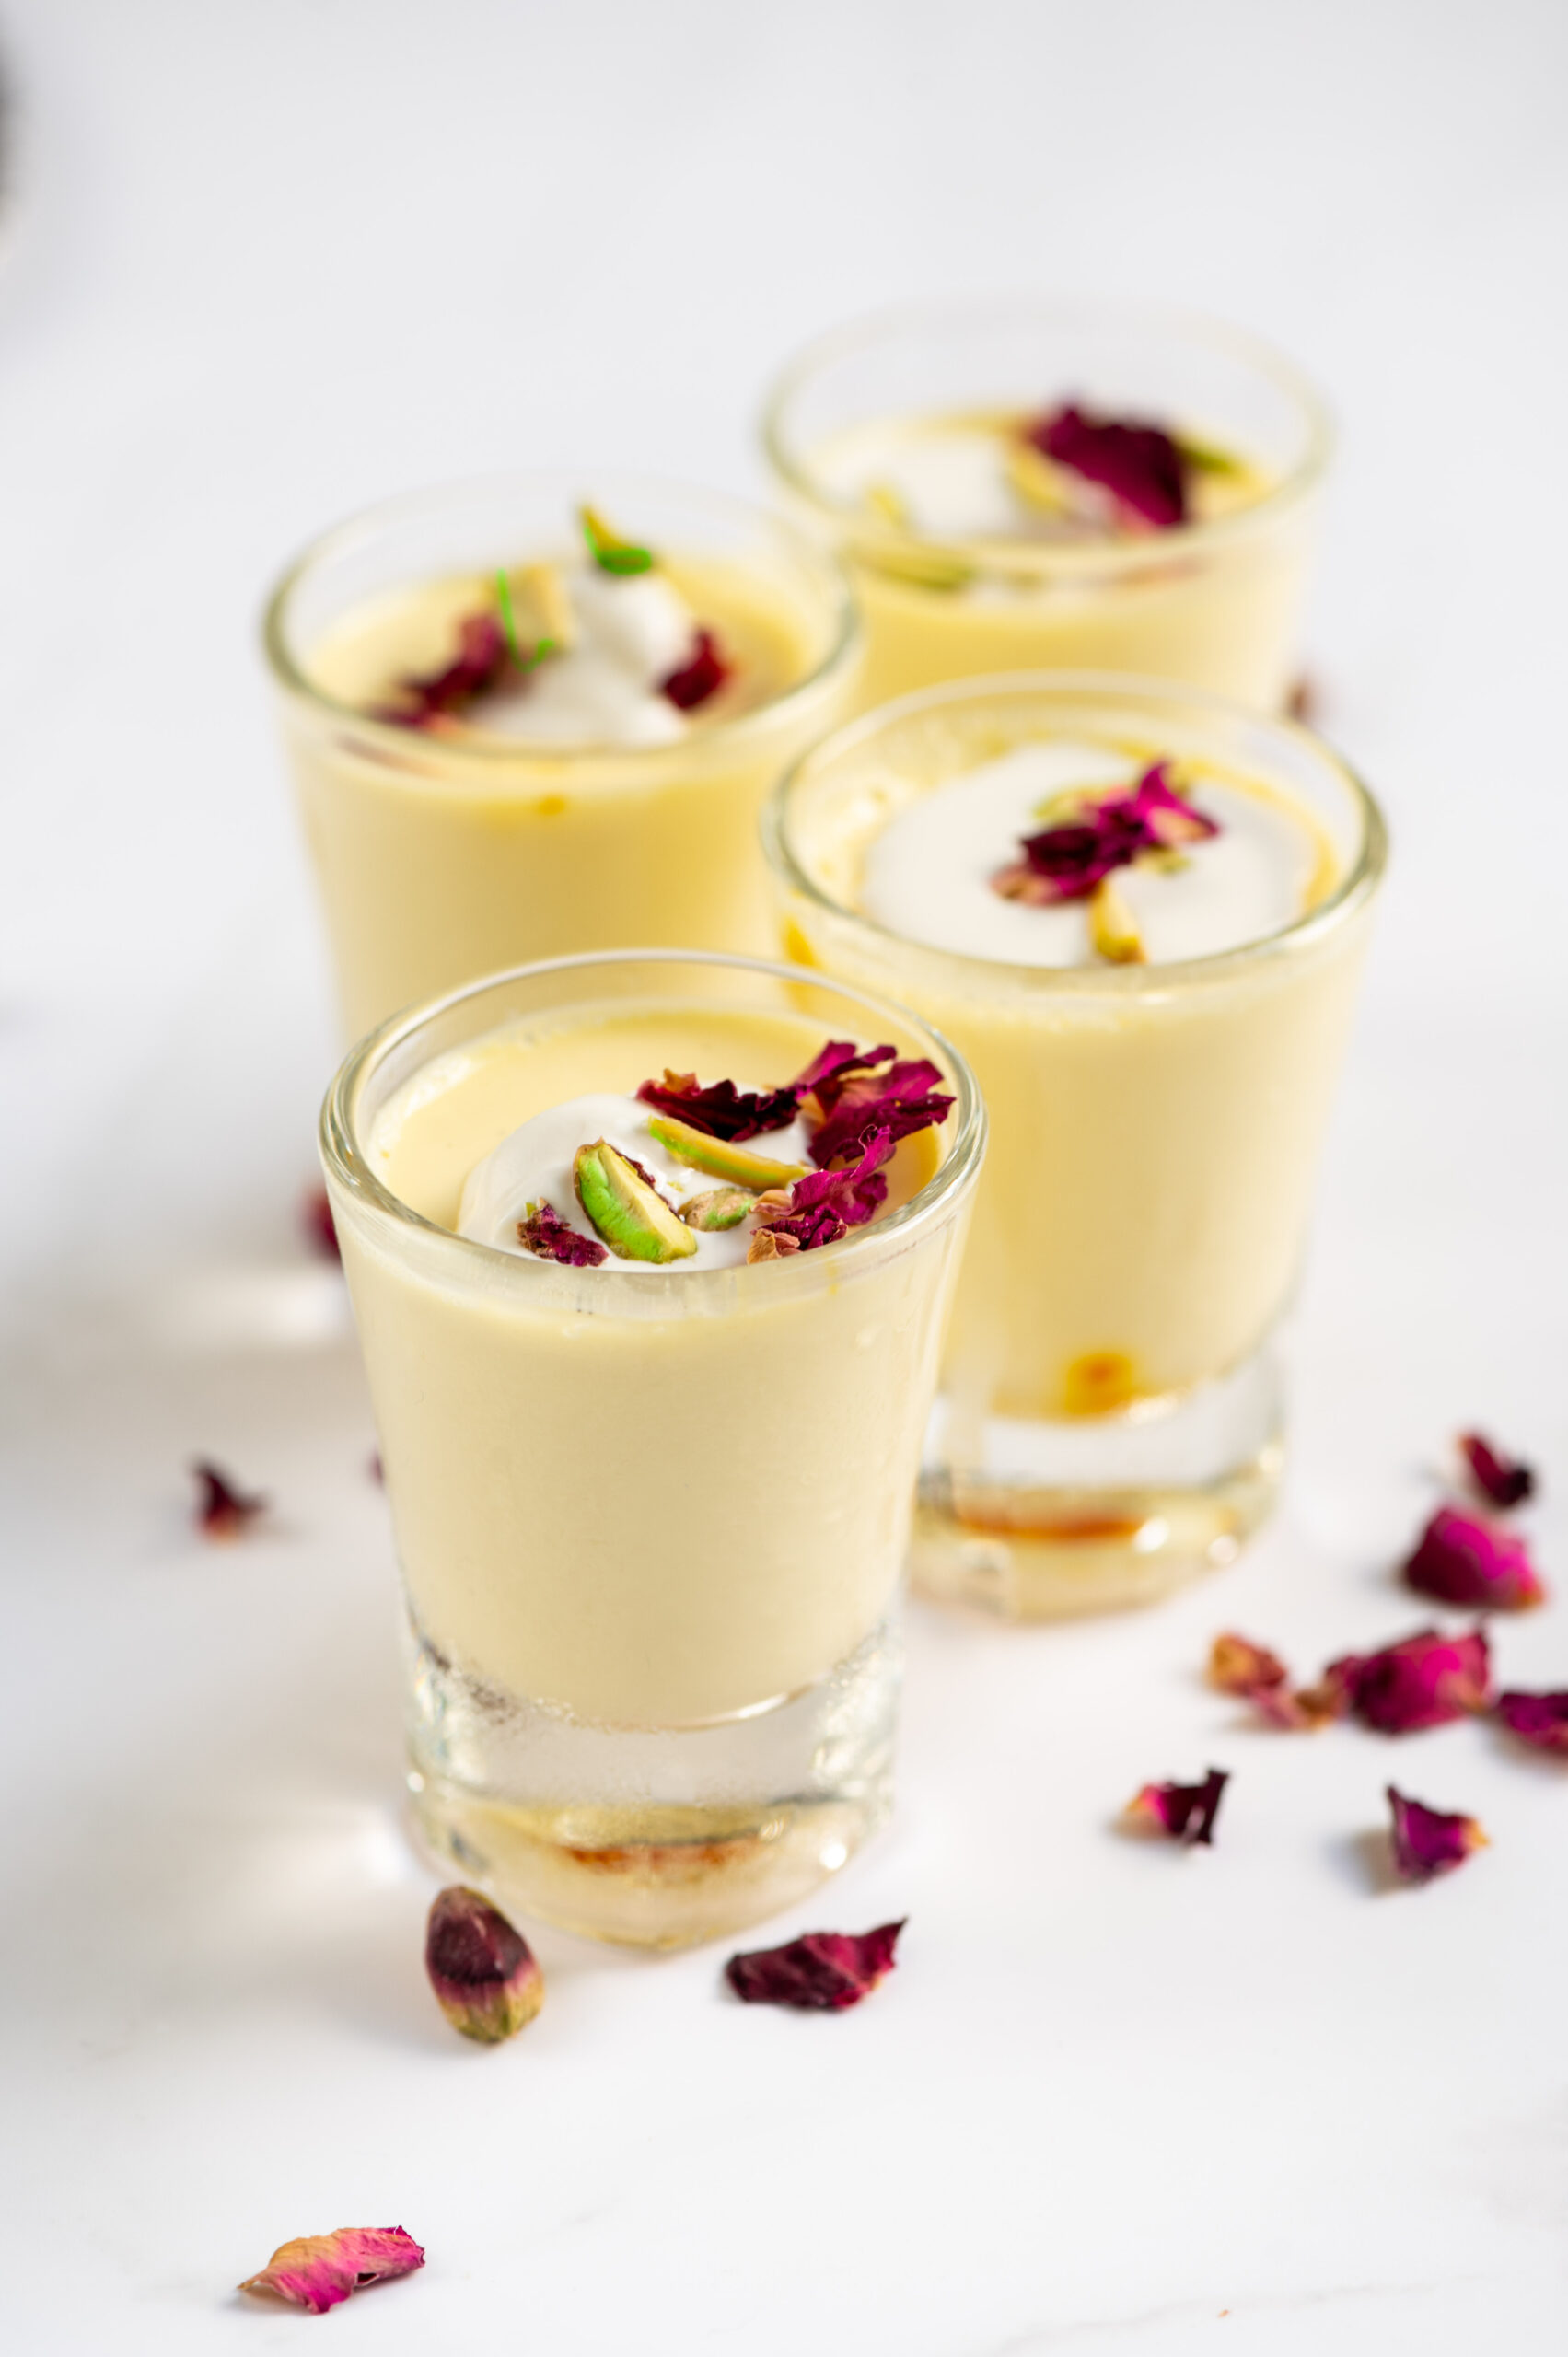
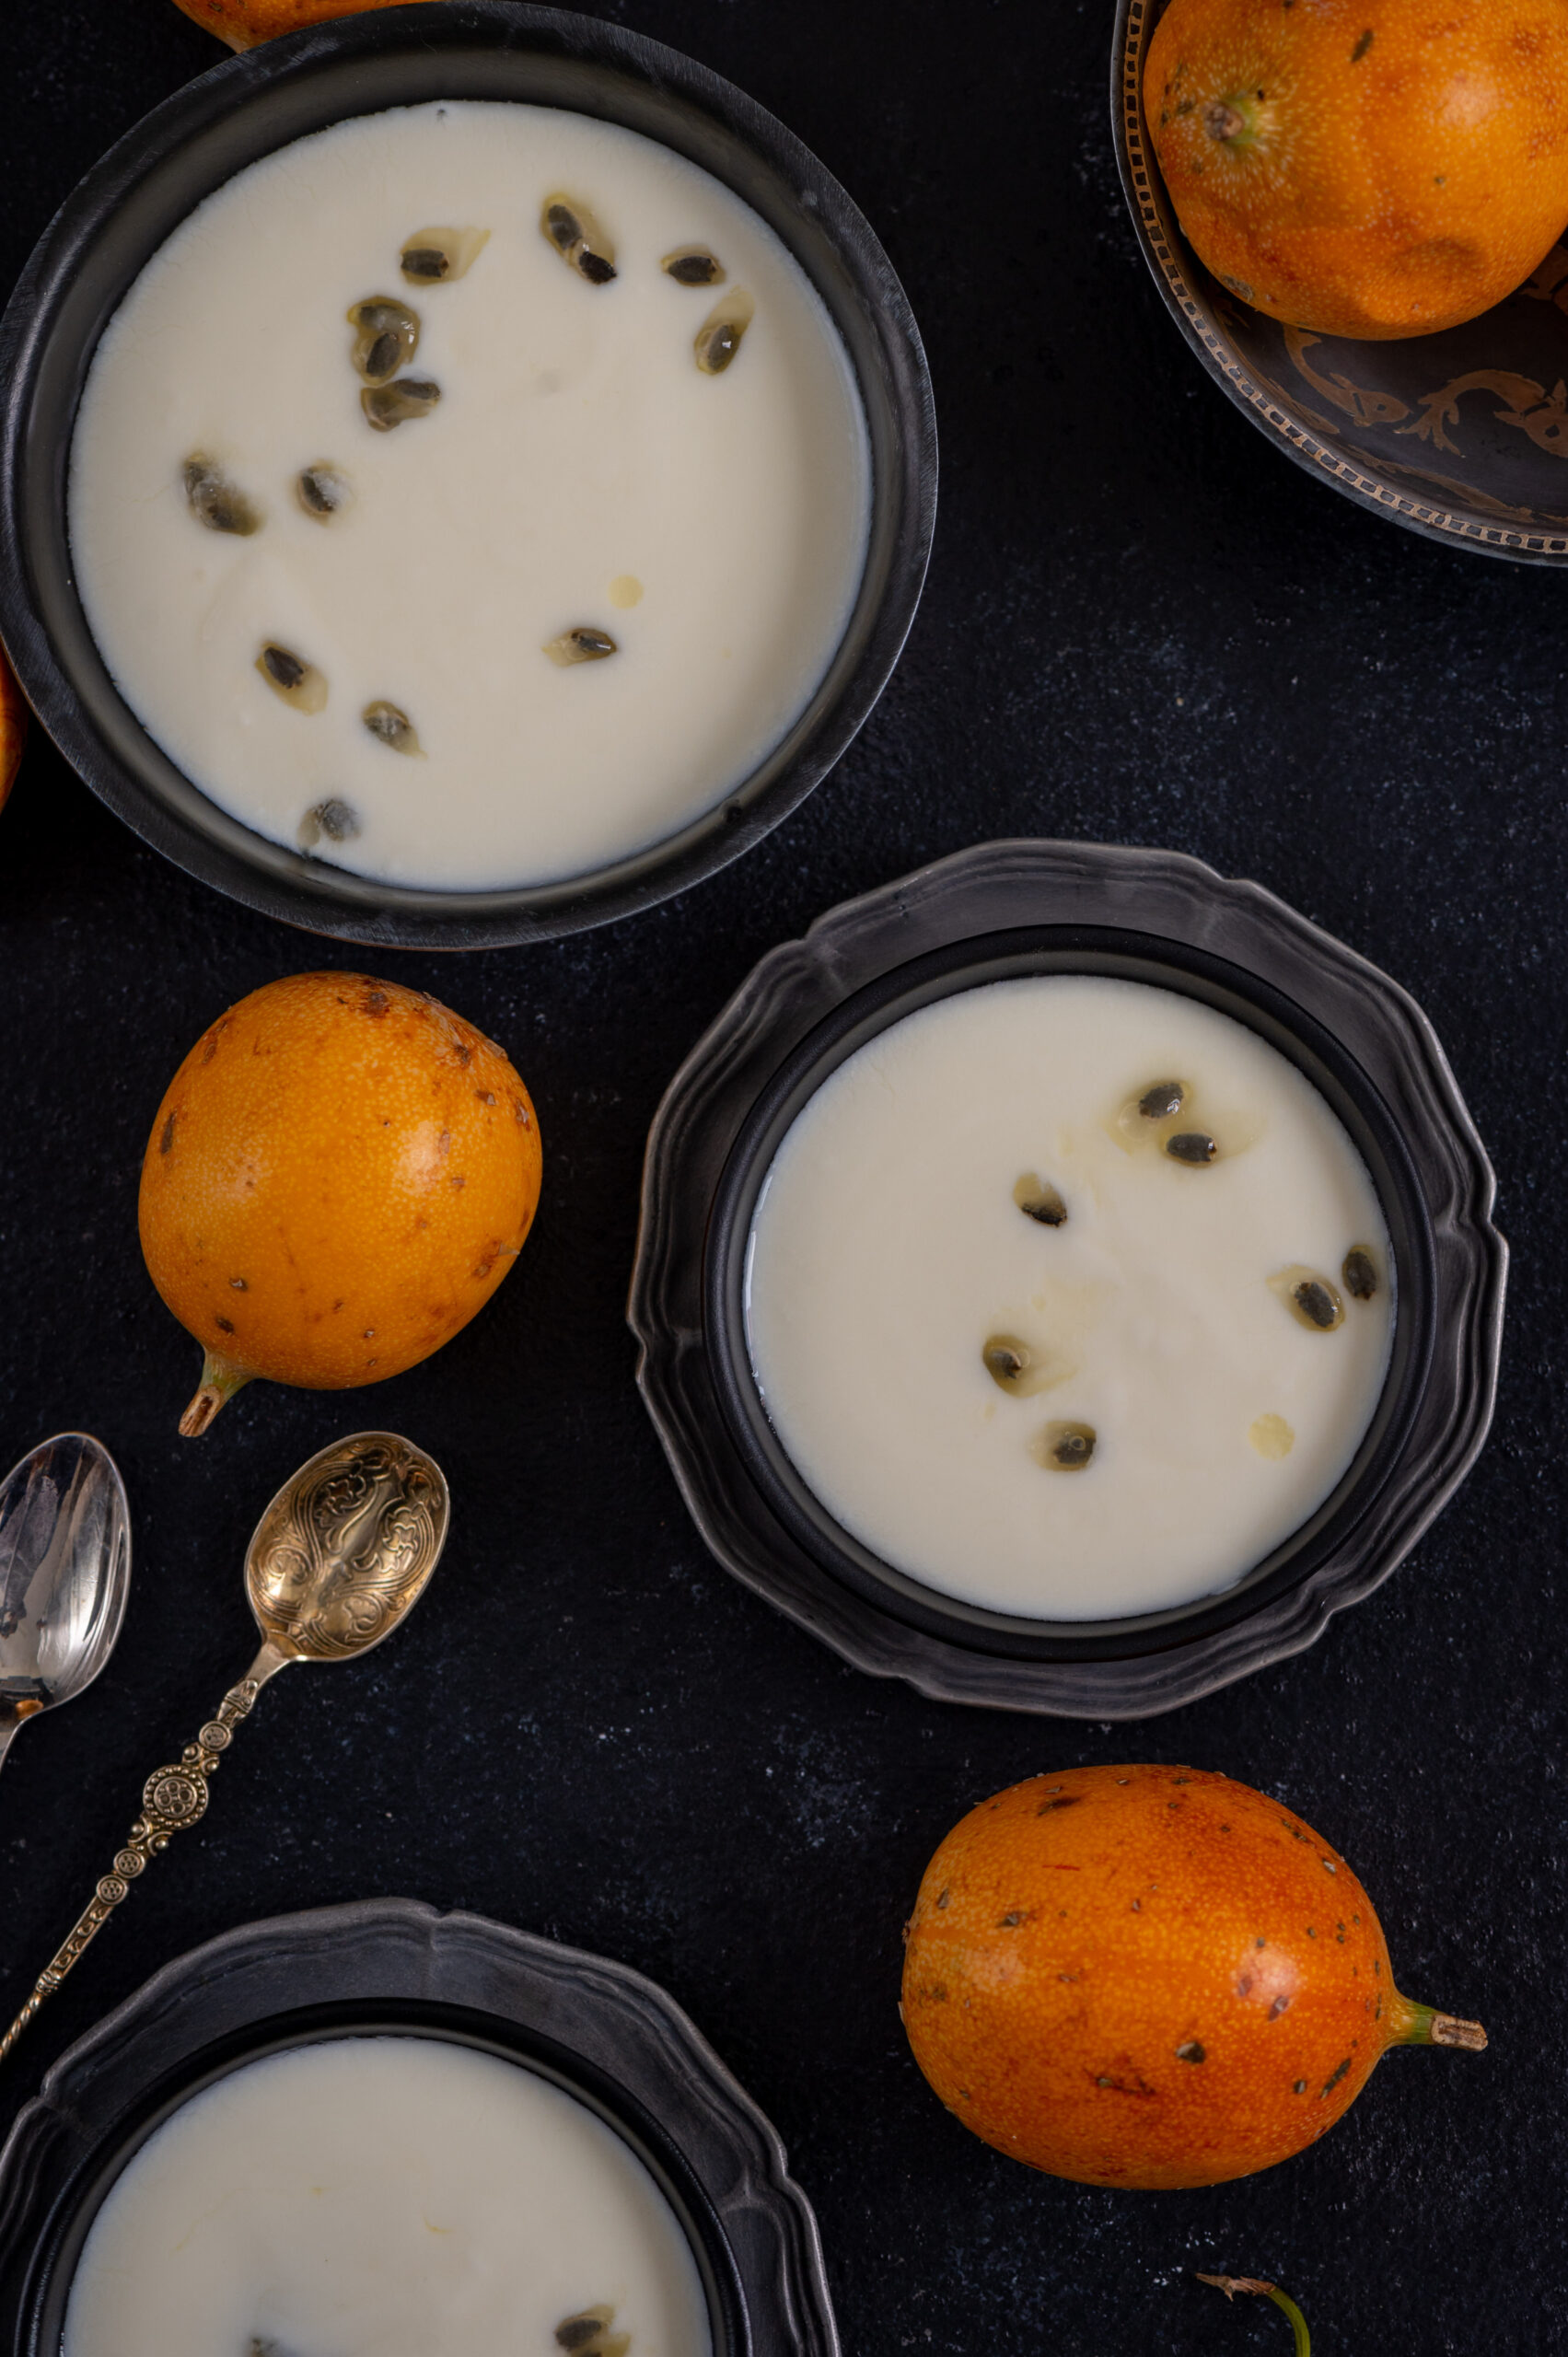
There is an abundance – maybe even an overdose! – of coconuts in my garden, as I have shared many times before. There are so many recipes on this blog that attest to this. From coconut oil (which I’ve made this year too, making use of the intense summer sun) to coconut pudding to coconut stew to coconut podi to rose-coconut kheer… and the list goes on. As much as we love the ingredient at home, we sometimes have so much of it that we don’t know what to do with it. Coconut milk is especially crucial to utilise soon, as it can go bad quickly. The need to use up a big, fresh batch, especially given the effort of straining it, was what gave me the idea for today’s post: coconut cupcakes.

But really, far from just being a way to make sure that an ingredient doesn’t spoil, these cupcakes are quite a treat in and of themselves. A note for my vegan readers: while yummy coconut milk is used in lieu of dairy, this is not an eggless recipe. For you, I recommend that you check out my vegan lavender cake recipe. If you’ve had some practice with baking, you should be able to put the two recipes together and tweak as needed so that you can prepare this coconut cupcake the vegan way.

If you are a first-time baker, I would suggest that you familiarise yourself with this recipe for citrus bundt cake first, which has an introductory guide for beginners. Assuming that you have the basics in place, here are a few more simple tips as general reminders.

Firstly, a pretty simple one: prepare the trays and line them while the oven is preheating to save time later.

Now, for some serious techniques and tricks… I’ve heard many people complain that the cupcake liner opens up during the baking process. I bake pretty much daily, especially for re:store orders, so I have confidence that mine won’t. Perhaps that confidence aka positive thinking goes a long way, but I feel that way in the first place because I’ve mastered the secret: too much butter or fat is what causes the liner to open up. Be careful about following quantities in a recipe to a tee, and this won’t happen.

As for that dome that forms on top of cupcakes sometimes, this can be avoided if you fill only 23 of the liner with batter.

To go back to the subject of ingredients: ensure that they are all at room temperature when you start, so that they bake evenly.

Even though you only ice a cupcake after it has completely cooled, I’ve found that it makes sense to prepare the icing while the trays are in the oven. The secret to smooth, silky icing relies on two things: you must sift the icing sugar first (do this for cocoa powder too, for other baked goods that have it). and you must beat the butter until it’s fluffy. These two factors – sifting and beating properly – make all the difference in the final texture of the icing.

Before we move on to the recipe and method for these coconut cupcakes, I want to invite you to check out and follow my Instagram, if you haven’t already. I’ve recently started sharing reels, in order to keep up with the latest trends on the platform. I have even attended a class to learn how to do this. While I’m confident with photography and the camera, the process for videos is very different. I hope you like the reels I’ve been sharing, including one of this recipe. Please give me your suggestions on how to make them better, and as always, do drop me a comment if you enjoyed this recipe or any other. I love hearing from you!
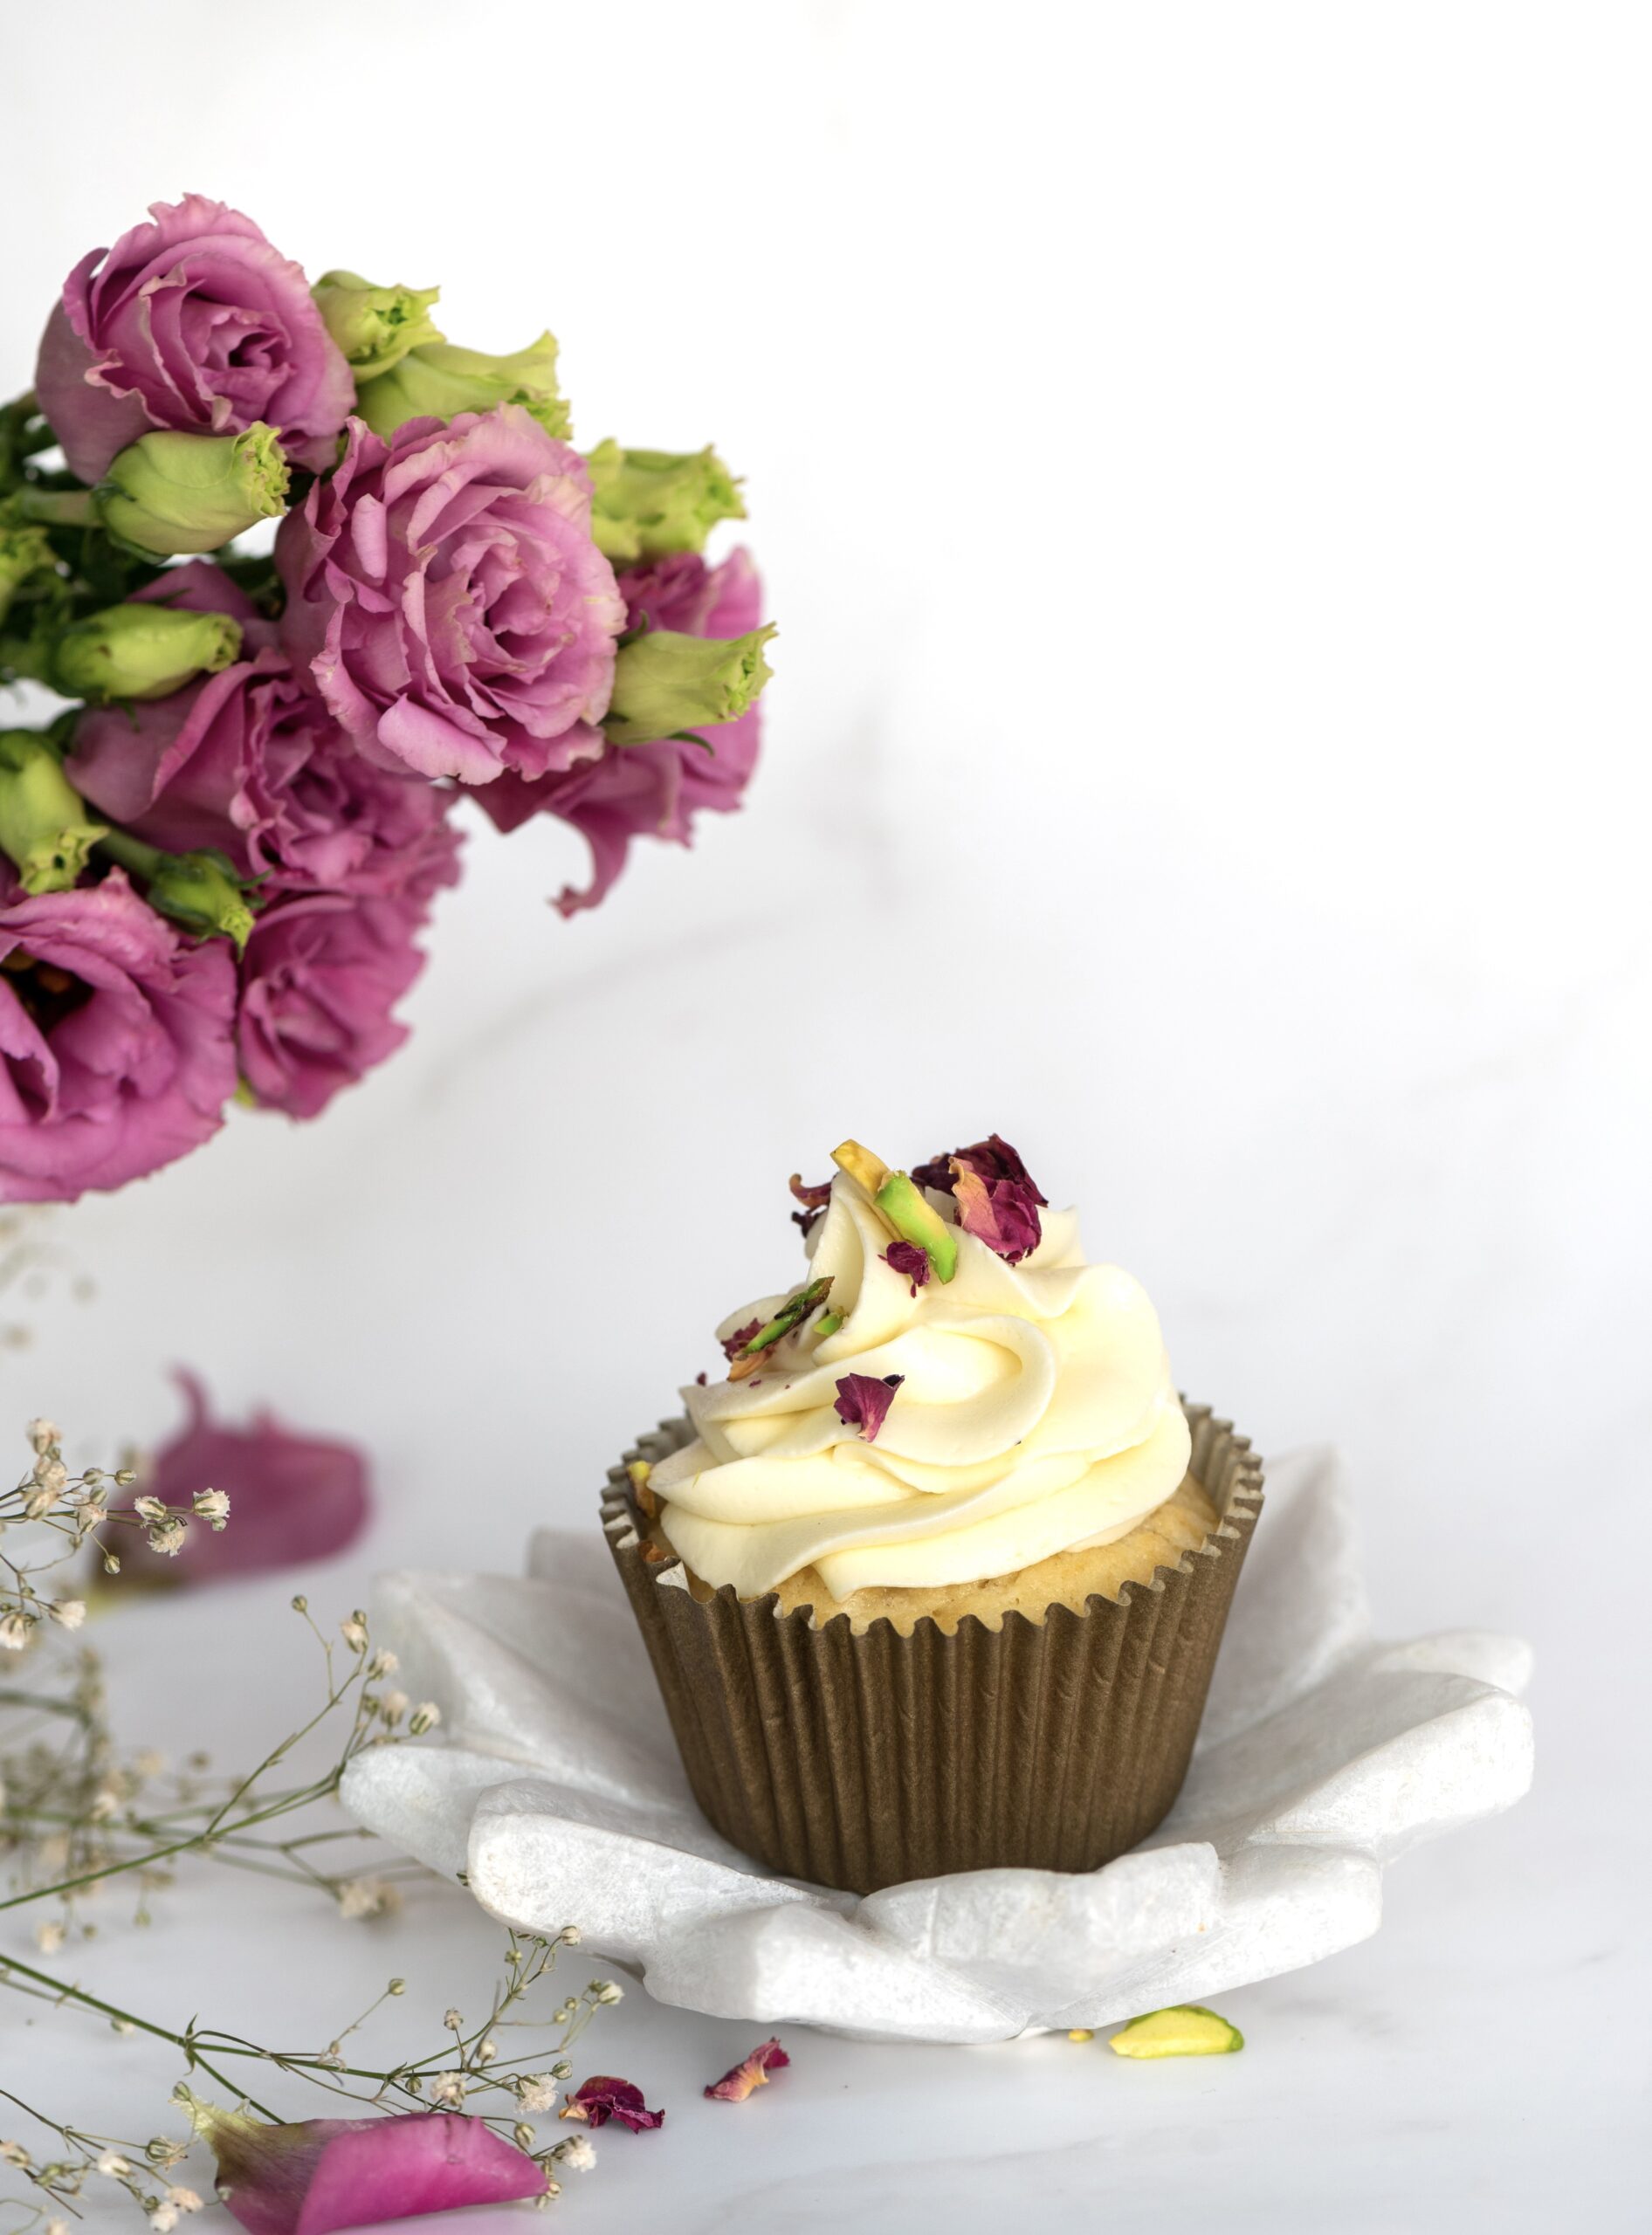
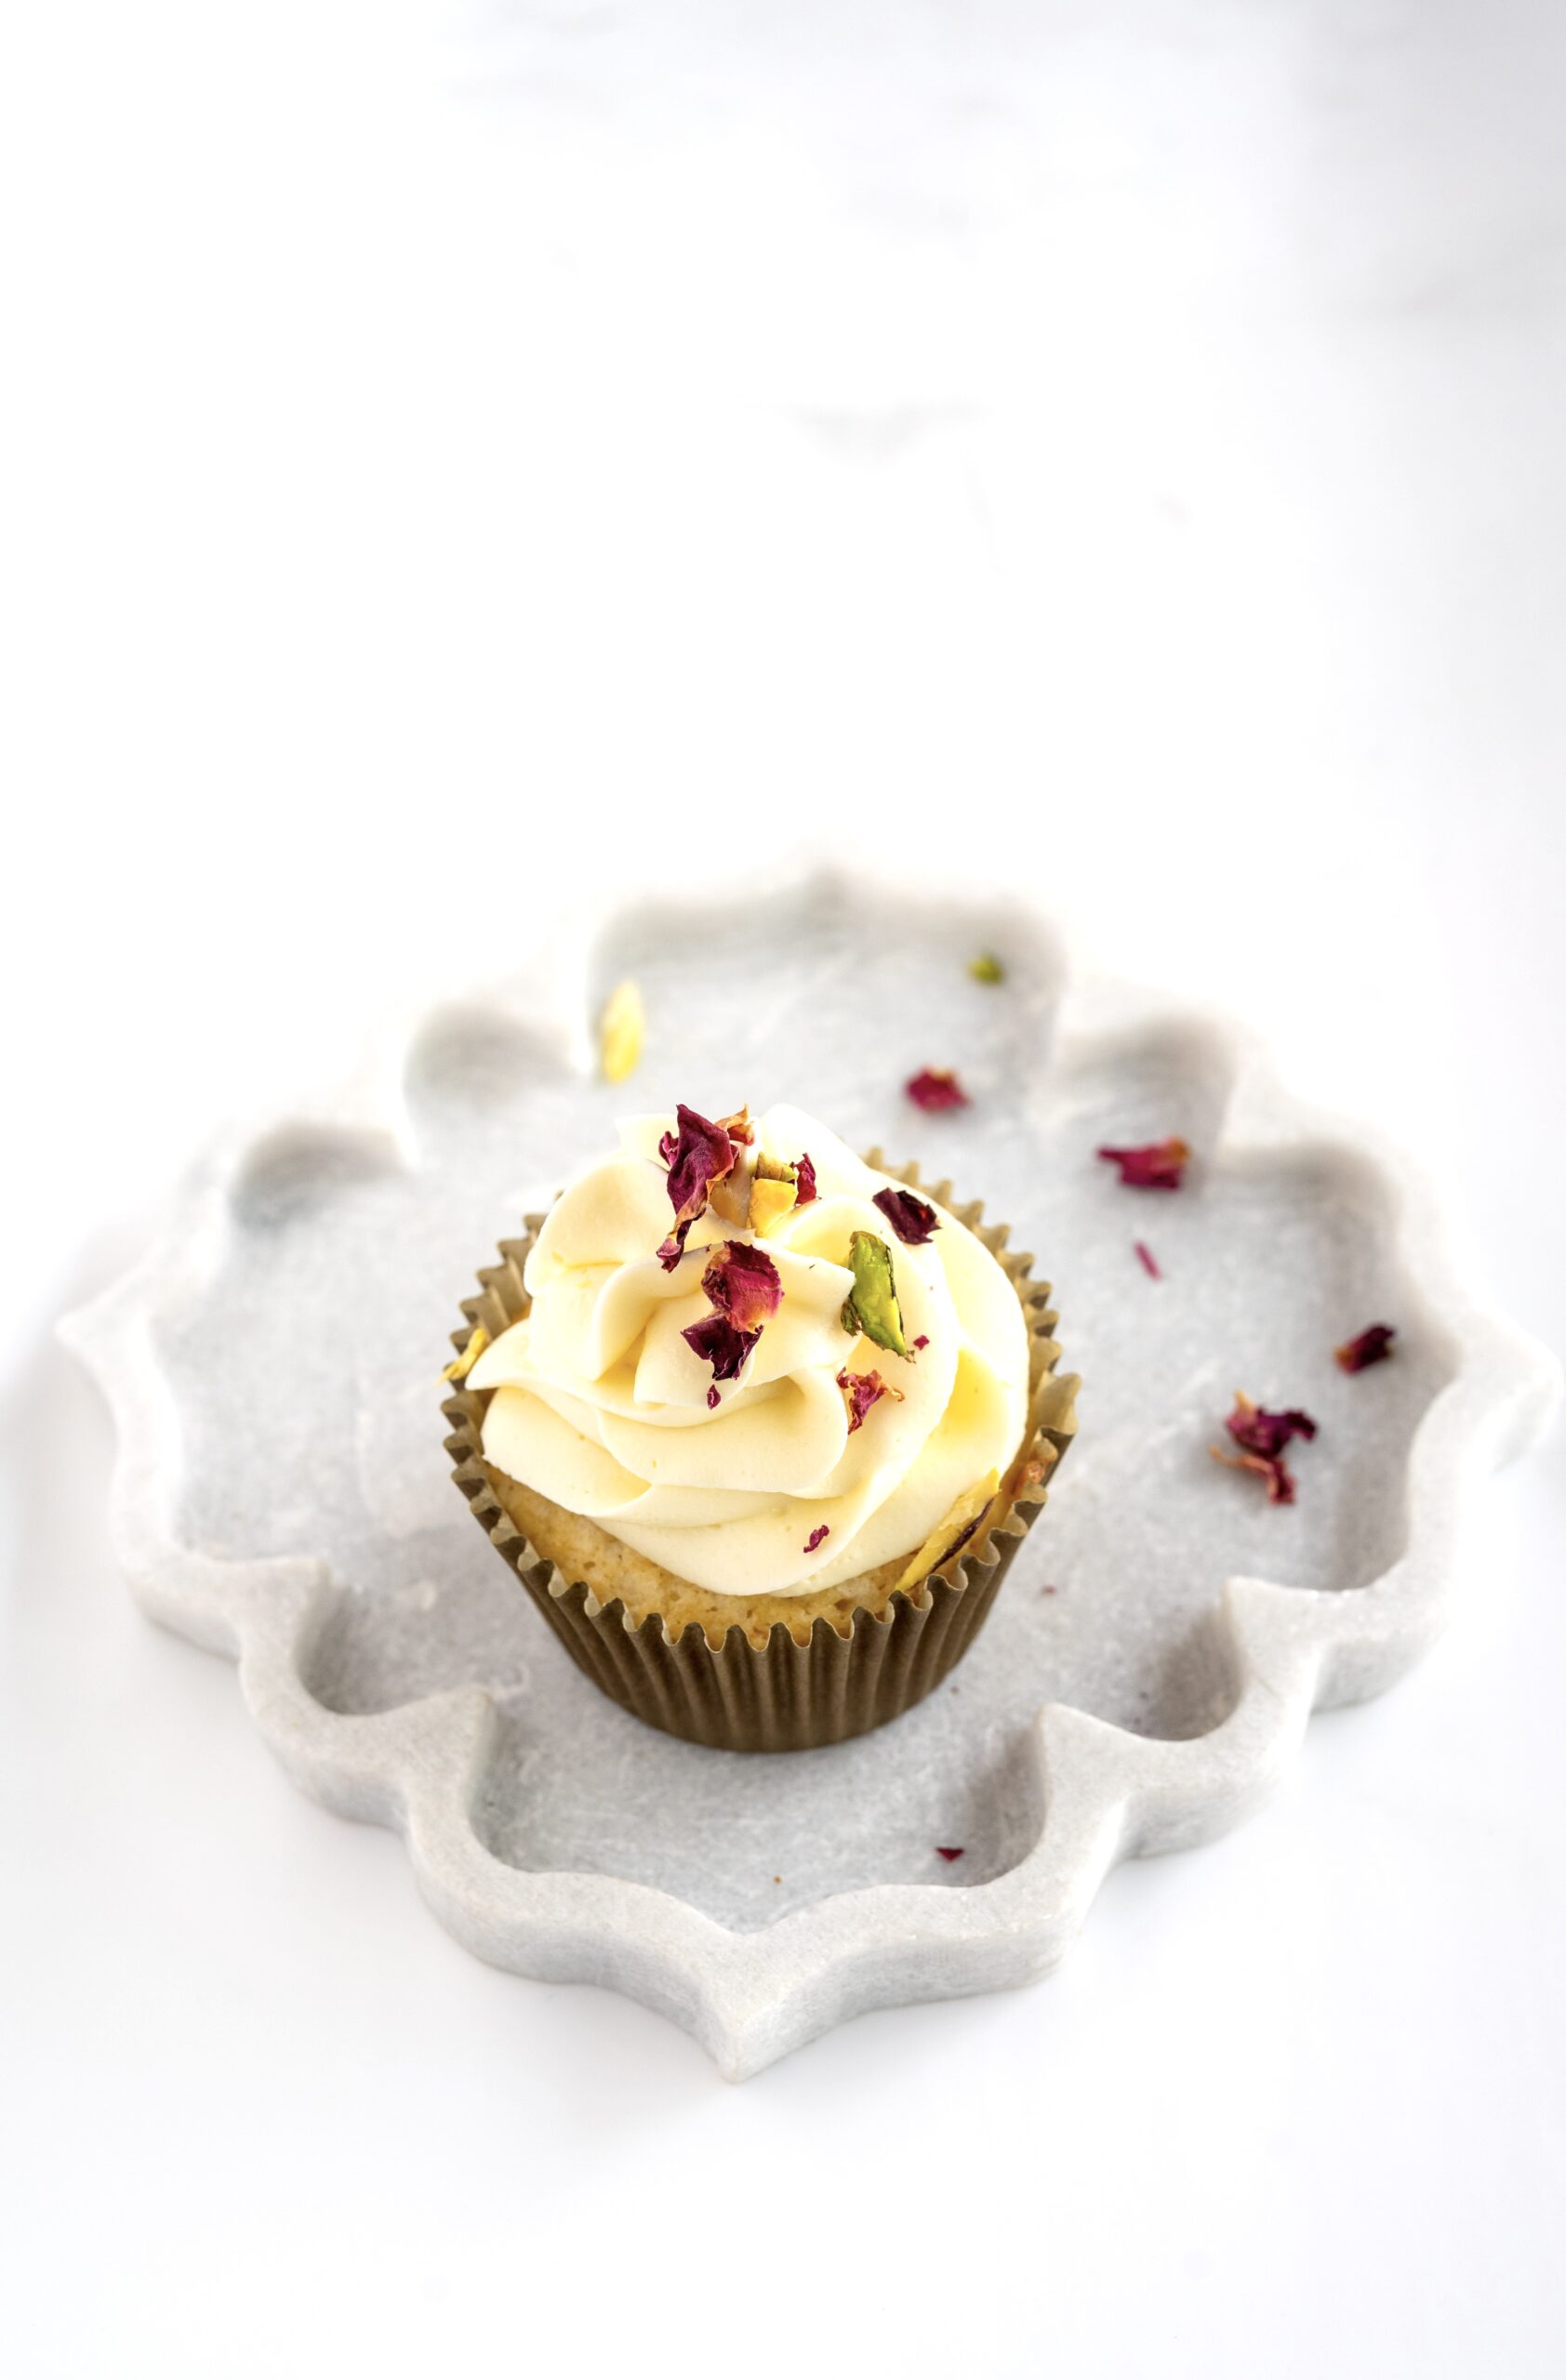
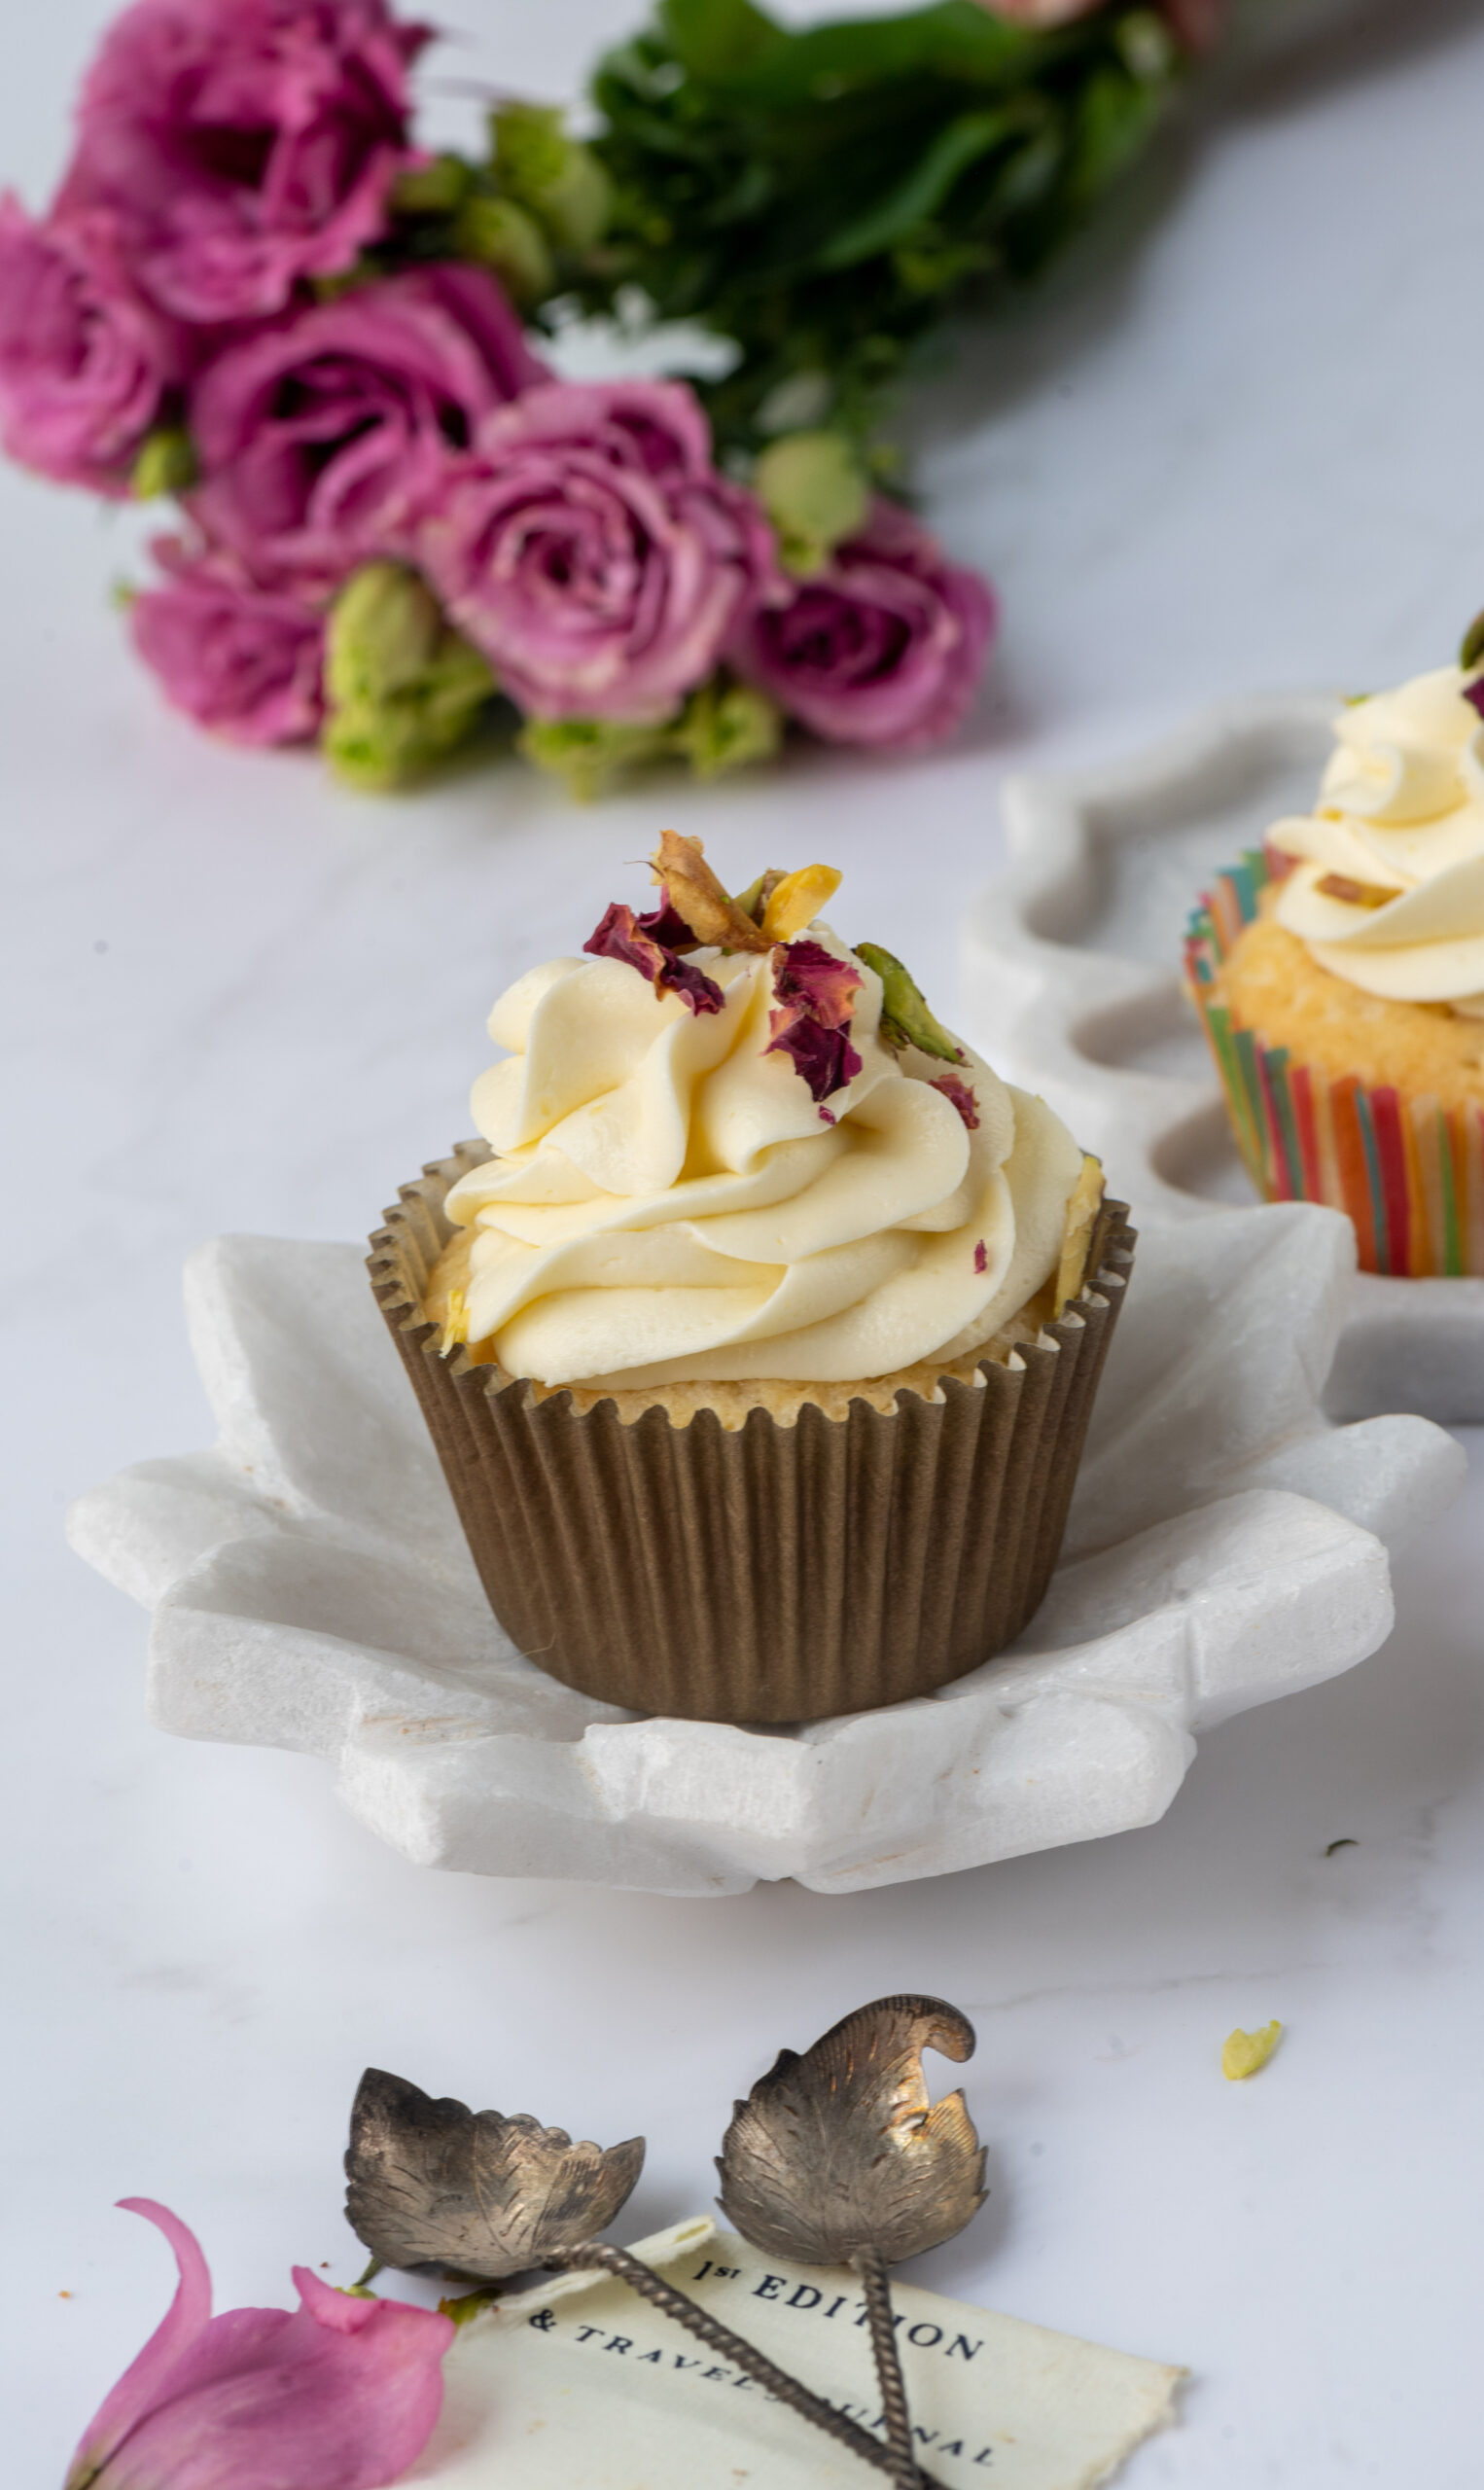
Coconut Cupcakes

(Yield: One dozen)


Cupcake

175 grams flour

120 grams unsalted butter (room temperature)

1 teaspoon baking powder

¼ teaspoon salt

2 eggs

½ teaspoon vanilla extract

190 grams granulated sugar

120 ml coconut milk

½ cup shredded coconut


Butter Frosting

4-5 cups icing sugar (sifted)

1 cup unsalted butter

A pinch of salt

Fresh cream (as required)

¼ teaspoon vanilla extract

Preheat the oven to 160°. Line a cupcake pan with liners. Set aside.

Sift the dry ingredients (the salt, flour and baking powder) and set aside.

In a mixing bowl, add the butter and beat it until it is light and fluffy. Then, add the sugar and beat again. Scrape down the sides of the bowl, making sure the mixture has been well beaten for about 3 minutes.

Add the eggs one at a time, beating between each addition.

Add the dry ingredients and the wet ingredients one by one alternately, mixing only until combined.

Finally, add the shredded coconut to the batter, and use a spatula to bring all the ingredients together.

Using a scoop, divide the batter into the liners. Bake for 15 minutes or until a toothpick comes out clean.

Allow to cool in the pan for 5 minutes and then remove gently onto a wire rack.

To prepare the butter icing, beat the butter and the salt well with an electric blender. Add half the icing sugar and beat again, then add the remainder. When using the electric blender, ensure the sugar doesn’t fly out of the bowl.

Add the cream, in your preferred quantity, and ensure that the butter cream is at a consistency that is thick enough to pipe.

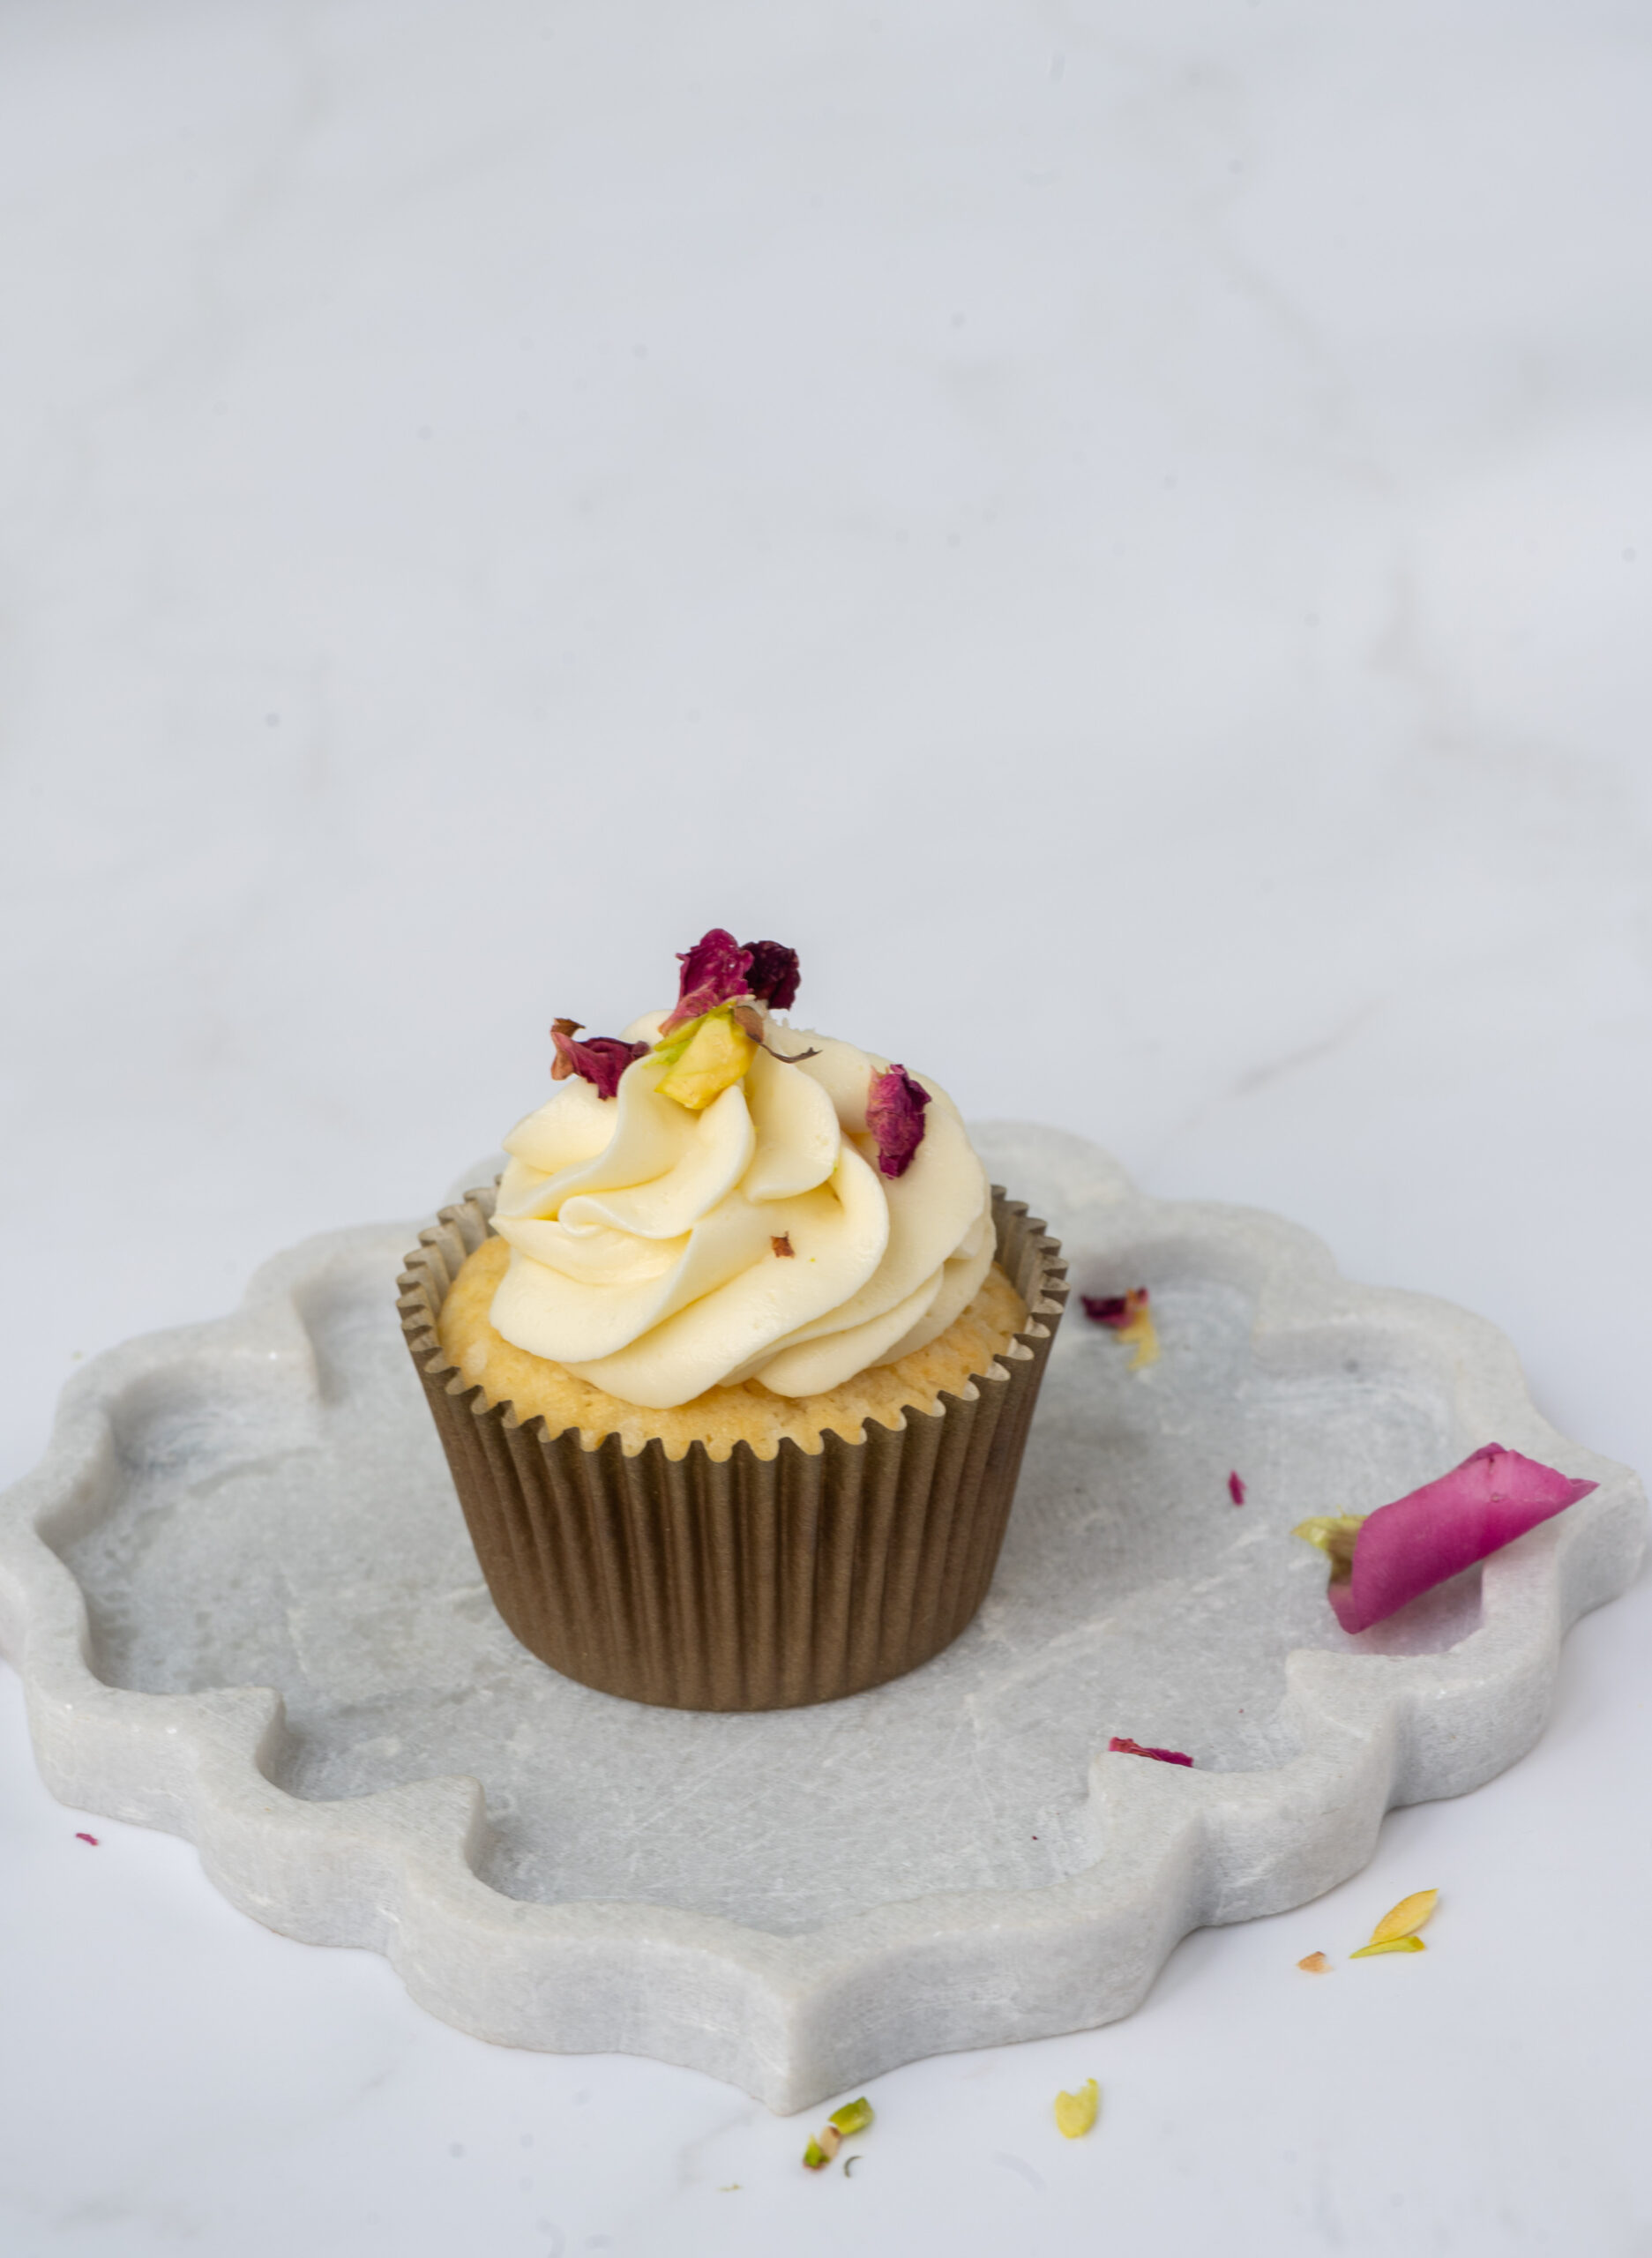
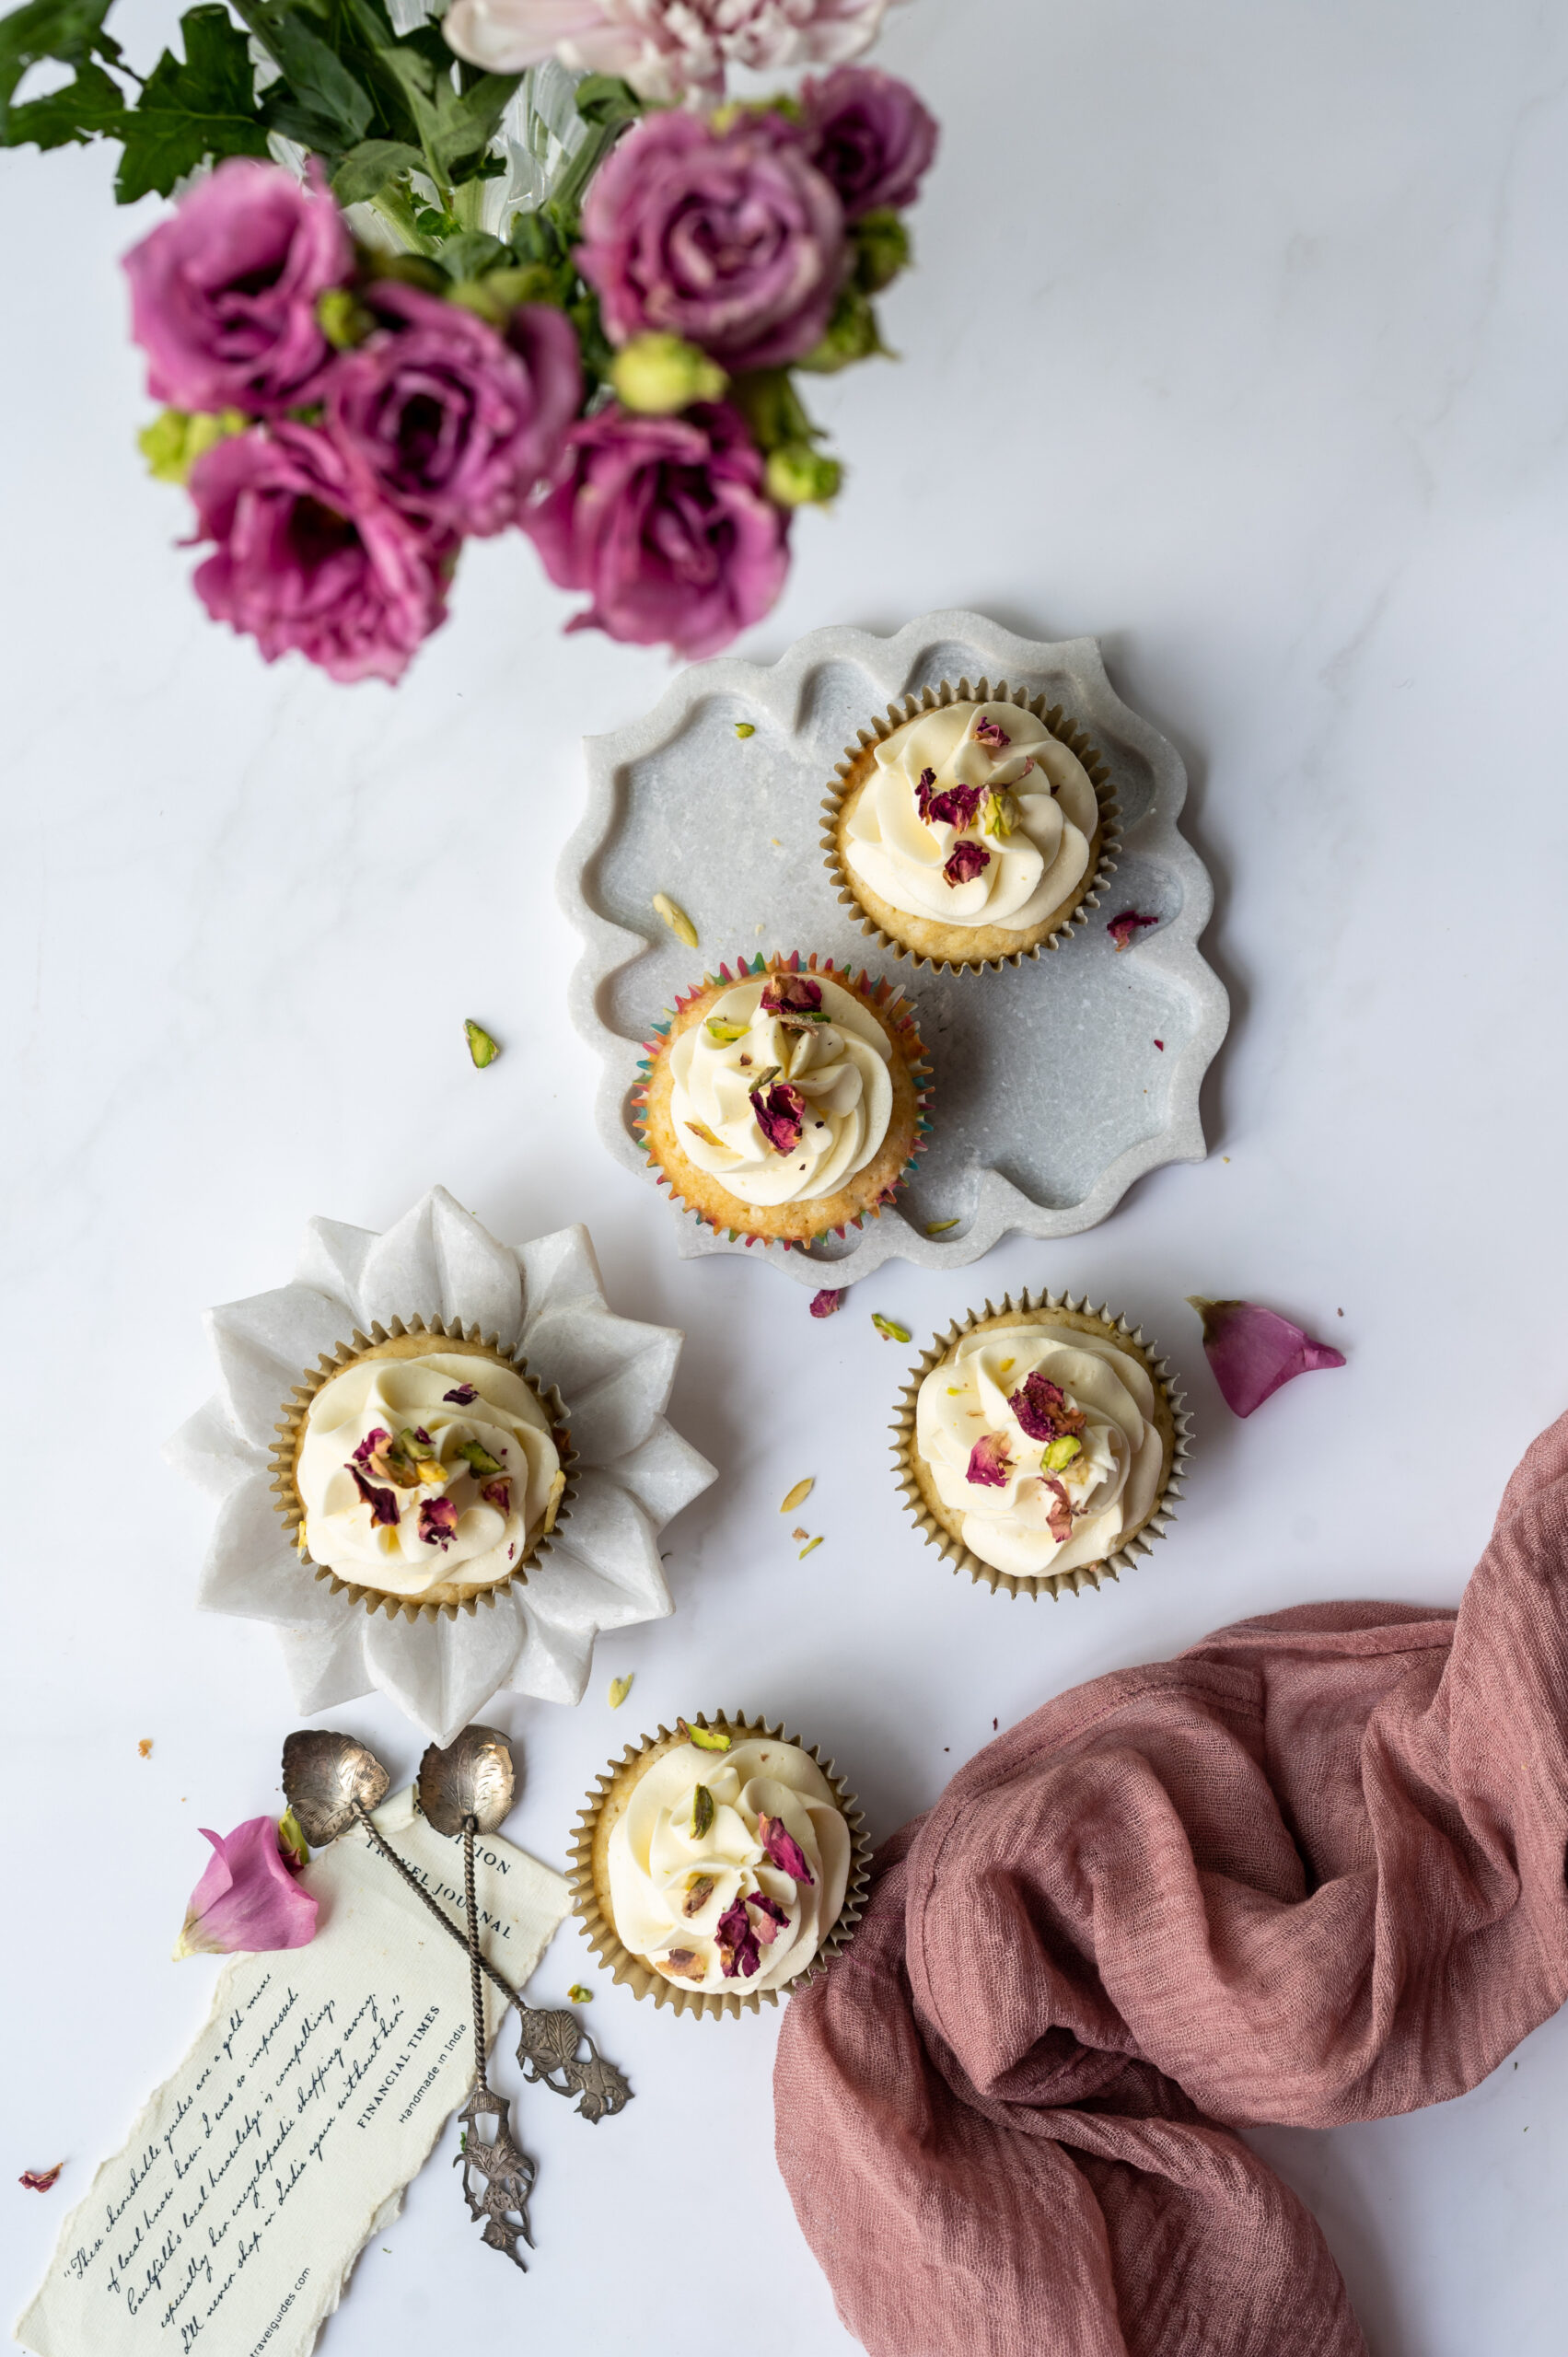
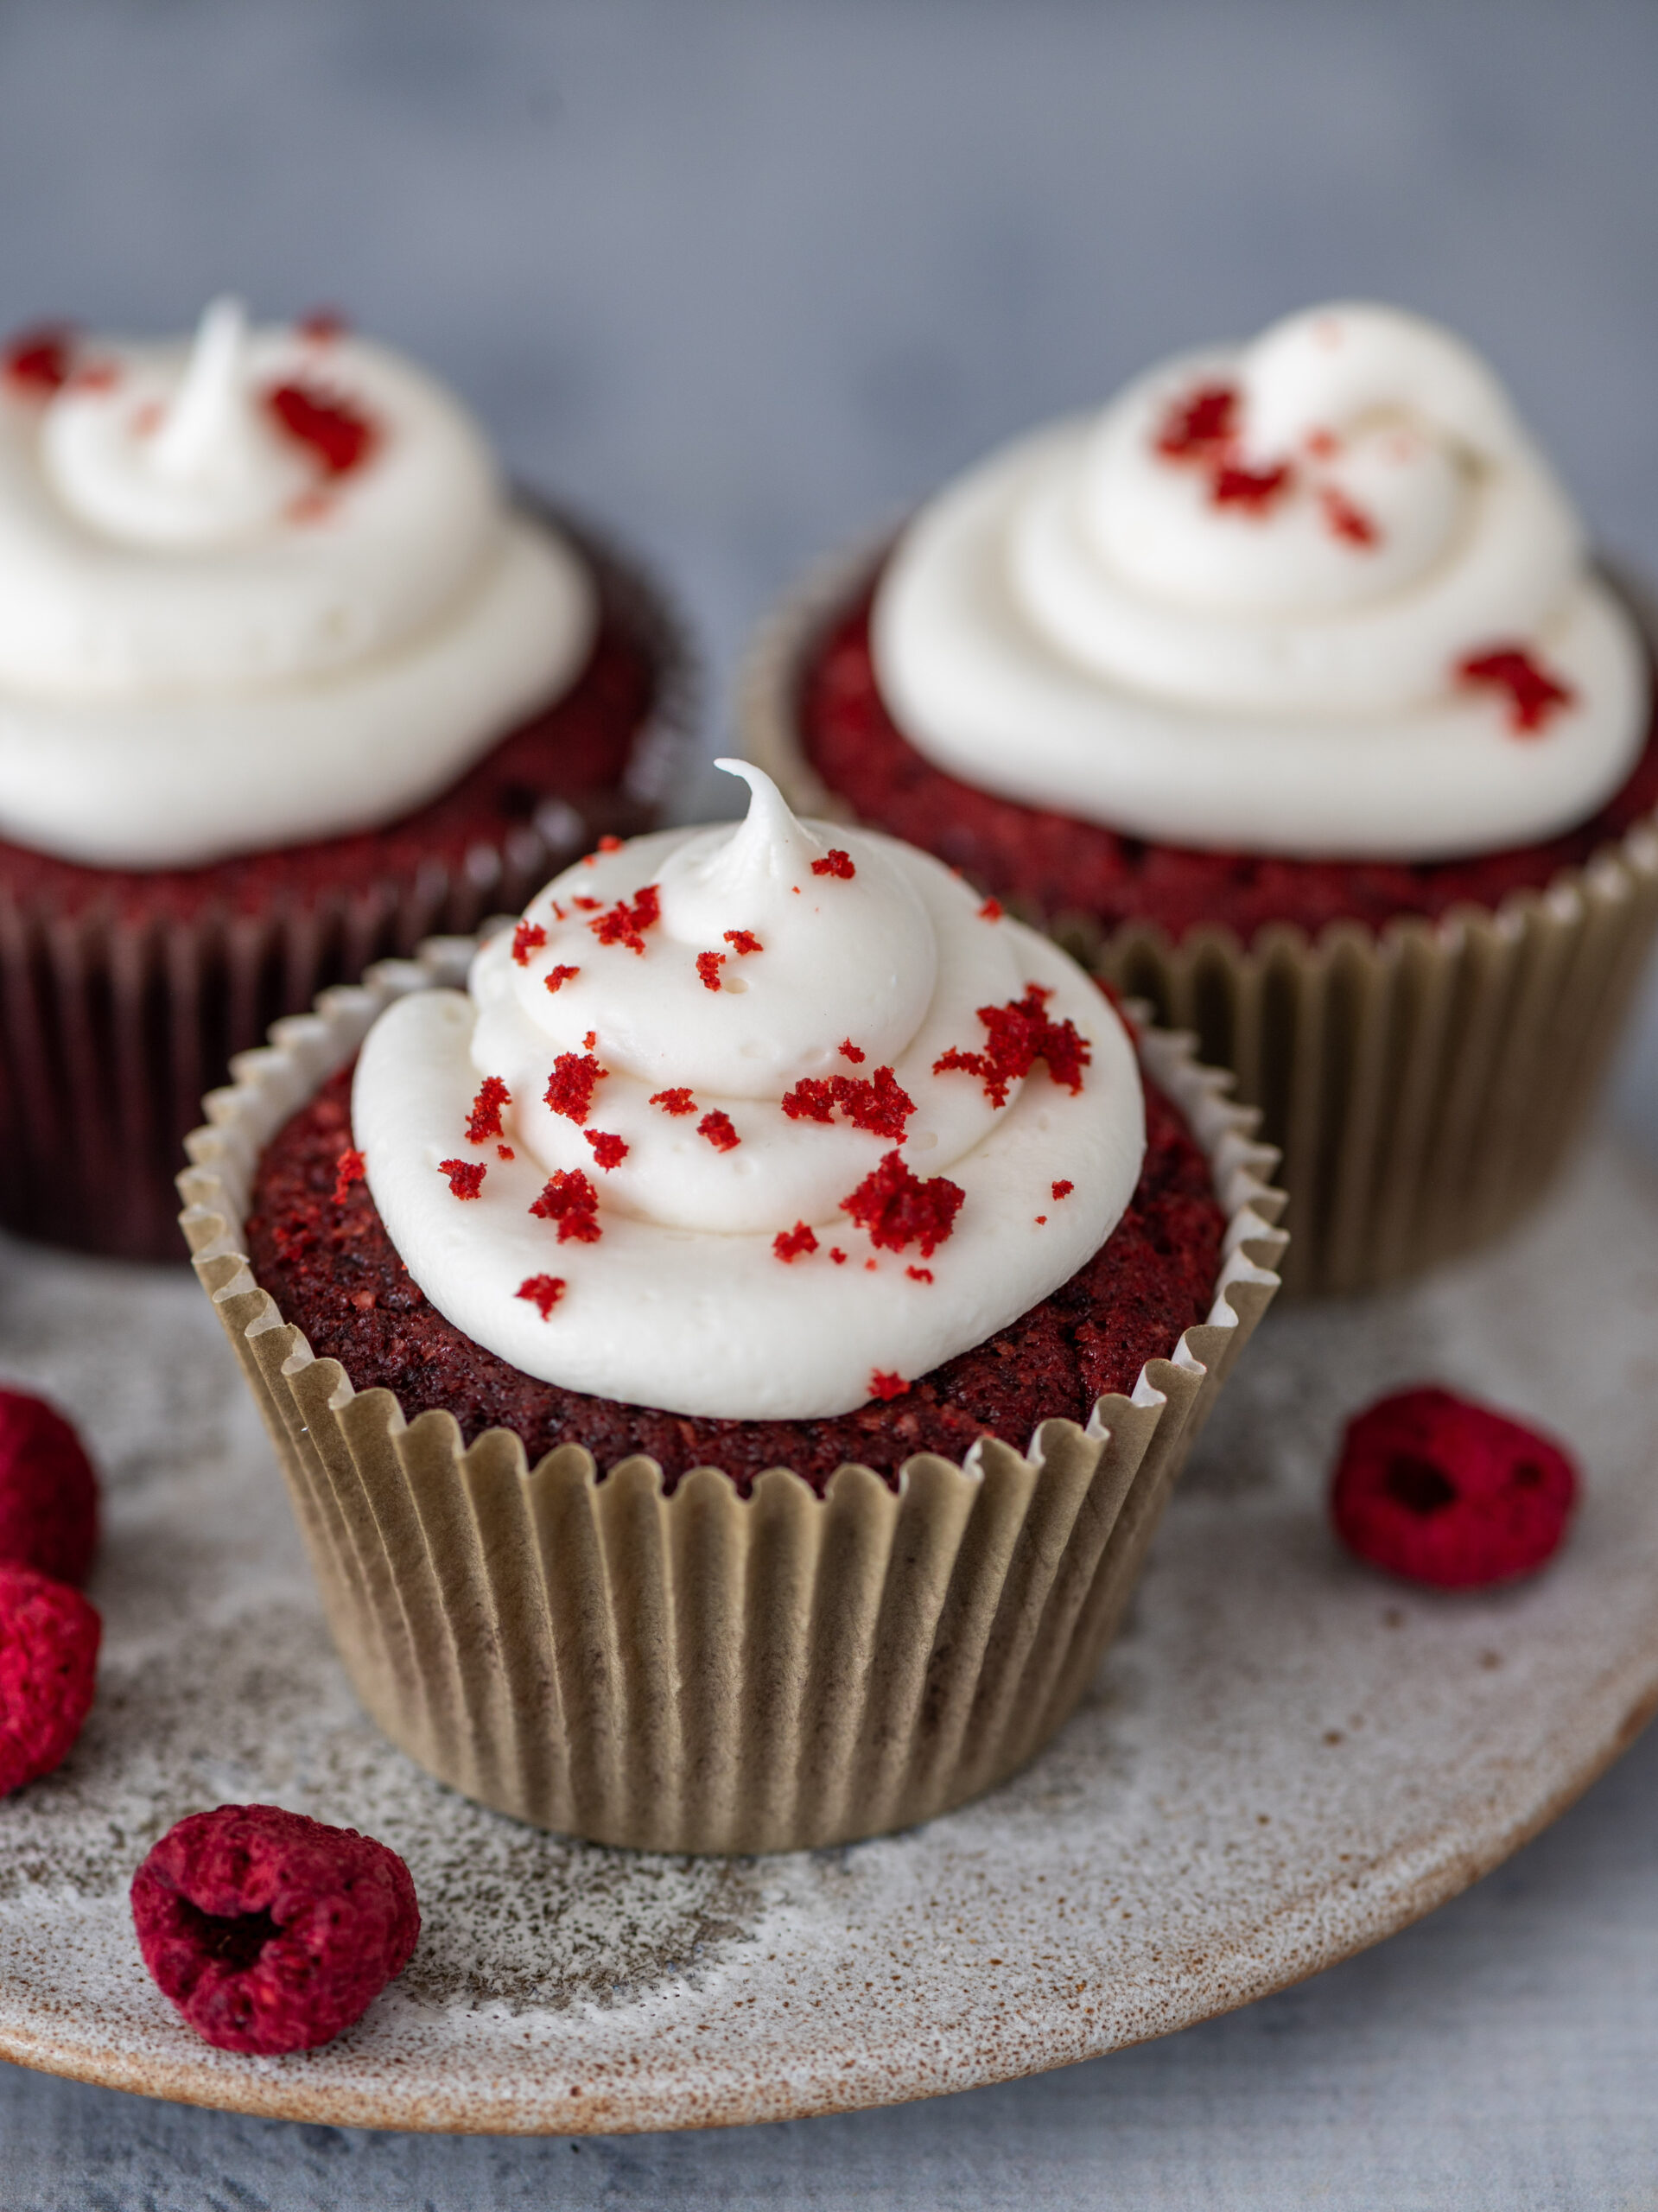
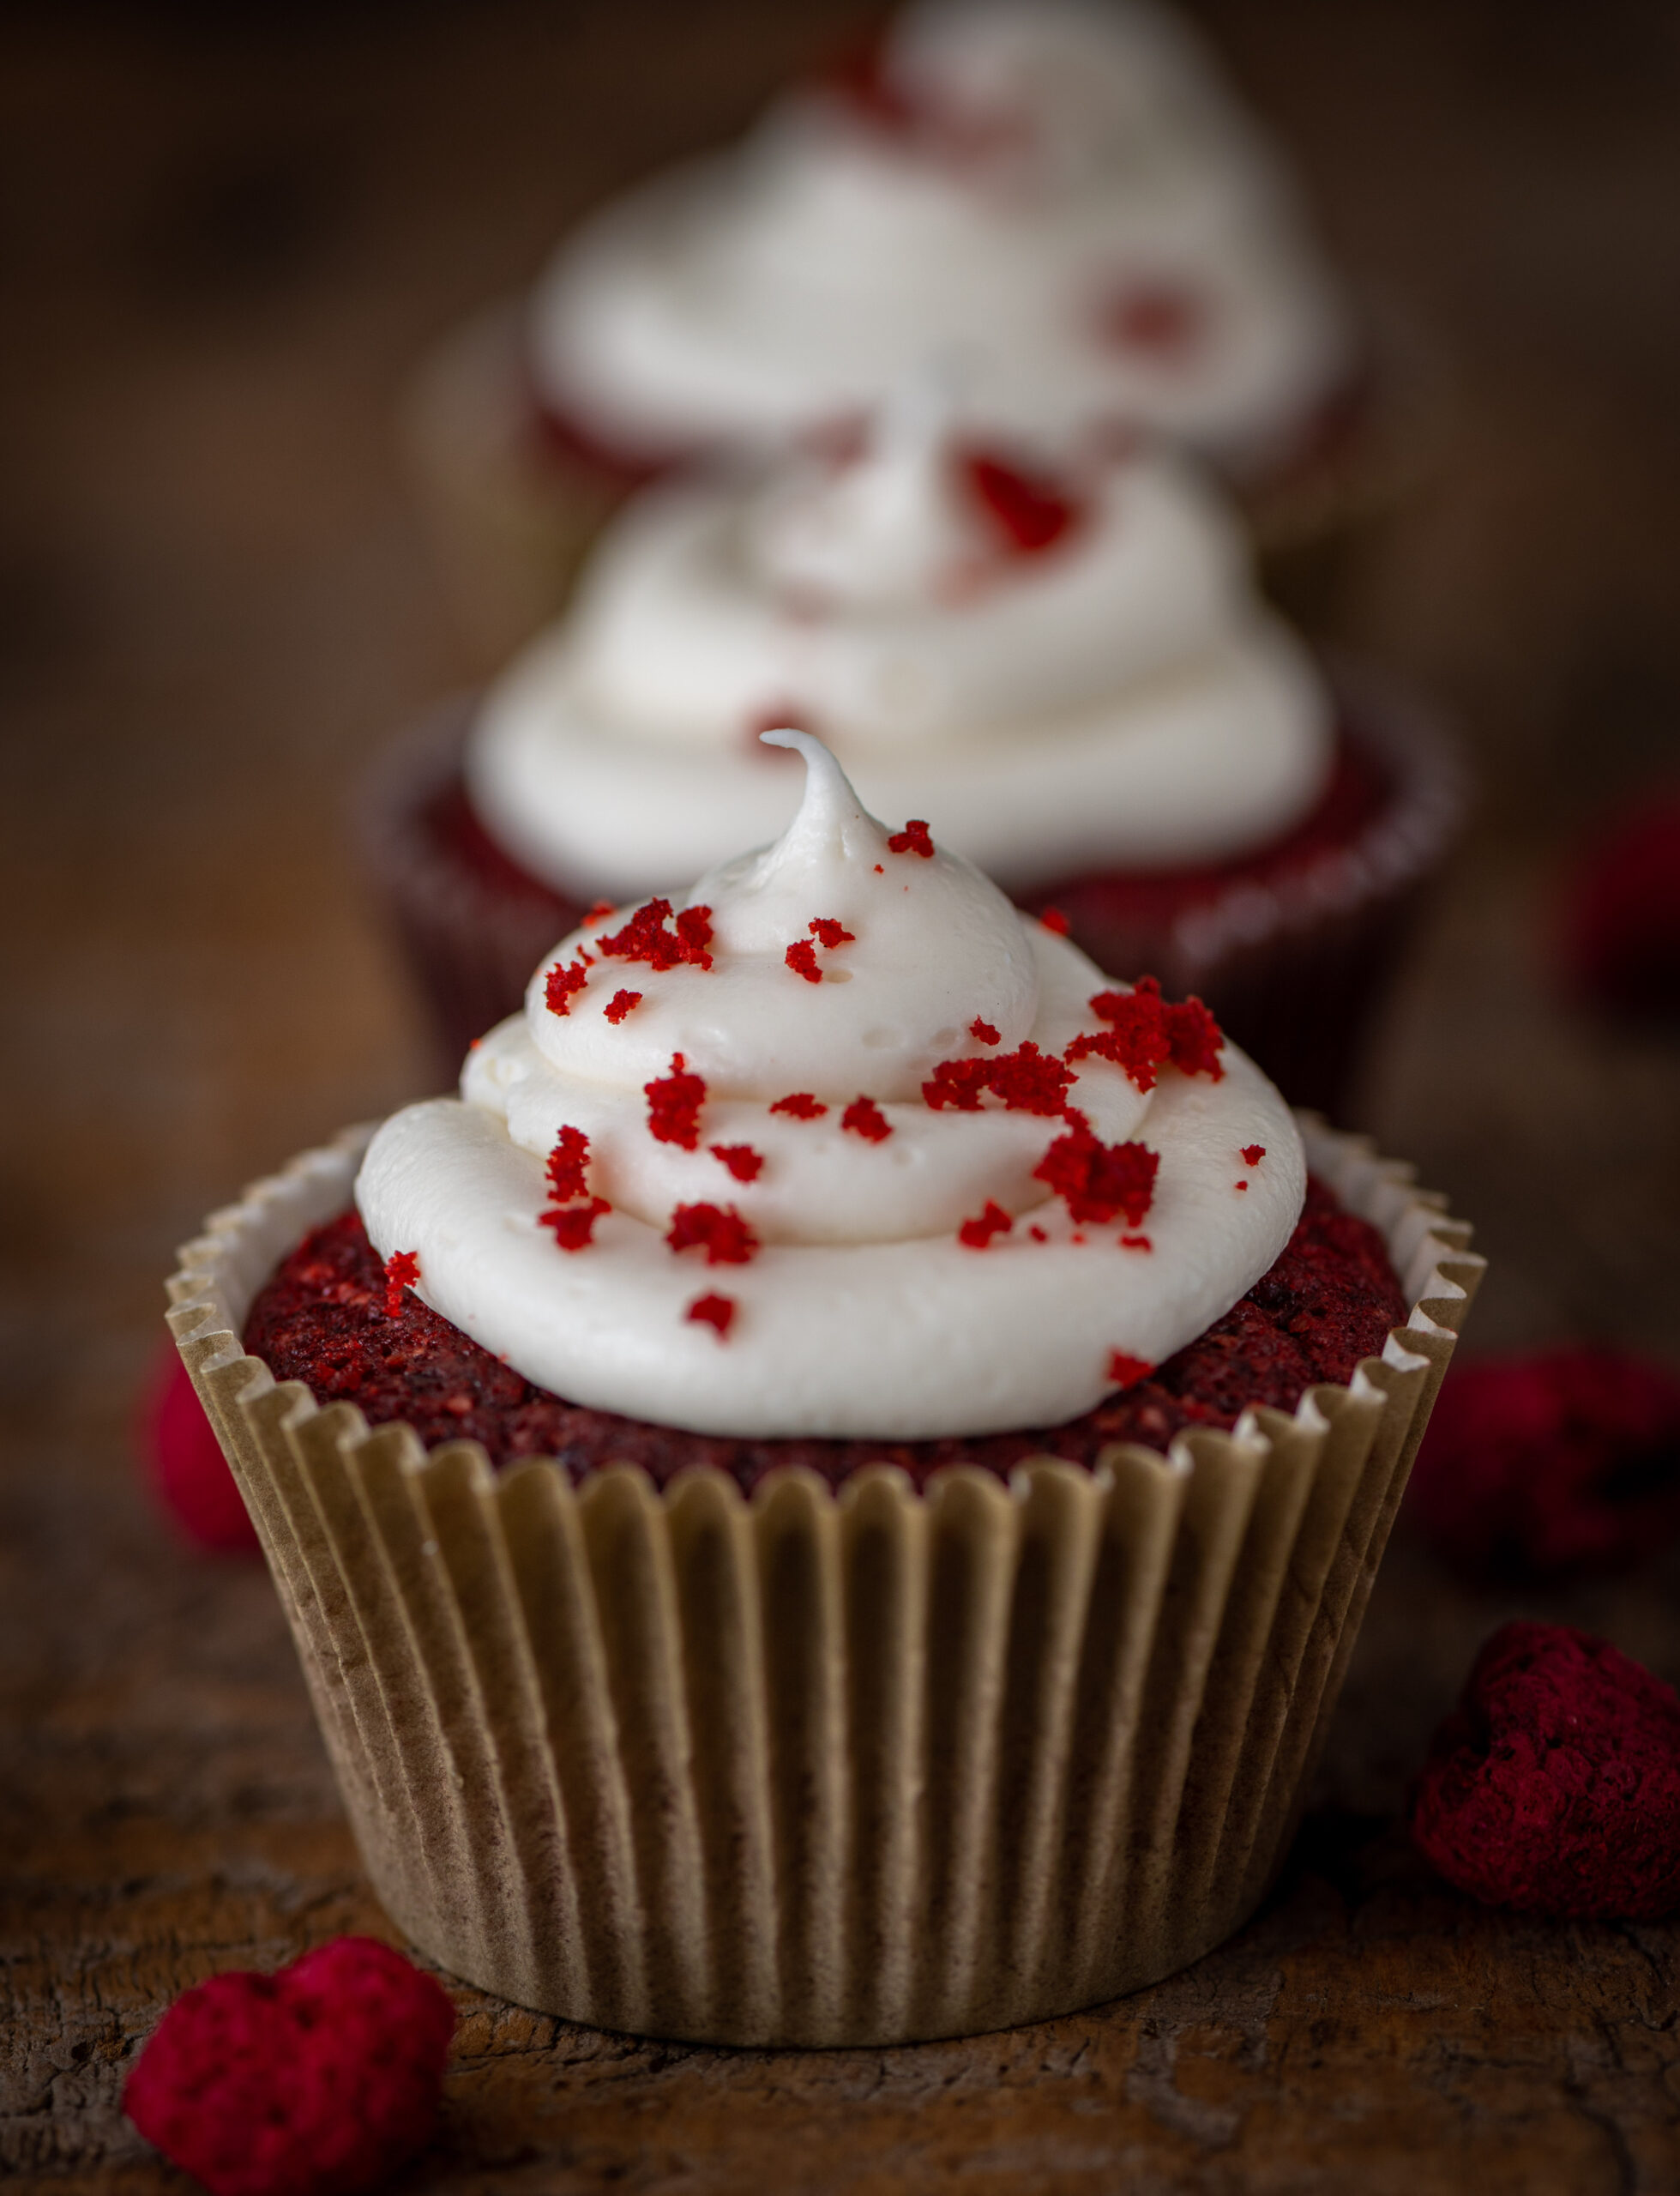
Pipe the icing onto the cupcakes, and garnish as you’d like before serving. Then, all the work of baking and icing done, there is nought to do but to enjoy watching these delicious coconut cupcakes disappear – which they do quite quickly in my home, and most likely in yours too – and make sure that you grab one for yourself before they do!

I shared a banana bread recipe with you a few years ago, which I hope you enjoyed. I encourage you to try it out too, if you have not already. I more recently began experimenting with a chocolate-banana combination, and this new version of deliciousness is what I’d like to share with you today. This banana chocolate loaf is not just an upgrade, but an entirely new recipe. As I’ve shared before, especially in this post, baking is a science, so please do go through the ingredients and method step by step when you prepare it, even if you are familiar with my earlier banana bread.

My first trial for this recipe didn’t include chocolate at all. The thought process behind it was that as I am not a fan of raw bananas, but appreciate the fruit’s amazing nutritional qualities, baking it into another cake was a fun way to incorporate it into my diet. After all, Indian meals often end with a banana, eaten for its digestive benefits, so why not end with a banana cake?

Keeping the health quotient in mind, as I have introduced chocolate into this cake, I have been mindful about its sugar quotient. I have chosen to use dark chocolate pellets, which are less sweet. I have also used brown sugar in a reduced quantity since the flavour of the banana already imparts the dish with natural sweetness. You may wish to substitute the same with jaggery powder, if you prefer. You will notice that this one also has a special ingredient, something that gives it a different zing from the earlier banana cake recipe.

I absolutely must have something to munch on along with my tea or coffee in the late afternoons, and this banana chocolate cake or my date cake (a favourite among re:store clients too) are what I find myself reaching out for often lately.

In fact, one of the best things about this banana chocolate loaf is that it packs and travels very well, which means I’ve gotten my fix of it even when I’ve not been at home. Recently, I made a trip with a dear childhood friend, and this treat was our companion for the first few days. Even though we were seeing each other after a long time, we picked up where we left off with ease. That’s how it usually is with childhood friends, isn’t it? You just catch up, and the happy memories from decades ago flood back afresh, and renew the bond quickly. The same thing happens with food, too. That’s why it is said that food is emotional: it helps one express and relive one’s memories, attachments and experiences.

I baked and carried this beautiful banana chocolate loaf with me on that holiday with my childhood friend. We travelled everywhere by train and by road, and enjoyed bites of this cake in the English countryside whenever we stopped to take in the scenery. Our afternoon tea in charming little villages had the requisite freshly-made traditional scones and clotted cream, of course, and I hope to master the recipe for that sometime. But my banana chocolate loaf was also present, loving parcelled and equally lovingly shared, and to me it was just as delicious as our authentic holiday treats.

Banana Chocolate Loaf

(Yield: 9 inch loaf)


175 grams maida

20 grams cocoa powder (unsweetened)

¼ teaspoon salt

1 teaspoon baking soda

½ teaspoon cinnamon

1 cup brown sugar

2 eggs

120 grams butter

1¼ cups very ripe bananas (mashed)

1 teaspoon vanilla extract

13 cup yoghurt and cream (mixed)

½ cup chocolate chips

¼ cup broken walnuts (for garnishing)

Preheat the oven at 160°-170° and grease and dust a 9-inch loaf pan.

In a bowl, sift the dry ingredients well. Set aside.

In another bowl, beat the butter and sugar well, scraping down sides and making sure they’re all mixed well. Now, add the eggs one by one and continue beating. Next, add the mashed bananas and vanilla extract and beat slightly.

Now, add the cream and yoghurt mixture and beat again. Next, add the dry ingredients as well as some of the walnuts and all the chocolate chips. Fold over lightly.

Pour the batter into the loaf tin and sprinkle the remaining walnuts on top.

Bake for about 30-40 minutes or until a skewer inserted comes out clean.

Rest the loaf in the tin for 10-15 minutes. Then, upturn and remove from the tin. Allow to cool.

Your banana chocolate loaf is now ready to be sliced and served. I do hope you’ll enjoy this recipe, and that you’ll make some special memories with it just like my friend and I did on our travels recently. Whenever I share cake recipes, it’s so that more people can enjoy the pleasure of baking, and I encourage you to try them out for yourself. But if you would rather have me whisk a cake up for you, I’m always happy to do so too. Just drop me a line!

Every time that I had whole wheat halwa while I was growing up, it was mostly made in a jiffy. This was because whenever unexpected guests landed up at home and my mother had to make something sweet to serve them, this was her go-to recipe. Most people of that generation who cooked were extremely versatile. They knew what would work quickly, based on the ingredients they had on hand. It was also a time when those of my generation literally grew up in each others’ homes. So unexpected guests were always aplenty, and the Indian courtesy of feeding them was never forgotten, no matter how much of a surprise they may have been!

The base of this recipe is wheat, jaggery and ghee – items which would invariably be in any Indian kitchen. The additions like saffron and cardamom may not always be available, but the essential ingredient list is one that was quite reliably in every home while I was growing up, and most likely still is today. These are inexpensive ingredients. Not many could afford refined sugar back then, so the accessible and healthier jaggery was used, along with affordable staples like wheat and ghee.

Wheat-ghee-jaggery is an age-old combo, as can be seen in the auspicious sukhudi, which uses the same base. Sweets that utilise this combo are offered to the gods in many Indian homes, and it’s easy to see how the accessibility of the ingredients make them a logical choice for many.

The simplicity of such offerings is part of their beauty. In fact, aside from them being offered in worship, they were also the key feature of birthdays. Back when I was a kid, a birthday cake was not always guaranteed. What we would offer to the gods on that day, and then consume for ourselves, was the big question. “Birthday? Big deal. Get up and go to school!” was a refrain many of us heard! Still, our mothers would usually prepare our favourite Indian sweets that day. My brother liked rava kesari, so that’s what he would receive. As for me, it was this whole wheat halwa that was usually my birthday treat.

I loved birthday parties, and had been to a few of my friends’. There was one year when I decided to throw myself a surprise party – meaning, it was a surprise for my mum! I went back home after school with my whole class, with absolutely no advance notice, and announced that they had all come to celebrate with me. I knew that if I had asked her earlier, she would just have said No. But with all my friends already there, she obliged so very sweetly. Looking back, it could not possibly have been easy to muster up a party immediately. But the feast contained this whole wheat halwa, some standards like toasted sandwiches – and even some McRennett’s cake which she somehow managed to organise last minute. You may recall that I’ve never quite been a fan of what I call that smelly vanilla cake, but it is cherished by my generation. It was a hit at my party too, of course. But that whole wheat halwa was what shone in my mind, and still does, all these years later.

Whole Wheat Halwa

(Yield: 5)

¾ cup whole wheat flour

¼ cup jowar flour

½ cup ghee

½ cup jaggery

A pinch of saffron

1 tablespoon milk

A pinch of cardamom powder

1½ cups hot water

½ cup jaggery


Soak the saffron in the milk and set aside.

Heat a kadai and add the ghee. Once it has melted, add the flours. You will notice that I use jowar, or sorghum. This is my addition to the recipe, and another way for me to bring healthy millets into my desserts.

Stir on a medium flame. Stir continuously, else the flour will stick to the bottom. This will take approximately 12-15 minutes.  Stir until the mixture turns a dark golden colour. You never want a dull-looking halwa! Even if you skip the saffron or cardamom, you absolutely cannot skip the continuous stirring when it comes to this dish. The secret to it rests entirely in doing that well.

Then, add the jaggery and keep stirring until the jaggery melts.

Lower the flame and add the hot water slowly, continuing to stir continuously. Be careful as the mixture will splutter. Stand away from the kadai at this point. Once the water mixes well with the flour, then bring it back back to a medium flame – while mixing non-stop.

The mixture will thicken and the ghee will separate. Add the cardamom powder and saffron. Mix well again. Serve.

When I think back about my mother stirring constantly over the stove while a gaggle of hungry schoolgirls waited, I am filled with love. That love continues to be passed on in this recipe. I hope you’ll enjoy it too, and please do check out the various Indian sweets I’ve shared earlier on this blog as well.

My absolute, all-time favourite dessert in the world is crema catalana. Barcelona is one of my favourite cities in the world as well, and to me the idea of a perfect Spanish meal simply must end with a delectable bowl of crema catalana. I can’t quite make it here in India, but fortunately for me, the next best thing to crema catalana is easy to make, and requires only easy-to-source ingredients. That would be crème brûlée, and I’ve added a dash of a regional element to pep it up, which gives us this week’s recipe: saffron crème brûlée.

Crème brûlée originates in France, and as with many dishes that one didn’t grow up with, I had the impression that it was very complicated to prepare. I can assure you that this was a misconception. The method is quite easy, the ingredients are basic, and you can make parts of it ahead of time, which also considerably speeds up the process. The original crema catalana is similar in all regards, except that it uses something we don’t get in India, an ingredient called farina (which looks like wheat rava).

I’m nostalgic for my travels at this time of year, and I love journeying through my tastebuds. So I thank you for joining me as I head back to Europe in my imagination! As I prepare this dessert, my mind lingers over happy memories of waking up in the mornings to go for a walk around the neighbourhood, finding a crowded café (a clue: if it’s popular with the locals, it must be good) where I would sit and people-watch over fresh, authentic coffee and pastries. This would be the same whether I was in Venice, in Santiago de Compostela or somewhere else.

If I was in Barcelona, this lovely day would later culminate with going out to dinner with friends. How I miss ordering a starter of deep-fried Padrón peppers sprinkled with rock salt, followed by delicious patatas bravas and saving the best for last with a tiny, well-presented portion of crema catalana! I love that culture and even tried to learn Spanish at one point. While studying the language didn’t go so far, I have had better luck with exploring and replicating European cuisines in my own kitchen. To be candid with you, I’ve never had a good crème brûlée in Chennai, which is one of the reasons why I tried my hand at it. So without further ado, here is my recipe, so that you can do so too!

Saffron Crème Brûlée

4 egg yolks

2 cups heavy cream

¼ cup sugar + 4 tablespoons

¼ teaspoon salt

2 pinches of saffron

Topping

2 teaspoons white sugar

1 teaspoon brown sugar


There are four parts to this method: preparing the custard, preparing the egg yolks, baking and then brûléeing. If you’re familiar with baking, you’ll find this method to be easy to follow. If you’re new to baking, keep in mind that the secret is in following the recipe to a tee.

Before we begin, here are a few more tips:

  • There are two key elements to a good crème brûlée: being mindful while adding the yolks to the custard and maintaining a continuous whisk, and baking only up to the correct moment so that the different textures of the dish are maintained.
  • Ovens vary and temperatures vary. I was literally sitting in front of mine with my eyes peeled, so that I would know exactly when to switch it off.
  • You can prepare the custard a couple of days ahead, then bake it and stick it back in the fridge, and then do the brûléeing just before you serve it. If you’re expecting guests, this paces the process well so that you can make the dish in a leisurely way.

Preparing the custard

In a pot, add cream, ¼ cup sugar and salt. Cook on a medium flame and stir often so the mixture doesn’t stick to the bottom.

Midway through mixing, add the saffron. It adds a nice festive colour to the dessert, as does the flavour. Once the cream comes to a simmer, remove from stove and cover with a lid. Rest this for 20 minutes, during which you must open and stir again no more than twice.

Preparing the egg yolks

Meanwhile, take the egg yolks, add the remaining sugar and stir well.

After the custard has rested for 20 minutes, it’s time to add the yolks to it. Slowly and in a single steady pour, add the custard to the yolks. Beat continuously while pouring. At this point, you have to be careful that the eggs don’t become a scramble due to the heat. This is where you may wind up with breakfast rather than dessert! The key is to stir constantly. Once all the cream is added, mix the custard well and refrigerate until you are ready to bake. This can keep in the fridge for up to 2-3 days.

Baking

Preheat the oven at 150° C. In a wide enough tray with tall sides, arrange 6 ramekins. Now, it’s time for the bain-marie technique, used for delicate baked goods like this. You do this by simply pouring hot water into the tray. With the help of a ladle, gently fill the ramekins with the custard-yolk concoction to ¾.

Place the tray gently into the preheated oven and bake for about 30 minutes or until the centre looks jiggly while the edges are not.

Remove the ramekins from the tray and allow to cool on a wire rack.

Once they are at room temperature, refrigerate for at least 5-24 hours.

Brûléeing

Remove the ramekins from the refrigerator and sprinkle 1 teaspoon each of brown sugar and white sugar on top. Brûléeing is the process of using a torch to heat the sugar until it melts and changes colour. Hold the torch longer to make it a nice crust on top and until all the sugar melts. You may add another spoonful of sugar if you like and repeat the same. Do this for each individually.

Serve immediately. The custard must be cold and the brûléed sugar on top must be warm. This play of temperatures, along with the play of textures, is what a good crème brûlée is all about!

It’s quite a simple recipe once you get a little practice at it. Remember to follow it very closely. The one place where you have room to innovate is in the flavouring. The authentic dessert is plain, but I have no doubt that others must also be playing with the taste additions like I am.  If you’re not a fan of saffron, you may want to try vanilla, rose or lavender. I also like to have the plain one with a little passion fruit on top of the brûléed sugar, which brings in a fun flavour interaction.

If you have any questions at all about the process, especially if you are still a little intimidated about trying out what is usually considered a somewhat fancy dessert, drop a comment below. I’m happy to help you figure it out. Trust me, you deserve to taste this loveliness!

On that note, more desserts are coming up here on this blog later this month, in time for Christmas, so do stay tuned! You may want to explore the dessert archive as you plan your menu as well. If you’re in Chennai and want to order from the re:store kitchen for the festivities, give me a buzz!

A while ago, I noticed on Instagram that many people had been making pedas in lovely shapes. These Indian milk sweets are always a mood-lifter, and seeing them online inspired me to put them on my own festive menu this year. I’ve always been a believer that presentation goes a long way when it comes to any dish, and we usually eat with our eyes first. That said, taste is ultimately the most important factor. So, while dreaming up my own pedas, the two elements came together. Firstly, I sought out exquisite little moulds that would beautify my sweets, thinking of Kolkata’s famously attractive sandesh. Secondly, I gave the flavouring quite a lot of thought. Through some trials, I eventually settled on one of my favourite flavours, and indeed one of re:store’s signature ingredients: rose water. These rose water pedas are aromatic, delicious and very sweet, just like I hope your Diwali will be.

Whenever I see something beautiful – either culinary or creative – I must learn to make it immediately. You could call it a flaw of sorts, or maybe a happy curse, but that’s just how I’m wired. From the moment of inspiration onwards, it becomes an obsession for me until I arrive at a rendition that I am happy with. That’s how I learnt how to bake, to photograph and to cook so many beloved items in my repertoire. I experiment, make mistakes and keep going until I succeed. Only sometimes do I concede that it’s time to give up, but even then I don’t consider those experiences failures. Rather, there are lessons in them too. When I succeed, the journey doesn’t just end at having made something. The next step is sharing it, which is why this blog exists, but also why I am an inveterate giver of gifts. In my case, my gifts are mostly edible nowadays.

The reason for this is that people really do receive enough and plenty of other kinds of gifts, and unlike a memento which may not be to one’s taste, food almost invariably will be consumed. Before I visit a friend, I now bake or cook a little gift, or else select organic vegetables and arrange them in a basket. These are items which I know for certain will be used by the recipient, and will never gather dust. Personally as well, there’s nothing more exciting to me than fresh ingredients, and I love getting gifts of the same. You may have noticed that many of my recipes here have been spurred by a present of some kind: such as lavender, cinnamon, saffron or more wonderful pleasures that travelled to me with love. Recipes, too, are fabulous gifts – and it’s my pleasure to keep gifting you these.

I learnt how to make basic pedas from my sister, who is the peda queen in my eyes. Peda-making was truly in my destiny because of a nickname in my extended family. My mother had nine siblings, and each had many children of their own, among whom I was one of the very youngest. As a baby, I seemed to that huge group of cousins to look like a little peda. So that’s what they called me: “pendo”, the Gujarati word for this dish. I remain Pendo to many of them, even to this day!


Rose Water Peda

(Yield: 10 pieces)

125 grams paneer

50 grams full fat milk powder

50 grams powdered sugar

2 teaspoons ghee

1 teaspoon rose water

1 teaspoon milk

Grate the paneer and place it onto a plate. Knead it with the palm of your hand until it is soft and even, like dough. Form a ball and set aside.

Heat a non-stick pan and add the ghee. Once it is hot, add the paneer. Keep stirring and pressing the paneer down. The paneer will become soft and smooth. This process should take no more than two minutes.

Add the rose water and the milk powder. Mix well. Then add the sugar and turn off the flame. Mix it all well together once more. Spread onto a plate. Allow to cool.

Once cooled, use the palm of your hand to knead this mixture until it’s smooth. It will feel sticky, but do not worry.

Then, wrap the mixture with cling film. Keep it in the refrigerator for between ½ an hour to five hours.

You will notice that this recipe uses milk powder rather than milk, and this is a common modern innovation on the old method, which involved boiling and boiling milk for hours on end. Milk powder makes the process far simpler and faster, while retaining the classic taste of this deeply cherished Indian sweet.

When you are ready to prepare the peda, take out the cold mixture and knead it once again, making sure there are no lumps. Now, make small balls and reshape them as you desire, or use moulds. Garnish with rose petals and pistachio slivers.

Keep the peda at room temperature, but protected by a netted cover. Allow to sit for a few hours.

Serve, and relish the delicate taste of these lovely rose water pedas. You can store any remainder in the refrigerator, as long as you consume them within three days.

In my home, whenever I make peda, the first offering is always to Balakrishna or Baby Krishna, the god who is very fond of dairy according to all the stories about him. He is our family deity and we have a seva or service for him every day, an elaborate process of waking him, bathing him, treating him lovingly like a child and of course feeding him. So when I’m making pedas, I always make tiny ones to offer at the altar, alongside the regular-sized ones. As with all kinds of prasad, it is never tasted while being cooked, as it must be offered pure.

Do you have rituals like these too, in which food and faith come together? I’m always interested in learning more about world cultures, and would love to hear from you.

The festive season has begun here in India, and I hope that those of you who are celebrating are having a wonderful time. Feasting is such a big part of our festivals, and this month I’ll be sharing some delicious recipes to add to your repertoire of sweets and snacks to share with friends and family. At the top of this list is a dish of sentimental value: puran poli. This sweet, healthy flatbread always evokes my mother for me. Perhaps that is true of all sweet foods, if not all dishes, from my childhood. But she really was exceptional at preparing puran poli, and so it holds a special place in my heart.

Puran poli was the favourite of all five of us at home (my parents, my siblings and I). For my siblings and father, it was to them what her dhokla was to me – the one dish that they only wanted made by her, even if they would prepare or buy other items. I suppose in my case I lucked out because I learned how to make puran poli from her, rather than only have her make it for me. Now, whenever I roll out the dough to make this sweet treat, memories of my mother flood back. I recall her hands as she prepared it, the way she would measure out ingredients and little nuances about her movements. Whether she was teaching me, letting me work alongside her or just letting me watch, all those moments come together and fill me with nostalgia as I make this.

She prepared it for special occasions and birthdays, and it was always a part of our festive meals. On such days, the lunch table would be laden with rich, heavy food of all varieties. We would partake of the feast while surrounded by happy people, and a nice long afternoon siesta would follow. One of the reasons why this sweet, which always featured in these feasts, was such a star on the menu is that something about it made her indulge us more. Even though there would always be healthy greens in the spread, she would say with a smile when she saw us reach for her famous puran poli, “It’s okay if you don’t eat your vegetables today”. So we would look forward to this dish all the more.

To me, these are not just memories to fondly look back on, but they show the way forward too. I feel strongly that beautiful moments at home must be created. They don’t just happen. When we put time and thought into creating experiences that celebrate the love within a family, while honouring tradition and heritage, we ensure that the next generation has something precious to look back on too. Festive occasions offer the perfect opportunity for this, which is why I have such a firm rule that my children come home for Diwali and Raksha Bandhan no matter where they are in the world. Every year, as a family, we renew our bonds and form new memories together. I know that some day, when they are older and reminiscing, they will feel joy – and remember us with love, just as I do my dear mother.

I often ask myself these questions: what will my children recall; what will their memories of me be? The desire to bring joy to them always, not just now but well into the future, is what motivates me to make our time together as meaningful as possible. Food as a daily expression of love enables this, and festivities make this expression all the more vivid and enjoyable. Family, food and feelings are interconnected. When we have healthy relationships, we eat better (as we share mealtimes, and are stressed less overall). When we eat nourishingly, we have healthier relationships (as our bodies and minds are performing optimally, and fatigue or illness don’t impede our ability to spend time together). Do you notice that you binge eat when you feel downcast? Do you notice that you enjoy food more when you’re with a close friend? These are clues about the nature of this interconnection.

This puran poli, thanks to the wonderful memories it brings back, strengthens my connection to my late mother. It is also meaningful to my children for the same reason. Decades ago, when I was away from home and expecting my second child, my eldest missed his grandmother – my mother – so deeply that I had to ask my friend Chandrika Behn to make puran poli just for him. She prepared it just like my mother would, and I didn’t mind my kid gorging on the treat often as it’s stuffed with protein-rich dal. Even now, when one of us visits her, this elderly aunty rolls out a batch of puran polis just for us. Such is the power of a beautifully-rendered dish. It becomes a way to treasure a relationship – between grandmother and grandchild, between friends, between parent and child, between siblings, between partners, and so on…

Puran Poli

(Yield: 10)


Stuffing ingredients

½ cup toor dal

1 cup water

½ cup jaggery

1 tablespoon almond powder

½ teaspoon cardamom

Ghee for topping


Dough ingredients

¾ cup whole wheat flour

A pinch of salt

½ cup water (based on your requirement)

1 teaspoon oil


Make a dough with the ingredients. Ensure it is soft and smooth. Make small balls, cover and set aside.

In a pressure cooker, cook the dal in water until it is soft and tender.

Open the cooker and add the jaggery. Keep stirring the mixture of dal and jaggery constantly on a low flame. Make sure the dal does not stick to the bottom of the pan/cooker.

Once the mixture has thickened, which will take approximately 12-15 minutes, turn off the flame and add the cardamom powder and almond powder.

You will know the stuffing is ready when you make a spatula stand upright inside the thickened dal and it doesn’t fall.

Allow to cool. Divide this into portions of 10 balls. Your stuffing is now ready to roll.

Assemble each puran poli. Roll out one small dough ball into a small disc. Place the ball of stuffing in the centre, gather the rolled out roti together and flatten. Dip the stuffed disc into dry flour for easy rolling out once again.

Now, place the rolled-out stuffed disc onto a hot griddle and allow to cook. Flip and cook on the other side. Remove onto a plate and pour ghee over the puran poli. Repeat for the remaining balls of dough and stuffing, until you’ve prepared them all. Enjoy them hot and fresh.

Each puran poli will be small – palm-sized. As far as sweets go, this is quite healthy, not only because of the portion size but also because the jaggery and almonds used in it are nutritious. Traditionally, it is made with chopped almonds, but my mother always used powdered almonds. This changes the texture of the stuffing, making it softer, and I’ve retained this twist too.

These are lovely little treats that invariably feel festive to me, and increase the joy of this season. I hope they will do the same for you. Wishing you and yours a wonderful time of celebration!

Some years ago, I shared a recipe for a vegan lavender panna cotta, and this dessert has been on my mind yet again. This time however, the non-vegan variety is what I’ve been craving. Perhaps I am drawn to dairy in desserts because it is the basis of most Indian sweets, and therefore is a part of what I grew up eating. Although it is not Indian in origin, panna cotta certainly hits the spot as a milk-based, delicious sweet treat. It is light but satisfying, and I love that it lends itself to a range of flavours. While playing around with possible flavours, I hit on a combination that retains a sense of the regional. So here you have it: a saffron-pistachio-rose panna cotta.

While many people enjoy their panna cotta with a coulis made of berries, I prefer a pistachio topping. I find it complements the saffron. It’s is one of my favourite flavours, and when I make my pistachio cake at re:store (available in saffron, rose and classic variants), I often make a tiny cupcake for myself from the batter. This panna cotta therefore brings together all the flavours that I have tried, tested and tasted time and again and know work well with pistachio.

You may wish to use agar-agar if you prefer, but I find that this substitute just doesn’t give the dessert the jiggle that gelatine does. If you ask me, a good panna cotta should jiggle. Perhaps it’s just a matter of presentation, but as I’ve said often, presentation is key when it comes to sweet treats. The eye eats first.

Remember that you can make sugar-free and vegan panna cottas, using any medium (almond milk, coconut milk, etc). I often do. Today, however, I felt indulgent… The saffron I used was some absolutely beautiful Spanish saffron that dear friends who live in Spain gave me when they visited. So many friends of mine scattered across the globe tend to bring gifts that can be used at re:store or in my kitchen. The lavender in my previous panna cotta recipe was a gift as well. I’m grateful to have these delectable ingredients, alongside my local and seasonal ones.

A pinch of Spanish saffron, with distinctly Indian touches of pistachio and rose water… And yet it’s memories of a trip to Rome that emerged as I prepared this lovely dessert. Wherever we went, we gorged on authentic panna cotta, tiramisu and gelato. Reminiscing on my Italian sojourn must have been what inspired me to become interested in making ice cream. As I’ve said on this blog before, I consider myself an eternal student, and I’m literally going to sign up for a course. Isn’t it wonderful how food is a way to travel, especially in these difficult times when travel is sometimes not possible, or just not what it used to be? It’s all the more special when we are able to evoke memories or aspirations of travel right in our very own kitchens.

Saffron-Pistachio-Rose Panna Cotta

(Serves 4)

Panna Cotta

7 grams gelatine

3 tablespoons cold water (to soak)

1 cup cream

1½ cups whole milk

13 cup sugar

A pinch of salt

½ teaspoon saffron + 1 tablespoon milk


Pistachio Topping

¼ cup shelled, toasted and sliced pistachio


Rose Cream

½ cup whipping cream

1 teaspoon rose water


Soak the gelatine in cold water for about ten minutes. Soak the saffron in milk.

In the meanwhile, add the cream, milk and sugar along with the salt in a saucepan. Allow to cook on a medium flame, stirring occasionally.

When the mixture is ready to boil, add the soaked saffron. Bring to a boil and turn off the flame.

Allow to rest for about ten minutes, and then add the bloomed gelatine. Due to the heat, the gelatine will melt. Stir well, pour into a mould and set overnight in the refrigerator.

When you are ready to serve the panna cotta, prepare the topping of rose cream. Whip the ingredients together in a bowl until you get soft peaks, or the consistency that you prefer.

Now, it’s time to assemble the dessert. Dip the mould in which the panna cotta has set in warm water. Turn it upside down onto a serving plate. Garnish the panna cotta with a sprinkling of pistachio, a dollop of the whipped rose cream and rose petals if you have them. You will have an aromatic, alluring-looking dish, replete with a plethora of flavours. You can keep this saffron-pistachio-rose panna cotta in the refrigerator for 3-5 days. It’s a perfect dish to prepare in advance when you are expecting guests, and it is sure to wow them visually too.

Saffron, pistachio and rose are international flavours as well as Indian ones, and I hope that they are easily available to you. The panna cotta base is beautifully adaptable, so you’ll easily be able to swap any of them out if you don’t have something on hand.

Aside from how gorgeous it is to the eye and how delicious it is to savour, what I like most about this dish is that it is a symbol of how food can make the world a smaller place. As we span worlds and cuisines, here’s an ongoing wish for the end of the pandemic and for us all to be able to communicate, commute, share and care again as easily as we did before.

Sometimes, you just don’t have the energy to do much in the kitchen at all, but that’s no reason to skimp on having a dessert that can make you feel better. Whether the heat has enervated you, or the ongoing pandemic has dragged your cheerful spirits down, the key to preparing a pick-me-up is in one aspect only: the simplicity quotient. I’ve been making this mango twist nearly every day, and you can too.

What I love about it is that ticks all the boxes: it satisfies my sweet tooth without the use of refined sugar, allows me to have well-rounded meals while I am off carbs, makes the most of the earth’s seasonal bounty, and is practically effortless to prepare.

Really, it’s so easy that anyone can make it. Which brings me to another reason that I thought this fruity dessert would be perfect to share right now. It’s that making it is just the kind of activity to keep your younger kids happy, and that’s something I can imagine many of you doing with the little ones being at home all the time now. Putting this dessert together is a simple way to get them to explore the vast world of cooking. The sense of achievement they’ll enjoy will taste almost as good as the dish itself. This is a beautiful way impart the value of a home-made treat or meal, and it shouldn’t surprise you if they graduate to wanting to try out more culinary experiments too. As I’ve said before on this blog, I consider my recipes my heirlooms. There’s no reason to wait till they are older to share an elaborate traditional method when you can instill the love of cooking in them from a very young age through simple dishes like this one.

Here’s yet another amazing tick on that check-list: this mango twist is vegan! Of late, I have noticed that cutting down on my dairy consumption really does make me feel better overall. While I am not a hardcore vegan, as much as I would like to be, I do love the coconut milk I use in this dish and enjoy consuming it in this delicious way. You can use dairy, if that’s what you have on hand. Or you can substitute the coconut milk with almond milk, which will result in a thinner dessert that you can plump up with nutritious chia seeds.

Variety is certainly one of the elements that keeps a dish like this interesting. When mango season ends, simply use any other fruit that you have on hand.

I think of this Mango Twist as one of those recipes that is so common that it hardly warrants a recipe. Surely, everyone already knows it, I pondered to myself when the idea of this post occurred to me. Then, I realised how in any hectic time, we often get so carried away that we neglect to notice what is right before our eyes. So this recipe is really more of a reminder, something that tells you to open your fridge and see for yourself – you probably already have everything you need to whip up something wonderful right away.

As a refrigerated dessert, you can also make it in advance so that it’s right there and ready for you when you desperately need something to cool off in this sweltering heat, or could use a pick-me-up. Some time in the hopefully not-far future, when we are back to entertaining guests as always, it’s also an ideal dessert to prepare earlier in the day so that you won’t have to take time putting a snack together after they arrive. Just take it out of the fridge and it’s ready to be served on a tray. It’s a visually attractive dessert, so presentation is key – what colours do you want to have pop inside the glass, and how will you layer the ingredients? You can go decadent, or you can keep it nutritious but still appealing by using fruits of different colours to create a tempting look.

Mango Twist

(Yield: 2 glasses)

1 cup coconut cream

½ cup mango pulp

Pecans or any topping of your choice

½ teaspoon maple syrup or honey (optional)


In each glass, add 2 teaspoons of coconut cream. I like to use small eatery glasses as they look very pretty. Layer this with the mango pulp. Freeze for sometime, then remove from the freezer. Now, top the pulp again with the coconut cream gently. Finally, add the pecans or any other toppings of your choice, and drizzle with some maple syrup or honey, as healthier sweetening substitutes. I only use these if I find the mango a little tart. Otherwise, the dessert doesn’t need it.

In lieu of coconut cream, you can also use pudding, fresh cream or other substitutes. Some other great toppings include caramelised nuts, maple syrup, honey, orange rind and seeds. Any kind of brittle, crumbled cake or re:store’s popular muesli will also add more taste and texture. Don’t forget that no matter what time of year you make this, you can use any seasonal fruit of your choice. When preparing it with your kids, indulge them with colourful jellies or cute chocolates that will make the smiles on their faces even bigger.

Given that this is a summer during which the simple pleasures are more important than ever, as we continue to collectively fight the pandemic, I intend to fully take all the joy I can get from the mango season. Do subscribe or connect over Instagram so that you’ll know as soon as my next few recipes go up – dishes that range from sweet to sour to savoury are coming, all thanks to this wonderful fruit!

As I said earlier, I think of this mango twist as a “reminder recipe” – is there anything similar that you’d like to share in the comments? I am sure we would all love to know more about each others’ summer go-to dishes and desserts!

I don’t believe in Valentine’s Day. That’s the reason why you’ve never seen the occasion observed on this blog with a special recipe, even though you know that love is the key ingredient in every dish I create! This year is different, however. The COVID-19 pandemic had brought all my children back home for the first time in ages. Despite all else, it gave us the rare opportunity of being able to have almost a year of each other’s constant company, that too with everyone working from home. Then, right on the cusp of Valentine’s Day, all three of them flew off again, returning to the respective cities in which they are based. I am experiencing all the emotions of having an empty nest, and I need to express them through the way I know best. So here I am in my kitchen, feeling wistful as I lay the ingredients out for some very special cupcakes. This post is a valentine in red velvet, a symbol of a mother’s love.

Through the many months that my kids were back home, they would ask for “a special cake” every other day. Red velvet was one of their favourites in this category, but it was rarely baked at home during the pandemic. I am extremely particular about the ingredients I use, and not being able to source the particular brand of red colouring I prefer meant that this was off the repertoire. As you must have noticed too, accessibility to goods had finally returned to a normal standard here in Chennai, and a beautiful bottle of red colouring now sits on my shelf, ready to bring vibrance to these Valentine’s Day cupcakes.

This one is for my youngest, my daughter, whose hands modelled for my photoshoots through the year. If she wasn’t up for it, I would threaten to withhold a slice of the day’s cake from her, which always did the trick. I often joke with her that my recipes are my prized heirlooms, but it is no joke at all that one of the reasons I compile them this way has always been for my children. My daughter is an excellent baker, and was in fact the one who inspired me to become one too, but she is also a busy young woman and rarely bakes these days. I hope she reaches for this recipe, the next time that she does.

This one is for my second son, my unofficial marketing man, who is so proud of my work and never fails to put a good word in for his mother’s cakes no matter where he goes. He doesn’t cook, unfortunately, but I hope he will pick up this wonderful activity some day. If that day comes, there is an archive right here for anything his heart or his tummy desire.

This one is for my elder son, my partner in the business and a valuable critic whose opinion matters to me very much. He loves cooking, and has just as much of culinary inquisitiveness as I do, and I hope that this recipe becomes a keeper for him.

This one is also for you. I know that many other parents who had their grown kids return and stay unexpectedly last year have felt or are feeling the same pangs that I am. I hope that baking these scrumptious cupcakes will offer you some comfort too. For me, what I noticed is that in the past – when they were away for their education or their work – these pangs were not as intense. They were adults with their own routines, just as I had mine, and I was used to seeing them at only certain occasions. But having this one year that felt like it was just dedicated to family, to catching up with each other on a deeper level, to reinforcing the values we instilled in them and live by… It was a very different experience. Perhaps you can relate to this too.

One day, hopefully sooner than later, when the world fully opens up again, I look forward to jetting off to see my three valentines just as often as always. If ever you bump into me at an airport, carrying big boxes in my hand luggage, you will know what’s in them. My precious baked goods are making their way with me to my children and their friends. Until then, and for long after, this recipe will always be here for them, whenever they want to recreate for themselves the taste of my love.

Red Velvet Cupcake

(Yield: 12 cupcakes)

For the cupcakes:

1 ¼ cups maida

3 tablespoons corn flour

2 tablespoons unsweetened cocoa powder

1 cup sugar

¼ teaspoon salt

½ teaspoon baking soda

¼ cup oil

¼ cup unsalted butter

1 tablespoon red food colouring

¾ cup whole milk (room temperature)

1 tablespoon (+ ½ teaspoon) vinegar

1 egg

1 teaspoon vanilla extract

For the cream cheese frosting:

1 cup cream cheese (room temperature)

¼ cup butter

2 cups icing sugar

¼ teaspoon vanilla extract

To prepare the red velvet cake cupcakes, preheat the oven to 170°C. Prepare 12 cupcake liners in the pans. You may want to check out this comprehensive introduction to baking, if you need to.

In a bowl, mix and sift together all the dry ingredients – flours, salt, baking soda and cocoa powder. Set aside.

In another bowl, add the milk and 1 tablespoon of vinegar and set aside. This becomes buttermilk.

In a large mixing bowl, use an electric mixer to cream together the butter and sugar on medium speed for 4-5 minutes, until the mixture is light and fluffy. Add the egg, and beat it in well. Next, add the oil, red food colouring, vanilla extract and the remaining ½ teaspoon of vinegar.

Add in the blended dry ingredients from the first bowl a little at a time, alternating them with the prepared buttermilk. Do not over-mix, and be very gentle.

Distribute the cake batter into the lined pans evenly. Bake for 15-18 minutes or until a skewer comes out clean. Remove the pans from the oven and cool on a wire rack.

To make the cream cheese frosting, use an electric mixer to beat the cream cheese until it is smooth. Add the butter and mix until the two are well-combined and smooth. Then, add the powdered sugar and vanilla extract, making sure the sugar doesn’t fly around. Beat until fluffy. There may be quantity variants based on the brand of sugar used, so add more or less to suit your requirement or until the icing is stiff enough.

Top the cooled cupcakes with a swirl of cream cheese frosting, and garnish with sprinkles for a celebratory touch.

This recipe has a generous yield quantity and is meant to be shared. I hope that you will enjoy these sweet delights with those who are most precious to you, during some cherished moments together. I’ve given the recipe away simply as a gesture of joy and camaraderie, but it is also on the re:store menu. If you’d prefer to order some red velvet cake or cupcakes from me, or perhaps any other delectable item from my array of goodies, please drop me a note. The pantry is fully stocked, the kitchen is thriving with scents and flavours, the house is quiet now – and I would simply love to bake for you!

A friend and I were on a weekend getaway in the hills when another friend, who coincidentally had embarked on the same idea of a little escape to the same sleepy town, dropped by to visit us. We were enjoying each others’ company and trying to pep up the meal we would share, wanting to make it as fancy as possible with the simple but fresh ingredients at our disposal. There was a lot of yoghurt on hand, and perchance, some luscious passion fruit. Voilà, inspiration struck! We were quick to leap into action and put together a beautiful shrikhand for dessert, and even quicker to polish it off as we caught up on our conversation.

Both passion fruit and shrikhand have been celebrated on this blog before, and bringing them together felt like a lovely stroke of luck. Passion fruit always has a short season, so I suggest that you take advantage of the same and try this recipe as soon as you find the fruit. It truly is one of the most beloved fruits in my home, as you may remember from this recipe for a passion fruit salad dressing that I still make as often as possible. At the very least, sliced passion fruit or passion fruit juice is a daily feature whenever we’re able to get a fresh harvest.

While I had prepared this dish using dairy while on the getaway, once I got back home I tried it again in a vegan preparation. I had initially wanted to make a vegan version of the coconut pudding that was shared last week, but wasn’t able to do enough trials due to the festive rush. So this time, what I am sharing is a tried and tested vegan dessert, made with coconut yoghurt.

Quite like the sitaphal kheer that needs very little to enhance it, being so flavourful on its own, the passion fruit shrikhand too does not need the the usual frills of a typical or traditional shrikand. It doesn’t need saffron or slivers of almond or pistachio to elevate it. All I used was a little bit of cardamom. The focus is very much on the taste of the fruit, which happens to be quite sweet, and this means that you can cut down on the sugar quantity used in the dish.

Gujaratis take pride in our shrikhand, and it is even eaten as part of a main meal in a great combination known as shrikhand-poori (I’ve written many times on this blog about that famous Gujarati sweet tooth!). So while I don’t want to make an easy comparison to flavoured yoghurts you can get in supermarkets, I can definitely say after this experiment that it’s very easy to flavour your shrikhand too, using different kinds of fruits. It’s very easy to prepare overall, too. The best part of it is that being homemade, we know exactly what goes into it. A flavoured shrikhand is a healthy treat, and a fun and simple way to add a twist to this immensely popular Gujarati dish.


Vegan Passion Fruit Shrikhand

(Yield: 4-5 cups)

5 cups coconut yoghurt

½ cup icing sugar (substitute: ½ cup honey or maple syrup)

¼ teaspoon cardamom

Pulp of 2 passion fruits


Take a fine muslin cloth, put the 5 cups of coconut yoghurt into it and tie the cloth. Use plain yoghurt if you prefer a vegetarian rather than vegan version. Hang this yoghurt for about 2-3 hours or until all the whey drips out. You can use this whey to bind dough for rotis.

Then, put the yoghurt into a strainer and add the sugar to it. Sieve the yoghurt with the help of a spoon and collect it into a bowl. Add the cardamom powder and passion fruit pulp. Mix well.

You may garnish the bowl with a pinch more of cardamom and some lovely passion fruit seeds. Serve chilled.

While you can use almost any fruit as flavouring, there’s just something about a naturally sweet one such as passion fruit that brings this dessert together so beautifully. Do be sure to take advantage of the season for it.

We returned from our trip to the hills with lots of fruits, bringing bags of avocado and passion fruit back to our urban lives. The cooler climes really do have such an interesting variety of produce, and if you have access to these at the moment, I’d love for you to check out some other posts using peas, plums, strawberries and peaches. Fruits had been such an integral part of our meals on our getaway, and usually made up our entire breakfasts too. Given the nutrition quotient of this food category, I think I’m going to keep looking more deeply into bringing more fruits into more dishes, innovatively…