Tag

food photography

Browsing

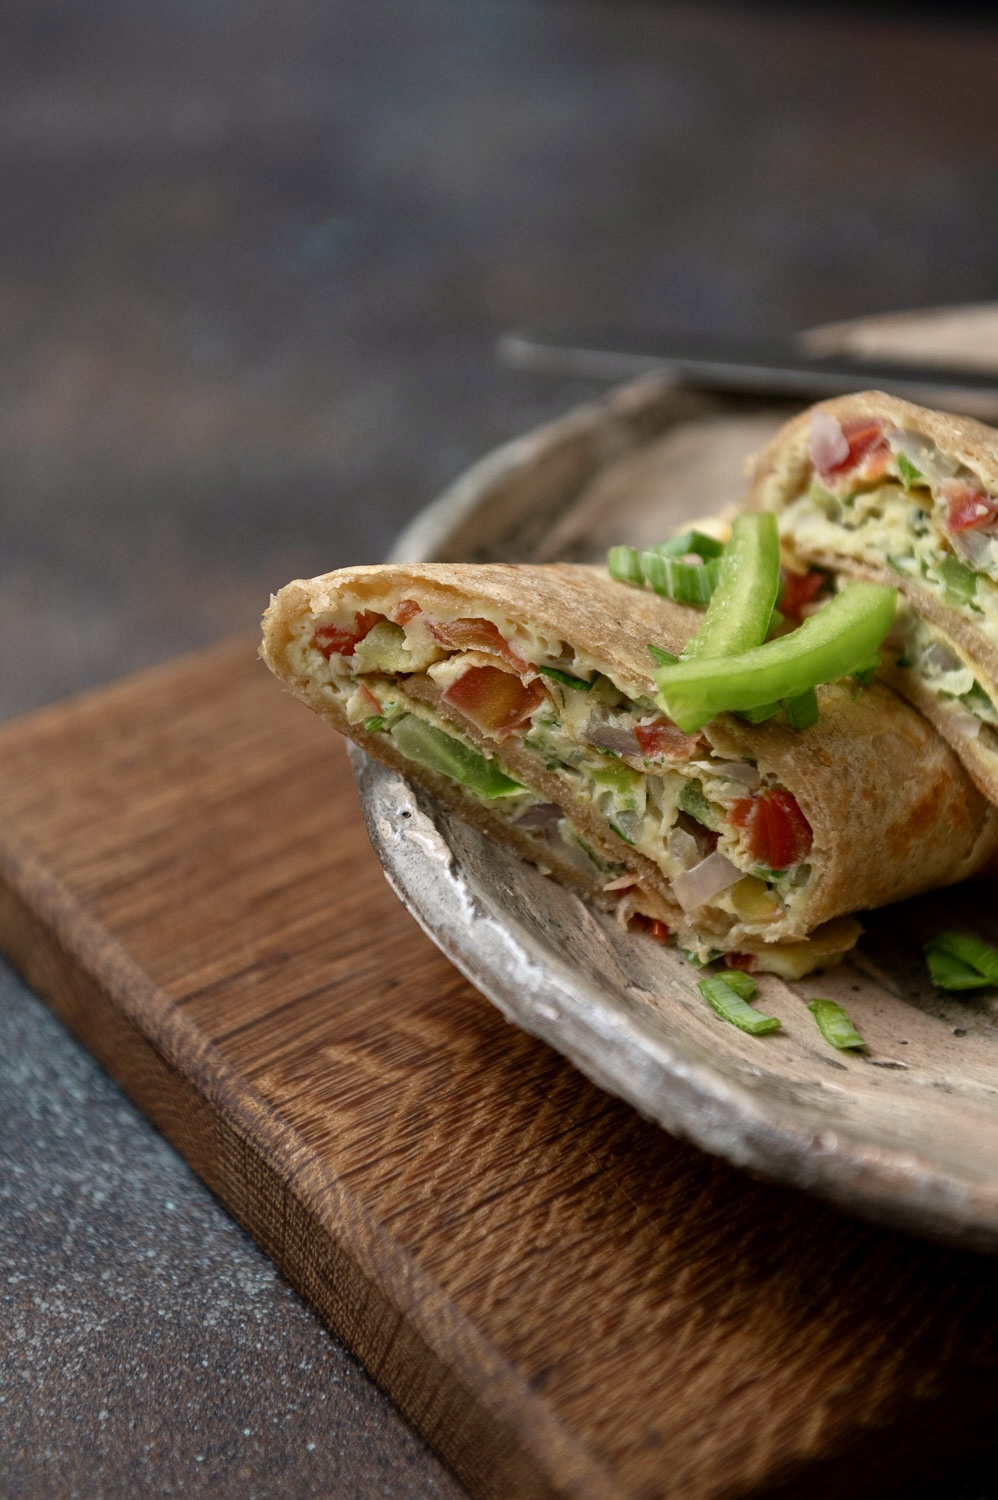
As promised in December, the re:store blog is back! Even as I invest most of my creativity into working on my first book, it makes me so happy to keep this blog alive with new recipes. Let’s get things “rolling” again with a simple yet satisfying dish: egg rolls.

Many people think of egg rolls as a breakfast item, but I think they work as a snack, a light dinner and most especially in a lunchbox. Whichever time of day you reach for them, a couple of egg rolls will provide a very healthy, protein-rich meal.

The goodness of eggs is a concept I grew up with. Although our family was vegetarian, our mother was thoughtful about our health needs and ensured that we had eggs in our diets. My brother, who was an athlete, ate them by the half-dozen, as I recounted in the recipe for masala baked beans on toast. As for me, I don’t know if I’ve mentioned this at some point on this blog, but I was sickly thin as a child and even as a young adult. This meant that eggs were incorporated into my meals with the intention of fortifying me physically. My mom would pour lots of delicious, fattening ghee into a pan and cook an egg just for me. She would also quite frequently pack eggs in some form into my lunchbox, and I’d enjoy them during break-times in school and in college.

I remain a big believer in eggs as a protein source, as you may have read in previous recipes including my breakfast dishes inspired by shakshouka and huevos rancheros, as well as several others. Equally, I’m an advocate for bringing more vegetables into our daily consumption. These egg rolls beautifully balance vegetables, carbohydrates and protein. Therefore, they are filling, tasty, nourishing and provide an energy boost.

In this recipe, I have used a roti as the base, on which an omelette is cooked directly. You can substitute the roti with bread or a tortilla. I have also utilized leftover chapati to make this dish, and doing so is a great way to use up leftovers while preparing a healthy, easy meal. The fillings will work just the same, although of course you may want to play with them and tweak them to your taste. You could mix the vegetables into the egg, or else sprinkle them on top, salad-style, just before you roll up the roti. You could also use chicken, paneer or tofu and further enhance the nutritiousness of the meal. If you’re sticking to just eggs, you could add some spices and turn it into a masala omelette.

Another thing I really like about these egg rolls is that they travel well for a day. I was reminded of this when I visited my daughter in the USA recently. We had a long train journey of around 6 hours, and it has always been a practice in my family to carry food with us on trips. We are both health-conscious – a lovely trait she shares with many people of her generation, and which more people of my generation could also inculcate – so we decided to pack our own snacks. I prepared a couple of these egg rolls, and we didn’t reach out for any junk food available during the trip at all.

We live in a time when it’s not unusual to hop on a flight even for a day’s work, and this is the kind of dish that allows you to carry the comfort of a homemade meal with you no matter where you go. Just make sure that you cover your egg roll with foil so that it doesn’t give off a strong smell when you’re on a plane or a train. Your co-passengers will appreciate that. And if by any chance someone asks you what you’re snacking on, don’t forget to share this link with them!

Egg Rolls
(Serves: 1-2)

2 eggs
2 spring onions
2 tablespoons tomato (finely chopped)
1 green chili
2 tablespoons coriander leaves
3 tablespoons bell pepper (finely chopped)
Salt to taste
¼ teaspoon pepper powder
2 pinches chilli flakes
1 teaspoon green chutney
2 rotis or tortillas
1 dollop of butter or 1 teaspoon olive oil for greasing

Chop all the vegetables finely and add them to a bowl. To this, add the eggs. Add salt and pepper and beat well.

Take one of the rotis and spread the green chutney on only one side. Set aside.

Heat a pan and grease lightly. Pour half of the egg mixture onto it. Allow the egg to cook and place the roti, chutney side down, over the egg. Press it down gently.

Cook for a minute or until the roti sticks to the egg. Now, flip over and roll up.

Repeat the process with the second roti, using the remaining mixture.

Your egg rolls are now ready to be served, either fresh off the pan or a few hours later. These travel-friendly treats are sure to bring a bit of deliciousness to your day!
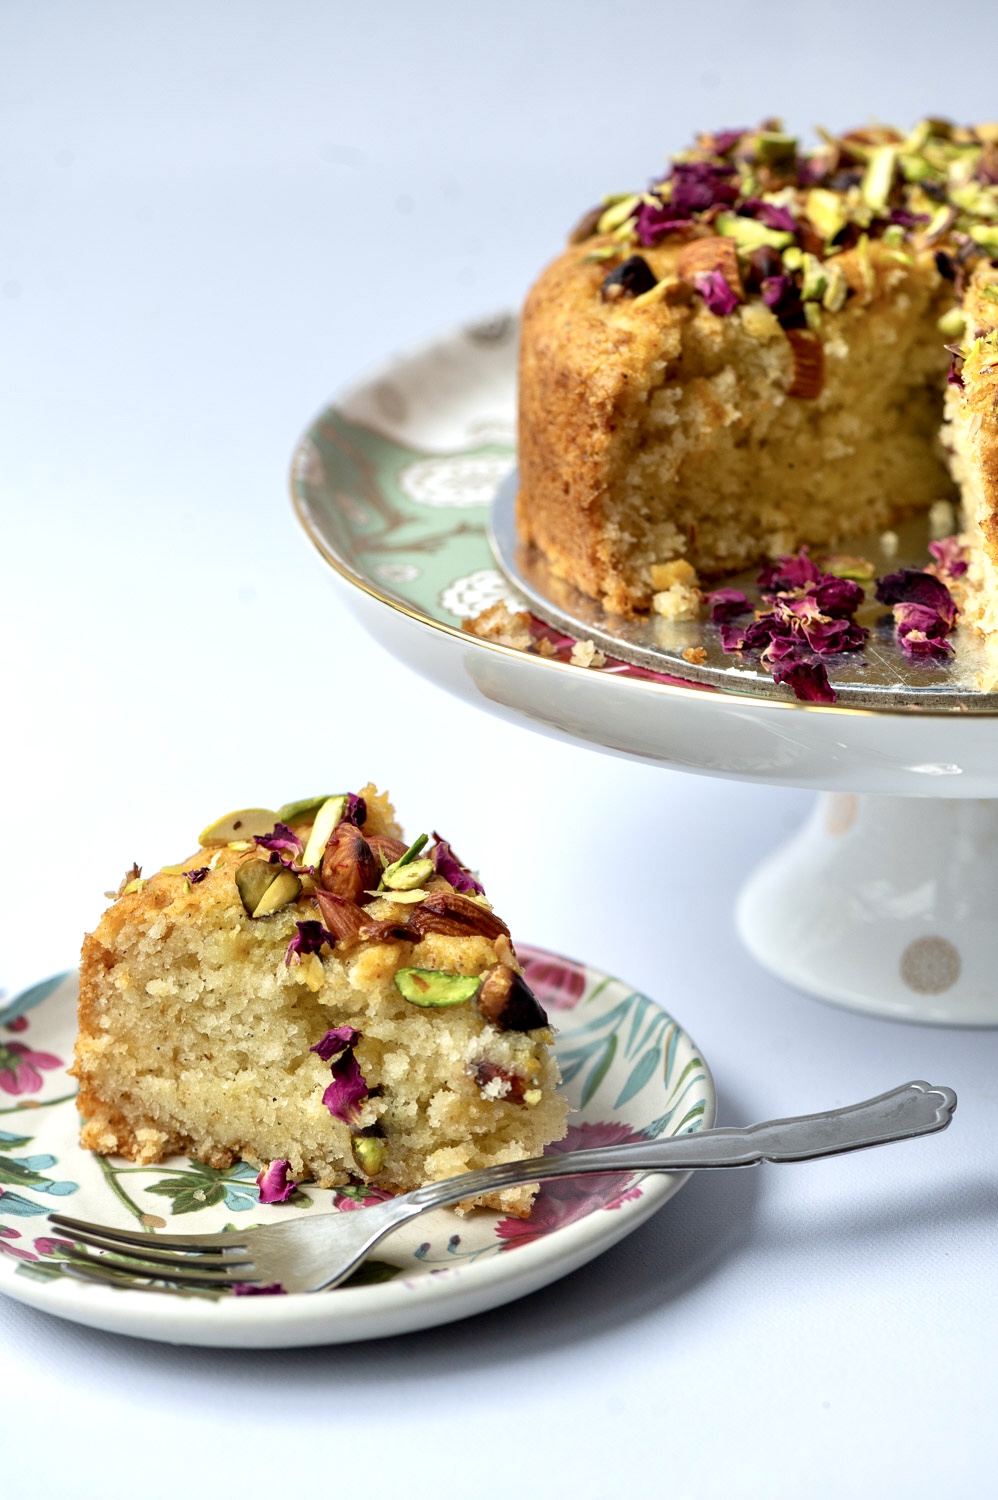
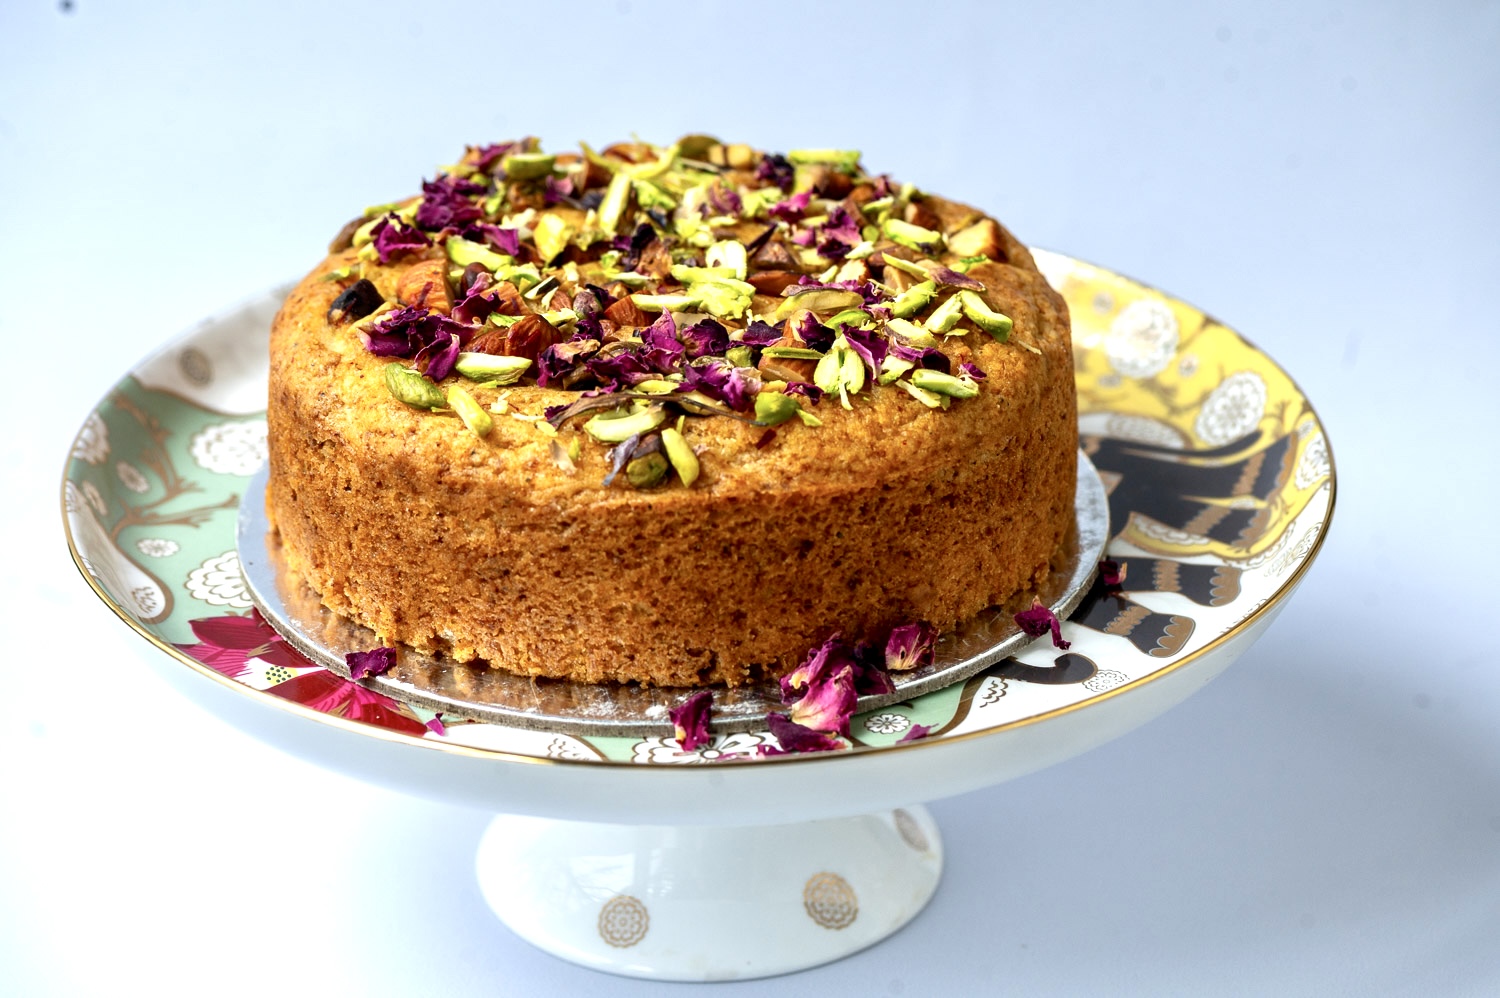
After over nine beautiful years of growing and sharing, I thought I had come to the end of an era, the completion of this blog. We had, that is, for some of you had been with me from the very beginning. I was ready to bid farewell to my life as a blogger with a full heart, and was planning the recipe that follows as the final one, when more than a few of you reached out to me privately. You shared such lovely sentiments with me; these convinced me that even as a new adventure begins, this one does not need to conclude. Rather than mark the end of the road, this eggless rose cardamom mawa cake now only represents only a shift in stride, as you’ll see when you read on…

I was able to reimagine the trajectory of this blog for the same reason that I had earlier been able to prepare for its winding down: because I had been musing for much of this past year about the concept of openness. It is the spirit of openness that allows us to experience more of life, to take big leaps and to keep ourselves motivated after every sea change. For me, launching re:store as a food delivery and bakery business out of my home was one such major transformation.

Then, a couple of years later, in October 2016, this online presence was born as a complement to the business, which continues to thrive. With this blog came so much discovery and delight as I explored my storytelling skills and found a renewed career in the visual arts as a photographer. At every step, with every post, that sense of openness carried me forward. Being open to learning, being open to experiments, being open to challenges, and more importantly, staying open in spite of them. I know that a lifestyle blog like this one – that is, a repository of memories and recipes that originate in one’s own experiences – going steady for almost a decade is unusual. I could not have come this far without so many blessings, and so much encouragement, and I am preparing to go further still.

I am at a new cusp now, choosing to focus my energies on creating a book, which has been a cherished dream of mine for a long time. It is also something that many of you requested from me over the years, only one of many ways in which you made me feel cared for and appreciated. My gratitude for your support is immense.

That support truly means the world to me, which is why the blog will continue, but with fewer posts each month, while I am concurrently working on the book.

To return to this special recipe, then: to me, it’s an amalgamation of flavours I am fond of and that are true to the essence of the re:store kitchen. This eggless cardamom rose mawa cake remains in my tradition of sharing Christmassy recipes near the end of the year. It comes from Parsi cuisine, which is known for very unusual, delicious recipes that carry an English touch. Parsis are especially known for their baking skills.

I first encountered a mawa cake at my sister’s home in Mumbai. She had ordered it from a baker there whose praises she sang, so while I could not get the recipe, I tasted it thoughtfully, trying to figure out ingredients and even aspects of the method with every bite. It was delicious, and I was eager to prepare it for my loved ones too. After much research, trial and experimentation, I perfected my own version of that cake sometime later, adding my sublime twists of cardamom and rose.

“Mawa” means milk khoya (solids) and is related to “mewa”, the word for dry fruits. This recipe contains both of them. It is an eggless recipe as that is what my sister enjoys, and I wanted to make this treat in a way that is inclusive of all my relatives and well-wishers who also prefer an egg-free diet.

My sister and I are both daughters of a terrific cook, so it is unsurprising that we both take to the kitchen. She is more traditional in her culinary style, while nothing excites me more than innovation. We have a nice balance there, and often exchange recipes. You would have noticed her being mentioned many times on this blog over the years, and of course, there is no one I owe more to in my gastronomic life than that “terrific cook” I mentioned: our mother.

She continues to be my biggest inspiration, not just in terms of how I cook, but also how curious I am and how much I love to share. One of the many things she showed me was that she always got back so much more than she gave. Here I am, doing the same thing. That is what this blog has always been about for me. Even when I have posted recipes that I ought to have kept secret, right out of the re:store menu, I have always felt that doing so would cost me next to nothing – but bring me so much good in return. And so it has.

Eggless Rose Cardamom Mawa Cake
(Serves: 4)

¼ cup milk
½ teaspoon ghee
¼ cup milk powder
½ cup sugar
½ cup curd
½ cup melted butter
1 cup maida
½ teaspoon cardamom powder
1 teaspoon baking powder
¼ teaspoon baking soda
1 teaspoon rose water
A pinch of saffron
½ cup nuts and dry fruits (chopped, in slivers)

Preheat oven to 160°C and prepare the baking pan by greasing and dusting with flour.

In a non-stick pan, add the milk and ghee. Mix well. Now, add the milk powder and stir on a low flame until it thickens and the ghee separates. Set aside. This is mawa – the milk khoya that is the base of this cake.

In a bowl, add the sugar and curd. Stir well. To this, add the butter and mix. Next, add the prepared mawa and mix again, until there are no lumps.

Sieve the flour along with the baking powder, baking soda and cardamom powder.

Mix these gently into the curd mixture. Add the rose water.

Pour the batter into the pan and bake for 30-40 minutes or until a skewer comes out clean.

Allow the cake to cool for 15 minutes. Then, upturn it and let it rest on a stand.

Make tiny holes with the help of a fork on top of the cake. In a bowl, add 1 tablespoon milk and the saffron. Mix these together, then brush the liquid all over the cake. The infused milk will sink into the cake and add depth and flavour.

Your eggless rose cardamom mawa cake is ready to be served.

And there you have it – an exquisite dessert to signify not the end of an era, only an exciting new bend in the road. Here’s to keeping our hearts, minds, hands and eyes open to all the good things still to come! May our stories and journeys continue, and may they be filled with beauty and brightness.

When my children were growing up, they attended a school that was very close to home. This gave me a big advantage in many ways. At the time, I was a full-time homemaker and the proximity of the school meant a reduction in my morning workload. I could wait for them to leave before preparing the mid-day meal, and I could also ensure that they had fresh, hot lunches every day, as I could drop these off easily. One item that was in rotation in those years was the pizzette, and I am happy to share the recipe with you.

Like so many of the recipes I have shared here over the years, this one evokes some precious memories for me of my children when they were actually children, and also of myself at a different chapter in my life. I recall with joy how I would really look forward to taking my kids’ lunchboxes to them. While running a household requires the completion of many tasks and chores, this particular moment always filled my heart. It was such a lovely feeling: taking hot meals to their school and seeing them waiting near the gate excitedly, eager to grab their tiffin boxes and run back to their friends to share the contents with them. They would always be so happy to see what I had whipped up for them each day. Every item was warm in every way – made fresh, and made with love.

With three kids each with their own tastes to please, and conscious of the fact that lunchboxes were shared with classmates, I liked to keep things interesting and bring fun meals like this into the menu each week. If my daughter would eat two slices, for instance, I made sure that I dropped off six so that there would be enough to go around.

I knew, and still remember, what each of my kids enjoyed – and sometimes what their friends liked too. To this day, when they come home and their old friends from school come over, they often reminisce about the lunches they shared together. I try and bring out some items from that repertoire when they visit, and these cute pizzettes have recently been in circulation again for that reason.

Just as much as I liked taking their lunches to school, I also like seeing how my kids and their friends have all grown into fine young adults. It’s a pleasure to continue to feed them nourishing, delicious treats and meals.

Yes, a pizzette is cheese on a base of bread, but as a parent you try your best to load it with an assortment of vegetables. My kids would certainly eat them in this presentation, even if they were fussy about those ingredients otherwise.

Today, as grown-ups, they request sourdough slices or brown bread rather than white, and want to include a protein of their choice in the topping. The youth of today are health-conscious in a way my generation simply wasn’t, as well as curious about what they consume. As a culinary enthusiast, this gives me hope. Traditions, science, seasonality and other wisdoms are not going to be lost for the sake of convenience any time soon.

While there are lots of variations you can play with, such as replacing tomato purée with pesto sauce or even a green chutney (for an Indian flavour that you can play up with local ingredients in the toppings too), or changing the shape of the pizzettes, what I’ll share here is exactly what I used to prepare when I was raising school-going children. The round shape was preferred at the time because it’s extremely easy to create it using a cup, which is an activity you can do with kids. Pizzettes are easy to prepare, and a way to get children interested in cooking. They’re especially good for when you have sudden guests, because they can be made quickly and are fun for the whole family.

Pizzette
(Serves: 2-4)

4 slices bread
4 teaspoons pizza sauce (like this tomato purée)
1 cup chopped mixed vegetables
1 teaspoon red chili flakes
½ teaspoon basil
½ cup mozzarella cheese (grated)

Preheat the oven to 160°C for 15 minutes.

Using a cookie cutter or a big cup, cut the bread slices into round discs.

Place all 4 discs on a chopping board. Top each of them with the pizza sauce.

Add a teaspoon of veggies on top of each disc, then sprinkle with grated cheese.

Bake on a grill tray for approximately 8-10 minutes or until the bread is toasted golden below and the cheese on top is melting.

Remove from the oven, sprinkle the chili flakes and basil. Serve warm.

I hope this pizzette and all the recipes in my blog archive will bring you and your loved ones joy for a long time to come, just as they have done for my loved ones and I for decades now!

The delicious guava fruit has made a couple of appearances on my blog before: in the recipe for a popular Gujarati guava curry, as well as in a lovely Parsi guava jelly. Guava is something I have always enjoyed in various forms, and is linked to special childhood memories of climbing neighbourhood trees and plucking the fruit – eating it that fresh, and in such a fun way too. Having grown up in Chennai and having seen the abundant growth of the tree right here in the city, it occurred to me that there had to be regional dishes that feature it too. Upon speaking to Tamilian friends, I learnt about the guava chutney. I had initially been pleasantly surprised even by the concept of a chutney being made from a fruit. Preparing it had been on my mind for some time, and then a beautiful coincidence occurred. I’m so glad to be able to share both the recipe and the story today, in the last few weeks before I wind this blog down for good.

The beautiful coincidence I mentioned is this… As with several of the recipes I have shared here over the years, I often enjoy doing a few experiments and a bit of research before I bring a dish to you. I had been mulling a South Indian guava chutney recipe for a while. I had decided some months ago that I would settle on a good guava chutney recipe and share it here, so imagine my sheer delight when I encountered it during some travel last week. Just in time, and just so delicious!

I had been visiting Thanjavur and stayed in a village, where I was thrilled to experience the local cuisine. A lady there who was cooking for us prepared some amazing food, and amongst the spread was guava chutney.

Naturally, I asked her for the recipe and even requested that I watch her prepare it. What you read here today is a recipe for authentic Tamil-style guava chutney from the Thanjavur delta.

Guava has its own distinct flavour, which this chutney brings this out beautifully. In addition to being tasty, it is also nutritious. It is rich in fibre and antioxidants, and is known for an extensive range of benefits – everything from boosting cardiac health to boosting collagen in the skin. It is a good source of vitamin C, which is why it has a tanginess to it. You can avoid lime as an ingredient entirely while making this chutney. A small piece of tamarind enhances it, but this is the only addition of an acidic note.

In the past, I found hybrid guava varieties on the market, imported from Thailand, but I have noted that they are also being cultivated in India now. The hybrid kind is pink on the inside all year round, and you can find them all year round too. They look very attractive but are not necessarily sweet, although I understand why their easy availability makes them appealing. As much as I relish all kinds of fruit and also have out-of-season cravings, I do prefer to lean towards the traditional and organic. I wish to plant more guava trees on our farm, and I’m eager to find native variants, or at least those that have long been grown here.

Guava Chutney
(Yield: Serves 2-4)

125 grams guava
2 green chillies
2 tablespoons grated coconut
2-3 cloves garlic
½ inch piece of ginger
1 inch piece of tamarind (soaked)
Salt to taste
Water as required

Tempering

2 teaspoons oil
½ teaspoon mustard seeds
½ teaspoon cumin seeds
A pinch of asafoetida

In a blender, add the guava, green chillies, grated coconut, garlic, ginger, tamarind and salt. Add ¼ cup water or as required.  Blend until smooth.

To prepare the tempering, heat the oil and add the seeds. When they splutter, add asafoetida. Pour this tempering over the chutney and serve. You will probably enjoy it most with dosas or rice.

As you can see, the recipe is really very simple. Guava chutney adds a fruity, flavourful note to any basic Indian meal of yours, complementing the staples and bringing a bit more joy to the day. If you enjoy chutneys in general, do check out more of them in the archives too.

It’s monsoon time here in India, at least where I live in the South. This is the season when something to warm your heart and soul is needed. Many people reach for fried goodies at this time, and watching the rain with a hot cup of tea and some pakoda is a classic activity. As much as I love doing something similar, and I know it has its place, it’s soup that really does the trick for me. There’s nothing that a bowl of soup can’t fix, and fixing a bowl of soup is a pleasure in itself. This carrot-ginger soup is a lovely one, richly flavourful and so soothing.

Honestly, while the rains are ideal soup-consuming weather, I do think soups work all year round. Their lightness is so suitable for summer, when heavy meals are harder to digest. Their warmth provides comfort in winters and monsoons. At any time of day or year, they make for a great appetizer, or even a meal in a bowl. They relax and they heal. And they just taste so good.

I’m the kind of person who likes to cook dishes on a loop. When something is really satisfying, I make it on repeat for the next few weeks or even a month or two, until my family and I grow tired of it and move on to the next food item that catches our fancy. That’s precisely what’s been happening with this carrot-ginger soup right now.

We especially love the spicy kick that the ginger provides, and now that everyone in the home is an adult, there is no more fuss about carrots or vegetables in general. In fact, it has been a real pleasure to see my older son in particular grow into a person who cares deeply about cooking. The foundation of my own cooking comes from my mother, who was a great innovator in the kitchen. I am the same, and so is my son. It is delightful to see this legacy continue, and as a parent it is just so wonderful to see one’s child challenging their mind and experimenting. I can imagine that he does this in the world of business, and brings that sensibility home to his food too. It’s such a fulfilling feeling, and gives me a sense that I have done something right with my life.

As I mentioned a few weeks ago, I will be winding down this blog next month, and I am doing so with a full heart. I know that my culinary gifts have been shared, with my own children, and with every well-wisher who has spent time here – like you.

Coming back to this soup for the soul: in India we tend to get basic orange carrots, not heritage ones, and very rarely do we find the other kinds on the market. Those may yield a more exciting colour to the soup, and I haven’t tried to replicate the same artificially either with a synthetic ingredient or when it comes to the editing of my photos. I prefer not to do either, in general.

What I do enjoy doing, as mentioned earlier, is playing around with ingredients in the kitchen. It’s a hit or miss situation, but when you land on something that works, you truly make that recipe your own.

With this soup, for instance, you can easily swap out the carrots for pumpkin or sweet potato, each of which has its own flavours. Or go further, and try it with moringa or another vegetable altogether. I tend to add a variety of chopped vegetables to any kind of soup I make, so as to boost its nutritional value. Adding finely cut tofu quickly elevates such a dish to a meal in a bowl, too. You can make this meal even more filling by adding a protein of your choice on the side. If you’re a meat eater, using bone broth will take the protein quotient to another level. Play around with garnishing: why not substitute freshly chopped coriander with sautéed curry leaves, which add a fantastic flavour? Let this recipe be a starting point for a soup that truly satisfies not just your tastebuds but your creativity too!

Carrot-Ginger Soup
(Yield: 3-4 cups)

2 medium-sized carrots (chopped)
1 tablespoon ginger (grated)
½ cup onion (chopped)
1 tablespoon coconut oil
2-3 garlic cloves (chopped)
Salt to taste
¼ teaspoon pepper
A pinch of cumin powder
A pinch of turmeric powder
2 tablespoons masoor dal (boiled)
¼ teaspoon chili flakes
1 cube vegetable stock
2-3 cups hot water
½ cup coconut milk
Chopped coriander leaves for garnishing

Heat a large pot over medium heat. Add the coconut oil. Add the chopped onions and garlic and stir until the onions are transparent. Now, add the carrots.

Melt the vegetable stock cube by adding 1 cup hot water to it.

Add this stock to the carrots. Season with salt, turmeric and pepper. Cover with a lid and allow to cook until tender.

Now, add the ginger and the masoor dal.

Allow the mixture to boil, then lower the flame. Simmer for between 10-20 minutes. Then, turn off the gas. Allow to cool, then blend the mixture.

Pour the soup back into the pot. Add coconut milk. Mix well. Do not allow to boil once the coconut milk is added.

Garnish and serve hot.

I have shared many more soup recipes over the years, and I hope you’ll enjoy exploring them all!

Even within a larger community, sub-communities often have their own methods of culinary preparation. I was born into a Vaishnav Gujarati family, and married into a Jain Gujarati one. When I came into my marital home, I began learning the nuances between the sub-cuisines from my mother-in-law. She also introduced me to recipes which I had not been familiar with earlier, including one for some cherished sweet-savoury pea-pomegranate kachoris, shared on this blog close to a decade ago. I am glad to share another one today: methi na dhebra, which is a kind of flatbread, and is in this iteration infused with nutritious fenugreek leaves.

My mother-in-law had an interesting way of making dhebras: rather than prepare them as flatbreads, she would hand-make them in a dumpling fashion, which would be cooked in a yogurt-based gravy that had to be eaten fresh off the stove. Her dhebras were made by repurposing leftovers, specifically theplas and rice. This is a skill I have always admired, one that is common across India, and which inspired my “Second Helpings” recipe series. Traditionally, however, the dhebra is a flatbread made of pearl millet, or bajra, which like most flatbreads keeps for a little while and thus travels well too. That is what I am sharing today.

You will notice that it is distinct from thepla: thicker, more coarse and slightly crispy. It is made of easily available and affordable ingredients, and is very filling. It requires just some curd or pickle on the side.

Although my mother-in-law’s unique twist on dhebra was something new to me, I had eaten the traditional version numerous times while growing up. My mother would prepare it as a one-dish dinner, especially when she was having busier days. My siblings and I would pull a long face whenever we saw it, not realizing at the time that it was pure, wholesome goodness. There were no gimmicks of protein, fibre or other important elements being had separately. It was an all-in-one wonder, like some of our simplest Indian dishes can be. I am going back to those old recipes now, and I hope they’ll never go out of style again.

What makes this particular dhebra extra nourishing is that I use fenugreek leaves in it, also known as methi. This crop is seasonal, so when you can’t get fresh leaves, dry leaves work just fine. You can also substitute it altogether with bottle gourd. You may also wish to incorporate garlic, which is eliminated altogether in many Jain households. All in all, you will get a flavourful flatbread that you can enjoy immediately, or pack into a lunchbox for later.

Methi Na Dhebra
(Yield: 6-8 pieces)

1 cup bajra (pearl millet) flour

¼ cup whole wheat flour

1 tablespoon yoghurt

1 teaspoon ginger-green chili paste

Salt to taste

¼ teaspoon turmeric powder

½ teaspoon cumin powder

½ teaspoon coriander powder

2 teaspoons oil

3 tablespoons water (or as required)

½ cup methi (fenugreek) leaves

Oil for roasting

In a bowl, add the bajra flour and wheat flour. To this, add the yoghurt, salt, turmeric, cumin powder, coriander powder, ginger-green chili paste, oil and fenugreek leaves. Add water and make a smooth soft dough. Cover and allow to rest for half hour.

Now, make lime-sized balls. Dust with some wheat flour and roll them out gently. Do not use pressure. As you are rolling, pinch the edges to help make them round. Roll them out to ½ inch thickness.

Heat a griddle and place a rolled-out dhebra onto the hot pan.

Allow to cook both sides. Then, add few drops of oil. Cook until golden and spots appear on both sides. Repeat with the remaining dhebras.

Serve with curd or pickle.

Methi na dhebra is one of many flatbreads that I have shared over the years, and it is yet another recipe for lovers of Gujarati food, which has long been at the heart of this blog. I hope you’ll explore more of both, as well as of so much else from India and everywhere, in the archives.

Over the years, I have shared recipes for special treats for Diwali. These include desserts from the Gujarati kitchen such as laapsi and ghugra. Joining these is kopra pak, a lovely sweet that is exquisite in both its taste and its simplicity.

When kopra pak occurred to me as this year’s Diwali recipe, I thought about how it is a dish that is often taken for granted. It utilises just a few basic ingredients, with the ubiquitous coconut as the core. “Pak” means “sugar syrup”, which preserves the sweet and makes it travel well.

As with all staples, there are many versions. Some use condensed milk rather than milk, which is a more modern take on a traditional recipe. Others use sugar syrup, not sugar, or else jaggery. Which ingredient is chosen has an impact on the softness or solidity of the dish. Those using jaggery set differently, and have their own flavour and texture. Hardened kopra paak becomes a kind of coconut candy, whereas the softer kind is naturally easier to cut and to shape. A version with jaggery is prepared for Ganesh Chathurti, and stuffed inside a rice flour modak (a dumpling that is offered to the deity during this festival). I love that one, and desperately wait for those treats at that time of year, which a friend of mine obliges me with.

Here, this kopra pak is for our Diwali celebrations – and hopefully yours as well, not only this year but for many years to still come. While sweets are always a part of our festivities, in our home, my health-conscious side and the fact that my husband is not a huge fan of desserts mean that we aren’t extravagant in our consumption of them. However, kopra pak happens to be one of the rare sweets that he really enjoys. And between watching our erratic cholesterol and BP readings, and still giving an occasion like Diwali its due, I decided that this is going to be the only sweet that I prepare at home this year. How lucky we are that it is so very delicious, and gives us just the right amount of indulgence, without immoderation.

As I prepared it, with excitement, my mind filled with memories of many festivities past. In my childhood, it felt like literally every other family we knew made kopra pak, or some version of it. Coconut is pan-Indian, and so is the concept of exchanging mithais or sweets during special occasions. Whether making a selection, or making just one type, it’s the thought that matters, and the love that is conveyed in the process.

Here, I have chosen to add a dash of rose to this traditional Gujarati sweet. It happens to be a signature flavour at re:store, and I offer this recipe to you with much gratitude for your support and recognition of my work.

This is my ninth Diwali as the creator of this blog, and if you have been with me all this while, it has truly been a journey. One of learnings, growth and change, all driven by my heart’s calling toward food and its intricate relationships with love, culture and life itself. I want to take this moment to share that I will be winding down my regular posting on this blog by the end of this year, in order to focus on a large project that has been close to my heart for a long time. That is, as you may have guessed – and if you are among my dear well-wishers, may even have enquired about – a book.

Kopra Pak With Rose
(Yield: 10-12 pieces)

1½ cups coconut (grated)
¾ cup whole milk
¾ cup sugar
A pinch of saffron in 1 tablespoon milk
¼ teaspoon cardamom powder
¼ cup pistachio (finely sliced)
½ teaspoon rose water
Ghee for greasing a plate

Heat a kadai and add the milk and coconut. Allow to cook on a low flame, stirring continuously. Make sure it does not stick at the bottom. Continue to stir until the milk has almost evaporated.

Now, add the sugar. Allow to cook. Keep stirring.

Once the mixture thickens, add the cardamom powder, saffron and rose water. Skip the rose water if you prefer not to have that flavour in your kopra pak.

Allow to cool slightly, then transfer onto the greased plate. Flatten with the help of a cup until it looks flat and smooth. Sprinkle with sliced pistachios. You may also wish to garnish with rose petals.

Refrigerate for an hour or until it sets well.

With the help of a sharp knife, cut the kopra pak into the desired shape.

As I said earlier, the gifting of sweets during Diwali is a tradition that conveys love. To me, that is what recording these precious recipes has always been about. I hope that they bring joy to you, and to all whom you share them with!

Chili cheese toast has been an Indian staple for generations, and many of us – myself, for certain, and my children as well – grew up eating it as a special snack. My association with it began at clubs, which were the only social gathering spaces back then. We as a family would look forward to those outings, and to the snacks available there which were inherited from the British. Even a few weekends ago, I found myself ordering chili cheese toast at a club get-together, as has been a habit for all these decades. The funny thing is that something that had such exotic connotations in childhood is actually an extremely easy dish to whip up, as you’ll see below.

Even though my first association with chili cheese toast was in a club setting, it has since become a faithful familiar at home. I realized when my kids were growing up that it was perfect to make for play dates, when the children need carbs for energy and good-tasting things to add to the fun. Later, it also became a go-to for when I found myself returning home after a long day and in need of some kind of easy-to-prepare, comforting snack.

There are a couple of different methods to putting a chili cheese toast together, depending on whether it is open-faced or a sandwich. Here, I share the method for open-faced toast, in which all that delicious melty cheese inspires the appetite on sight.

Chilli cheese toast really is all about the cheese, most would say. To this day, I still use trusted Amul cheese in mine, even though such a wide variety is available. This is also a nostalgic throwback. The India of my growing years, in the 1970s, experienced a huge dairy movement, known as the White Revolution. This was when milk not only became a major Indian export, but also became very accessible for purchase on the market all over the country, wherein earlier people relied directly on cows and farmers. All store-bought dairy products became popular, and among them cheese. At the time, Amul was the only brand we knew of. I remember when slices were introduced, not just blocks of cheese. They remain reliable. I travel so much and pick up some very flavourful foreign cheeses often, but when it comes to certain basic recipes, the simple ingredients of my childhood remain close to my heart.

Chili Cheese Toast
(Yield: Serves 2)

1½ cups grated cheese (mozzarella or pizza cheese)
3 slices bread
1 green chilli (finely chopped)
1 tablespoon coriander leaves (finely chopped)
Salt to taste

Preheat oven to 200°C.

Place 3 slices of bread flat in the oven tray. Sprinkle the grated cheese over the slices. Next, sprinkle the green chilli and coriander leaves.

Bake for 2-5 minutes. You will know when it’s ready when golden spots appear and the cheese melts. Remove from the oven.

To pack more punch, sprinkle with red chilli flakes if so desired. Serve your chili cheese toast hot.

I hope this effortlessly tasty snack brings a bit of joy your way!

The cultures around us always have a huge influence on us especially while we are growing up, and this influence often remains through life. Certain recipes and food habits are the most common evidence of this influence, in my opinion. As a Gujarati who was born and brought up in Chennai, Tamil cuisine is obviously one I have immersed myself in, just as much as my native one. Additionally, with a Sindhi member of the family and numerous Sindhi friends, Sindhi cuisine is another one I have an abiding love for. This recipe – a vegetable curry known as sai bhaji – is from the same.

Sindhis are a community who are mostly originally from the Sindh region of Pakistan. The majority of Indian Sindhis are believed to have migrated from there during Partition, a highly significant event in subcontinental history. Subsequently, they also moved to many other countries, and are known – in addition to delicious food – for being very enterprising. It is often said that a Sindhi-owned company can be found no matter where you travel in the world, such is the community known for its business acumen.

My exposure to Sindhi food began in childhood, as I mentioned, through a friend who now lives in Mumbai. Whenever I visit her, she asks me what I would like to eat, and I will invariably request sai bhaji. It is a dish that I recall fondly not just from ordinary meals at her house, but even from birthday parties and such. Back then, these parties were always in homes, and featured homemade food. The only special or exotic thing would be a cake, while even the other treats would all be items prepared by the family. In India, proper food is served at every such gathering, as feeding guests well is a valuable tenet of our culture. A sai bhaji – a healthy item! – would certainly not be out of place.

“Sai” means “green” and “bhaji” means vegetables. The dish is spinach-based, and also contains a variety of leftover ingredients. A little leftover brinjal, a little leftover carrot… All these will be pressure cooked along with dal in order to prepare this nourishing dish.

When I said earlier that feeding guests a hearty meal is a part of Indian culture, across all communities, I was thinking specifically of how this is a collective choice in spite of a history of droughts, famines and lack of economic power. Perhaps because of this history, we are very cautious about not wasting food and use leftovers very sensibly. Some years ago, I did a series called “Second Helpings” of traditional recipes that innovate using leftovers. We turn around every little bit that sits in the fridge, and have done so since well before the invention of fridges, in fact!

To me, how we treat food and how we treat knowledge are the real wealth of India. We hold both in such regard, because the fact is that many generations have had to do with less of both or either than they deserved. To us, throwing food into a bin is as much of a sin as stepping on a book or a newspaper. The respect we have for such objects, the respect we have for guests: we know what is precious, whether or not that preciousness is measurable on material terms.

Sai Bhaji
(Yield: Serves 4)

1 medium-sized onion
1 medium-sized tomato
1 tablespoon ginger (grated)
1 teaspoon garlic (grated)
1 green chilli
1 bunch spinach (palak)
3 tablespoons yellow moong dal
1 medium-sized potato
1 medium-sized carrot
Any vegetables of your choice
2 tablespoons oil
Salt to taste
½ teaspoon turmeric powder
1 teaspoon chili powder
1½ teaspoons coriander powder
½ teaspoon cumin powder
2 tablespoons water

In a pressure cooker, place the dal followed by the vegetables and finally the spinach. Add 2 tablespoons of water and allow to cook or whistle until tender.

Meanwhile, chop the onion and tomato.

Heat a kadai, add the oil. Then, add the onion, garlic and ginger. Finally, add green chilli and sauté everything until golden.

Next, add the chopped tomato. Sauté and add all the spices. Stir well.

Open the pressure cooker and mash all the vegetables until they come together.

Finally, add the vegetables to the onion-tomato mixture and mix well.

Add a dash of water if you prefer it to be less thick.

Your sai bhaji is ready. I enjoy eating it alongside hot rice, with kadhi and curd on the side. I hope you’ll enjoy this lovely recipe from Sindhi cuisine. I am sure you will find, as I do, that it pairs beautifully with other dishes from across the Indian subcontinent.

Millets have made numerous appearances on this blog. They were, traditionally speaking, widely consumed across India and have in recent years made a comeback among the health-conscious. When it comes to jowar (which you may know as sorghum), the fibre, protein and essential minerals it provides – along with the fact that it is relatively light to digest – make it an excellent choice. This jowar khichdi is a great dish to put a little energy boost into your day, and is ideal for either lunch or dinner.

In the last post, I shared the recipe for jowar roti. I had said then that the winter variant of jowar roti is bajra roti, which uses the heavier pearl millet. It is important to note that millets are not universally interchangeable. A jowar dish made for breakfast, such as for example a jowar upma, cannot become a bajra dish through mere substitution. Bajra tends to be heavier on the stomach and takes more effort to chew. One does not want to tax the system so early in the day. If at all I want to have bajra in the mornings, I will have it in roti form.

That said, you can certainly use some other millets in lieu of jowar in this khichdi form. The method will remain the same, but the cooking and soaking time (if required), will vary. A millet with smaller grains, such as little millet or foxtail millet, will cook faster and without pressure cooking. Jowar, on the other hand, benefits from a few hours of soaking. Keep these factors in mind whenever you select a millet, for any kind of dish.

When my children were younger, millets weren’t part of our regular meals. We weren’t familiar with them, and there was hesitation around the unfamiliar taste and texture. I myself only started experimenting with them a little over a decade ago. At this point, the entire family also began to enjoy them. Since then, I’ve been a strong advocate for incorporating millets into daily meals. Each kind satisfies certain nutritional requirements, and has its own taste. As with any grain, flavour pairings also make a difference. For instance: jowar is known for a subtle, slightly sweet taste, while little millet has a hint of nuttiness. My recommendation is to keep experimenting in the kitchen, always. Even when working with very traditional recipes, the learning never has to stop.

Jowar Khichdi
(Yield: Serves 2)

1 cup coarsely ground jowar
Water as required for soaking
2 cups water (for cooking)
Salt to taste
1 tablespoon ghee
½ teaspoon cumin seeds

Soak the jowar for 6-10 hours. Rinse well.

In a pressure cooker, add the soaked and rinsed jowar along with water and salt.

Cover and cook for 4 whistles. Allow to cool, then open the lid.

Heat a small tempering bowl. Add ghee and then cumin seeds. Once the seeds splutter, pour the tempering over the khichdi. Serve immediately.

Hot khichdi is a comfort food that has had other iterations on this blog, and I’m glad to share this one with you too. I hope this jowar khichdi becomes one of your preferred variants too.