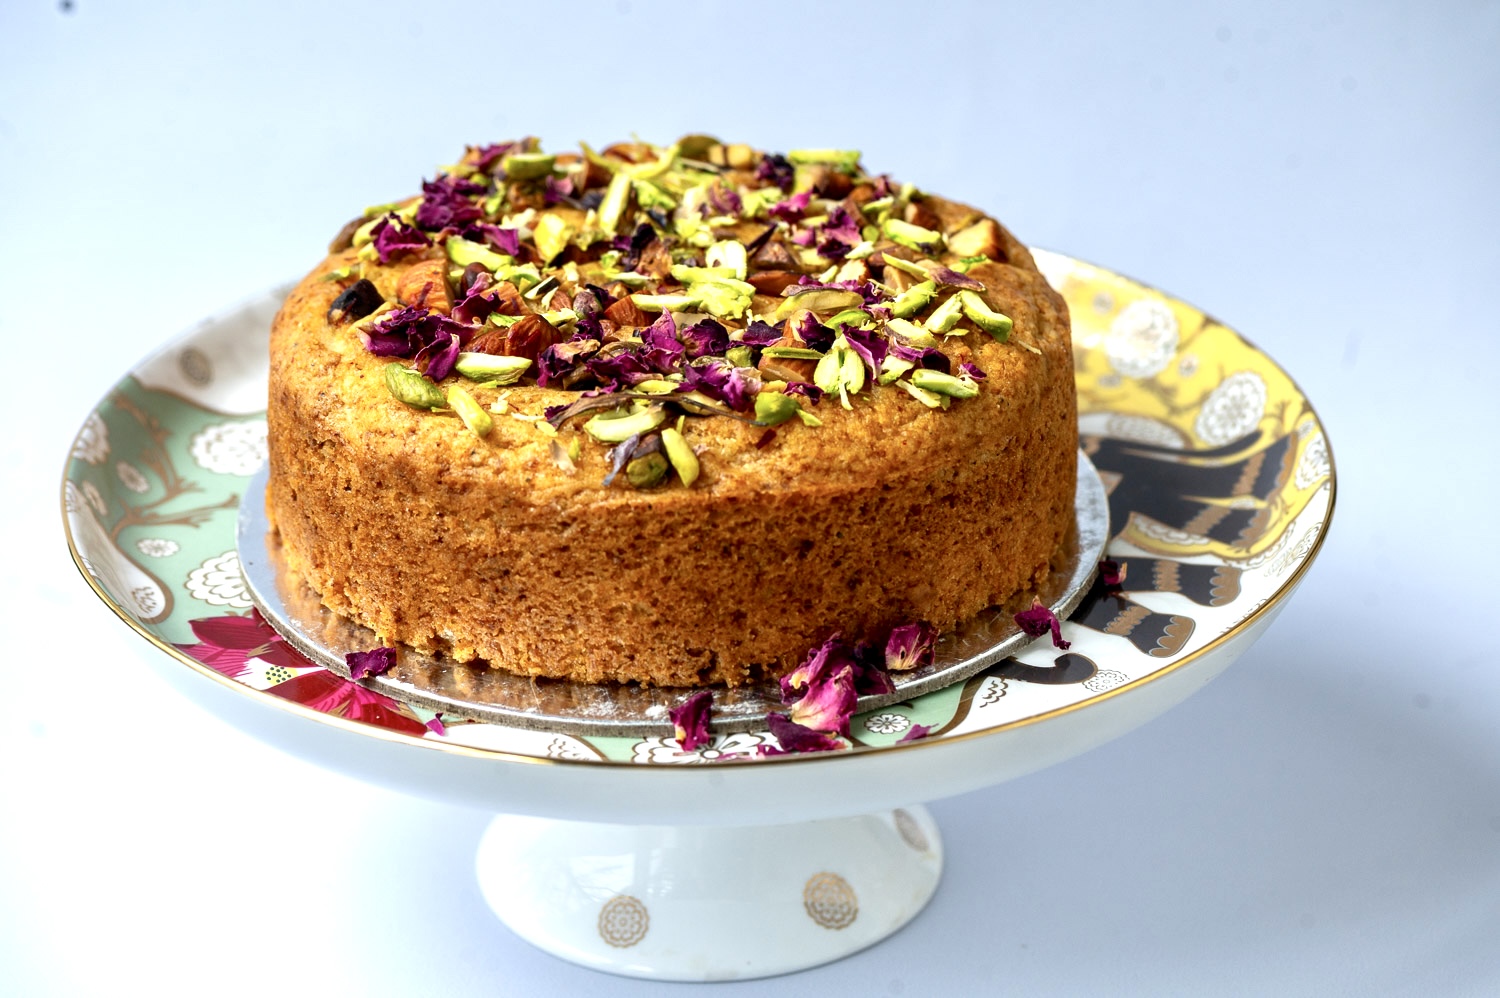
Tag

baking

Browsing

After over nine beautiful years of growing and sharing, I thought I had come to the end of an era, the completion of this blog. We had, that is, for some of you had been with me from the very beginning. I was ready to bid farewell to my life as a blogger with a full heart, and was planning the recipe that follows as the final one, when more than a few of you reached out to me privately. You shared such lovely sentiments with me; these convinced me that even as a new adventure begins, this one does not need to conclude. Rather than mark the end of the road, this eggless rose cardamom mawa cake now only represents only a shift in stride, as you’ll see when you read on…

I was able to reimagine the trajectory of this blog for the same reason that I had earlier been able to prepare for its winding down: because I had been musing for much of this past year about the concept of openness. It is the spirit of openness that allows us to experience more of life, to take big leaps and to keep ourselves motivated after every sea change. For me, launching re:store as a food delivery and bakery business out of my home was one such major transformation.

Then, a couple of years later, in October 2016, this online presence was born as a complement to the business, which continues to thrive. With this blog came so much discovery and delight as I explored my storytelling skills and found a renewed career in the visual arts as a photographer. At every step, with every post, that sense of openness carried me forward. Being open to learning, being open to experiments, being open to challenges, and more importantly, staying open in spite of them. I know that a lifestyle blog like this one – that is, a repository of memories and recipes that originate in one’s own experiences – going steady for almost a decade is unusual. I could not have come this far without so many blessings, and so much encouragement, and I am preparing to go further still.

I am at a new cusp now, choosing to focus my energies on creating a book, which has been a cherished dream of mine for a long time. It is also something that many of you requested from me over the years, only one of many ways in which you made me feel cared for and appreciated. My gratitude for your support is immense.

That support truly means the world to me, which is why the blog will continue, but with fewer posts each month, while I am concurrently working on the book.

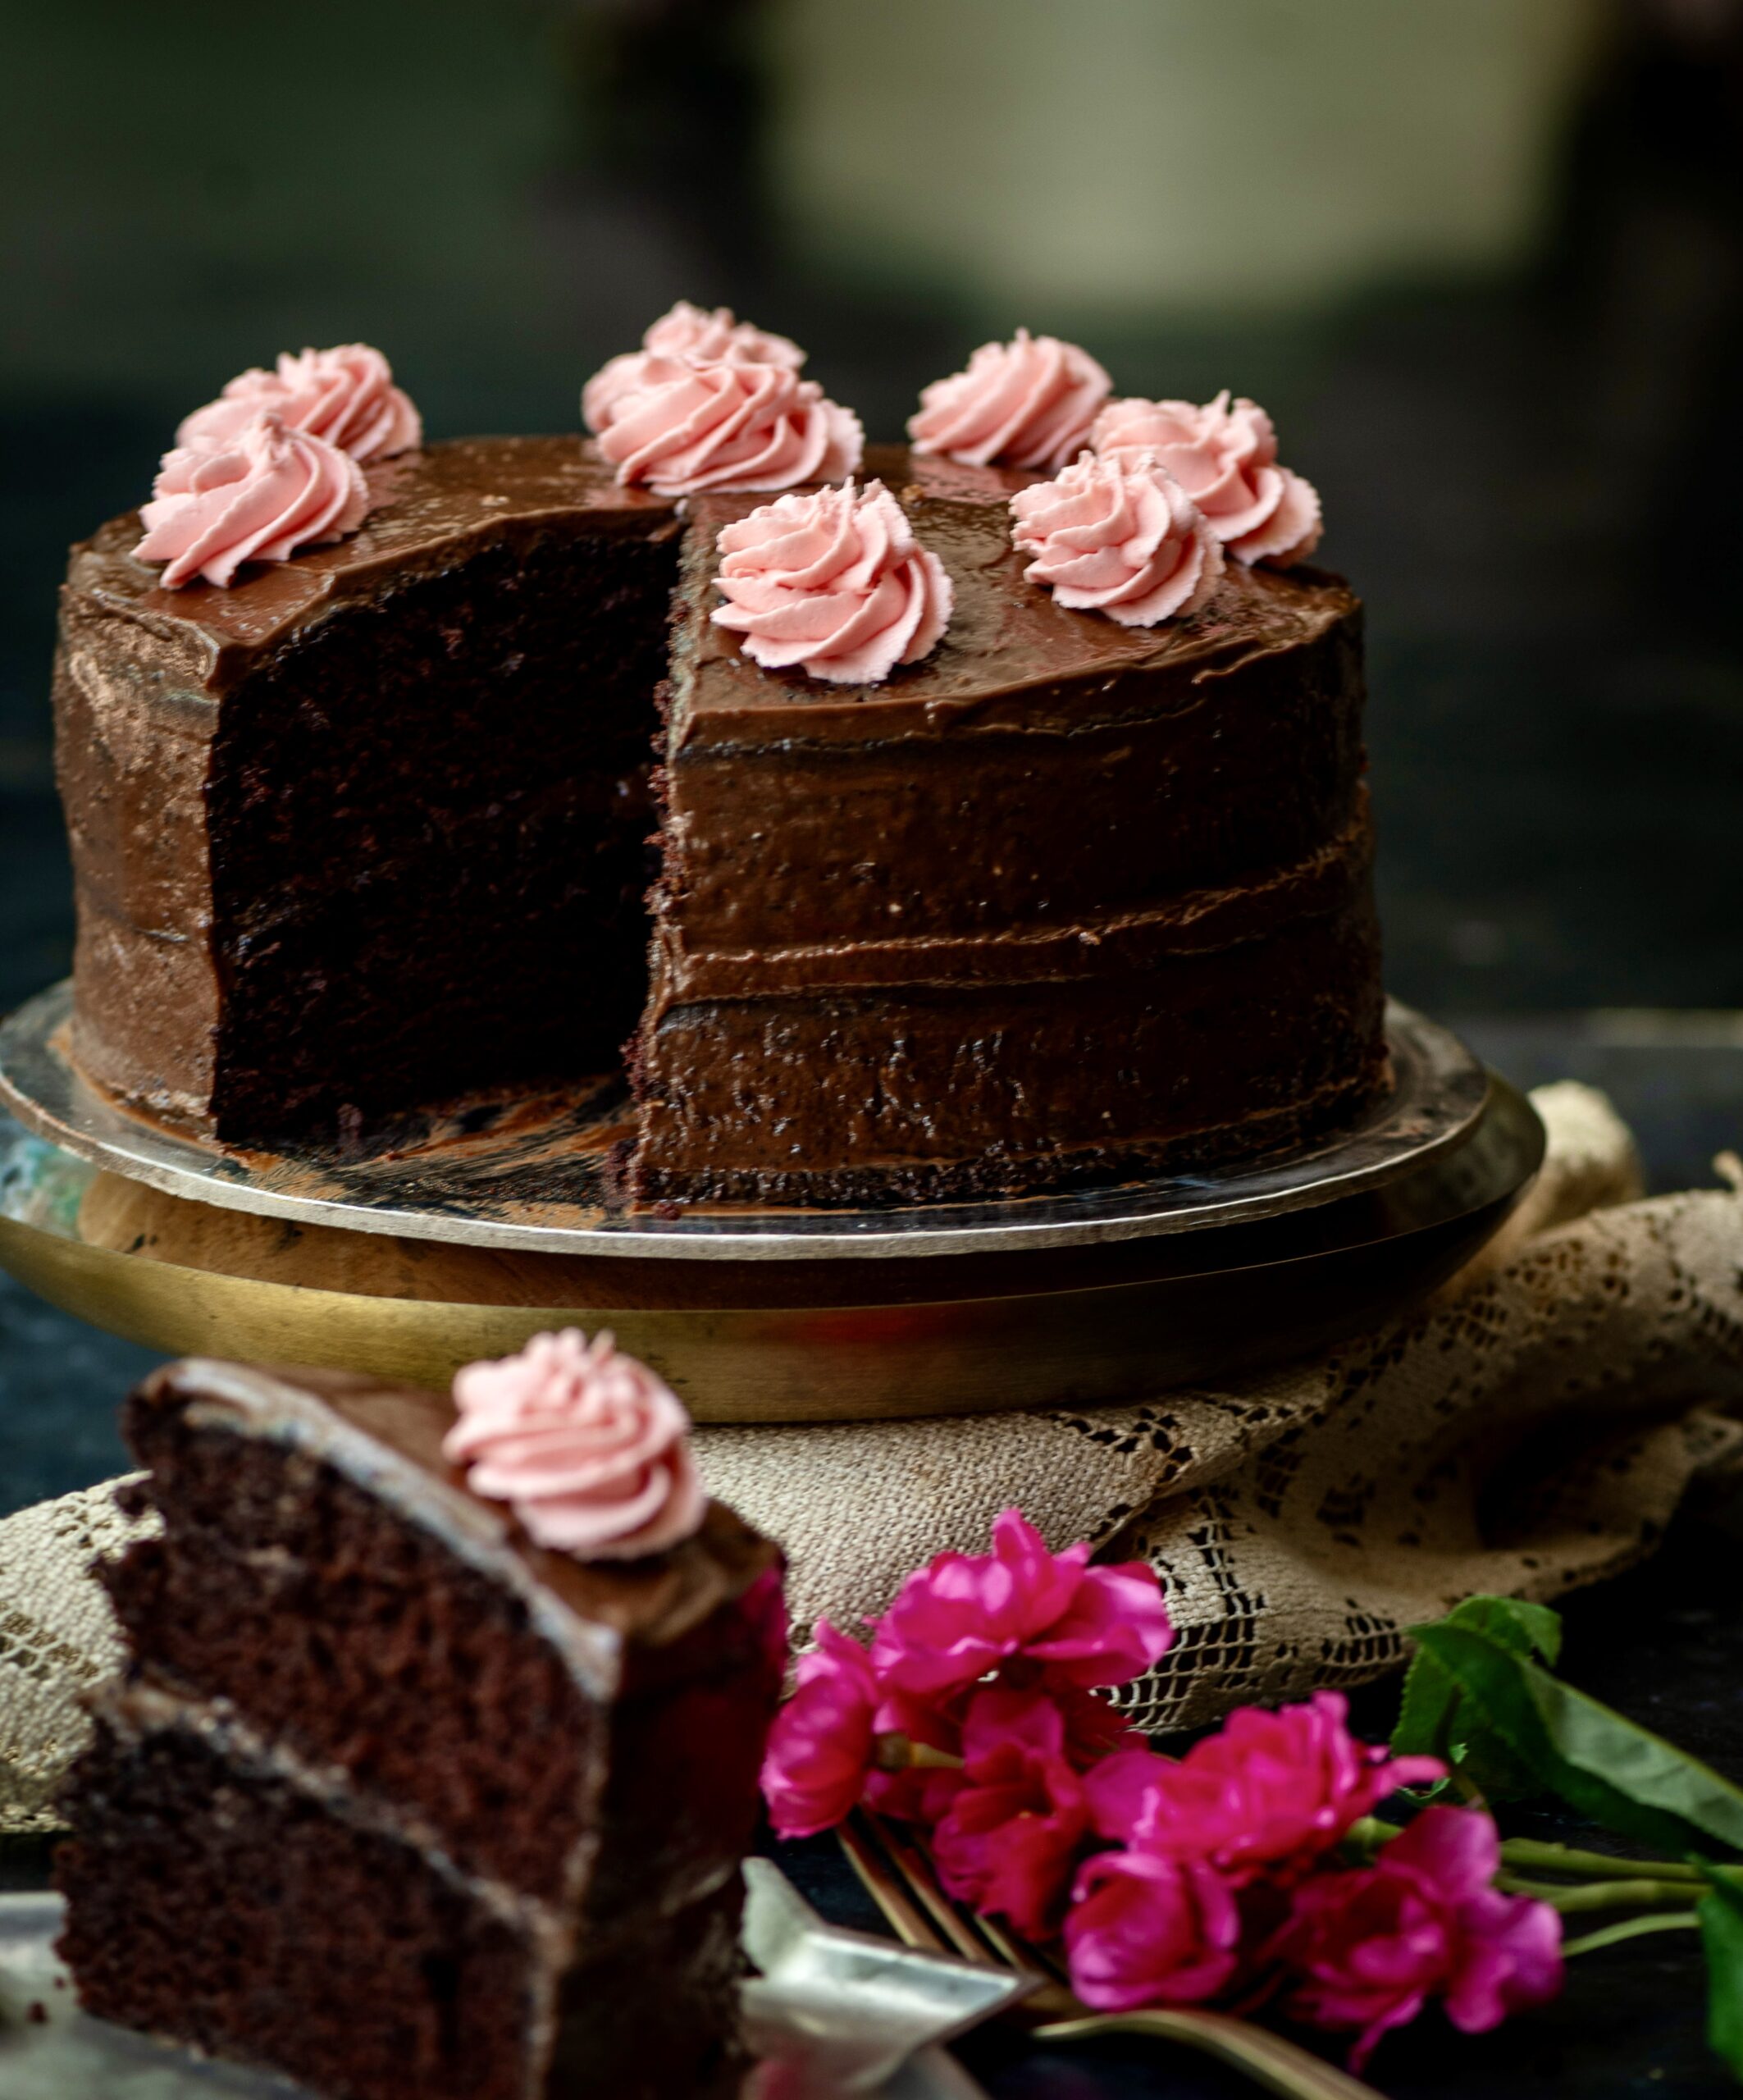
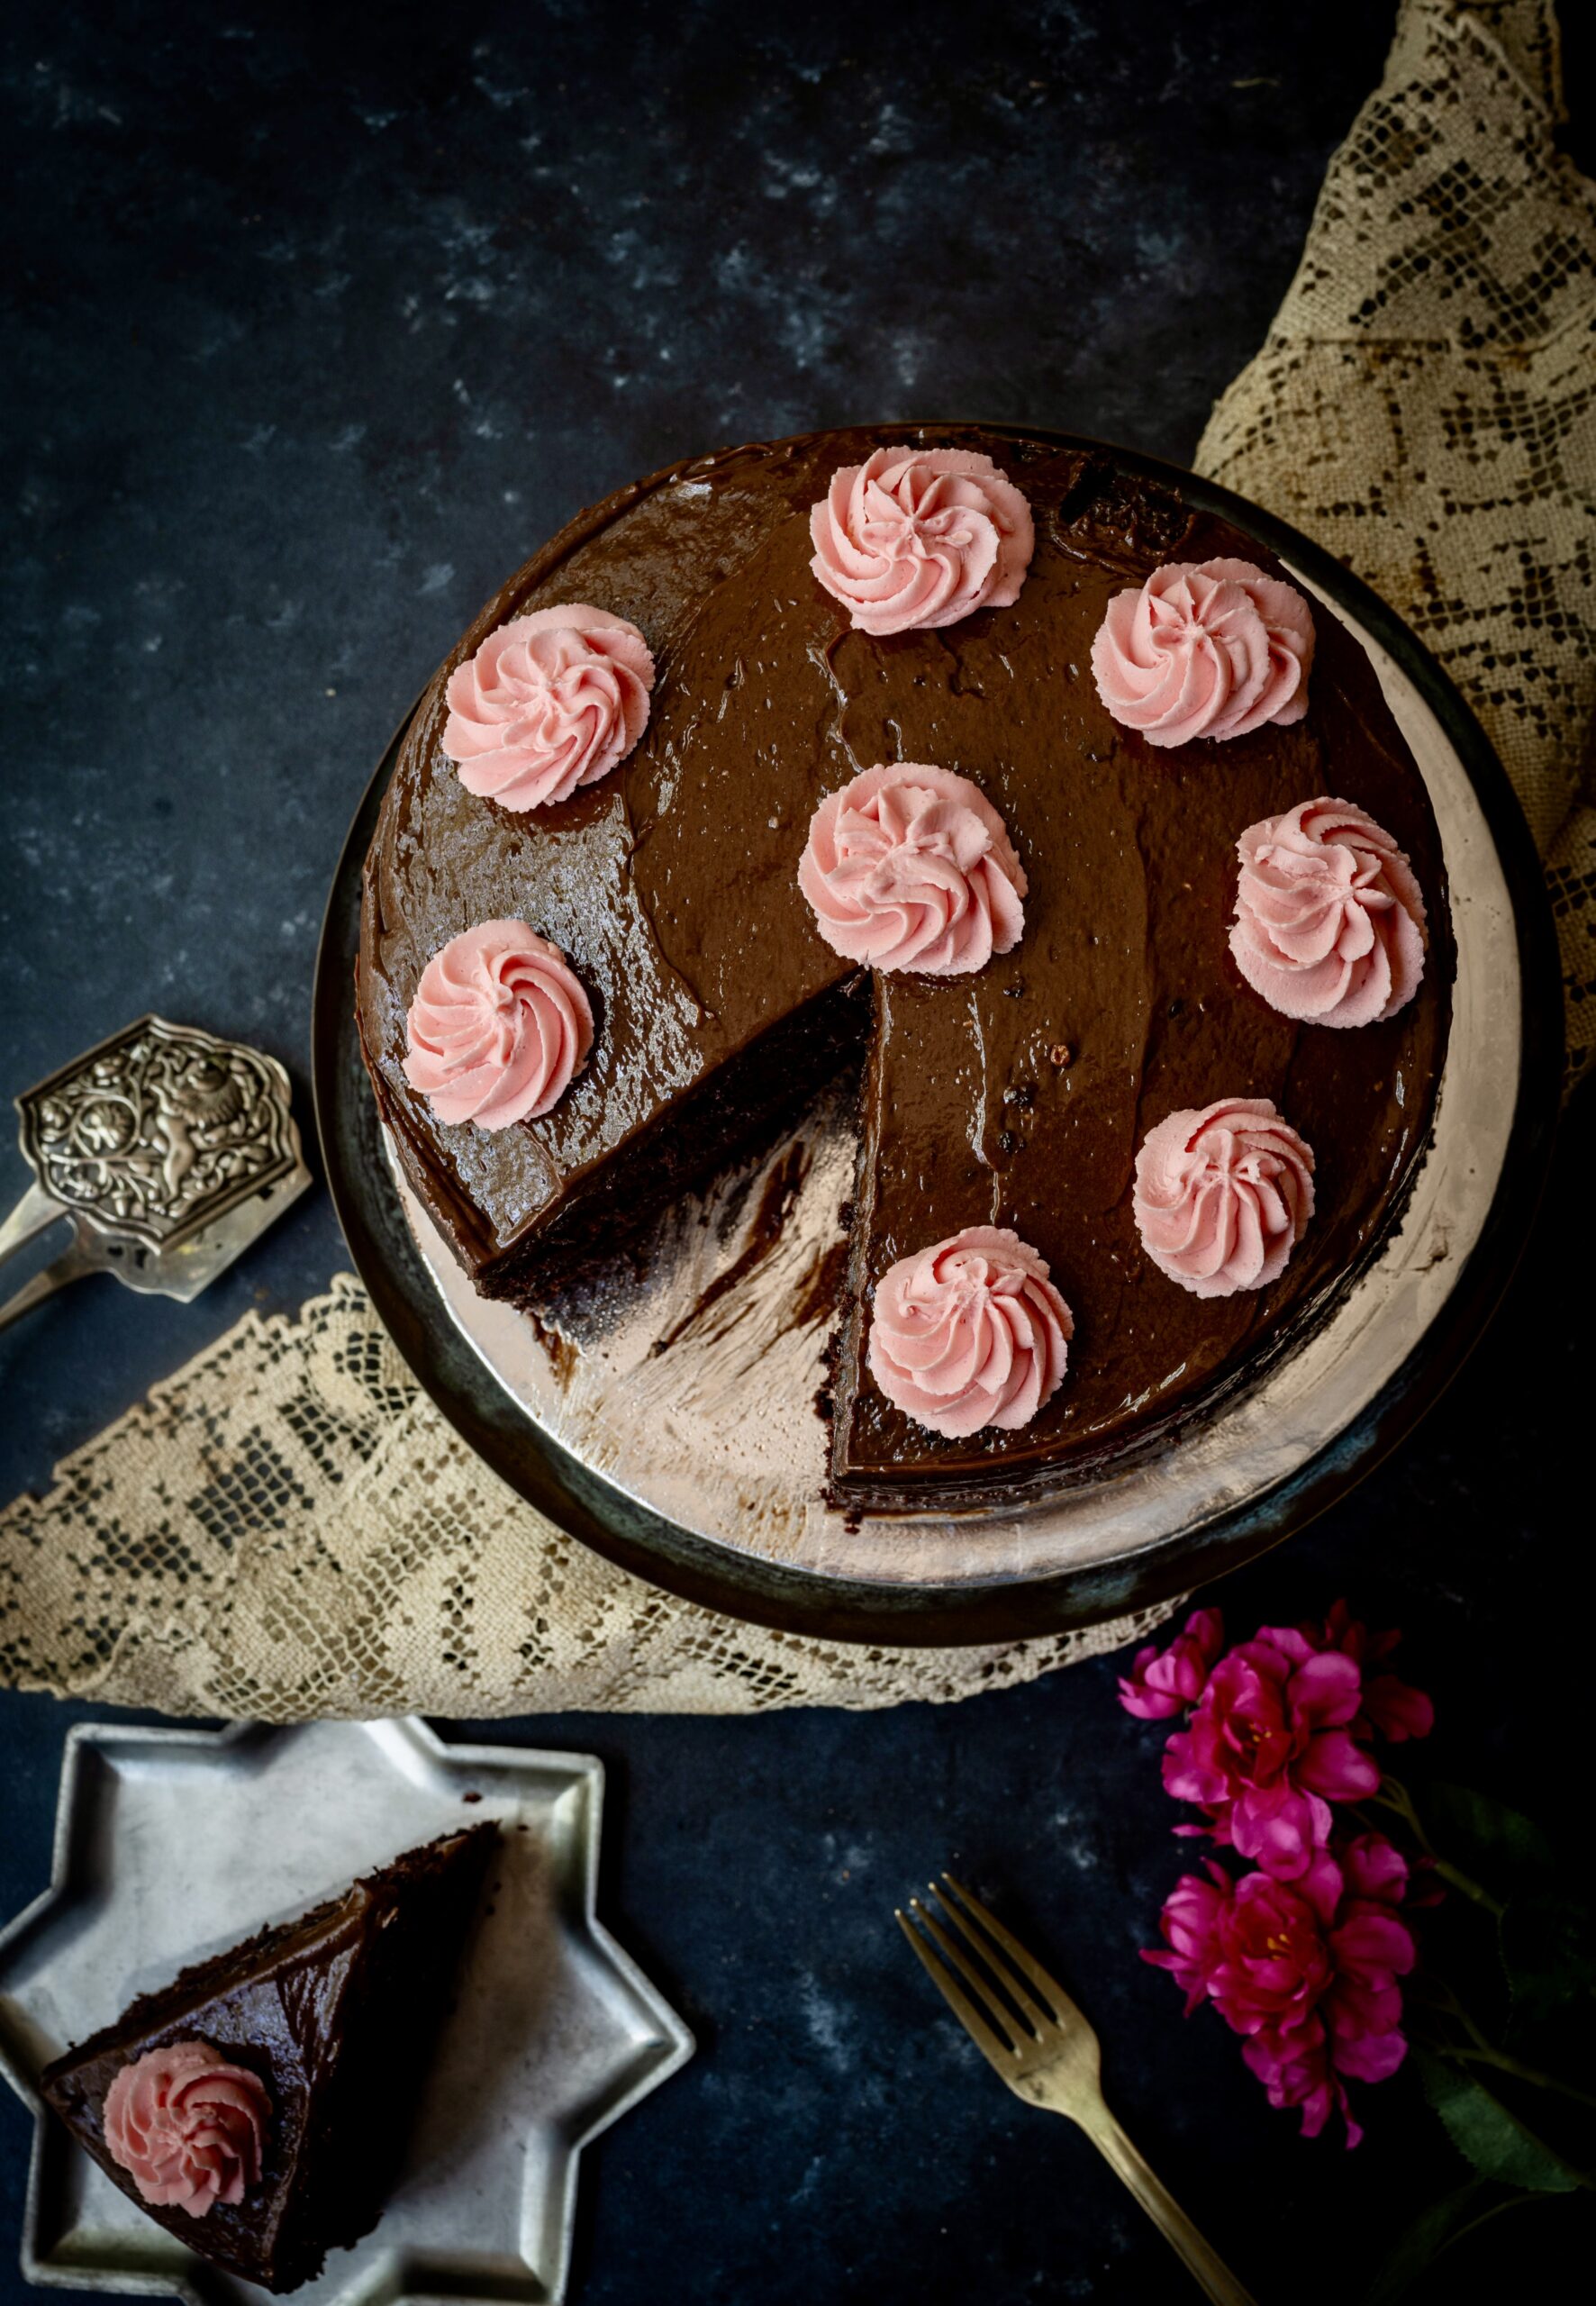
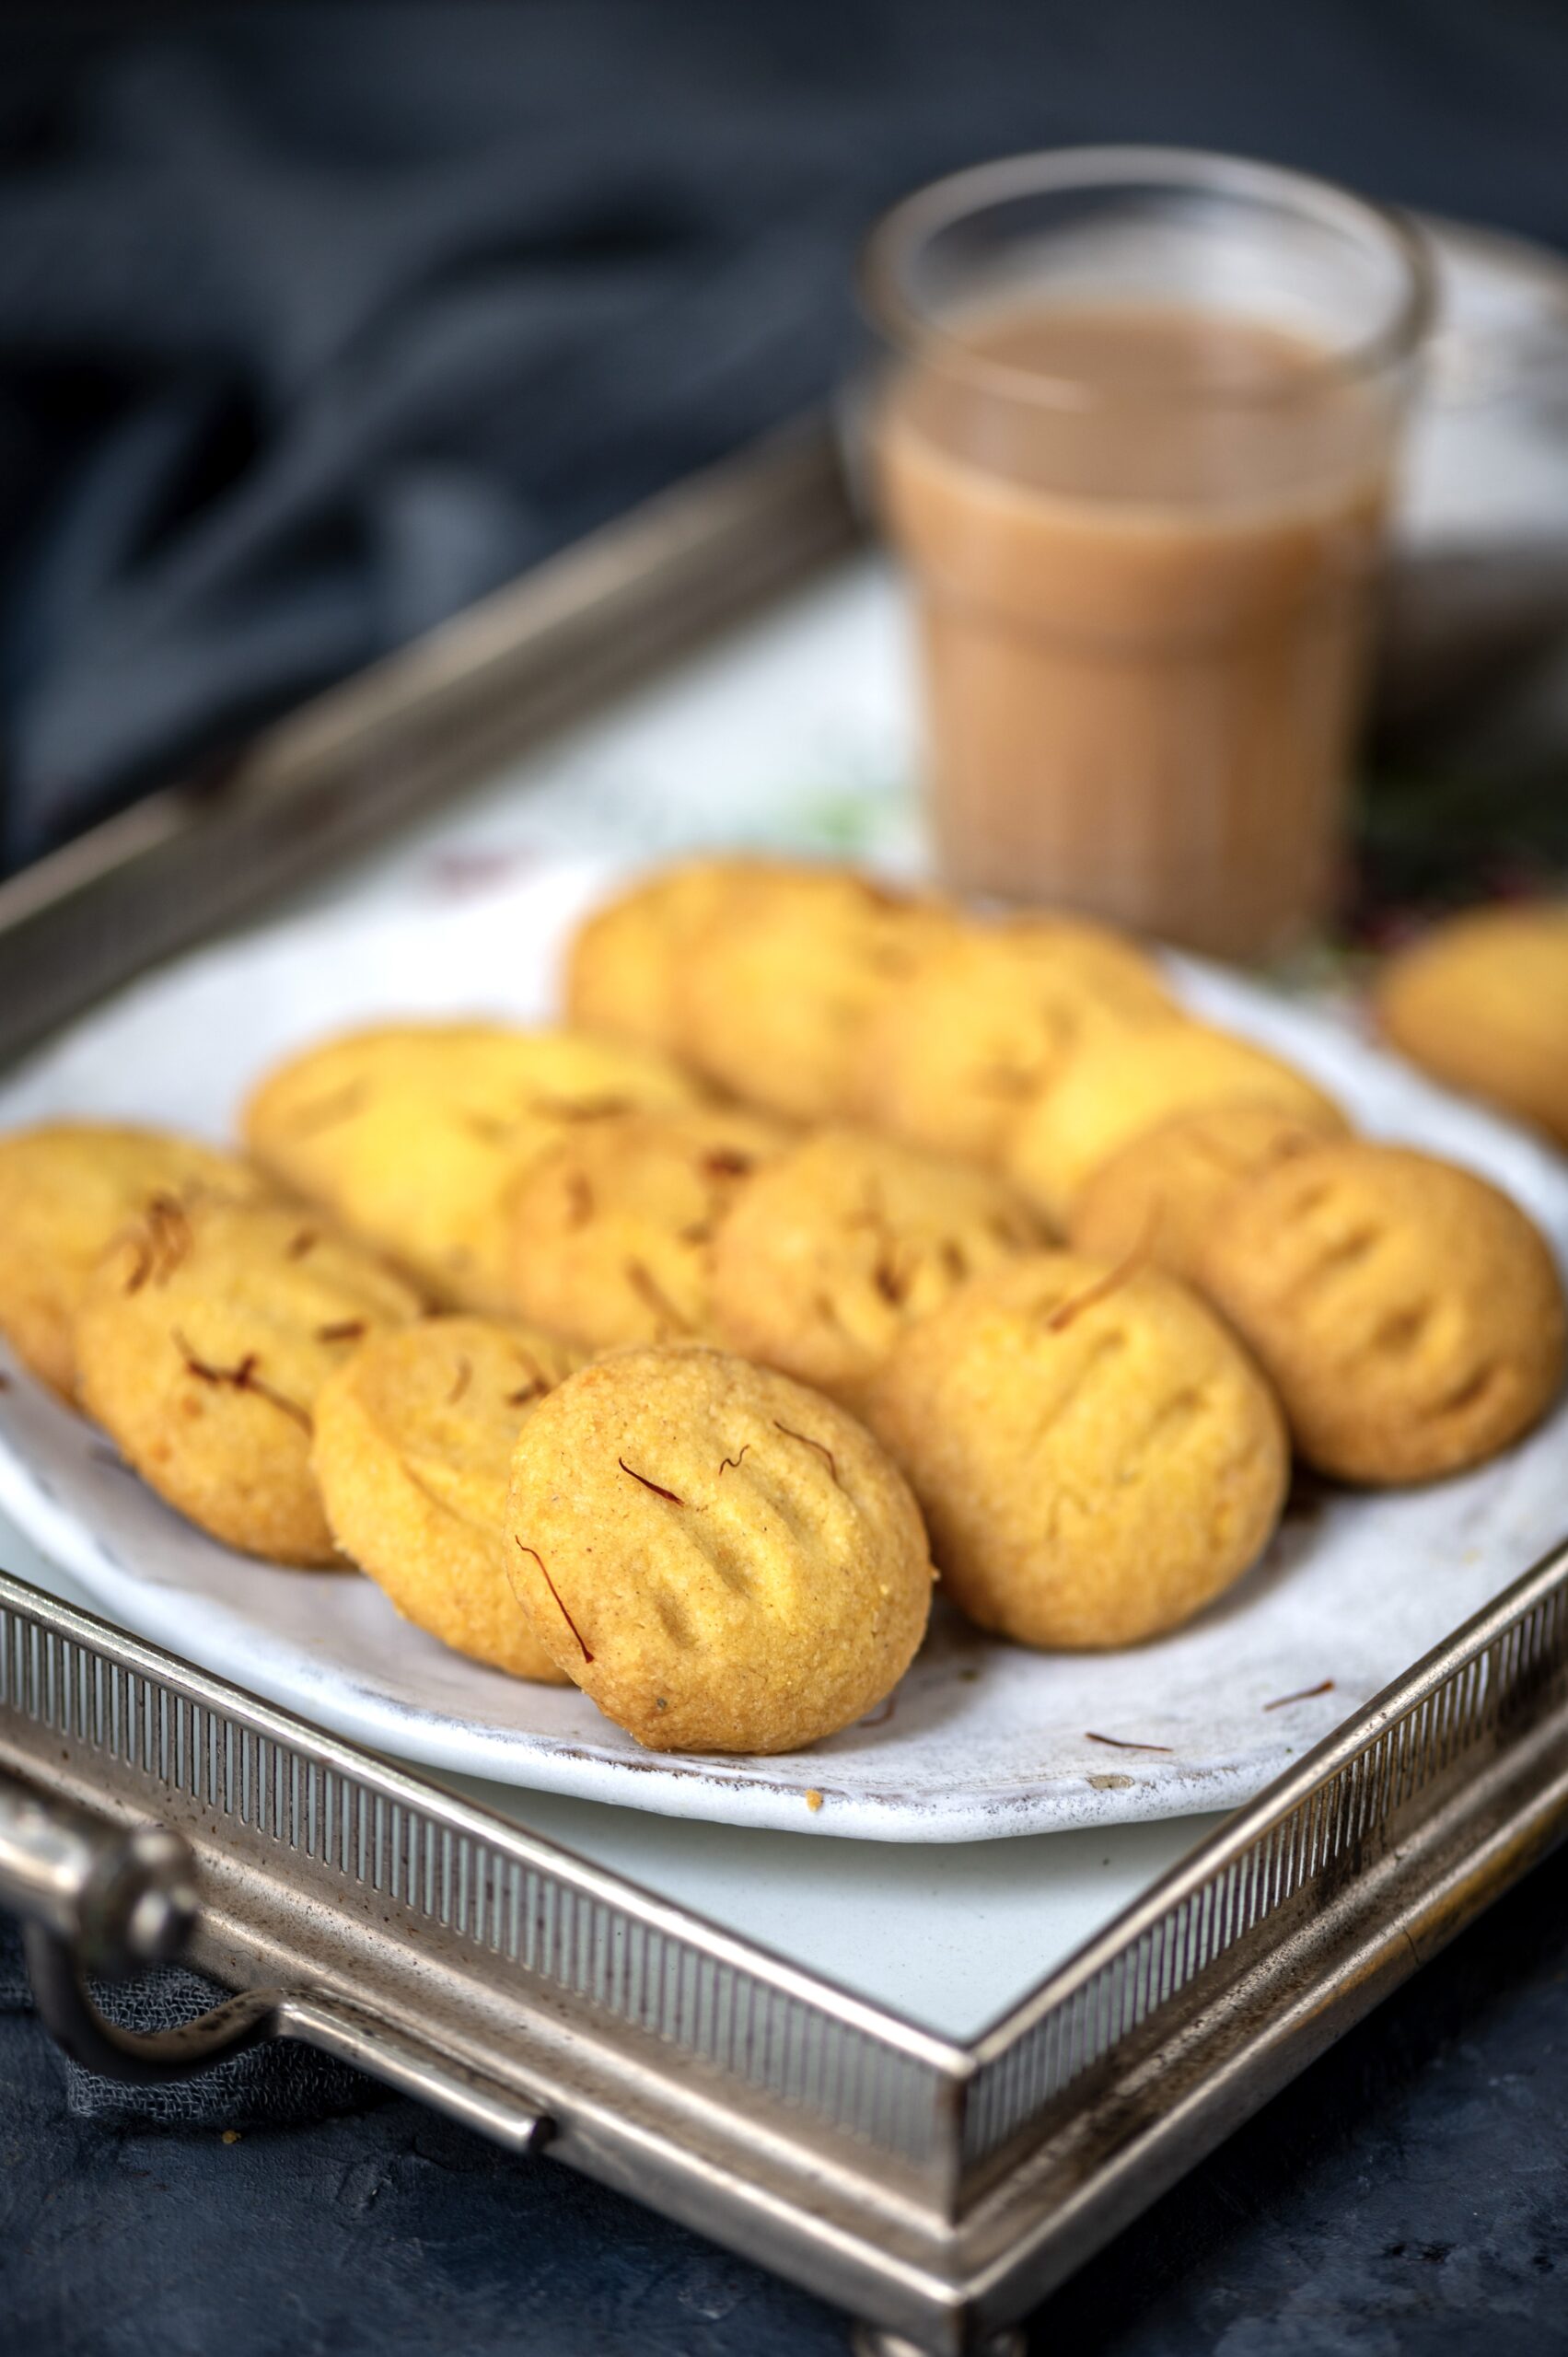
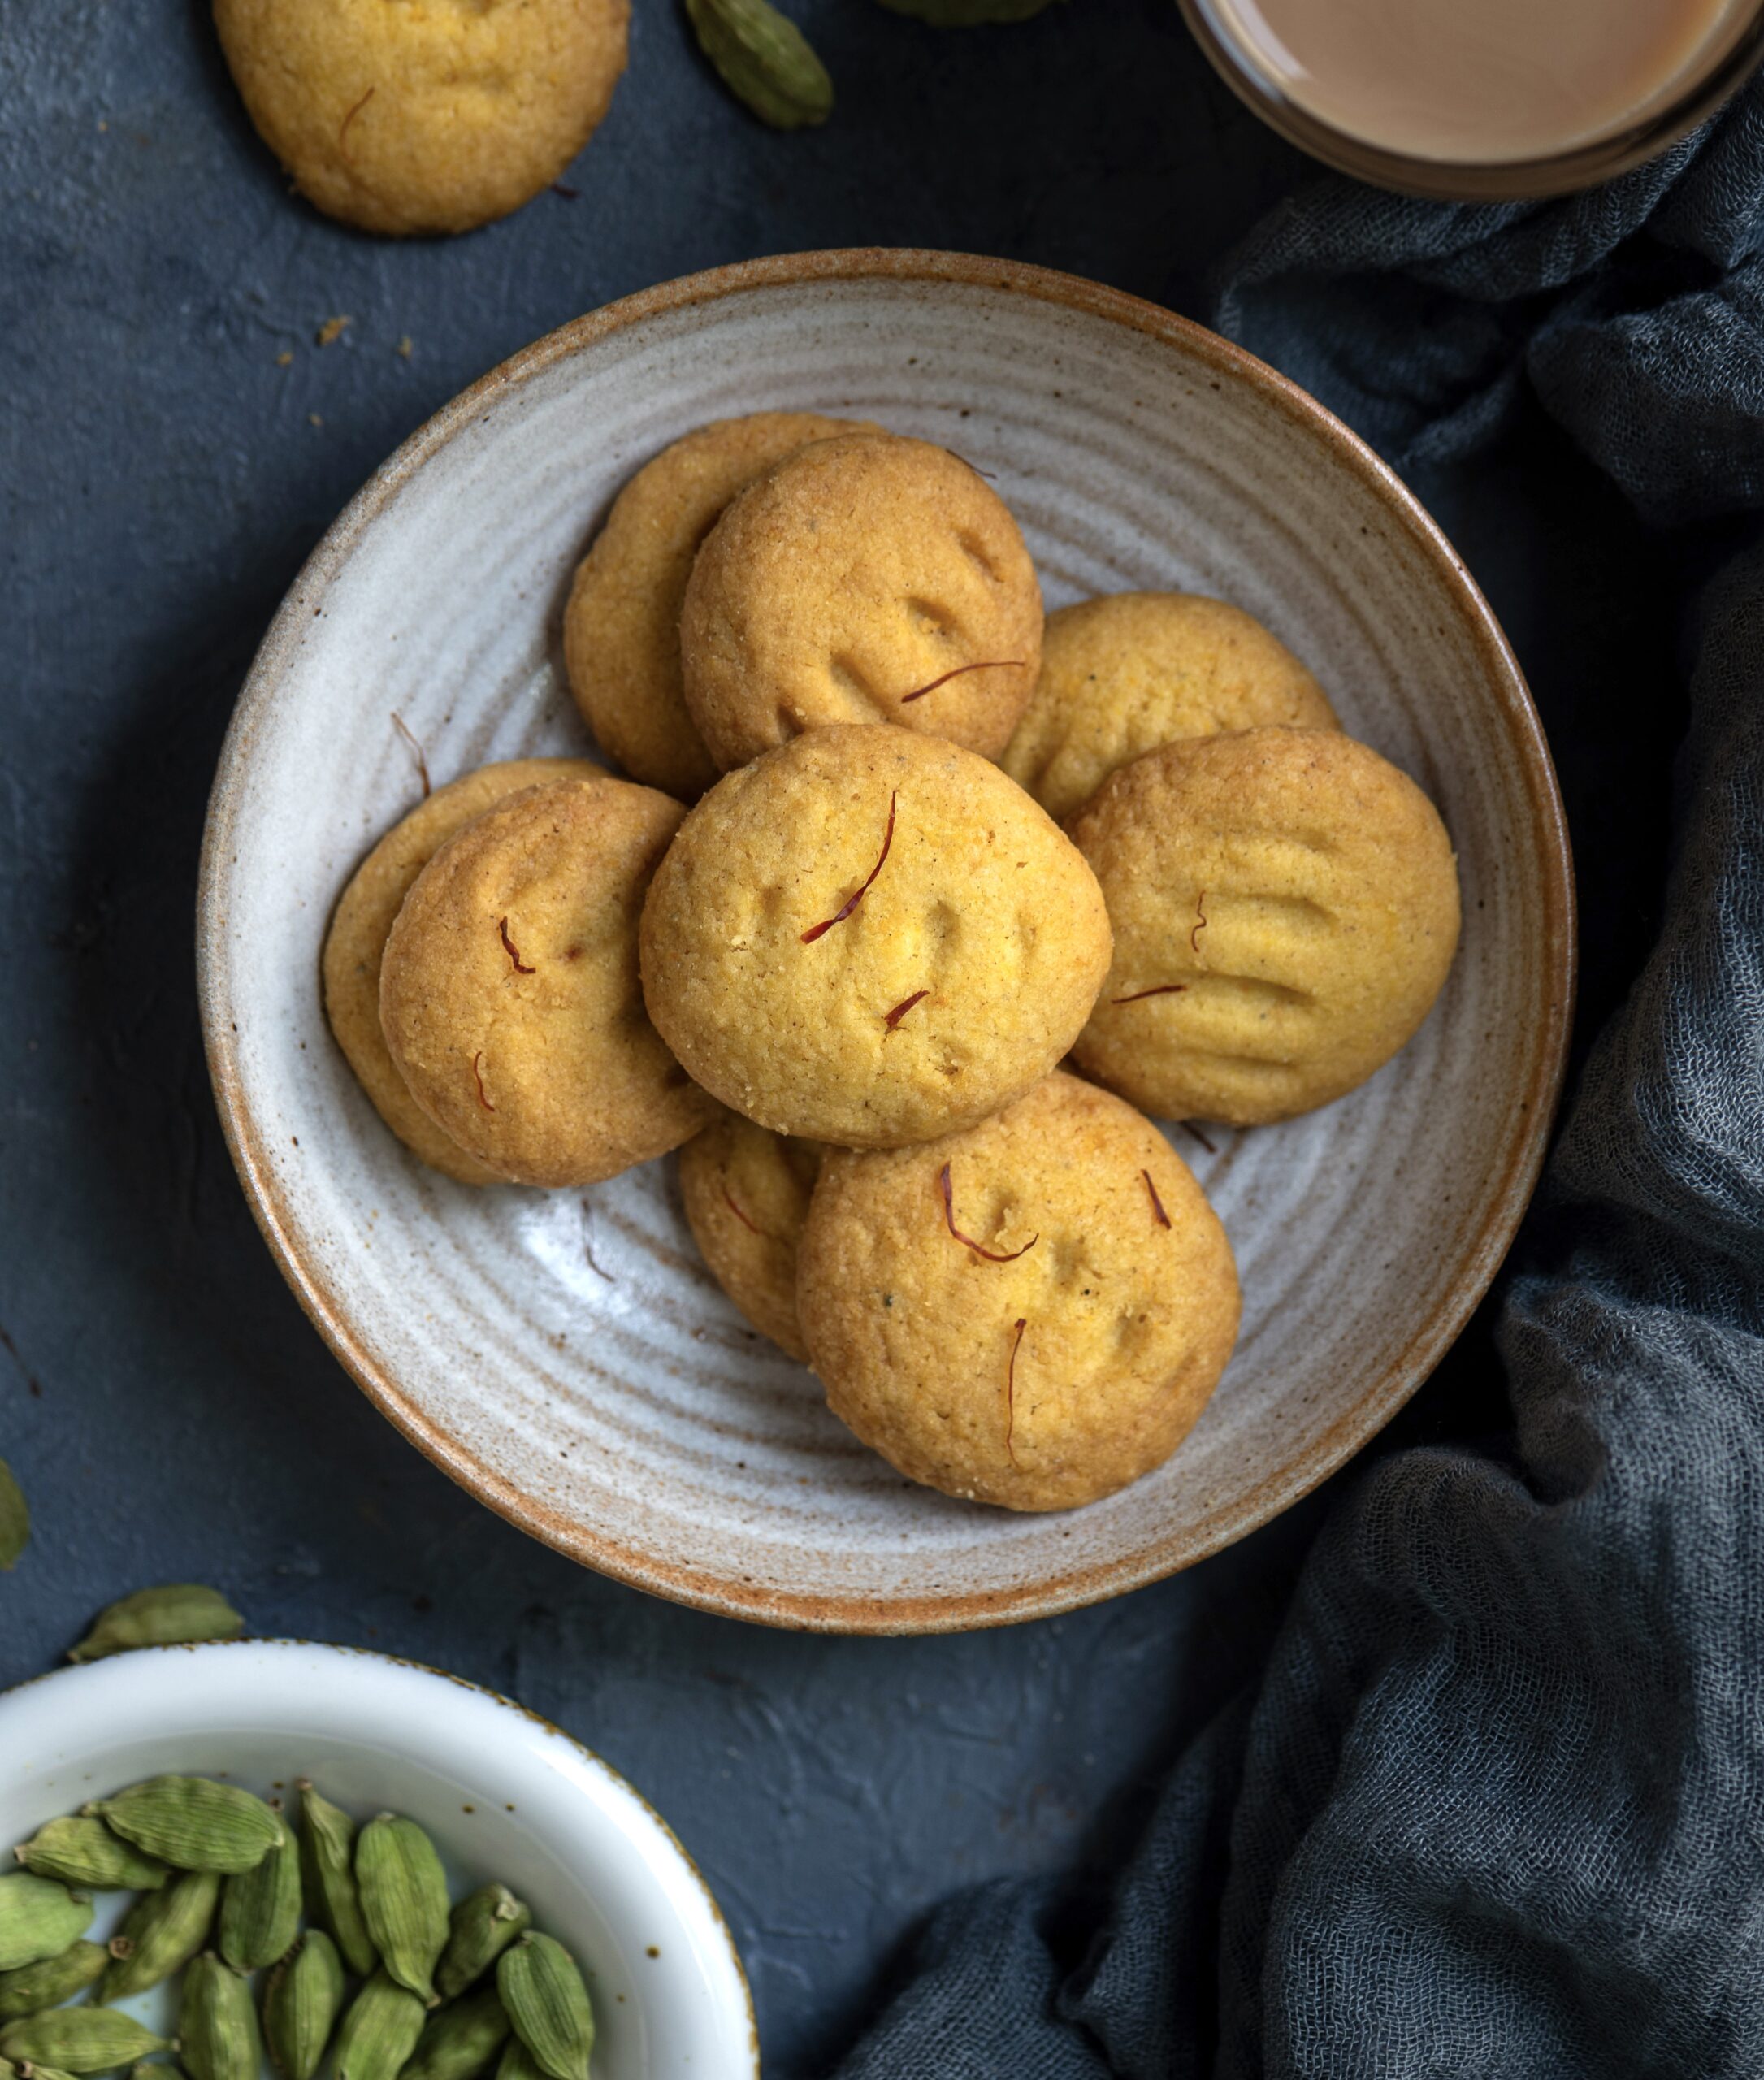
To return to this special recipe, then: to me, it’s an amalgamation of flavours I am fond of and that are true to the essence of the re:store kitchen. This eggless cardamom rose mawa cake remains in my tradition of sharing Christmassy recipes near the end of the year. It comes from Parsi cuisine, which is known for very unusual, delicious recipes that carry an English touch. Parsis are especially known for their baking skills.

I first encountered a mawa cake at my sister’s home in Mumbai. She had ordered it from a baker there whose praises she sang, so while I could not get the recipe, I tasted it thoughtfully, trying to figure out ingredients and even aspects of the method with every bite. It was delicious, and I was eager to prepare it for my loved ones too. After much research, trial and experimentation, I perfected my own version of that cake sometime later, adding my sublime twists of cardamom and rose.

“Mawa” means milk khoya (solids) and is related to “mewa”, the word for dry fruits. This recipe contains both of them. It is an eggless recipe as that is what my sister enjoys, and I wanted to make this treat in a way that is inclusive of all my relatives and well-wishers who also prefer an egg-free diet.

My sister and I are both daughters of a terrific cook, so it is unsurprising that we both take to the kitchen. She is more traditional in her culinary style, while nothing excites me more than innovation. We have a nice balance there, and often exchange recipes. You would have noticed her being mentioned many times on this blog over the years, and of course, there is no one I owe more to in my gastronomic life than that “terrific cook” I mentioned: our mother.

She continues to be my biggest inspiration, not just in terms of how I cook, but also how curious I am and how much I love to share. One of the many things she showed me was that she always got back so much more than she gave. Here I am, doing the same thing. That is what this blog has always been about for me. Even when I have posted recipes that I ought to have kept secret, right out of the re:store menu, I have always felt that doing so would cost me next to nothing – but bring me so much good in return. And so it has.

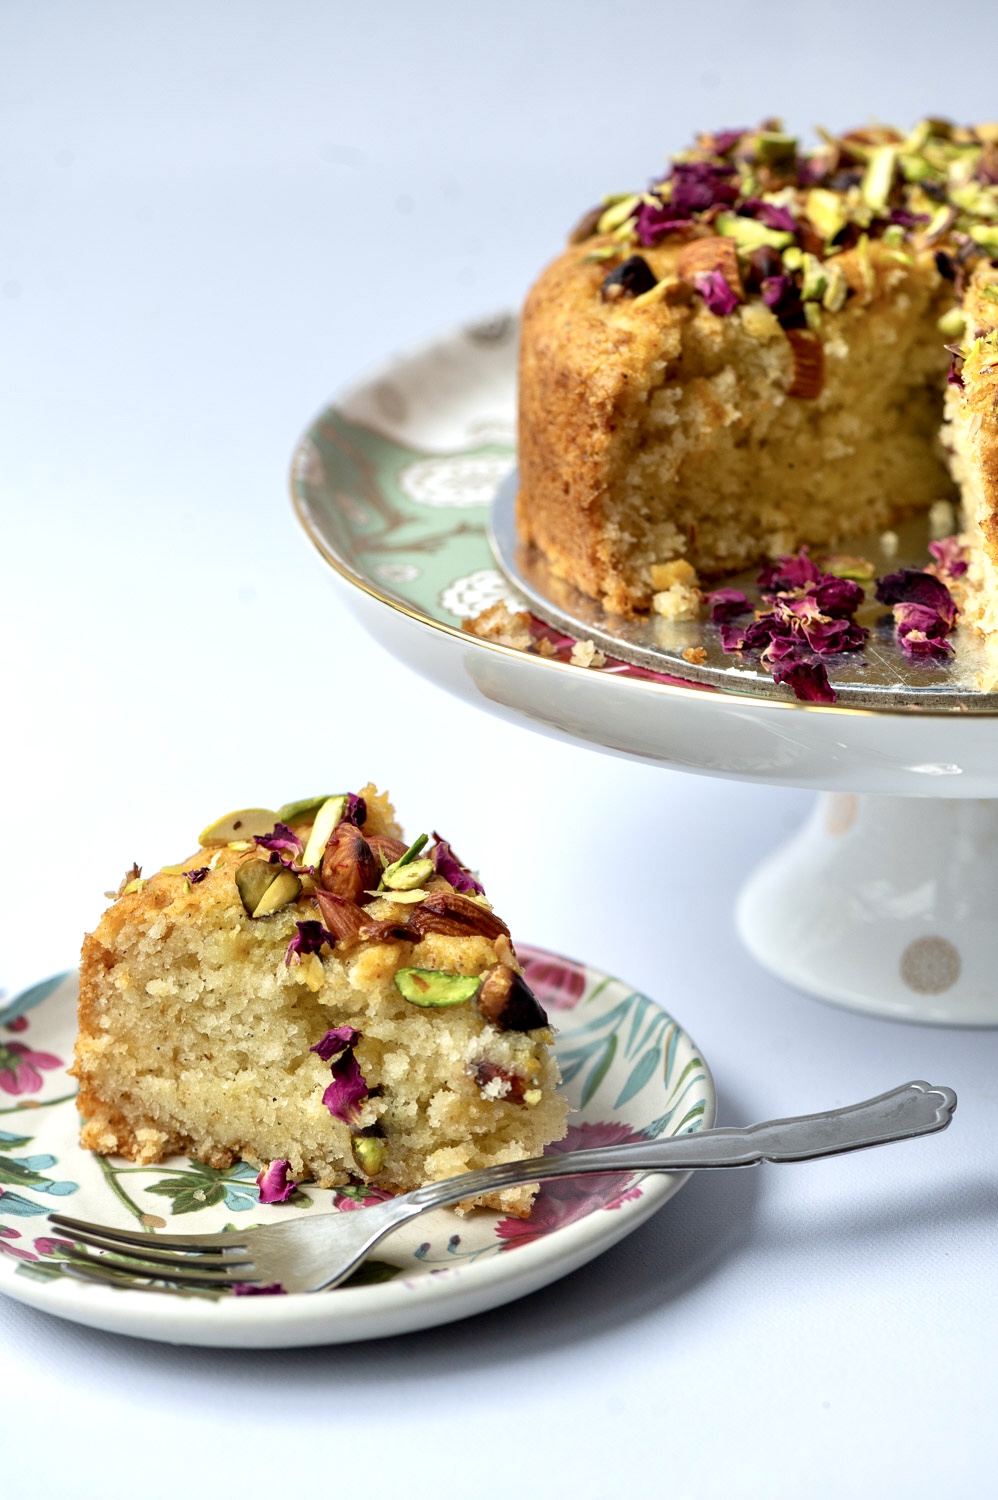
Eggless Rose Cardamom Mawa Cake
(Serves: 4)

¼ cup milk
½ teaspoon ghee
¼ cup milk powder
½ cup sugar
½ cup curd
½ cup melted butter
1 cup maida
½ teaspoon cardamom powder
1 teaspoon baking powder
¼ teaspoon baking soda
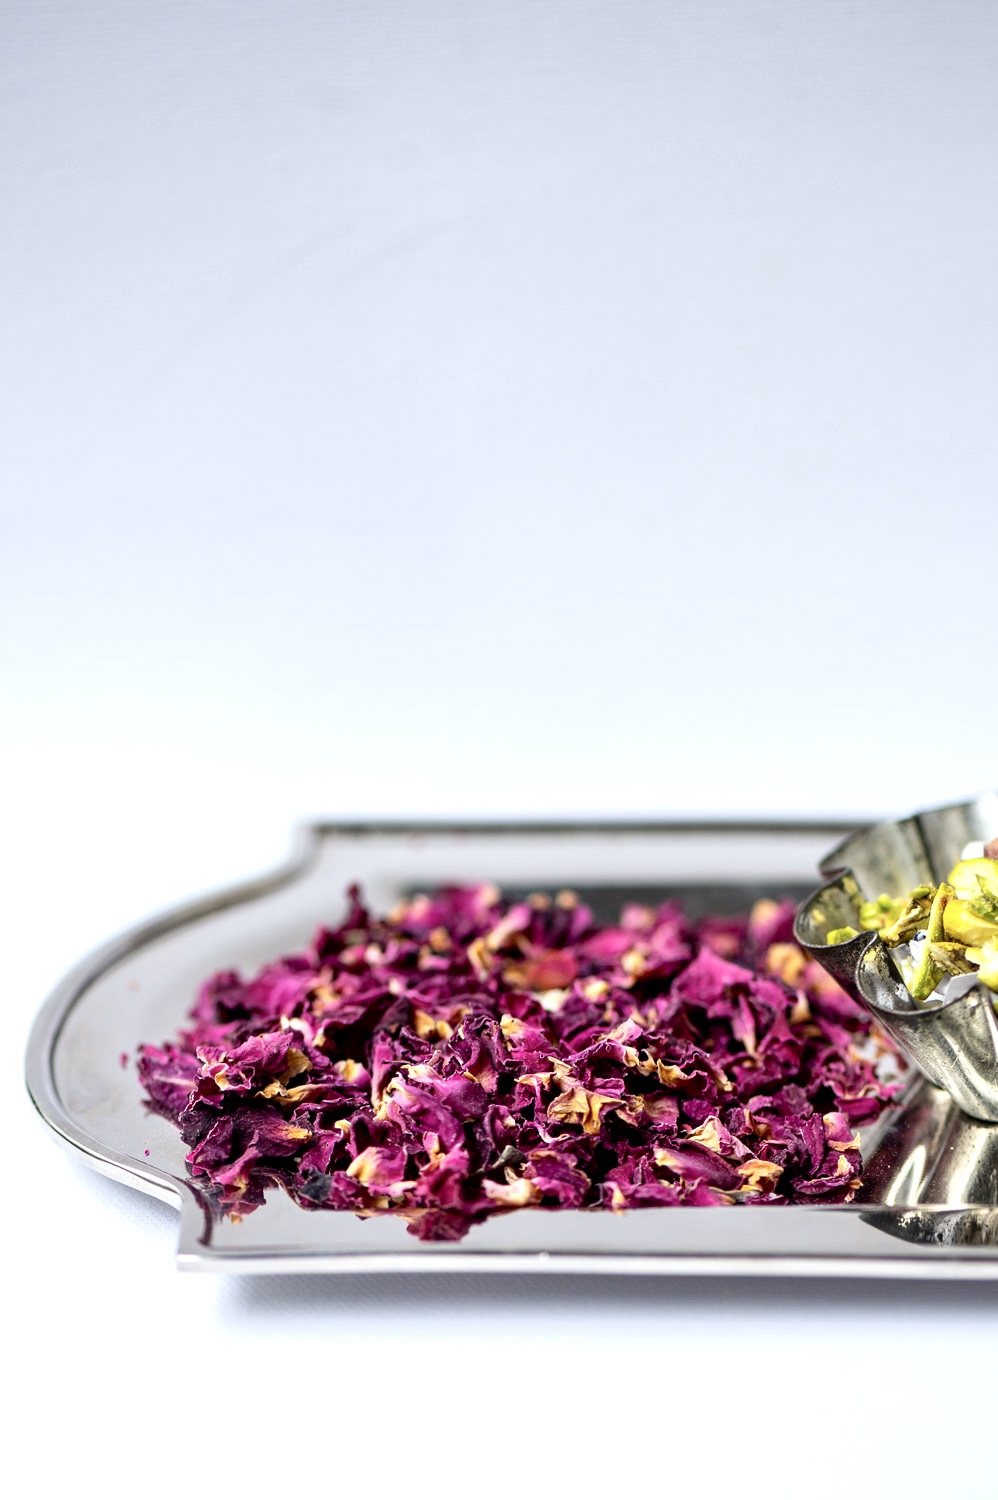
1 teaspoon rose water
A pinch of saffron
½ cup nuts and dry fruits (chopped, in slivers)

Preheat oven to 160°C and prepare the baking pan by greasing and dusting with flour.

In a non-stick pan, add the milk and ghee. Mix well. Now, add the milk powder and stir on a low flame until it thickens and the ghee separates. Set aside. This is mawa – the milk khoya that is the base of this cake.

In a bowl, add the sugar and curd. Stir well. To this, add the butter and mix. Next, add the prepared mawa and mix again, until there are no lumps.

Sieve the flour along with the baking powder, baking soda and cardamom powder.

Mix these gently into the curd mixture. Add the rose water.

Pour the batter into the pan and bake for 30-40 minutes or until a skewer comes out clean.

Allow the cake to cool for 15 minutes. Then, upturn it and let it rest on a stand.

Make tiny holes with the help of a fork on top of the cake. In a bowl, add 1 tablespoon milk and the saffron. Mix these together, then brush the liquid all over the cake. The infused milk will sink into the cake and add depth and flavour.

Your eggless rose cardamom mawa cake is ready to be served.

And there you have it – an exquisite dessert to signify not the end of an era, only an exciting new bend in the road. Here’s to keeping our hearts, minds, hands and eyes open to all the good things still to come! May our stories and journeys continue, and may they be filled with beauty and brightness.

As mentioned in my previous post, strawberry compote is a versatile topping that can be used on a wide range of desserts. After sharing the recipe for it, I was debating whether to prepare a cheesecake or a baked yoghurt using the same, as a suggestion for you in case you are exploring the compote’s usage too. I chose the latter. Summer is setting in in Chennai and a cooling yoghurt-based dish rather than a rich and heavy cheesecake just made sense. This baked yoghurt with strawberry compote, using seasonal strawberries, is ideal for the climate in every way.

We have recently had a number of celebrations in the family, and to be honest, given the quantity of sweet treats we have all been consuming, I have also begun to veer towards lighter desserts now.

Strawberries remain in season, and I want to make the most of them before we move towards mangoes. Already, I can see small fruits on my own trees as well as those around the city. The days are becoming longer and the heat is steadily rising. I have a feeling the mango harvests will be good this year, and look forward to them. But meanwhile, right now, strawberries continue to have my heart. Pairing them with yoghurt – an item that I relish perennially – makes for even more pleasure.

As I’ve mentioned in various posts, dairy products in general are considered sacred in Hindu traditions and used in rituals. Any form of dairy is enjoyed across India in general, as well. Come mango season, for example, a lot of buttermilk is going to be consumed across the country, as the coolant is used to counteract the heatiness of the fruit, as per Ayurvedic practices.

Yoghurt in particular is my personal favourite among the various dairy products, and the reason why I have not been able to go vegan even during periods when I have tried to adapt my diet as much as possible to those principles. I prepare it at home, and I have shared the method earlier too.

Yoghurt by itself is enough for me, but elevating this quintessential Indian component into a dessert that to me has both Continental and subcontinental influences was a very intriguing idea. I first enjoyed baked yoghurt at a popular café in Chennai. It was moist, soft and had just a hint of sweetness. The subtlety of the sweetness was what I found most attractive. Gujarati shrikhand and Bengali bhappa doi are similar in texture, but usually made much sweeter. To me the bhappa doi is one of the inspirations for my baked yoghurt. I don’t know much about the culture and cuisine, but my research also suggests that the two dishes are connected. Baking is not traditionally Indian, but I would venture a guess that baked yoghurt dishes on Indian menus may have evolved from bhappa doi.

While I grew up with shrikhand, on the other hand, I would have to say that I have come to prefer baked yoghurt to it. The minimal use of sugar is what creates the distinct advantage, in my view. Furthermore, by preparing strawberry compote or other toppings at home, I also get to control the sugar quantity for all aspects of the dish. If your strawberries are naturally sweet enough, you may not even have to add sugar to the compote at all.

That said, this baked yoghurt can be paired with a variety of other toppings too. Rose jam, mango purée or salted caramel are some wonderful options. The base itself is very versatile that way.

I began making baked yoghurt at home only recently, so I’m also excited about trying out new varieties. They are perfect for when you are entertaining guests, which is why I have suggested making them in individual portions below. Alternately, you can also prepare it in a large glass dish and spoon out the required portions.

Baked Yoghurt With Strawberry Compote
(Yield: 5-6 ramekins)

250 grams yoghurt
200 grams condensed milk (or less, if you prefer)
50 grams cream
½ teaspoon vanilla extract
1 tablespoon rose water

Prepare a bain-marie by pouring water into a wide tray and placing it into the oven. Make sure that it has a tall lips or sides. You may want to check that the water will reach midway to the ramekins you will use. Preheat the oven to 160°C for 20 minutes.

Meanwhile, in a bowl, add all the ingredients gently one by one.

Using a whisk, gently bring them all together until there are no lumps. Pour the prepared mixture into the ramekins equally. You will get 5 or 6 portions depending on their size.

Place the ramekins into the bain-marie, after checking that the water is hot, and bake. This should take approximately 15 minutes, depending on your oven. Bake only until the centre looks jiggly.

Remove the ramekins from both the oven and the tray. Allow the baked yoghurt to cool completely and then refrigerate.

Serve chilled, with a spoonful of strawberry compote or any other topping of your choice.

If you’d like to enjoy more strawberries or more yoghurt this summer, I have a selection of recipes on this blog that feature either ingredient. Don’t forget that the former will soon be out of season, but as I said earlier, here in the Indian subcontinent we have something equally or perhaps even more wonderful to look forward to: mangoes! I am still thinking up some recipes that will highlight this them year, but in the meanwhile, I hope you’ll explore my archives.

As I have mentioned at various times on this blog, I do love the festive season. Diwali is an occasion I look forward to very much, but I also enjoy the December festivities, in particular Christmas. I find that people tend to be in a more buoyant spirit now, and I love to elevate that further through providing recipes that add more cheer. This past year has been rather difficult and very busy for me, and I would not be surprised if it has been the same for you, but I believe you can always make time to bake an orange cake. It will immediately improve your mood, as I have experienced time and again.

So yes, let’s bring the coming year in on a happy note. To me, there is something about the scent of oranges that is particularly uplifting, and Nagpur oranges happen to be in season. They are particularly juicy and sweet right now, as well as inexpensively available. These fruits were what inspired me to come up with this recipe. It was such a pleasure to put this one in the oven. The whole house smelled of citrus fruit, and was imbued with a sense of celebration. It was a treat to slice it up after the photoshoot. I like to bake my cakes lightly sweet, so that we can eat more without finding them too rich, and with less guilt over the indulgence. This one has the perfect combination of citrusy, sweet and buttery flavours, resulting in a moreish delight.

Long-time readers may recall a date and orange cake and a citrus bundt that have made appearances on this blog, but this one is different. It has a beautiful balance of tartness and sweetness that I love.

Yes, it really is all about balance at the end of the day. But I do believe in something called hope, which is why I dare to say: I hope that no matter what has come before, let the coming year bring a large share of sweet experiences our way. I read somewhere long ago that one of the things that differentiates human beings from animals is our capacity for hope. It is a mental concept that comes from higher evolution, and is what makes us innovate. That idea has stayed with me.

It is said that we have to consciously manifest what we want, asking the universe to provide it. This requires a positive mindset: thinking positive, wishing for positive things, even as we work hard to bring our dreams to life.

“Manifest” happens to have been the Cambridge Dictionary’s Word of the Year 2024, and I have been pondering the concept. I know that nothing happens overnight. Hard work must be present, and we must change things for ourselves in small ways wherever possible (and in larger ways if we get a chance to). It’s not like we can sit still and just wait for the Universe to give us what we want. We have to reach out, choose and act. There will undoubtedly be challenges along the way, but what allows us to stay motivated is hope.

I want to say another word here about manifestation, though. It’s not, if you don’t mind the pun, “as easy as cake”. When we put our intentions out there, even with all sincerity, we still have to make sure that we don’t feel dejected if things don’t play out like we thought they would. I once tried to manifest something in my life. I deeply wished and wished, and it didn’t happen – at least not in the way I expected it to. Now, much later, I feel glad, because what did happen instead turned out much better in the long run. But at the time, I was very sad. In retrospect, the lesson for me is in trusting the bigger picture. The Universe knows what it is giving each of us, and whatever happens is for the best. We may not feel that right away, but some day we might. Hopefully. Yes, it really is all about hope when it comes down to it. Let’s enter 2025 with hearts full of hope about what we can look forward to, and how we can make peace with all that has already come to pass.

Orange Cake

265 grams maida
45 grams corn flour
2¼ teaspoon baking powder
½ teaspoon salt
250 grams sugar, granulated
⅓ cup oil
¾ cup unsalted butter
3 teaspoons orange zest
½ cup milk
½ cup orange juice
1 teaspoon vanilla extract
3 eggs

Cream cheese frosting

1 cup butter
450 grams icing sugar
1 cup unsalted butter
1 cup cream cheese
1 teaspoon vanilla extract
2 tablespoons orange juice
2 teaspoons zest

To prepare the cream cheese frosting, which you can do ahead of time, cream the butter using a hand-held blender. Now, add in the sugar slowly. Making sure the sugar is covered as you pour, as it can fly all over the counter.

Next, add the cream cheese, zest and orange juice. Mix well until it all comes together. Refrigerate until use.

To bake the cake, preheat the oven at 160°C. Prepare two 8-inch cake tins by greasing and dusting them. Set aside.

Sift the dry ingredients: the flours, baking powder and salt. Set aside.

In a mixing bowl, add the sugar, butter, oil and orange zest. Using a hand-held blender, beat this mixture well until it is creamy. This will take approximately 1-2 minutes.

Now, slowly add the eggs one at a time, beating continuously. Add the milk, orange juice and vanilla extract. Beat well. Now rest the hand blender.

Next, add the dry ingredients to the wet. Use a spatula to fold the mixture gently until it all comes together. Do not over beat at this stage.

Divide the mixture evenly into the two prepared baking tins. Bake in the oven for approximately 30 minutes. Check that it is thoroughly baked by inserting a toothpick. If it comes out clean your cake is ready.

Remove the tins. Allow them to cool on the counter for 10-15 minutes before turning them on to a wire rack to cool completely.

Now you can ice the two cakes, layering them with cream cheese frosting in between as well as on top.

Your festive, fruity orange cake is now ready to charm anyone you serve it to – and I hope that by sharing this recipe, I have brought more joy to you, too!

Every time our uncle visited from the USA when we were growing up, he would hand my siblings and I a beautiful, round, dark blue tin filled with shortbread cookies. When the tin was opened, these lovely and aromatic delights would be layered inside. As children, we waited for these treats every year and we would inevitably start fighting over them before dividing them up between the three of us. The emptied tin itself was a thing of joy, and never discarded. These precious memories made me smile recently, as I began planning ahead for my Christmas baking here at re:store. I decided to put a batch of rose shortbread cookies in the oven for old times’ sake, and I wanted for you to be able to do the same too.

Do you remember those cookies from far away too? Many of us grew up with these tins of shortbread cookies, and both the contents as well as the packaging itself have a nostalgic quality for us. They are a favourite of my mother-in-law as well, as they were enjoyed by her generation when they were younger, too. It’s funny how our love for this cookie has travelled through generations. My grown-up kids love them, I love them, and their grandmother loves them. Perhaps it is similar in your family as well. Nowadays, I visit London often and buy shortbread cookies there every time. There is something about bringing them back from a trip that just feels special.

There is also a bakery in Pune that makes shortbread cookies that are almost like the European original. These have their own distinct taste, but I would say they are a close cousin. Relatives coming from there sometimes bring me a box of these. That’s right: a box rather than those classic tins are what cookies tend to be packaged in in many places nowadays.

That takes us back to the tins themselves. Back when the cookies were annual gifts from my uncle, I would save the tins and keep various things in it. Handkerchiefs, stationery, school items and so on would go into them. Each time I opened one, the scent of the cookies – already eaten and enjoyed – would still rise from it for quite some time after. That scent itself would make me anticipate my uncle’s next visit, year after year, and it would also seep into whatever I kept in the tin.

I will let you in on a secret: I enjoy collecting anything kitchen-related, and can be a bit of a hoarder when it comes to such objects. So I still have a few of those old cookie tins in my home. When I bake shortbread cookies, I pull a lovely dark blue tin out, line it and store my own homemade cookies in it too. They then evoke the childhood experience all the more. And that lovely buttery, sugary, freshly-baked fragrance is once again retained in that tin for some time after, with any knick-knacks stored in it taking on that aroma too.

Receiving them as a gift is wonderful, and baking them at home brings an equally good feeling. They may not turn out quite like the store-bought ones, but they will be imbued with the joy of making a treat from scratch, which is a pleasure of its own. You can also add personal touches that suit your preferences: for instance, the addition of rose to this recipe is my own take, incorporating a beloved ingredient into the treat.  Often, when I eat something that I really love that is a bit difficult to make, I take it up as a challenge to achieve the perfect flavour and taste – or at least the perfect flavour and taste for my version, to be replicated and enjoyed many times over. That’s how it was with these rose shortbread cookies too, and I think that that is the right spirit to approach any cooking and baking in general!

Rose Shortbread Cookies

250 grams cold unsalted butter
50 grams powdered sugar
115 grams sugar
1 heaped teaspoon salt
250 grams maida
2 teaspoons rose water
2 tablespoons rose petals

Using a hand blender or a stand-mixer, beat the butter in a bowl until it is soft. Now, add both sugars along with the salt. Beat for 2 minutes or until the mixture is fluffy and has risen. Add the flour slowly, little by little, and beat on low. Now, add the rose water.

Once it comes together, using your fingertips, fold the dough gently.

Cover with cling film and refrigerate for 24 hours before using. You could also freeze the dough for 3-4 hours before using.

When you’re ready to bake, preheat the oven to 160°C. Line a baking tray with parchment paper.

Make 2 balls of the dough and roll one out to ½ – ¾ inch thickness. Using a cutter, cut into the desired shape. Making sure the cookie dough shapes don’t become too thin else they will spread while baking. Sprinkle rose petals on top.

Gather all remaining bits of the dough and repeat with the other ball.

Arrange the cut cookies in a tray, keeping a distance between each, as they will spread while baking.

Bake until golden. Keep a close watch and make sure they don’t turn too dark or remain partially baked.

Remove the tray from the oven. Allow the cookies to cool in the tray for about 10 minutes. Then, remove and place in airtight tins.

These shortbread cookies are delightful on their own, or with tea. They are sure to evoke some fond memories for you – and perhaps be a part of new ones that you’ll make with your loved ones too. For more baked goodies, do check out my blog archive. If you’re in Chennai and are looking for some special treats for Christmas and New Year, do explore the re:store menu and get in touch!

My children are all grown up and all of them live away from me, so every time they come to visit, I always try to think of what they will enjoy eating during their stay. One of my sons loves chocolate cake, so this particular treat is the welcome home dish that I currently have in the oven, ahead of his next arrival. It looks so beautiful that I couldn’t resist picking up the camera – and subsequently came the idea of sharing the recipe with you too.

Before I began to bake, many years ago now, we would often order from a friend of ours who used to bake from her home in Chennai too. Hers was one of the most fantastic chocolate cakes we had ever tasted, and it remains the benchmark for us all. It served as my inspiration too, when I became a baker myself.

Creating this recipe of my own was the result of many trials, exploring recipes from across cookbooks and the Internet, tweaking them based on my taste and my experience. Eventually, I formed a chocolate cake recipe that hit the spot, and became a personal benchmark. While my almond cakes are the most popular among customers (hyperlink), it’s this chocolate cake that is my own family’s favourite.

When I think about the experiments that lead toward this recipe, and indeed many others, I feel grateful for my blogger and Instagram friends and the accounts I have followed over the years who inspired me – both in terms of food and in terms of photography.

But there are many things that I have been contemplating lately about the world of food blogging and how it is changing. Now that re:store’s own online presence is over seven years old, I am able to observe and comment on the vast shifts that have taken place in this time and I wonder about what is still to come. For instance – many of the people whose work I used to look forward to no longer post, or sometimes have even disappeared altogether. Even though new bloggers have come up, some equally fantastic, there was a sense of community in the past that is less experienced today. It all feels different now, both as a creator and as someone who enjoys the content. I wonder if you feel similarly, or if you have other thoughts?

Then, there is the dominance of reels. Food photography as a genre is dwindling, and to be honest I don’t see the kind of aesthetic that I used to love exploring online and which challenged me to keep growing as a photographer too. While I respect reels as their own format, they are not for me. Even as photography loses popularity, I pick up my camera time and again because it is an artform that I am passionate about, and because in certain ways I would define myself as being old school – especially in the sense that I believe that if the going is good, keep going.

The going is good, so to speak, when it comes to photography. I am just as enthused and as inspired as ever as a photographer, and some of you may know that my explorations in this medium go beyond shooting for this blog. I also work with still life and nature themes, and I’ve been fortunate to have received gallery support for the same, and I sometimes accept commercial commissions too.

I still approach every kind of shoot with my old and faithful Nikon and the lenses I’ve used all these years, and remain perfectly happy with the outcomes. I don’t intend to go in for an upgrade because I know I don’t need to. Although I love finding new appliances for the kitchen, somehow with photography the tried and tested just works for me. I like to think that my not constantly seeking out new technology helps reduce my personal impact on landfills. None of us is perfect and none of us is going to avoid creating waste, but being mindful about our consumer choices is something that is in our hands.

And when it comes to something that is literally in my hands – my camera – I really don’t want to let go of the instrument that has brought me so much creativity and joy. I will also say that I sometimes feel disturbed when people say, “Oh your photographs are so nice – you must have a good camera”. I do, but there is so much more to this artform than just the device. Even as trends move away from it, I continue to learn and to grow within it.

So yes: the world, and not just the world of food blogging, is always changing – but we can have some constants, too. A decadent chocolate cake will almost without fail please anyone, for instance. In that sense, this is a timeless dish, and I hope you’ll enjoy my version of it.

Chocolate Cake

(Serves 5-6)

2 cups sugar
1¾ cups all-purpose flour
1 cup cocoa powder
1 teaspoon baking powder
2 teaspoons baking soda
1 teaspoon salt
2 eggs
1 cup buttermilk
1 cup hot water
1 tablespoon instant coffee
½ cup oil
1 teaspoon pure vanilla extract

Preheat oven to 170°. Prepare two 8’ cake tins by greasing, lining and dusting the pans.

Sift the flour, cocoa powder, baking soda, baking powder and salt – thus combining the dry ingredients. Add sugar.

Separately, add hot water to the coffee powder. Keep aside.

Using a hand blender, mix the eggs, vanilla extract, oil and buttermilk. You can make buttermilk at home by adding a tablespoon of white vinegar to a cup of room temperature milk, and allowing it to sit for 15 minutes before usage.

Add the dry ingredients to the wet ones and mix well.

Add the hot coffee to this mixture now. The batter will be a little runny. Avoid over beating.

Pour this batter into the two tins equally and bake for 30-35 minutes or until a skewer comes out clean. After the cakes sit for 15 minutes, turn them onto a tray and allow to cool completely. Decorate with chocolate icing.

If you’re new to all this and would like a little primer or refresher to the basics of baking, check out this citrus bundt recipe with lots of tips.

As I said earlier, this recipe is really the best one I know for the classic chocolate cake. I wonder how it will compare with ones you have made or tasted. I do hope you’ll enjoy it just as much as we do!

There are elaborate ways of making a Victoria sponge cake, but after various experiments, I came to realise that an easier method makes for a very satisfying dessert indeed. While it has a fancy name (it is called this because it was the favourite dessert of the British Queen Victoria), in truth the Victoria sponge cake is itself actually one of the simpler variations of the sponge cake. It consists of two layers, between which cream and berries are sandwiched. It’s a lighter cake, ideal for the summer, and I’m delighted to share the recipe with you.

It certainly wasn’t only Queen Victoria’s favourite. I think my mother enjoyed baking it too, as much as I enjoyed eating it, and it was often the special treat when we came home on some days, like birthdays. I can’t help but repeat myself, as I have so many times over the years, but my mom was my first teacher in the realm of the kitchen and my inspiration in all my culinary adventures – whether that’s cooking, exploring cuisines, food studies, eating mindfully or crafting this blog. She has been gone for a few years now, and nowadays I think often about how we as children both little and grown-up take our moms for granted. All those times when they call and we say, “Sorry, I don’t have time” – and all the regrets, later on… If your mother is still in your life, do try and spend more time with her. Take it from me, as someone who misses hers a lot.

Missing my mom also means reminiscing about all the food she made for us over the years, and returning to those experiences in my own kitchen. This Victoria sponge cake is obviously one such experience for me, for the scent in particular brings her to mind vividly. My mother’s handwritten cookbook contained a recipe for Victoria sponge cake. To me, the cookbook even smelled of this cake, so I have a strong association between it and my memories both of my childhood and of my mother herself.

Perhaps my kids will also associate certain dishes and their aromas with me. On Sundays, when they’re visiting, they invariably ask me what I plan to bake for them that day. During the week, they will claim to be on diets and refuse the many goodies that pop into my oven on a daily basis, especially as I’m always baking for customers. But come Sunday, come the demands for baked deliciousness. This Sunday, I’ve already anticipated this request. Guess what I’ll be preparing for them?

I said earlier that one of the key components of a Victoria sponge cake is the use of berries. Seasonal ones are ideal. For mine, I have used a strawberry jam that a dear friend makes at home every year from fruit grown in her backyard. It’s the only strawberry jam we consume. It really is the best there is, and we are lucky to have it.

Simple Victoria Sponge Cake

(Serves: 6-8)

150 grams self-raising flour

150 grams unsalted butter

150 grams powdered sugar

3 eggs

½ teaspoon vanilla extract

2-3 tablespoons strawberry jam

½ cup butter cream


Preheat the oven to 170°. Prepare two 8-inch tins by greasing the edges and dusting with flour. Set aside.

In a bowl, add the butter and sugar. Beat until light and fluffy. Next, add the eggs one at a time, making sure to beat well each time. Add the vanilla extract and beat again.

Sieve the flour and add it to the mixture. Fold the mixture and divide the batter into the two tins equally. Each of these will be one layer of the Victoria sponge cake.

Bake for 25 minutes or until the cake layers turns golden. Then, remove them from the oven and allow to cool.

To assemble the Victoria sponge cake, apply strawberry jam generously on top of one layer. Over this, apply butter cream generously as well. Now, gently place the other layer on top of the first. Sprinkle some powdered sugar over the top.

Your Victoria sponge cake is now ready to be eaten. Slice and enjoy the delicious flavours of berries, cream and cake coming together. The cake can be stored in the fridge and enjoyed over a few days – or shared immediately with the whole family, the way I love to do.

If you’ve been following my work for a while now, you may know all about my love of sourdough, and perhaps even came along for the journey on my Instagram Stories as I practiced and practiced making that wonderful bread. By now, I’ve been baking sourdough for years, and it was especially a fixture in my home during the COVID-19 lockdowns when I wanted to ensure my family was eating extra clean and healthy food. Still, that doesn’t mean that it is the only type of bread that I bake regularly. In fact, when my kids come home to visit, they tend to be a bit fussy about wanting regular, plain white bread for their breakfasts. Being me, rather than just pick some up at a store, I decided to start baking good old basic bread at home too, using refined white flour. The last time I put a loaf in the oven, I thought – why shouldn’t you too?

Believe me when I say that baking your own basic bread is easy. I know there are plenty of bread-making devices out there, and I do have one too. My brother had gifted me one when the gadget was still very new on the Indian market. I recall that the instructions were pretty easy: throw all the ingredients in at night, set the timer, and come down in the morning to fresh bread, ready to eat. I used to do that, until I learned how to bake a loaf without the device. I still keep it for its nostalgic value, as it was a gift from my beloved brother.

That said, the device I still love to use, and which adds more fun to my bread-making, is a small bread slicer. I do enjoy culinary gadgets of all kinds and this one ensures that the loaf is evenly cut. One of the great things about making your own bread is that you get to decide the thickness of each slice. A regular slice is great for sandwiches and toasties, and a thick one is ideal for French toast. I’ll share the recipe for the latter in the future (please remind me, if you’d like it!), and as for the former category, there is a whole variety of recipes to explore on this blog through the links above.

However you slice it, I can say this for sure: it will fly off the table. Made from scratch, the loaf will be warm, moist, soft and fresh. As with all totally homemade food, you will know exactly what went into it and be assured that it is healthy and free of preservatives and so on. This is also an eggless recipe.

While I was baking this loaf for my kids recently, another memory popped up – from back when they really were kids. Each year during their summer holidays, we would go up to the hills, where there was a bakery just down the road from our home there. When I say it was “just down the road”, I mean on hill terms – which is to say that it was quite a bit of a walk, that too a sloping one. So every morning, to get our exercise, we would go for that long walk, and it would always culminate at the bakery.

I knew the exact time when hot buns and bread would be fresh out of the oven there, so I always made sure that we embarked on our walk at a precise time, on an empty stomach, so that we would reach at the perfect moment – and pretty hungrily, too! The bread would be so hot that it couldn’t even be sliced, and we would greedily pluck at it with our fingers, enjoying our delicious breakfast. I still smile to myself remembering those mornings.

That bakery continues to exist, and when we travel to the hills we still go there for old times’ sake. My grown children, now discerning eaters, claim that my homemade bread is tastier than what we buy there. I don’t know if they just say that to make me happy, but one thing’s for sure: baking for my loved ones warms my heart. I am sure you will feel the same way too, when you give this basic bread a shot.

Basic Bread

(Yield: 1 loaf)

3 cups flour

1½ tablespoons granulated sugar

1 teaspoon salt

¼ cup milk

1 cup water

1 tablespoon butter/oil

2 teaspoons dry yeast

In a bowl, combine 1 cup flour, sugar, salt, yeast and mix thoroughly. Make sure the yeast is not expired – this is an easy mistake to make.

In another bowl, mix the water, butter and milk. Warm gently, to a little over room temperature. Do not let it get hot. Add this to the flour mixture.

Blend for a minute and then add the remaining flour. Continue blending for approximately 2 minutes or until the mixture all comes together, scraping down the edges until it forms a ball.

Remove from the mixer stand onto a clean and lightly floured surface and knead for about 5 minutes at least. Kneading is key. Make sure you knead as much as possible until the dough looks smooth.

Now, cover with a cloth and allow the dough to rest.

Roll the dough into a rectangle using a rolling pin, very gently.

Start by folding from the short end of the rectangle and pinch the edges.

Oil a 12×8 inch bread tin and gently place the dough in the centre.

Cover with a cloth and allow to rise for about 30 minutes.

Bake in a preheated oven for 20 minutes at 180-200°C or until golden brown.

After you remove the loaf from the oven, use a knife to edge out the loaf. Cool before slicing.

There is just something about fresh, hot bread coming out of the oven. The entire home takes on that fragrance. It’s irresistible!

I suppose that biscuits were originally an English concept, known as cookies in the USA and popular across the world. Here in India, we do have our own versions and adaptations. Take for instance the nan kattai, which I shared my own pistachio-rose rendition of a few festive seasons ago. It is believed to have been created by Dutch bakers in 16th century Gujarat. Similarly, all over India today, little bakeries utilize millets and Indian flavours to make their own biscuits, giving us treats like ragi cookies. All these inspirations put together made me decide to bake Indian spice biscuits, and to share the recipe with you too.

I feel that Indians give a lot of importance to spices in general, and this is in part because many of them grow in India and are either native or at least traditional in this part of the world. They hold a very special place in our cooking, which is why they appear in everything from meats to sweets. Nutmeg, mace, saffron, cardamom and cinnamon come to mind as common elements. I’ve chosen to use a few of these to flavour these biscuits.

It is the beginning of the festive season this year, and of culinary indulgences, so I thought this would be the perfect time to share this recipe. These biscuits go well with the mood and the weather, and are ideal to have at tea time. If you are seeking more recipes in this vein to serve at your special occasions, the archive has lots to offer.

Another reason why I chose to try out a new biscuit is because I realised that I love hoarding props. I have quite a large collection in my kitchen, and I wanted to use some of my cookie cutters out of that array.

Strictly speaking, it’s not really a new biscuit for me, just one I haven’t made in some time. When my daughter was living here, we often baked together, and this recipe was one of our usual choices. It was so lovely having her company, with her young mind and her penchant for ideas and innovations. Baking these made me miss her, and I think I will send her a care package with these home-baked Indian spice biscuits.

Baking also makes me miss my mother. As I have mentioned in numerous posts over the years, she attended a baking class when we were growing up, and this meant that we had all kinds of interesting treats at home. For instance, she made cornflake cookies, dipping the dough in cornflakes before baking. At a time when cornflakes themselves were an unusual concept for us, we were fascinated by these. I remember plucking the cornflakes and eating them separately. I remain deeply inspired by my childhood memories of my mother in the kitchen.

I hope these Indian spice biscuits become a part of many more happy memories – for my loved ones and I, and for you and yours.

Indian Spice Biscuits

(Yield: Approximately 20 pieces)

175 grams unsalted butter

75 grams powdered sugar (sifted)

55 grams custard powder

175 grams flour

¼ teaspoon cardamom powder

½ teaspoon cinnamon powder

8-10 strands of saffron

1 teaspoon milk

¼ teaspoon salt

1 teaspoon baking powder


Preheat the oven to 170°.

Meanwhile, in a small cup, add the saffron and the milk and allow to steep.

Line a baking tray with a silicone mat. Set aside.

With an electric beater, beat the butter until light and fluffy. To this, add the sugar and then the custard powder.

Beat gently, and now add all the spices. Sift the flour and baking powder and add it to the mixture.

Mix gently using your hands. Cling wrap the dough and refrigerate for 5-10 minutes.

With the help of a spoon, or using your hands, make small discs of the dough. Place them apart on the prepared tray.

Bake in the oven for 12-15 minutes or until the edges are golden.

Remove and cool on a wire rack before consuming.

These delicious biscuits have a beautiful flavour to them, one that I am sure will pep up your mood in the late afternoon. You may notice that they are also eggless, which makes them ideal for serving vegetarians. Here’s wishing you a wonderful festive season ahead!

We talk about memories all the time on this blog, and the deep link between food and nostalgic experiences. The recipe that I am sharing today is more about my kids’ memories than my own. When they were little, this spinach and corn bake was the only kind of Continental or baked food that they truly enjoyed at dinner. Their choosiness worked just fine for me, because I was very happy about the fact that they loved a spinach-laden meal that also contained a good protein quotient, thanks to the paneer. It’s a nutritious, filling and delicious dish – and as I’ve indicated, child-friendly, too.

Looking back, I can see a reason, taste aside, as to why they found it so appealing. It was that I usually used individually baked bowls, which made the dish seem quite fancy. They always got a thrill out of having it be served in this style. My kids would often request this spinach and corn bake when they had their friends visit, and I could see how it was the presentation that really enhanced the experience for all of them. This is a good point to keep in mind when preparing it for entertaining, for all ages.

Now – about the vegetables used, which are the secret to our satisfaction as parents! I tried to replace corn with broccoli many times, but my kids simply refused to accept this back then. With my experience in mind, I would say: if you are preparing this recipe for children, consider introducing the extra healthy vegetables, or even the ones they aren’t fond of, early on (rather than as a substitute later, which they will recognize as being just that). I now bake more variations, but still like to retain the spinach as a base. You can also replace the paneer with tofu, chicken or bacon.

You may wish to make a lighter version of this by using wheat flour rather than maida in the white sauce. While I’ve grated some cheese on top, you can avoid this to further lighten the dish. If you’re using it, another method is to add some to the white sauce when it’s ready, rather than to grate on top.

Spinach & Corn Bake

(Serves: 2-4)

50 grams butter

50 grams flour

3 cups milk

Salt to taste

A pinch of pepper

125 grams paneer

1 cup spinach

1 stalk rosemary

½ cup whole corn

Cheese (optional)

Make a roux of the butter and flour. You will get about 2.5 cups. A roux typically uses equal parts of fat and flour, and then a liquid is added (in this case, the milk). To do this, melt the butter in a pan and add the flour. Keep stirring so that the mixture does not stick to the bottom. Stir until golden. It will be a thick emulsion at this stage.

Now, add the milk and the rosemary and continue stirring, making sure it’s a smooth and thick sauce.

Blanch the spinach and squeeze it well. A quick tip: when you squeeze the water out of the spinach, while making this or any other dish, add that used water to a dough or a dhal. It doesn’t need to be wasted.

In a baking dish, add the paneer, spinach and corn. Pour 1.5 cups of the roux over this and mix gently so that all the vegetables are coated well. You can store the remaining roux in the fridge for later, to be used as a sauce.

Either add the cheese to the sauce before you set it aside, or else grate some on top of the dish now. Bake for 20 minutes or until it’s golden.

I like pairing this with a toastie, but a simple toast also works well.

My adult kids still enjoy this dish, and I recently met one of my son’s childhood friends who was reminiscing about it too. I share this recipe here for them and their partners, and I hope they’ll have fun baking and eating it together, perhaps with their young families. I think you will too!

When I was growing up – and perhaps when you were too – cupcakes were a treasured treat. We all looked forward to birthdays because that was when we could visit each other’s’ homes and enjoy them. More often than not, our mothers were the bakers. Today, cupcakes convey memories of a special, and simpler, time. Despite the assortment of goodies that are now easily available, I still feel that homemade cupcakes are a very sweet but almost forgotten gift, especially during festive occasions. To me, they taste of nostalgia and celebration.

Even though I regularly bake cupcakes alongside various other delights for my customers at re:store, as we have now reached the 7th anniversary of this blog, I wanted to do a little more. So, I thought that I would give away a cherished recipe of mine, as a gesture of gratitude for your warmth and support. Here is the recipe for coffee cupcakes, the very same recipe that I use in my work.

My coffee cupcake recipe emerged as a response to a craving I had for something with a tiramisu flavour. While I have opted to use a simple buttercream frosting, you can try this out with mascarpone in order to elevate that tiramisu influence. You can also replace coffee with a different flavour altogether. Here’s another suggestion: include some maple syrup and adjust the sugar quantity accordingly, and the taste will change too. Have fun with how you use this recipe as a base!

I love making my cupcakes bite-sized, and just right. They are not too sweet, yet they conjure up such sweet memories. Here’s hoping to make many more: more gorgeous cupcakes and more great memories too!

Below are a few images of some of the cupcakes that are available at re:store. I hope that they give you some inspiration – either to prepare your own, or to drop me a line. If you are in Chennai and you’d like me to bake something for you, you know how to reach me.

Coffee Cupcakes

(Yield: 12 pieces)

185 grams all-purpose flour

1 teaspoon baking powder

1 teaspoon instant coffee powder

1 pinch salt

110 grams room temperature butter

200 grams granulated sugar

2 eggs

1 teaspoon vanilla extract

½ cup whole milk


Frosting

1 cup unsalted butter

Fresh cream as required

4-5 cups sifted icing sugar

1 teaspoon coffee powder


Preheat the oven to 170° C.

Line the cupcake tray with liners. Set aside.

In a bowl, sift all the dry ingredients together.

In a mixer bowl, add the butter and the sugar and beat for a couple of minutes or until the mixture is light and fluffy. Add the eggs one at a time, scraping down the sides of the bowl. Alternating them, add the milk and flour in two batches and mix gently. Do not over mix once the flour is added.

Now, divide the batter into the liners, filling them up to a 23 level.

Bake for 12-15 minutes or until the skewer comes out clean.

Remove and cool on a wire rack.


To make the frosting: mix the butter, cream and coffee powder. Add the icing sugar in batches and mix gently, making sure the icing sugar does not fly around. Add enough to make the frosting such that it holds up. Beat well into a smooth consistency.

Using a piping nozzle, ice the cupcakes and keep cool until serving. Refrigerate to preserve longer.

My older son loves my coffee cupcakes and asks me for some whenever he visits. He recently came home after a few months, which is a long time for us, and I baked some for him. From being a childhood favourite to becoming a treat that connects me to my own children, cupcakes and I have had a long journey. Those of you who have been with me since the start at re:store have had a long journey with me too, and I hope it’s been a delicious one. Thank you for being here.