Author

Nandi Shah

Browsing

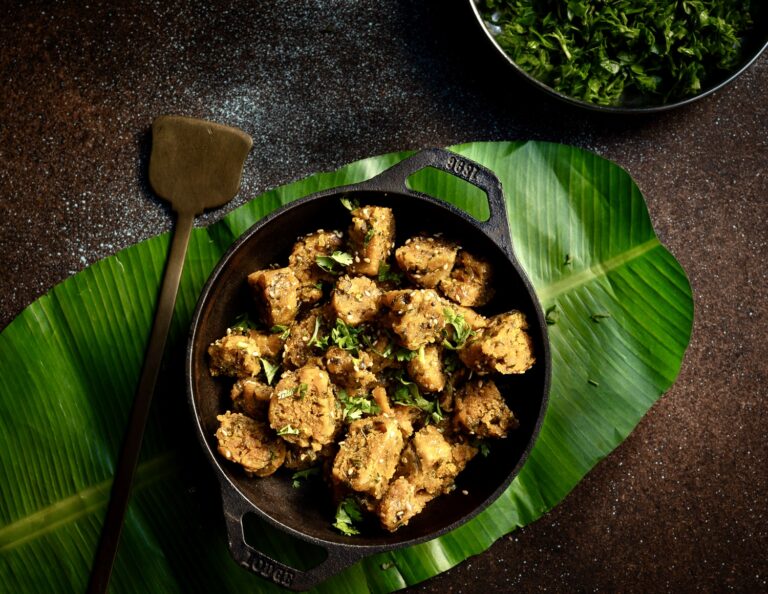
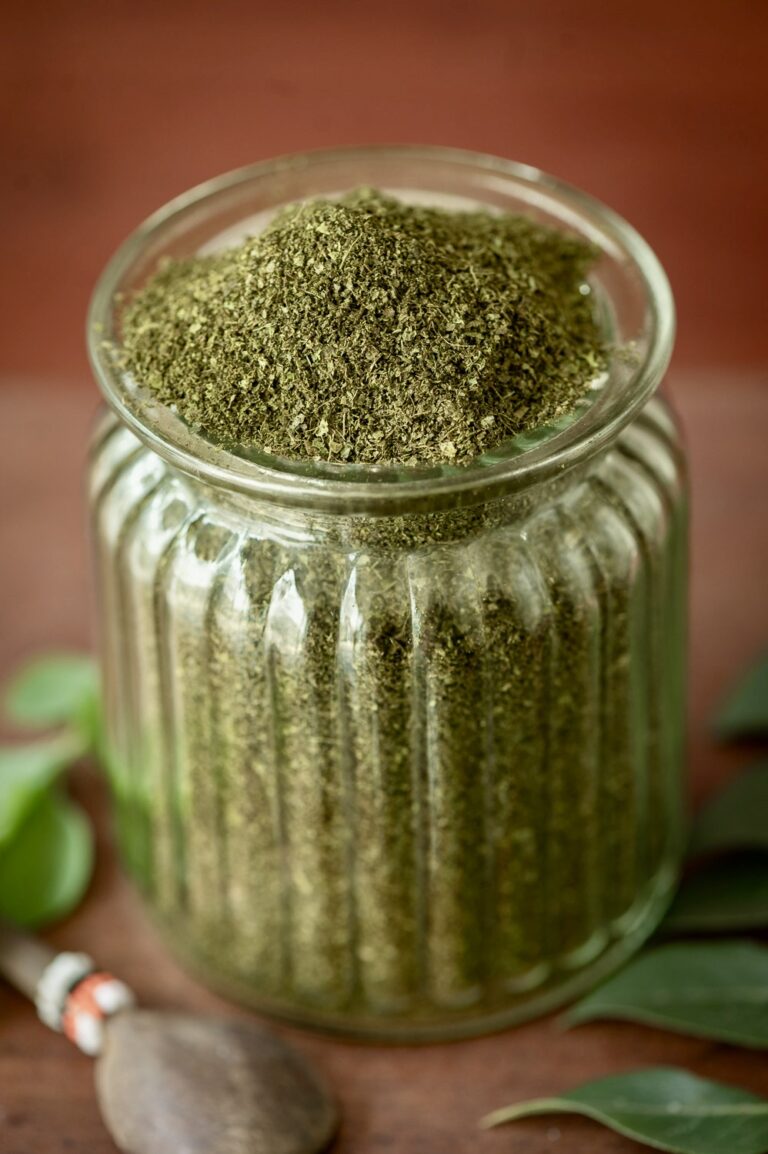
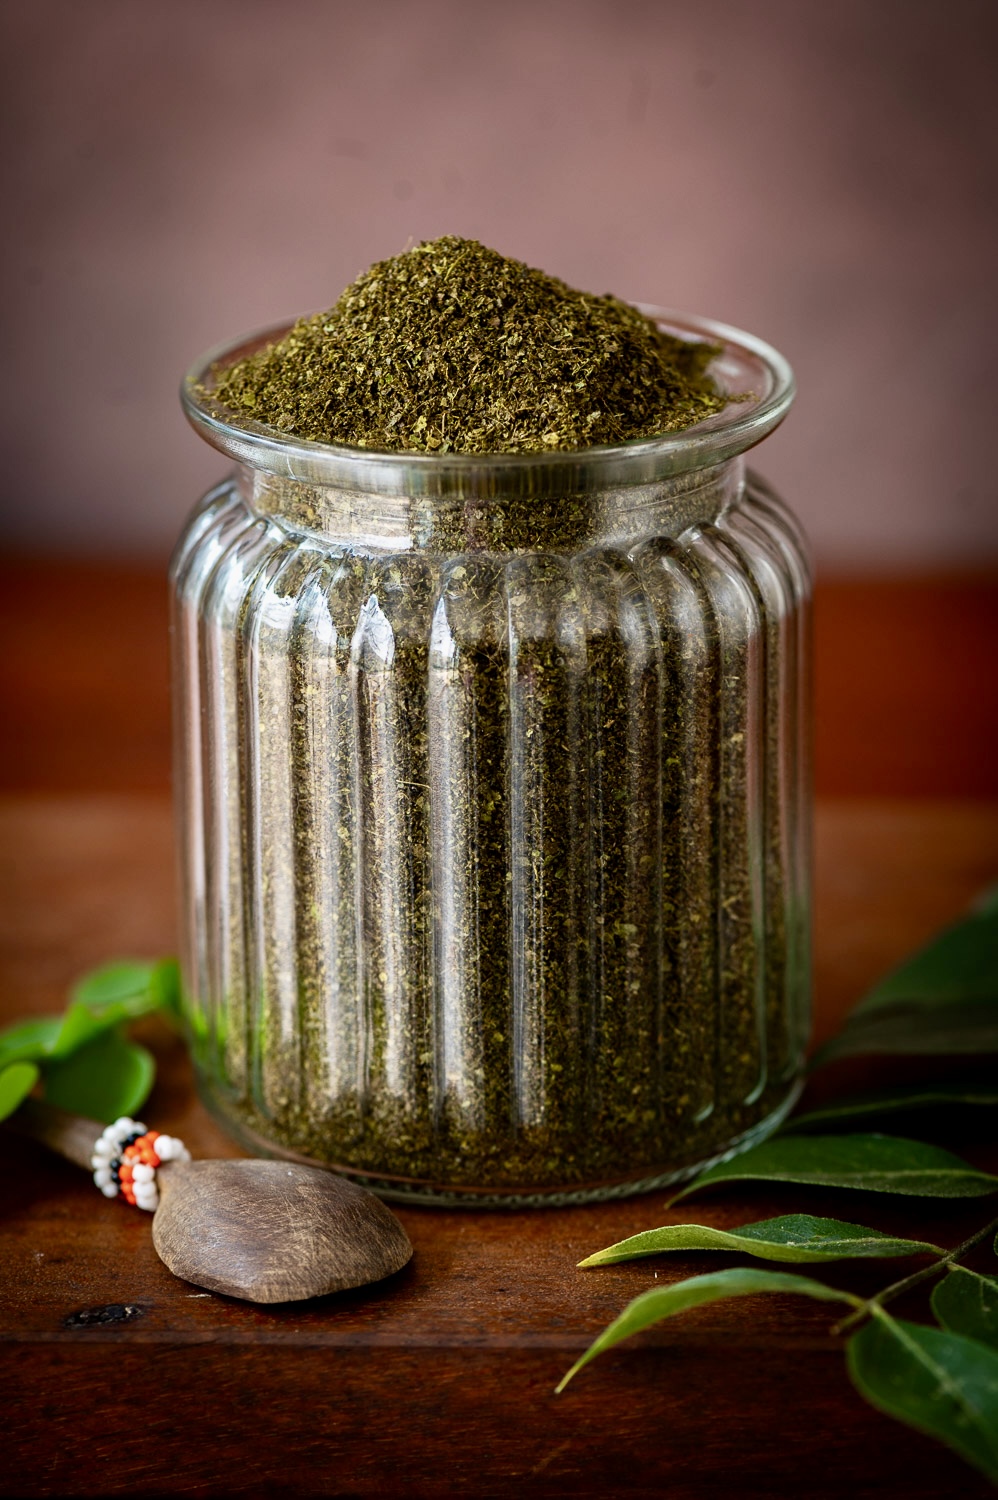
Even though I grew up in Chennai and have enjoyed the regional cuisine throughout my life, when it comes to podis or condiment powders, I didn’t quite understand the nuances of the food type until I was older and began to really consider the technicalities of the art of cooking. I did not know, for instance, that idli podi is different from molagai podi (the recipe for which I shared with you recently), or that curry leaf podi is different from both of these. There are many other varieties too, of course, and each kind has particular uses.

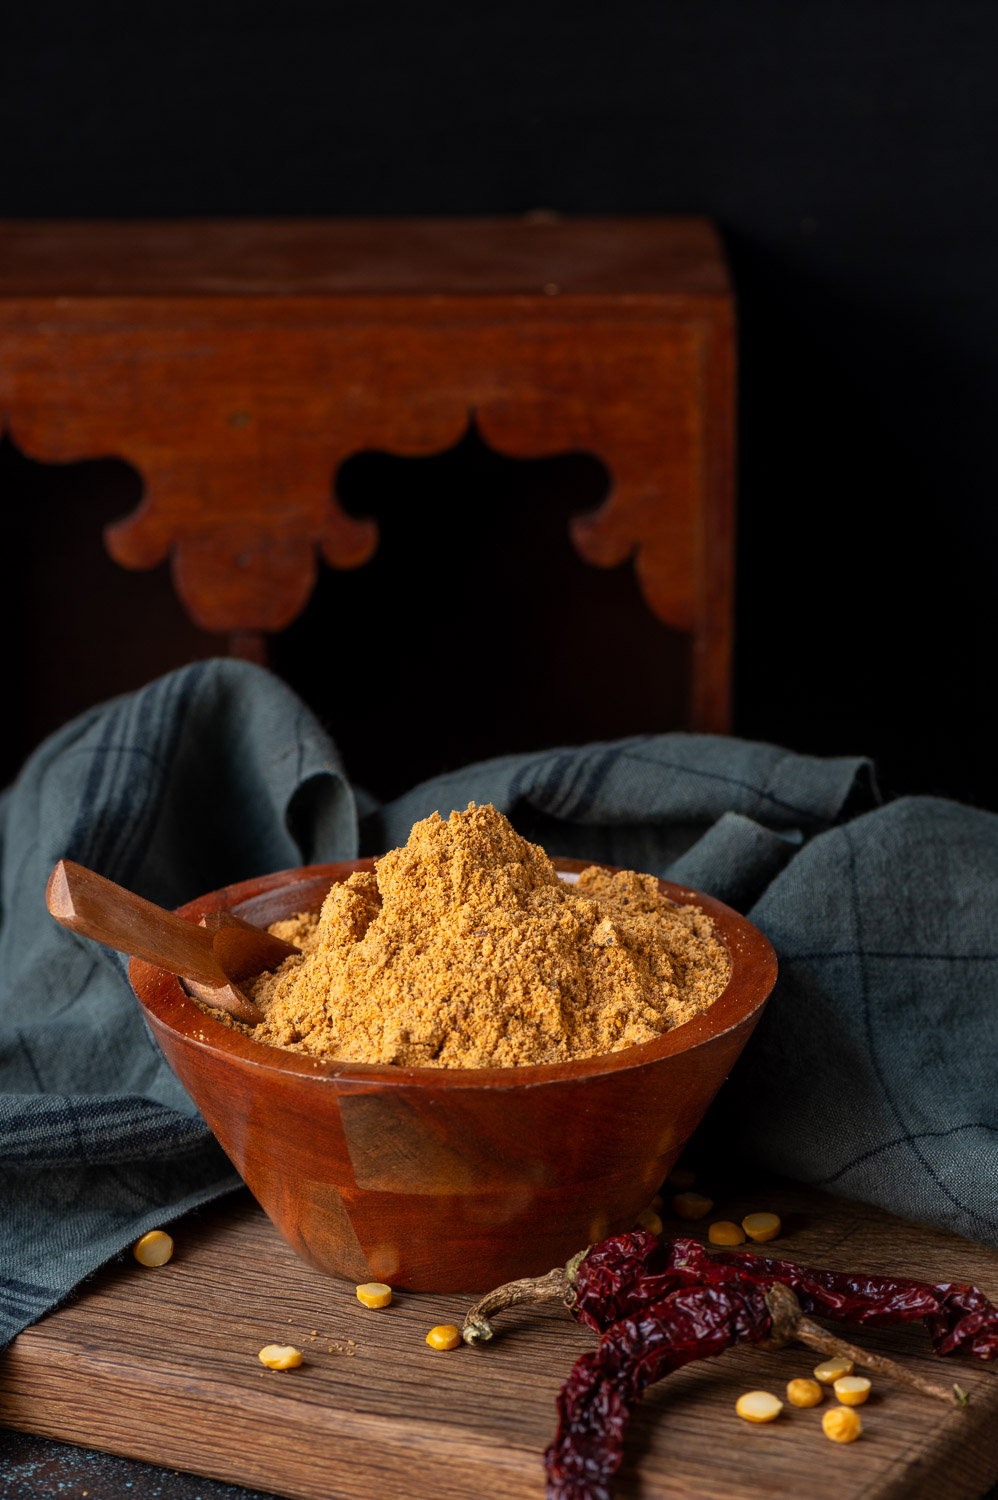
As a child, at friends’ homes and at wedding celebrations, I would consume podis but didn’t really notice what kind was served. At most, I would wonder why a little spoonful of powder would be on one side of the banana leaf, and I would taste it but I would not necessarily think beyond that. By now of course, my awareness has deepened, and so has my expertise in preparation. I’m glad to share this curry leaf podi recipe with you, and I hope you’ll be able to discern its uniqueness too.

Curry leaf podi is usually enjoyed mixed into either gingelly oil or ghee and eaten as an accompaniment to hot rice, or else idly or dosa. It enhances the flavour of the main dish, and significantly cuts down on cooking time when one needs to eat in a hurry. It is the key to a very simple and fast meal that is still tasty. It also works beautifully when a meal contains a few more dishes, adding a touch of spice that elevates the plate (or the leaf) on the whole. Unlike pickles, which are very pungently flavoured, a podi is subtler while still packing a punch. The quantities consumed are more liberal as opposed to pickles, which is why blending into rice becomes possible. I also presume – or maybe I just imagine – that podis were traditionally used mostly in summertime when the curry leaf plant thrives and there is a dearth of vegetables, other than some water-based ones. Nature’s seasons and human resourcefulness both have deep impacts on how we eat, when we eat and how much we eat.

I have shared about the goodness of curry leaves before, along with some photos of the flowering shrub. You may have also noticed lush stems of it in many of my photographs across this blog. That is because whenever I want to incorporate a natural element into a frame, I often step into the garden and pluck some for my photoshoot. Here, we often take it for granted as it grows in many backyards. It is used across South Indian cuisines, and is truly one of the most delicious herbs in this part of the country. It imparts any dish it is used in with a distinct flavour. More often than not, most of us pick out the curry leaves and abandon them on the side of the plate, since the flavour has already been steeped into the dish, but this is a waste. The leaves have a nice taste themselves, and moreover are rich with antioxidants.

If you ever visit me at home, you may find me adding curry leaves to a Gujarati dal perhaps – but that is only because of my exposure, for it is hardly used in my ancestral cooking, if at all. It doesn’t grow there, but as I often say, I grew up right here – like this plant! Of course, my fusion experiments go beyond these two cultures, such as in the making of this curry leaf hummus. Here, however, I offer a condiment that is as authentic as possible.

Curry Leaf Podi
(Yield: Approximately 1½ cups)

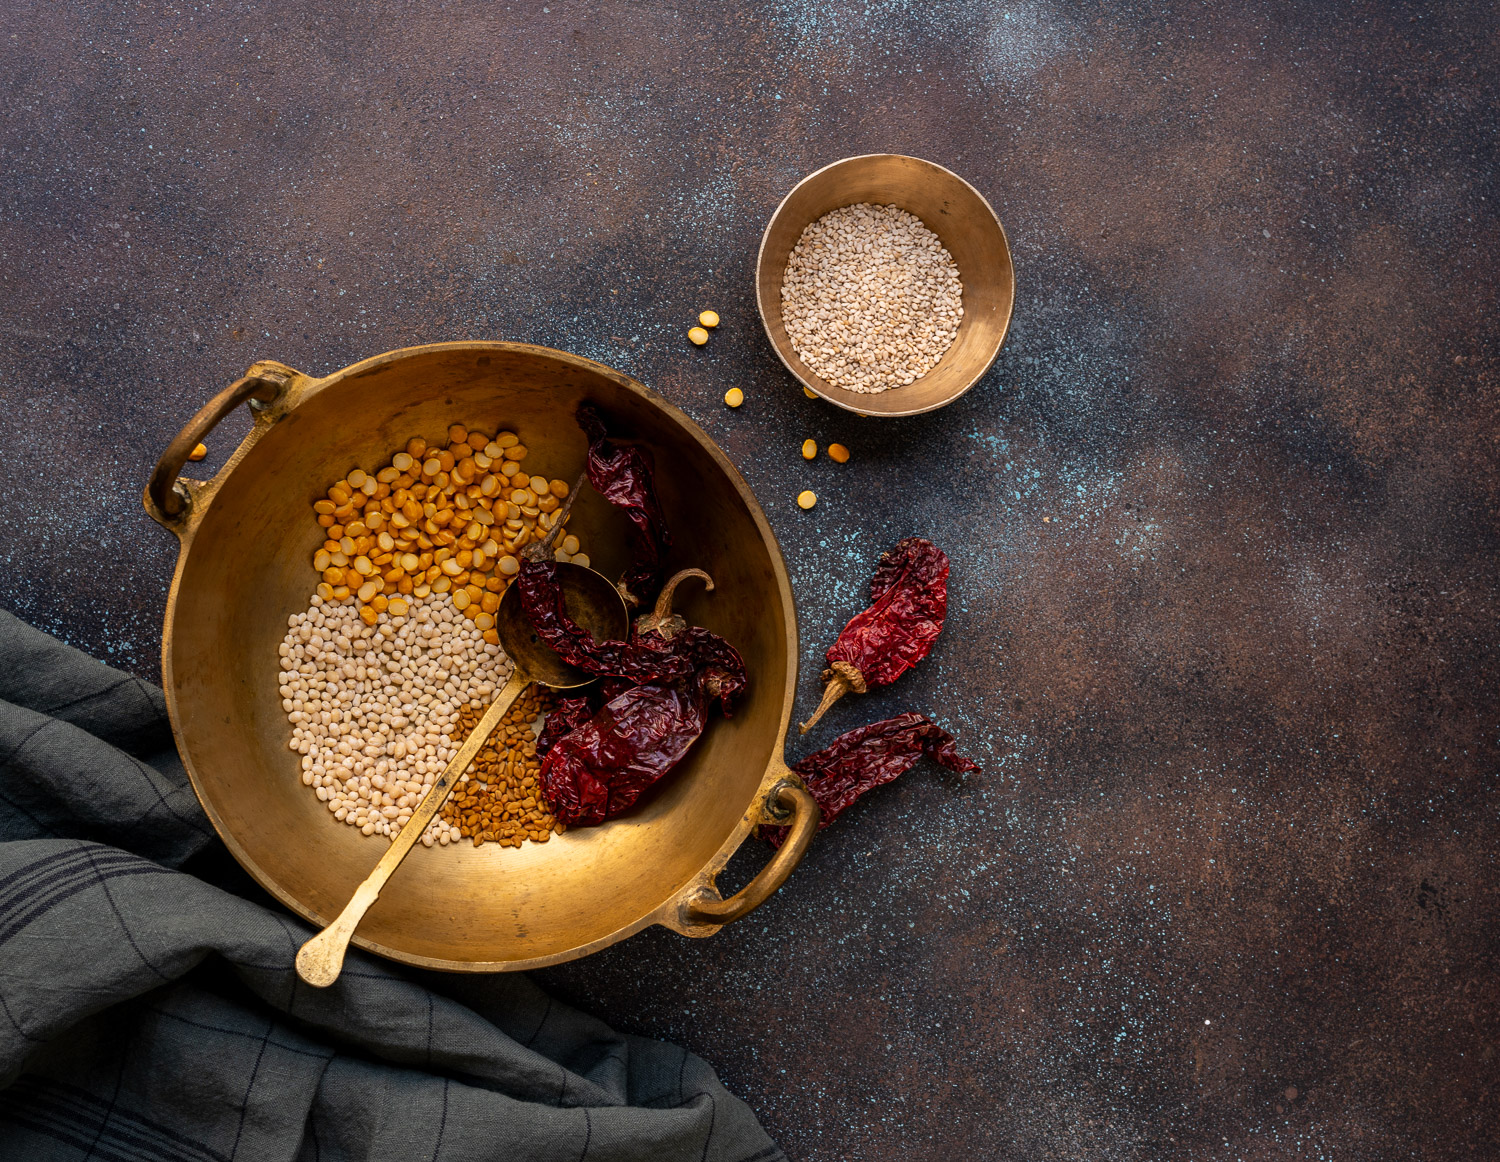
1 tablespoon urad dal
1 tablespoon channa dal
1 teaspoon cumin seeds
1 teaspoon sesame seeds
1 cup fresh curry leaves
3-5 red dried red chilies
1 tablespoon desiccated coconut
½ teaspoon asafoetida
1 tablespoon oil
Salt to taste

Rinse and wash the curry leaves well. Then, pat them dry in a cloth. Lay them out in the sun to dry. In summer, they will dry up in a day. Alternatively, you could place them in the oven on a low temperature and allow them to dehydrate until they are crisp to the touch.

When ready to prepare the curry leaf podi, add the oil in a pan. Dry roast the urad dal, channa dal, sesame seeds, dried red chillies and cumin seeds until the ingredients are golden. Finally, add the desiccated coconut and asafoetida. Allow all these to roast all together for a short time.

In a blender jar, add all the roasted ingredients along with the dried curry leaves and salt. Blend until you get a coarse powder.

Store in an airtight jar. Serve with rice, idly and dosa, or experiment with using this condiment in your own versatile ways. I would eat it with rotis and theplas too, for instance. I have shared various other condiment recipes in the past – not just powders, but pickles and more too – and I hope you’ll explore my archives and find other interesting ways to liven up your enjoyment of a meal too.

“Podi” means “powder” in Tamil and the word is used for a variety of dry condiments. One highly versatile one is molagai podi, the primary ingredient of which is the red chilli. It is an accompaniment that is typically served with idli or dosa. It is mixed with ghee or gingelly oil into a thick paste that resembles a chutney’s consistency, and eaten with these main dishes. I also like to sprinkle molagai podi on potatoes or other dishes to enhance their taste. It can be used in plenty of ways – once you make a batch, you’ll find yourself reaching for it quite a lot.

Nowadays, I also notice restaurants serving podi idli or podi dosa, with the powder dusted on top rather than on the side. It reminds me of the tiffin boxes carried by my friends when we were back in school, when their moms would sprinkle the powder on top of the dosa for a little flavour, so as to maintain a dry lunchbox. I would send my kids off to school with mini idlis served like this myself, with the spice quotient adjusted for their intake, and with the knowledge that the cute size of the idlis would hold their attention well. Of course, when one has the option to eat at home and at leisure, convenience is not the main factor, and ghee and oil can be used to enhance the taste.

The dosa itself has so many variants served in just about any restaurant now, and while I understand the novelty factor, I lean a bit more traditional and stick to the plain dosa with the basic chutneys, podis and sambar that I grew up with. That said, when I am entertaining at home – especially when I have Gujarati relatives coming here and I want to show off the local cuisine – I prefer to serve a wider variety of condiments. I will include this molagai podi, of course, but will perhaps add a curry leaf podi. That is usually eaten with rice but I feel it goes well with dosas too. That’s the next recipe I will share on this blog, so do keep an eye out for it.

Of course, the easiest of all methods is to just buy readymade podis. There are excellent ones out there and I myself have bought them when lazy or in a hurry. Still, I remain a stickler about finding out what goes into each dish I serve and I enjoy doing things myself, especially in the kitchen.

Not long ago, I decided to try making my own molagai podi too, with the help of my friend Anandi. She is an expert in Tamil cuisine and my go-to person for any recipes I want to learn to make authentically. I give her a call, and she generously shares her mom’s recipes, techniques and tips.

My molagai podi usually came from Anandi’s home, but when I got it into my head that I wanted try making it too, she was only happy to help. This is not my first trial at molagai podi. I have made it a few times now, and it gets better with practice. The same will be true for all your cookery attempts, as they have been for all of mine.

Being in the region where the cuisine emerged and evolved in means that authenticity is possible, thanks to the right ingredients, climatic conditions and so on. As I’ve said at other times on this blog, fun matters most when cooking and eating, but there is also something special about perfecting a dish exactly as it has been made for generations. In order to retain that effect and that quality, one must also keep passing it along. My grown children have established their own homes and kitchens, and I am encouraging the notion of being aware of exactly what goes into their food. I hope my approach inspires them.

Now, let me also clarify that what we have here is an authentic variant of molagai podi. Different regions and communities will have their tweaks and renditions, and ultimately it still comes down to the person who makes the podi. Everyone has their own touch and their own style. Either way, you will get a spicy punch that you’ll love adding to your everyday meals!

Molagai Podi
(Yield: Approximately 1½ cups)

1 cup black urad dal
1 cup channa dal
2 tablespoons toor dal
1 teaspoon methi/fenugreek seeds
3-4 tablespoons sesame seeds
½ teaspoon asafoetida
50 dried red chillies
1 tablespoon gingelly oil

Roast the urad dal, toor dal and channa dal separately, until they get fragrant. Set them all aside.

Roast the sesame seeds and the methi seeds together. Set aside.

Now add the oil to the pan and add the dry red chillies. Finally, add the asafoetida. Once the chillies have roasted, remove from the pan.

Add all the ingredients in a blender and blend well.

Store in a jar and use as required. You’ll enjoy this versatile condiment in numerous ways, I’m sure. Don’t be afraid to venture beyond the traditional idli, dosa and rice uses – let it pep up any dish where you feel the spicy flavour would enhance the experience!

I may sound like I am repeating myself, but what I am about to say (again) is just one of those basic facts about me: if you put a gun to my head and ask me to choose whether I like Gujarati cuisine or Tamil cuisine better, I would very quickly and quite happily admit that it’s the latter. Even though I am Gujarati, I grew up here in Chennai, and as much as I love the food of my culture, the food of my surroundings has my heart. Among the dishes I cherish most is tamarind rice, and I’ll tell you why.

South India has been described as the rice bowl of the country, and there are hundreds of varieties grown here, as I’ve discussed in the past. The different cuisines in the Southern states also lean heavily towards rice dishes, as well as those that use rice flour as a chief ingredient. As with all parts of India, traditional food is always thoughtfully designed to serve two objectives in particular: healthiness and seasonality. Certain items are prepared year-round, and I believe tamarind rice falls into this category.

That impression may have been formed of course by the fact that tamarind rice is the standard prasadam, or food served to the deities and then to devotees, across temples in South India. Perhaps that is because it is fast and easy to make, and because the tamarind acts like a preservative, allowing the dish to keep better as well as to travel a bit – which is great if someone wants to take some home after a pilgrimage.

Moreover, a selection of flavourful dishes is also always served on the side in elaborate banana leaf meals at special events like weddings. Coconut rice and lemon rice will be present as well, but it’s the tamarind rice that I always reach out for most eagerly.

Tamarind itself is an ingredient that’s important in this part of the world. Its English name comes from the Arabic term “tamr hindī”, or “date of India”, referencing its value as a trade item. While the tree is indigenous to Africa, it is so thoroughly naturalized on the Indian subcontinent that even its scientific name, Tamarindus indica, carries a nod to this region. Not only was the fruit coveted globally, but the tree has been valued here through time. I remember encountering many stories in books as a child in which tamarind trees were considered the trees of travellers. This was because they were planted alongside routes in order to provide shade and coolness. The canopy is huge and a person or small group can easily rest beneath one. There are still many tamarind trees around in Chennai today, though perhaps not as many as when I was growing up. I have fond memories of the ones that grew in my school’s compound. We would wait for strong breezes to blow the fruit off, to the ground, and race to collect them.

The raw, deseeded fruit can be soaked and used to flavour food, or else made into a chutney, which my mother would prepare quite often back then. She would also make tamarind rice, and let me be honest – as much as I am in awe of her culinary skills, I’ll be honest and say that it wasn’t her finest dish. It was sort of her own version, and I knew even back then that it wasn’t quite as tasty as the tamarind rice served in the temple near my grandparents’ house. Still, it was a start, and I appreciate that for a busy homemaker it would have been a simple dish to put together on days when she had less time to cook.

Nowadays, there are even easier ways of making tamarind rice. Readymade mixtures are sold in shops, almost in a pickle form, and mixing a dollop with cooked rice is all it takes. But I’ve always felt that there’s a special pleasure in making things from scratch. This particular recipe was taught to me by a sloka teacher I had a few years ago. After classes, she would come into my kitchen and teach me some authentic recipes, including this ginger chutney. She made a delicious tamarind rice paste, and the method she taught me is what goes into this preparation.

As for the rice used, I’ve gone ahead with the common ponni, which is a small-grained, boiled variety. This is easily accessible to me, and I suggest you choose one that is available wherever you are in the world. A short, stout rice works best to absorb the deep flavours of the paste and spices.

Tamarind Rice
(Yield: Serves 4)

2 cups cooked rice

Spice Powder
½ teaspoon methi/fenugreek seeds
2 teaspoons coriander seeds
2 teaspoons sesame seeds
6-8 dry red chilies
1 teaspoon whole black pepper

Tamarind paste
¼ cup sesame oil
1 teaspoon mustard seeds
2 teaspoons channa dal
½ teaspoon turmeric
3-4 dry red chilies
1 teaspoon urad dal
A handful of curry leaves
½ teaspoon asafoetida powder
¼ cup peanuts
Salt to taste
1 tablespoon jaggery
1 large lime-sized ball of tamarind
2 cups water

Dry roast each of the spice powder ingredients separately. Allow to cool and then powder them all together. Set aside. Soak the tamarind ball in warm water. Once soaked, squeeze and extract the pulp as much as possible. Discard the fibre.

Heat a pan and add the oil. Now, add the mustard seeds, chillies, channa dal and urad dal. Roast slightly and then add the asafoetida and curry leaves.

Add the tamarind pulp, salt and turmeric powder. Stir. Cover and allow to simmer until the raw smell of tamarind goes away. This will take approximately 10-15 minutes.

Remove from the flame and allow to cool.

To assemble the tamarind rice, put the 2 cups of cooked rice in a bowl. Add ¼ cup of the tamarind mixture. Using your hands, gently mix it well into the rice. Add 1 tablespoon of sesame oil to bring all the flavours together. Tamarind rice need not be eaten hot, and this is now ready to serve. Store the remaining tamarind mixture in a glass jar and refrigerate. I’d say it can be used for about a couple of weeks.

Rice is such a fixture in many homes in Asia and other parts of the world, and it can get a little boring. I have more recipes in the archives that may bring some novelty to your rice consumption, and I hope you’ll explore them.

You may already know, if you’ve been a reader of this blog for some time, of my love of Mexican cuisine. I enjoy the authentic dishes so very much, and make my own fusion or Indianized versions, some recipes for which you’ll find at that link. My Mexican friends do tease me about my tweaks and substitutes, but we still sit together in my home when they visit and enjoy what I’ve prepared, even while laughing over it. Also, no matter what: when my older son visits, he insists on tacos, made by me, made my way. Over time, I have let go of any inhibitions I have had about inauthentic cooking and have learned to focus on the fun of it. That’s how these Mexican-style eggs came into being.

I really do feel that eggs make for brilliant breakfasts. I have shared some of these recipes in the past too, for instance: my version of the West Asian shakshouka and the protein-powerhouse moringa leaf omelette.

Shakshouka had been our customary Sunday brunch at home for quite a while, but it has become a bit boring for us lately. Our family is such that if we like one dish, we have it on repeat until we tire of it and need a break. That’s what happened with the shakshouka. I wanted to pep things up again, while retaining the protein quotient that the eggs bring. I also wanted to bring in flavours from a different part of the world and deepen them. That’s when I decided to experiment with Mexican seasonings. This recipe is kind of my own invention, and I make no claims about it being like any actual counterparts that may exist in Mexico! I know about a famous dish called huevos rancheros, of course, but I have not even tasted this – so far, that is. I look forward to doing so some day, and hope to visit that amazing country again.

There is a kind of chilli that imparts the particular flavours in this dish, as well as others in many of my experiments with this cuisine. It is the jalapeño, which appears here in three forms. One is the whole chili itself, chopped up. The other two are in the form of a seasoning that uses both chipotle, which is essentially a jalapeño that has been smoked and dried, as well as adobo pepper, which is when the smoked chipotle has been preserved in a spiced tomato-garlic purée. You can find all these online and in big supermarkets in India, where Mexican and Mexican-ish food is enjoyed by many. You may use canned kidney beans if that is your preference, but I like to soak our good old rajma. These are what go into what I call my Mexican eggs. They’re not quite Mexican, I know, but they come from a deep appreciation for the cuisine and its ingredients.

Coming to the eggs themselves, there’s something interesting about them too. We have a little plot of land adjoining my husband’s factory, and the women who work there have made it a special place on which a few vegetables are grown and some hens are raised too. These cluck around and make a nuisance, but they do produce great eggs. The credit is really to the workers who decided to utilize this space thoughtfully. They get to take the veggies and the eggs home for very nominal prices, and we do the same. I absolutely dislike store-bought eggs, more so since their initiative took off. I treat those eggs like gold, and knowing that they are fully organic, farm-to-table ones makes me really happy about feeding them to my family too.

We love having loud, noisy brunches on Sundays. During very pleasant weather such as what we have right now, we sit out in the garden and enjoy our food and our conversation, and these Mexican eggs make for a perfect meal. I like to make individual servings as the presentation is lovely, but you can also make a large amount on a big plate and share it.

Mexican Eggs
(Yield: Serves 1)

50 grams red kidney beans (cooked, with water)
2 teaspoons + 2 tablespoons olive oil
250 grams tomatoes (crushed, with 1 cup water)
1 teaspoon taco seasoning
1 tablespoon adobo-chipotle seasoning
2 eggs
Salt to taste
1 tablespoon jalapeños (finely chopped)
¼ cup onions (chopped)
¼ cup bell peppers (chopped)
¼ cup corn

Crush the kidney beans and set aside.

Heat a kadai. Add the olive oil and then add the crushed tomatoes with water. Stir and add salt, taco seasoning and adobo-chipotle seasoning. Stir well. Once it starts to cook, add the kidney beans and the water. Cook well and set aside.

In a flat pan, add 2 tablespoons of olive oil. Heat, then add the onions, bell peppers and corn. Stir well. Next add the seasoned kidney beans and tomatoes mixture. Mix and allow to cook without stirring for about 2 minutes.

Make a shallow well in the mixture and break the eggs directly into them. Sprinkle the eggs lightly with salt. Cover and allow to cook.

If you wish to, you could grate some cheese on top. I find that Manchego complements the flavours beautifully. With or without that garnishing, serve immediately. These delicious Mexican-inspired eggs are quite filling and sufficient for a full breakfast when paired with toast, and sourdough is especially recommended.

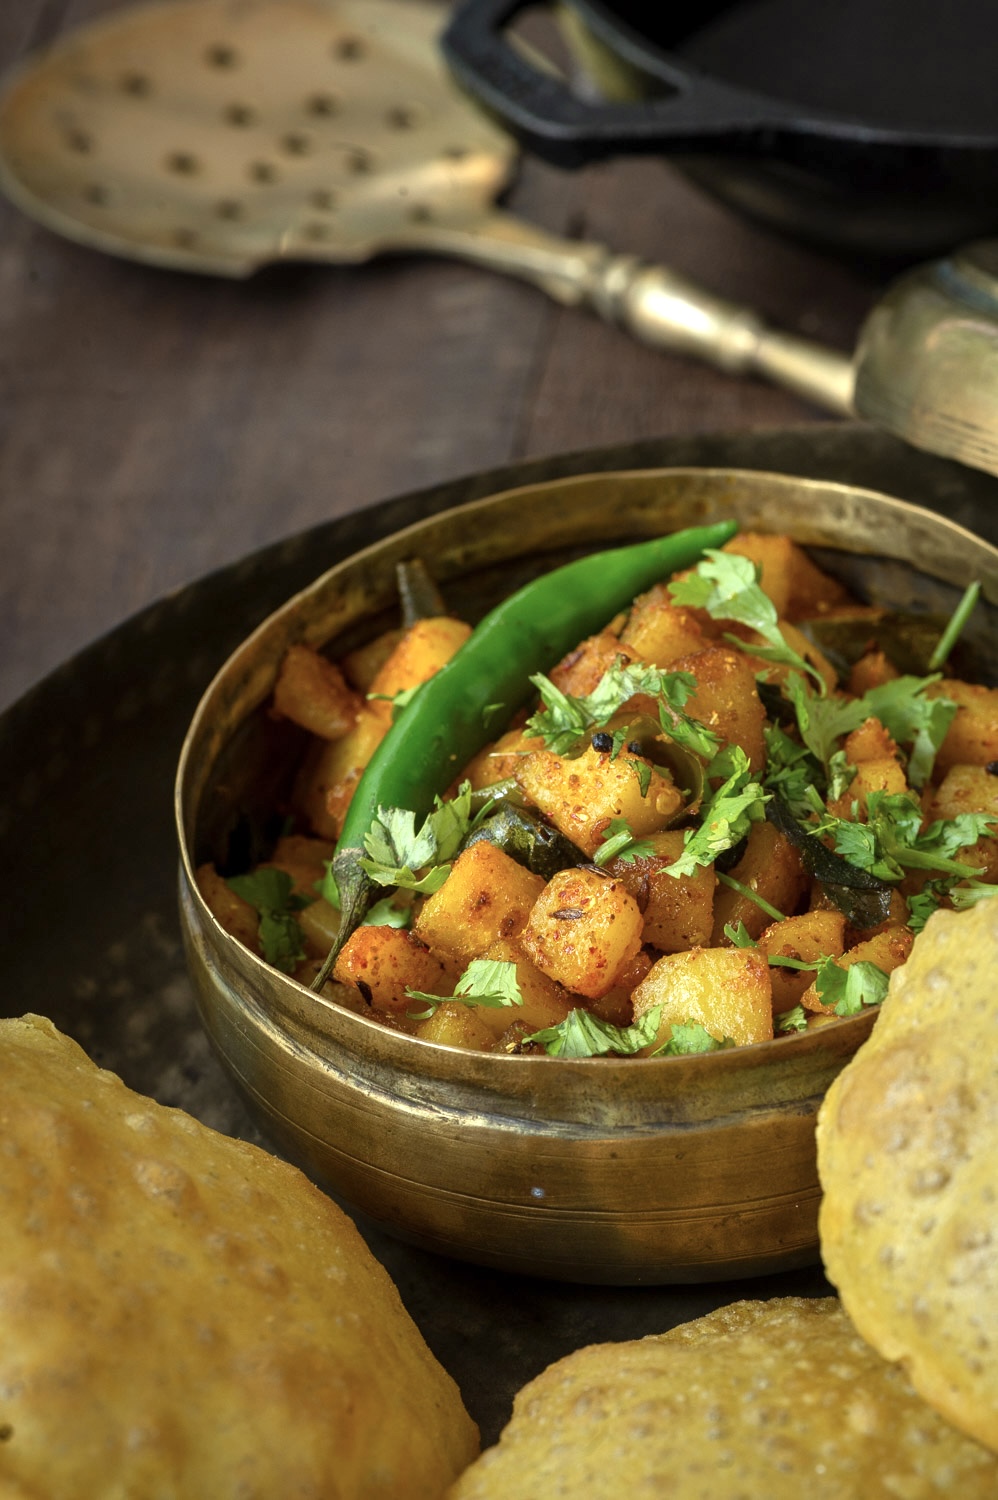
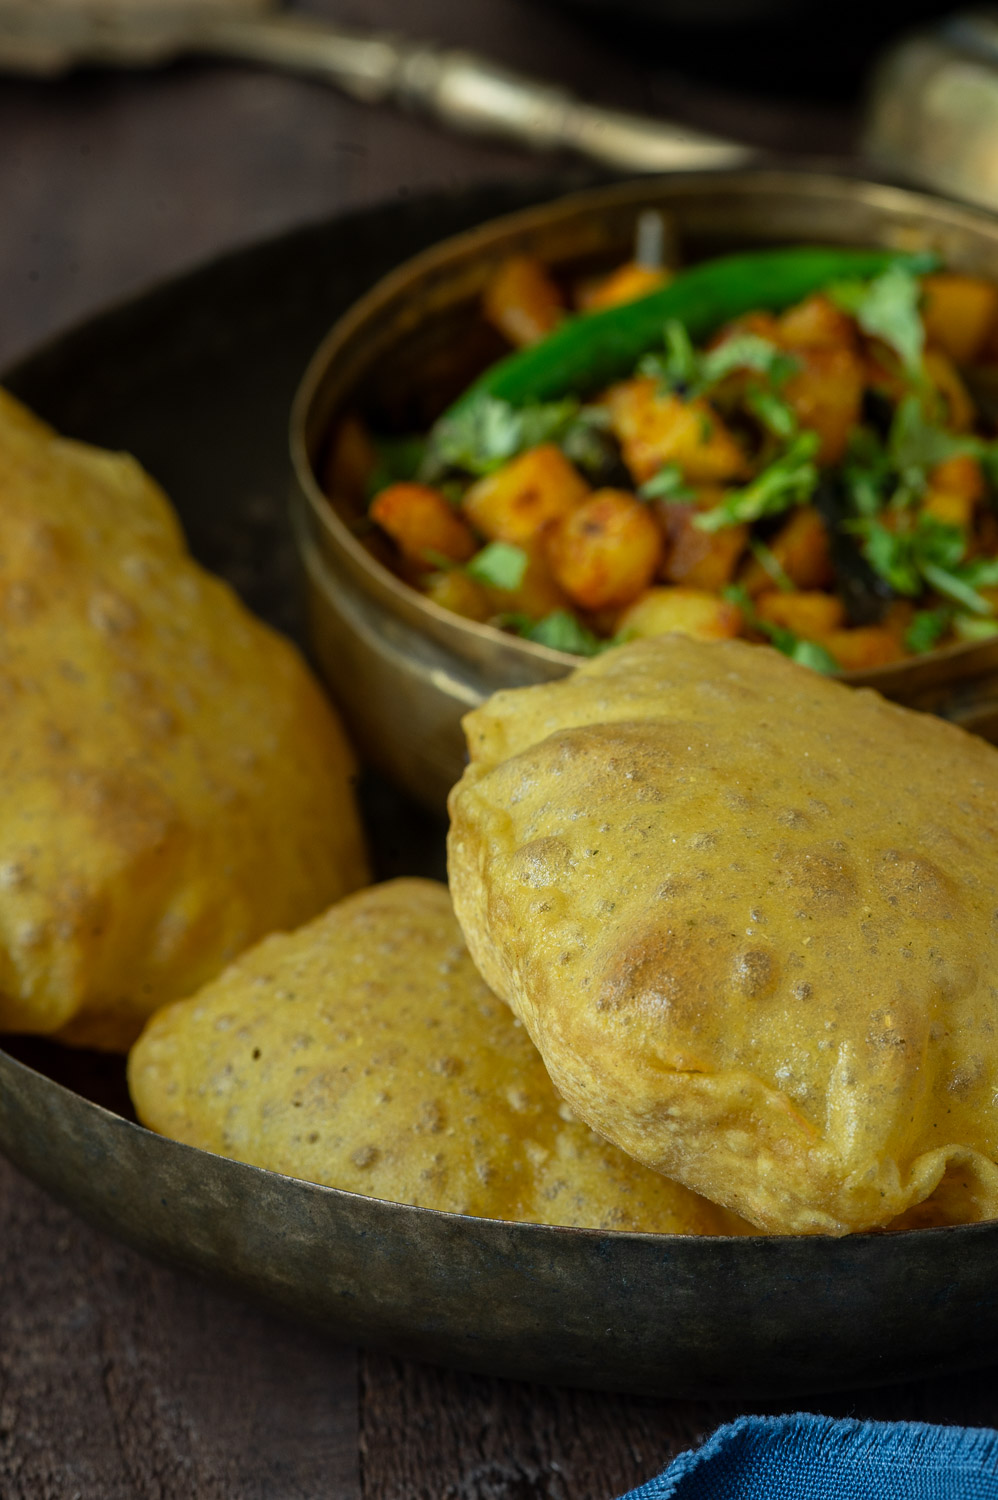
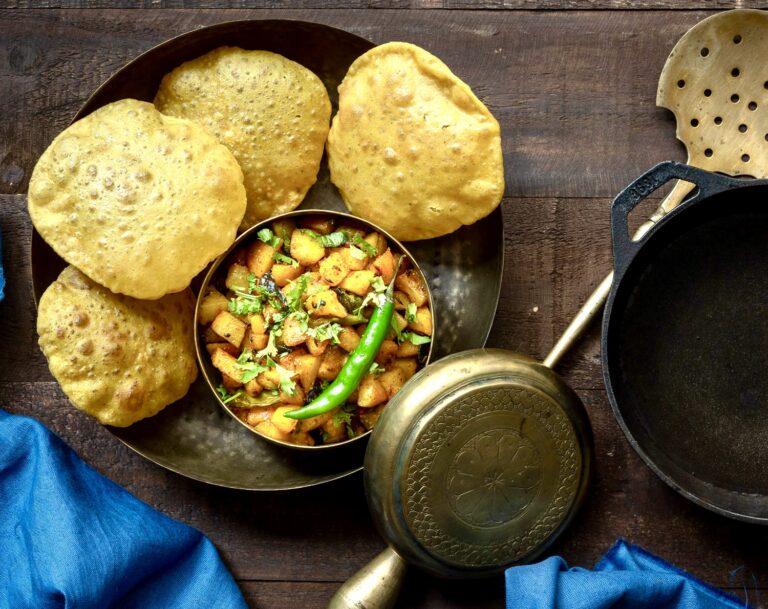
When it comes to recipes, sometimes just having one of a certain dish isn’t enough. I have shared my own version of roast potatoes on this blog in the past, but lately I have felt inspired to start making them in the Tamil Nadu style more often. As someone born and brought up in Chennai, this dish is one that I have known and enjoyed all my life, as will anyone who loves a spicy accompaniment.

When I said I was feeling inspired, this was in part because one of my favourite pastimes is surfing the Internet for all things to do with food. I love looking up and reading about the subject, seeing what people out there are making, and watching videos not just on trends but also on classic dishes. They may or may not be authentic, but they are exciting just the same. I choose whichever I am interested in, tweak the recipes a bit based on my preferences, and they often turn out yummy. Through this blog, I am a part of that community too, and contribute to it. It feels special to know that we are all inspirations to one another, and to me this is true whether in the art world or in cooking or in writing or in so many other arenas. Online and offline, my passion for recipes – creating them, discovering them, and sharing them – is joy-bringing, I love being gifted or gifting nice cookbooks too. It has long been a dream of mine to publish one of my own, and this is the year in which that will come to fruition.

Coming back to the South Indian-style roast potatoes, let me just say at the outset that it’s okay to indulge in carbs and a little extra oil sometimes. I try not to do either too often, so when I do I choose my favourites and make sure I relish them. This dish is one I have become such a pro at that I even make the masala at home, powdering and keeping a fair quantity to use as needed. I have shared the recipe for that too, and recommend that you take a little extra time to prepare that too. You’ll taste and smell the difference it makes.

The aroma and flavour truly take me back to my school days, when many of my friends would bring curd rice in their tiffin boxes with roast potatoes on the side. The moment that lunch was unpacked was special: the fragrance of deep-fried, well-seasoned potatoes would rise. It would be irresistible. We loved sharing our lunches, as I’ve shared in earlier posts like this spinach rice recipe.

I will admit: carb-consciousness has made me like potatoes somewhat less now than I used to, or at least eat them less often. But as a child and a teenager, I simply adored them. So much so that when I first started learning how to cook, I told my mom that the first dish I would prepare on my own would feature this ingredient. I had also been inspired by my older brother. When our mom travelled, he would make my sister and I sit in the kitchen and watch as he prepared potato sabzi and roti for us. So at around age 14 or 15, under her supervision, I made a simple sautéed potato dish with barely anything but salt. Salt, heat and oil are all that’s really needed to make a potato taste good, anyhow.

Still, what a long way I have come since that basic fried potato dish! From nothing-but-salt to grinding my own spices, from the easiest way to the elaborate and the innovative. I continue to learn every day, and the journey goes on. I am so glad to have you along on mine, sharing recipes that make life more delicious.

South Indian Roast Potatoes
(Yield: Serves 2)

250 grams potatoes
Salt to taste
½ teaspoon turmeric powder
¼ tsp mustard seeds
½ teaspoon urad dal
¼ tsp cumin seeds
¼ tsp asafoetida
A few curry leaves
2-3 tablespoons oil
3-4 Kashmiri red chillies (whole)
2 tablespoons onions (finely chopped)

Spice powder
1 tsp urad dal
½ teaspoon methi seeds
½ teaspoon cumin seeds
1 teaspoon channa dal
1 teaspoon oil

Boil, peel and dice the potatoes. Set aside.

In a pan, begin to prepare the spice powder by adding the one teaspoon of oil. Once it has heated, add all the spice powder ingredients and roast until golden. Remove onto a plate and allow to cool. Now blend coarsely and keep ready.

In the same pan, add the 2 tablespoons of oil, and once heated add the mustard seeds, cumin seeds and urad dal. Once they turn golden and splutter, add the red chilies, curry leaves and asafoetida.

To this, add the onions first. Sauté and then add the potatoes and the freshly-made spice powder. Sprinkle with salt and turmeric powder. Mix this all together well. Allow to roast until it all comes together well and the potatoes are slightly golden at the bottom.

This dish works as a great accompaniment for dosas, rotis or any kind of rice dish. If you’d like to explore more potato dishes or more South Indian flavours, there’s more in the blog archives where this came from!


On the first Sunday of every month, through my childhood, my mother would make my siblings and I stand in a line and consume a very bitter Ayurvedic powder, which was mixed into a quarter glass of water for each of us. This was a non-negotiable, and we hated it, dreading those Sundays for that very reason. We were forced to drink it up because her claim was that it cleared the stomach of any bugs, infections or worms and contributed to overall good health. I don’t know exactly what was in that powder, which was from a brand that has now long become obsolete, but I presume it contained fenugreek leaves – known in Gujarati as methi – because of the taste, as well as its medicinal potency. It took many years, but eventually I realised my mother was right. I believe her now, and I use methi liberally in my cooking. It even makes its way into a yogurt-based curry known as kadhi. As a result, methi kadhi is both nutritious and tasty.

I have shared a kadhi recipe in the past, and this is a variation that, as mentioned, boosts the healthiness quotient. That recipe contained a few grains of methi, which I also add to various dals, whereas this one utilizes fresh leaves. Fenugreek is extremely beneficial in both seed and leaf form, and is considered by many to be a superfood. A herb that originated in the Mediterranean region, it has been cultivated in India for at least 3000 years and plays a major role in North Indian cuisines. It is known to lower blood sugar and cholesterol, improve digestion and fertility, support the immune system and even enhance skin and hair health.

I mentioned recently that I enjoyed sprouting microgreens as a kid, and methi was among the seeds I used. My sister would also grow hers separately, and we would compare notes. I don’t think we ended up consuming our homegrown herbs, but I do remember the pure joy of seeing the small shoots. Nowadays, I buy the fresh green leaves, but I prepare my own kasoori methi or dried fenugreek powder at home. It is methi season now, and the best place to prepare the powder is at my home in Ahmedabad. The combination of the winter sun and general climate there are ideal for this, whereas Chennai is more humid year-round. The leaves dry up in a day or two. I store them to use through the year, and I make enough for my homes as well as my children’s.

There are two varieties of methi that are generally available. There is one with small, thick leaves that doesn’t grow more than 6 inches, and a bigger, bushier variety. I prefer using the small one when I need fresh leaves, and the bigger one for powdering. While I feel the former is more potent in taste, the yield quantity I require for the powder is better achieved by using the latter.

Kadhis don’t appear on my dining table that frequently, because I prefer to serve dals and lentils daily instead as they contain more protein. In fact, I ate it much more frequently as a child as my father loved it and thus my mother would prepare it very regularly. I myself preferred it to dal back then, and enjoyed it when combined with a plain khichdi. This means that when I prepare any kind of kadhi now, I look forward to it all the more, since the dish was a childhood favourite that has become infrequent.

Methi Kadhi
(Yield: Serves 4)

1 cup yogurt
2 tablespoons besan (split brown chickpea flour)
1½ cups water
1½ cups methi (fenugreek leaves)
1 tablespoon ginger + green chilli paste
2 tablespoons oil
2 tablespoons ghee
Salt to taste
½ teaspoon jeera seeds (cumin)
1 cinnamon stick
2 cloves
½ teaspoon asafoetida

Take the yogurt in a bowl. Add the besan and water to it, and beat well until there are no lumps. Set aside.

Clean and finely chop the methi leaves. In a kadai, add the oil and once it has heated, add the methi leaves. Sauté until tender. Add the ginger+green chili paste.

To this, add the yoghurt and besan mixture. Add salt and cook until the raw flavour of the flour leaves and the mixture thickens. Stir continuously as it cooks, otherwise it will separate.

Now, prepare the tempering. In a frying pan, add the ghee. Once it has heated, add the jeera, cinnamon stick, cloves and asafoetida. Pour this over the kadhi.

Your methi kadhi is now ready to serve. As mentioned, it pairs perfectly with khichdi.

While there is an Indian belief that curd should be avoided at night and during winter, I would suggest that even if you follow that custom, the use of methi and besan in this kadhi provide a counterbalance. Don’t deprive yourself of this deliciousness, in any season! I may eat less of it now than I did growing up, but I certainly still do!

As I have mentioned at various times on this blog, I do love the festive season. Diwali is an occasion I look forward to very much, but I also enjoy the December festivities, in particular Christmas. I find that people tend to be in a more buoyant spirit now, and I love to elevate that further through providing recipes that add more cheer. This past year has been rather difficult and very busy for me, and I would not be surprised if it has been the same for you, but I believe you can always make time to bake an orange cake. It will immediately improve your mood, as I have experienced time and again.

So yes, let’s bring the coming year in on a happy note. To me, there is something about the scent of oranges that is particularly uplifting, and Nagpur oranges happen to be in season. They are particularly juicy and sweet right now, as well as inexpensively available. These fruits were what inspired me to come up with this recipe. It was such a pleasure to put this one in the oven. The whole house smelled of citrus fruit, and was imbued with a sense of celebration. It was a treat to slice it up after the photoshoot. I like to bake my cakes lightly sweet, so that we can eat more without finding them too rich, and with less guilt over the indulgence. This one has the perfect combination of citrusy, sweet and buttery flavours, resulting in a moreish delight.

Long-time readers may recall a date and orange cake and a citrus bundt that have made appearances on this blog, but this one is different. It has a beautiful balance of tartness and sweetness that I love.

Yes, it really is all about balance at the end of the day. But I do believe in something called hope, which is why I dare to say: I hope that no matter what has come before, let the coming year bring a large share of sweet experiences our way. I read somewhere long ago that one of the things that differentiates human beings from animals is our capacity for hope. It is a mental concept that comes from higher evolution, and is what makes us innovate. That idea has stayed with me.

It is said that we have to consciously manifest what we want, asking the universe to provide it. This requires a positive mindset: thinking positive, wishing for positive things, even as we work hard to bring our dreams to life.

“Manifest” happens to have been the Cambridge Dictionary’s Word of the Year 2024, and I have been pondering the concept. I know that nothing happens overnight. Hard work must be present, and we must change things for ourselves in small ways wherever possible (and in larger ways if we get a chance to). It’s not like we can sit still and just wait for the Universe to give us what we want. We have to reach out, choose and act. There will undoubtedly be challenges along the way, but what allows us to stay motivated is hope.

I want to say another word here about manifestation, though. It’s not, if you don’t mind the pun, “as easy as cake”. When we put our intentions out there, even with all sincerity, we still have to make sure that we don’t feel dejected if things don’t play out like we thought they would. I once tried to manifest something in my life. I deeply wished and wished, and it didn’t happen – at least not in the way I expected it to. Now, much later, I feel glad, because what did happen instead turned out much better in the long run. But at the time, I was very sad. In retrospect, the lesson for me is in trusting the bigger picture. The Universe knows what it is giving each of us, and whatever happens is for the best. We may not feel that right away, but some day we might. Hopefully. Yes, it really is all about hope when it comes down to it. Let’s enter 2025 with hearts full of hope about what we can look forward to, and how we can make peace with all that has already come to pass.

Orange Cake

265 grams maida
45 grams corn flour
2¼ teaspoon baking powder
½ teaspoon salt
250 grams sugar, granulated
⅓ cup oil
¾ cup unsalted butter
3 teaspoons orange zest
½ cup milk
½ cup orange juice
1 teaspoon vanilla extract
3 eggs

Cream cheese frosting

1 cup butter
450 grams icing sugar
1 cup unsalted butter
1 cup cream cheese
1 teaspoon vanilla extract
2 tablespoons orange juice
2 teaspoons zest

To prepare the cream cheese frosting, which you can do ahead of time, cream the butter using a hand-held blender. Now, add in the sugar slowly. Making sure the sugar is covered as you pour, as it can fly all over the counter.

Next, add the cream cheese, zest and orange juice. Mix well until it all comes together. Refrigerate until use.

To bake the cake, preheat the oven at 160°C. Prepare two 8-inch cake tins by greasing and dusting them. Set aside.

Sift the dry ingredients: the flours, baking powder and salt. Set aside.

In a mixing bowl, add the sugar, butter, oil and orange zest. Using a hand-held blender, beat this mixture well until it is creamy. This will take approximately 1-2 minutes.

Now, slowly add the eggs one at a time, beating continuously. Add the milk, orange juice and vanilla extract. Beat well. Now rest the hand blender.

Next, add the dry ingredients to the wet. Use a spatula to fold the mixture gently until it all comes together. Do not over beat at this stage.

Divide the mixture evenly into the two prepared baking tins. Bake in the oven for approximately 30 minutes. Check that it is thoroughly baked by inserting a toothpick. If it comes out clean your cake is ready.

Remove the tins. Allow them to cool on the counter for 10-15 minutes before turning them on to a wire rack to cool completely.

Now you can ice the two cakes, layering them with cream cheese frosting in between as well as on top.

Your festive, fruity orange cake is now ready to charm anyone you serve it to – and I hope that by sharing this recipe, I have brought more joy to you, too!

What has become a challenge for me recently, cooking-wise, is figuring out how to pack nourishing and interesting lunches for the office-goers in my home. While I love having a hot Gujarati thaali ready for them, it isn’t always possible for them to come home mid-day. Sometimes, they have to travel a little far, as is common in India, or the day’s schedule is especially busy. It is always better to have home-cooked food in any case, and I prefer that they do so. This means that quite often lately, my mornings begin with a question: “Oh gosh, what shall I prepare for them today?” This is different from the regular daily musings over what to cook, because time is of the essence. The food has to be packed, and made to suit various likes and dislikes, before they leave. This paneer mint paratha is a recipe that came about to fulfil exactly this need.

I know that some of my readers may wonder why these lunchboxes aren’t prepared in advance, but that is because in India it is customary to cook fresh food each day. It is rarely carried forward, except for specific dishes, such as those in the Second Helpings series that I did long ago. Leftovers are consumed as soon as possible, and innovatively. Even so, fresh, hot, home-cooked food is just a preference and a way of life for most Indians.  I think there are many reasons behind why this is the norm. One is that culturally, we don’t believe in wastage so we tend to cook in exact quantities. More often than not, even if we can afford to waste food, we prefer not to because the high levels of poverty here make an impression on us and make us conscientious. The idea is to cook only as much as is required, consume all of it, and then make more food for the next day.

Coming back to the paneer mint paratha: as I said, it is one among several recipes that I’m able to make fresh in the mornings and pack off with my loved ones for their workday lunches. My own workday therefore begins even earlier than theirs, but I’m fortunate to have household staff who help me cope with the demands of a very active kitchen that functions both for my family as well as for re:store. If you have a similar lifestyle, juggling other people’s schedules and preferences while also working either at home or beyond it, dishes like this will come very handy. The same is true if it’s your own lunchbox that you’re packing for.

A good lunchbox has to have a fair bit of thought behind it. The items in it should keep well and still maintain their taste and texture hours after packing, even if reheating is not possible. Items that may spill need to be very carefully packed. Something like this paratha, which doesn’t require a curry and is flavourful on its own, is a safer bet. That said, some curd or buttermilk on the side rounds out the meal, as does a pickle or chutney. These enhance the experience of eating on the go. I really believe that there should be something to look forward to during such lunch breaks, even if they are short and without frills. Filling the tummy is only one aspect of it. Even if eaten straight out of a lunchbox while pausing for just a few minutes, the meal should be appealing and rejuvenate the person who eats it so that they can carry on with the rest of their busy day.

I also came up with this particular paratha because I’ve been growing some herbs and basic vegetables in my garden, including tomatoes and – you guessed it – mint. These grow fast and are pretty easy to cultivate too. Little experiments like this are a lifelong fascination for me. As a child, I would sprinkle mustard seeds on a steel plate and be fascinated by the little shoots that appeared when I would check on them a few mornings later. That always excited me and made me proud. Now, we call these microgreens and incorporate them into healthy diets. Growing various sprouts or certain herbs ourselves is not difficult at all, even if we don’t have the space to grow plants.

Mint works especially well in summers as it has a cooling effect, but I feel it’s great at any time. It pairs well with so many other ingredients, and always gives a very refreshing touch to a dish. The paneer here can be replaced with peas, for instance. Or you can keep the paneer – that is, retain the protein boost – and include peas too. This is a compact lunch, flavour-packed, healthy and very delicious. Whether you’re eating it on the go or in a more relaxed way at home, you and your family are sure to enjoy it too.

Paneer & Mint Paratha

(Yield: 5 parathas)

Paratha

1 cup whole wheat flour
½ cup maida
¼ teaspoon salt
2 teaspoons oil
¾ cup water

Filling

1 cup paneer
2 tablespoons mint leaves (finely chopped)
1 tablespoons coriander leaves (finely chopped)
¼ teaspoon aamchur powder
¼ teaspoon chaat masala
½ teaspoon green chili-ginger paste
Salt to taste

Ghee for frying

First, prepare the dough for the paratha. In a bowl, add the flours and the salt. To this, add water. Make a tight and smooth dough. Set aside for at least 30 minutes.

Prepare the filling by adding all the ingredients to a bowl. Mix gently. Set aside.

Now, roll out the dough into 5 balls. You may find that you have some extra, which you can use for plain parathas.

Using the help of some flour, dust 1 ball and roll it out into a disc. Repeat with all five. Place a spoonful of the filling in the centre of each disc and seal the edges by folding the corners of the dough. Gently roll out the filled discs into small parathas.

Heat a griddle on a medium flame, and place a rolled-out paratha on it. Allow to cook on both sides with the help of some ghee. Roast both sides well until golden. Repeat with the remaining parathas.

Your paneer mint parathas are now ready. You may want to serve them hot with pickle or chutney of your choice, or else pack them into a lunchbox that you or a loved one can look forward to, a little later in the day! If you’re a fan of Indian breads, don’t miss my post on different rotis. There are also a range of paneer dishes to explore on the blog.

For us here in India, this is the time of year when we get lovely, fresh vegetables and fruits throughout the country. Most of them have brief seasons – at most, a couple of months. When we have a period like this when the weather is gentle and the markets are full of just-harvested goodies, it’s a time to be appreciated. Even here in Chennai, it can feel a little chilly in the best way nowadays: the way that calls for soups and warm beverages and a feeling of coziness. Today I am sharing a soup that has its base sweet potato, which is available year-round, but which I feel is especially delicious come December.

This also happens to be that short window between Diwali and Christmas when one isn’t feasting with friends and family, and can therefore focus on more mindful and lighter eating. This spiced sweet potato soup ticks all the boxes. It is given its piquancy through garlic, ginger, pepper and shallots and has the sweetness of its core ingredient elevated through coconut. It is nourishing, filling and perfect to enjoy in this pleasant temperature. Ginger is a warming ingredient, which is just what is needed. It’s important to eat appropriately for the weather, and Nature tends to give us exactly the kind of produce we need for specific times and climes.

It really is such a pleasure to pick out ingredients for a soup, which is a dish that can contain just about anything. I’ve chosen very simple and accessible ingredients for this one, but you can play around and come up with a recipe or a style that suits your tastes. The sweet potato is baked before blending, so if you follow the method below, you could choose to replace it with carrot or pumpkin, or any other vegetable from their families.

Truly, and not just for this recipe but for any cooking you do at all, there is such a treasure trove of harvests to explore out there. I’ve been taking quite a lot of domestic flights lately, and I think many of us are flying within the country more than ever before, for work, for leisure, or to visit loved ones. Wherever I travel, I head to the markets and explore what is seasonal and local there. For instance, I just returned from Ahmedabad with bags full of lovely vegetables that we don’t get in Chennai, along with lots of fresh lentils and millets that are grown in Gujarat. It is similar wherever I go. I find it such a thrill to visit a bustling vegetable and fruit market, no matter where I am, and even if I don’t make any purchases (since not everything can be carted back), I will at least be photographing the produce. I admire them and enjoy the colours and scents and even learning about the crop through talking to people. I usually either come away with something I can cook with once I’m back home, or else with images that preserve the memory of that trip forever. I also sometimes return with my curiosity piqued. For example, I’ve been seeing water chestnuts lately but don’t really know how to use them except in a salad. I’m eager to find out how, and will share a recipe if I hit on something really good.

Speaking of memories, soups weren’t really a big part of my growing years, because they don’t suit the Chennai weather for most of the year. Now, of course, our palates have become more diverse and we have begun enjoying not only warm soups like this one, but even cold ones like gazpacho! It’s all about picking the right one based on time, place and occasion.

Sweet Potato & Ginger Soup

(Serves 2)

2 cups chopped sweet potato
6-8 garlic cloves
1 tablespoon minced ginger
5-6 shallots
2 tablespoons olive oil
Salt to taste
¼ teaspoon pepper powder
1 tin coconut milk
1-2 cups vegetable broth

Preheat the oven to 200°C. Place the sweet potato, shallots, ginger and garlic cloves on a baking tray. Sprinkle with salt and drizzle olive oil. Mix using your fingers.

Bake in the oven for 30-40 minutes or until the vegetables are tender and slightly charred.

Remove the tray from the oven and once the sweet potato, shallots and garlic have cooled a little, blend them in a mixer jar along with the coconut milk and 1 cup of vegetable broth. Use more if making a larger quantity.

Remove from the jar. Taste and adjust the salt and pepper if required.

Top it off with a squeeze of lime if you would like to add more tang. Garnish the soup to your preference (I used coriander leaves and roasted pumpkin seeds). Your spiced sweet potato is ready to serve, and just right for the season! You can explore more of my soup recipes here.

Every time our uncle visited from the USA when we were growing up, he would hand my siblings and I a beautiful, round, dark blue tin filled with shortbread cookies. When the tin was opened, these lovely and aromatic delights would be layered inside. As children, we waited for these treats every year and we would inevitably start fighting over them before dividing them up between the three of us. The emptied tin itself was a thing of joy, and never discarded. These precious memories made me smile recently, as I began planning ahead for my Christmas baking here at re:store. I decided to put a batch of rose shortbread cookies in the oven for old times’ sake, and I wanted for you to be able to do the same too.

Do you remember those cookies from far away too? Many of us grew up with these tins of shortbread cookies, and both the contents as well as the packaging itself have a nostalgic quality for us. They are a favourite of my mother-in-law as well, as they were enjoyed by her generation when they were younger, too. It’s funny how our love for this cookie has travelled through generations. My grown-up kids love them, I love them, and their grandmother loves them. Perhaps it is similar in your family as well. Nowadays, I visit London often and buy shortbread cookies there every time. There is something about bringing them back from a trip that just feels special.

There is also a bakery in Pune that makes shortbread cookies that are almost like the European original. These have their own distinct taste, but I would say they are a close cousin. Relatives coming from there sometimes bring me a box of these. That’s right: a box rather than those classic tins are what cookies tend to be packaged in in many places nowadays.

That takes us back to the tins themselves. Back when the cookies were annual gifts from my uncle, I would save the tins and keep various things in it. Handkerchiefs, stationery, school items and so on would go into them. Each time I opened one, the scent of the cookies – already eaten and enjoyed – would still rise from it for quite some time after. That scent itself would make me anticipate my uncle’s next visit, year after year, and it would also seep into whatever I kept in the tin.

I will let you in on a secret: I enjoy collecting anything kitchen-related, and can be a bit of a hoarder when it comes to such objects. So I still have a few of those old cookie tins in my home. When I bake shortbread cookies, I pull a lovely dark blue tin out, line it and store my own homemade cookies in it too. They then evoke the childhood experience all the more. And that lovely buttery, sugary, freshly-baked fragrance is once again retained in that tin for some time after, with any knick-knacks stored in it taking on that aroma too.

Receiving them as a gift is wonderful, and baking them at home brings an equally good feeling. They may not turn out quite like the store-bought ones, but they will be imbued with the joy of making a treat from scratch, which is a pleasure of its own. You can also add personal touches that suit your preferences: for instance, the addition of rose to this recipe is my own take, incorporating a beloved ingredient into the treat.  Often, when I eat something that I really love that is a bit difficult to make, I take it up as a challenge to achieve the perfect flavour and taste – or at least the perfect flavour and taste for my version, to be replicated and enjoyed many times over. That’s how it was with these rose shortbread cookies too, and I think that that is the right spirit to approach any cooking and baking in general!

Rose Shortbread Cookies

250 grams cold unsalted butter
50 grams powdered sugar
115 grams sugar
1 heaped teaspoon salt
250 grams maida
2 teaspoons rose water
2 tablespoons rose petals

Using a hand blender or a stand-mixer, beat the butter in a bowl until it is soft. Now, add both sugars along with the salt. Beat for 2 minutes or until the mixture is fluffy and has risen. Add the flour slowly, little by little, and beat on low. Now, add the rose water.

Once it comes together, using your fingertips, fold the dough gently.

Cover with cling film and refrigerate for 24 hours before using. You could also freeze the dough for 3-4 hours before using.

When you’re ready to bake, preheat the oven to 160°C. Line a baking tray with parchment paper.

Make 2 balls of the dough and roll one out to ½ – ¾ inch thickness. Using a cutter, cut into the desired shape. Making sure the cookie dough shapes don’t become too thin else they will spread while baking. Sprinkle rose petals on top.

Gather all remaining bits of the dough and repeat with the other ball.

Arrange the cut cookies in a tray, keeping a distance between each, as they will spread while baking.

Bake until golden. Keep a close watch and make sure they don’t turn too dark or remain partially baked.

Remove the tray from the oven. Allow the cookies to cool in the tray for about 10 minutes. Then, remove and place in airtight tins.

These shortbread cookies are delightful on their own, or with tea. They are sure to evoke some fond memories for you – and perhaps be a part of new ones that you’ll make with your loved ones too. For more baked goodies, do check out my blog archive. If you’re in Chennai and are looking for some special treats for Christmas and New Year, do explore the re:store menu and get in touch!